First off, I am not the camera person on our hikes. All the images you see are done by my husband. He is learning as he goes, but has found a great love for photography. Most importantly, it’s the way we capture our moments for our daughter.
The biggest issue for anyone hiking with a camera, outside that of your phone, is how the heck to carry it. You can put it in your bag, which means putting your bag down and get your camera out then putting it back in and moving on. Well, that’s great, if you enjoy doing all that and do not want to take images that happen in under 25 seconds.
You can use a standard neck strap then engineer a way to strap down the camera to your pack or belt, so the camera is not swaying while you move. Depending on the camera, its weight can start stressing your neck and shoulders.
We, more like, J has been looking for a device for his camera when we are hiking. The Strapshot by Cotton Carrier was it. We watched this video that helped us really see the differences and what we needed to help make a purchase. The video is done by Landslide03 via YouTube. You can check out the video, here. It is a little lengthy 27:33, but he walks you through the difference between the StrapShot by Cotton Carrier and the Peak Design Capture Clip V2. It was very helpful for seeing differences and the StrapShot in action.
Here are our reasons for the StrapShot:
*In no order of importance*
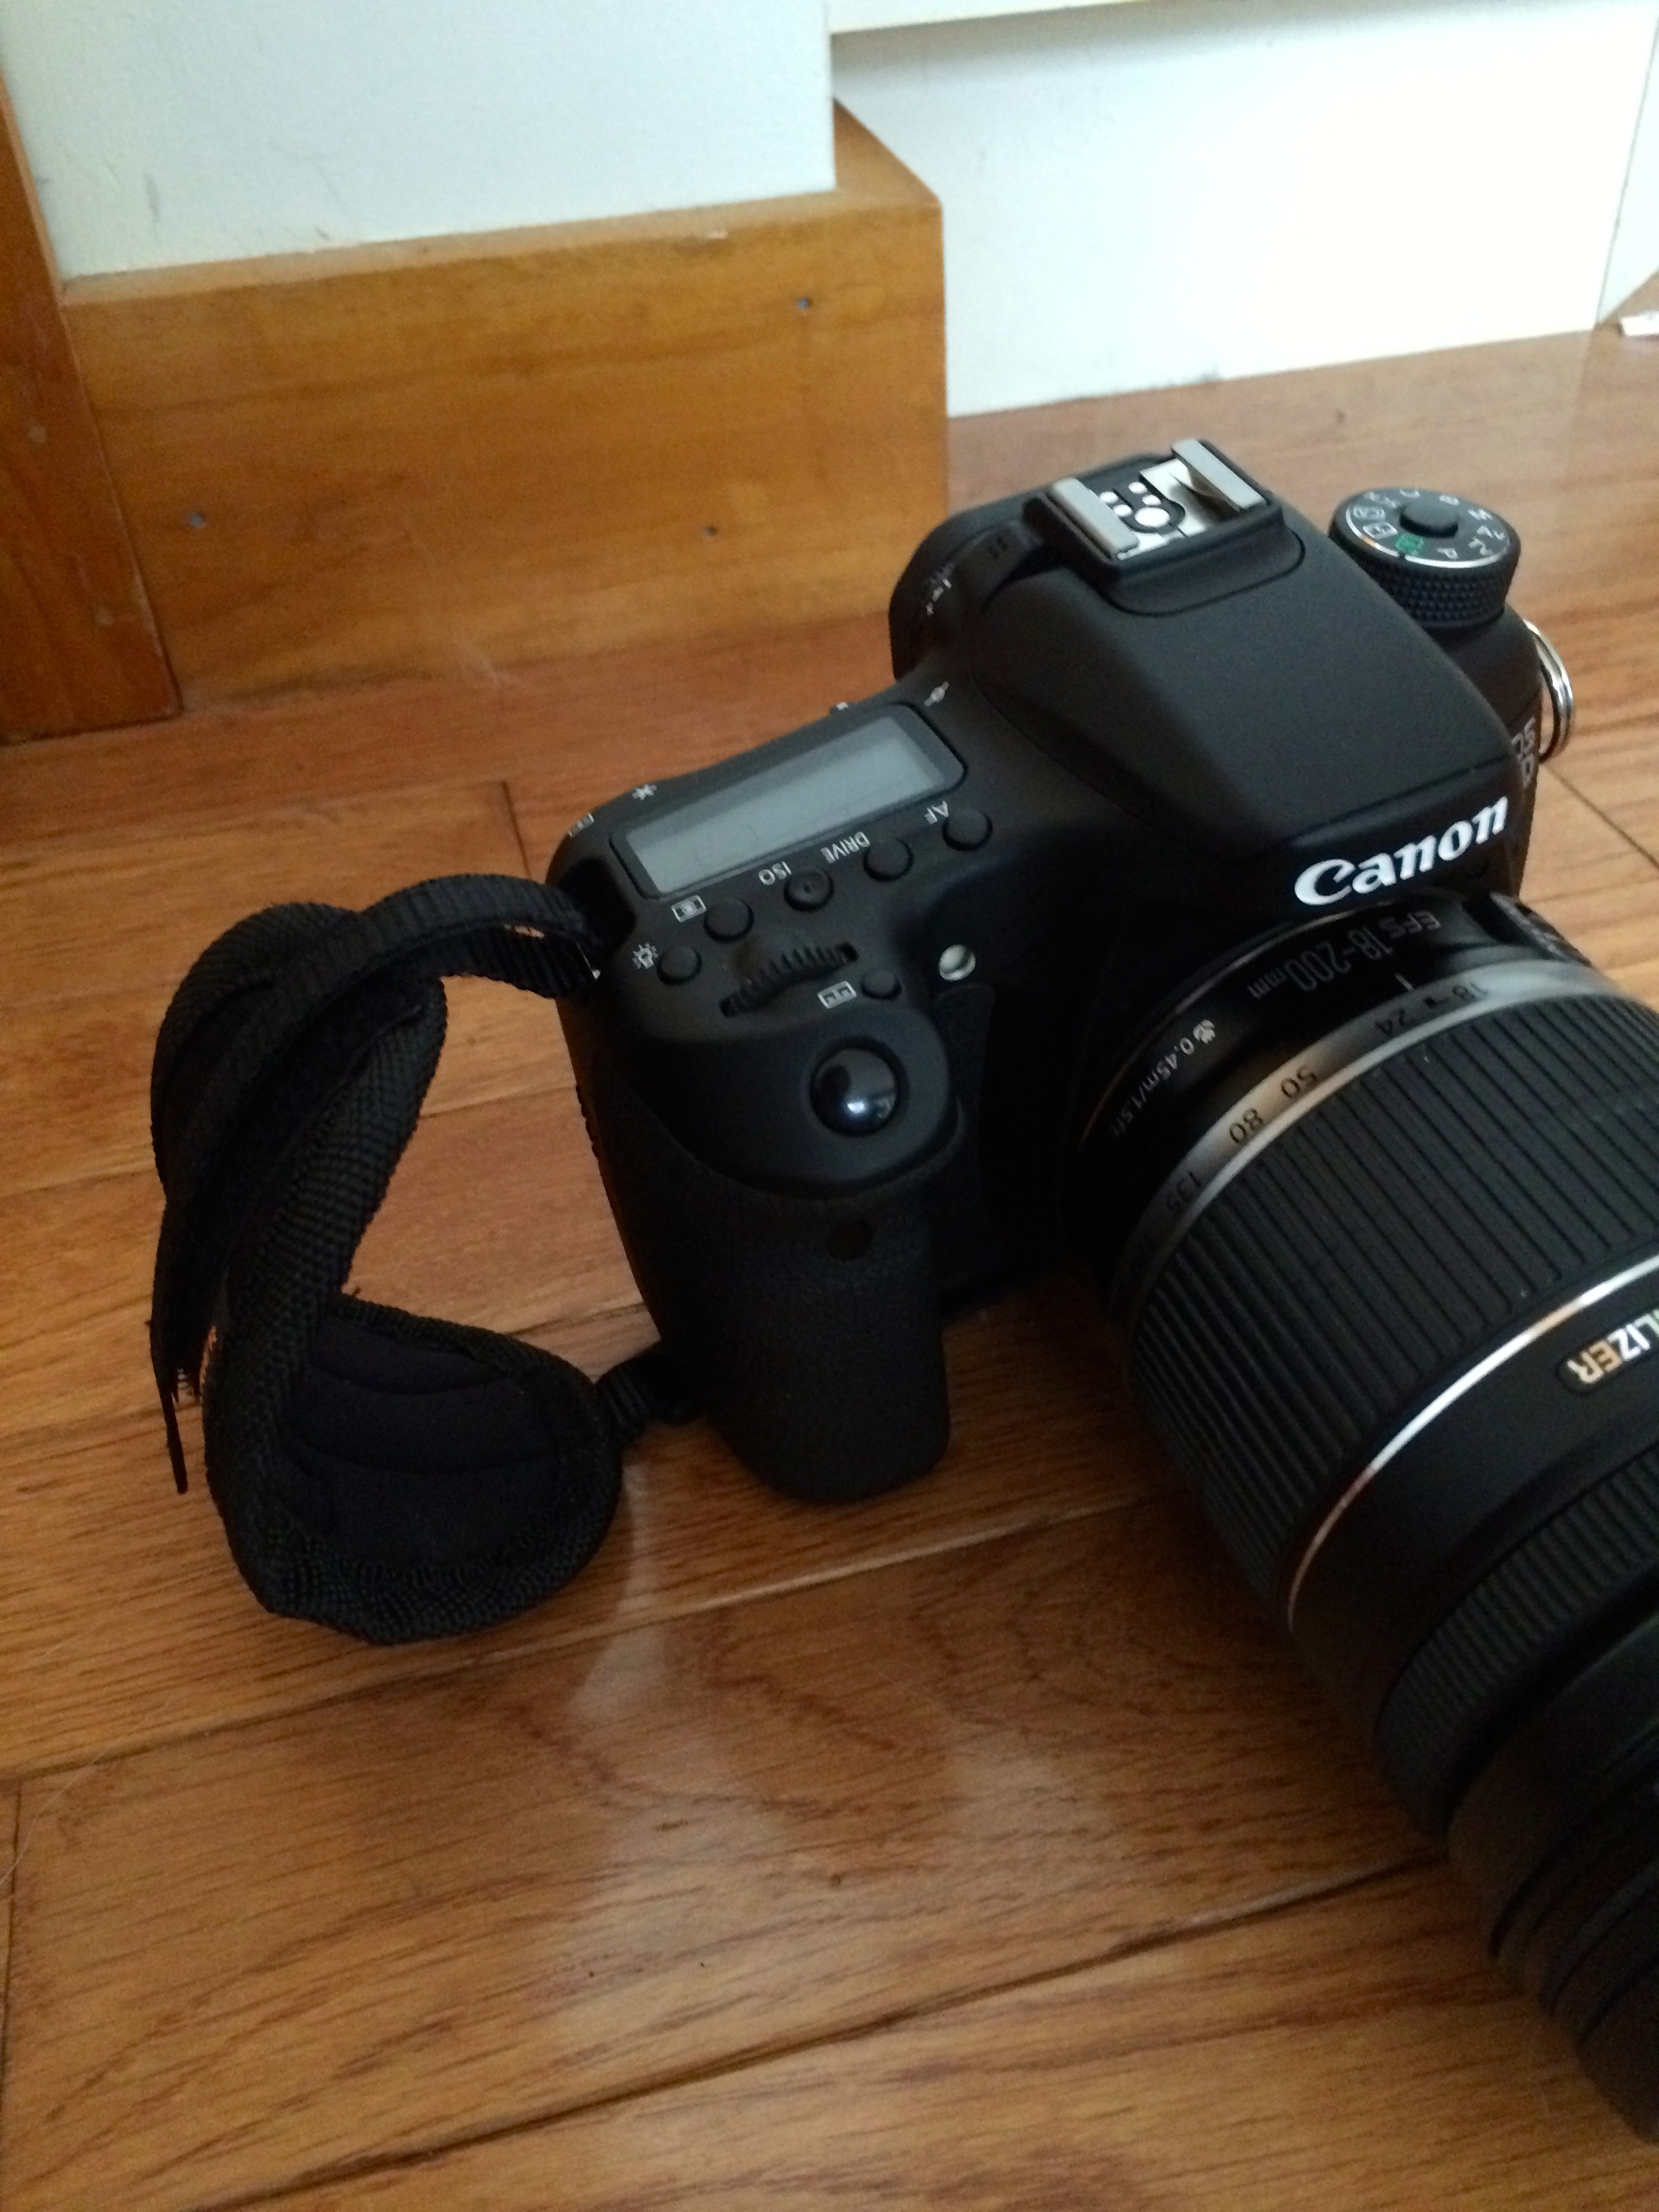
- Weight of lens, helps to secure the camera in place. J uses a Cannon EFS 18-200mm IS. The lens weight makes the camera stay in place.
- Security straps connected to the camera. After spending time researching this, many other brands do not have this function.
- Easy of un-latching the camera from the strap, its is a turn and pull technique.
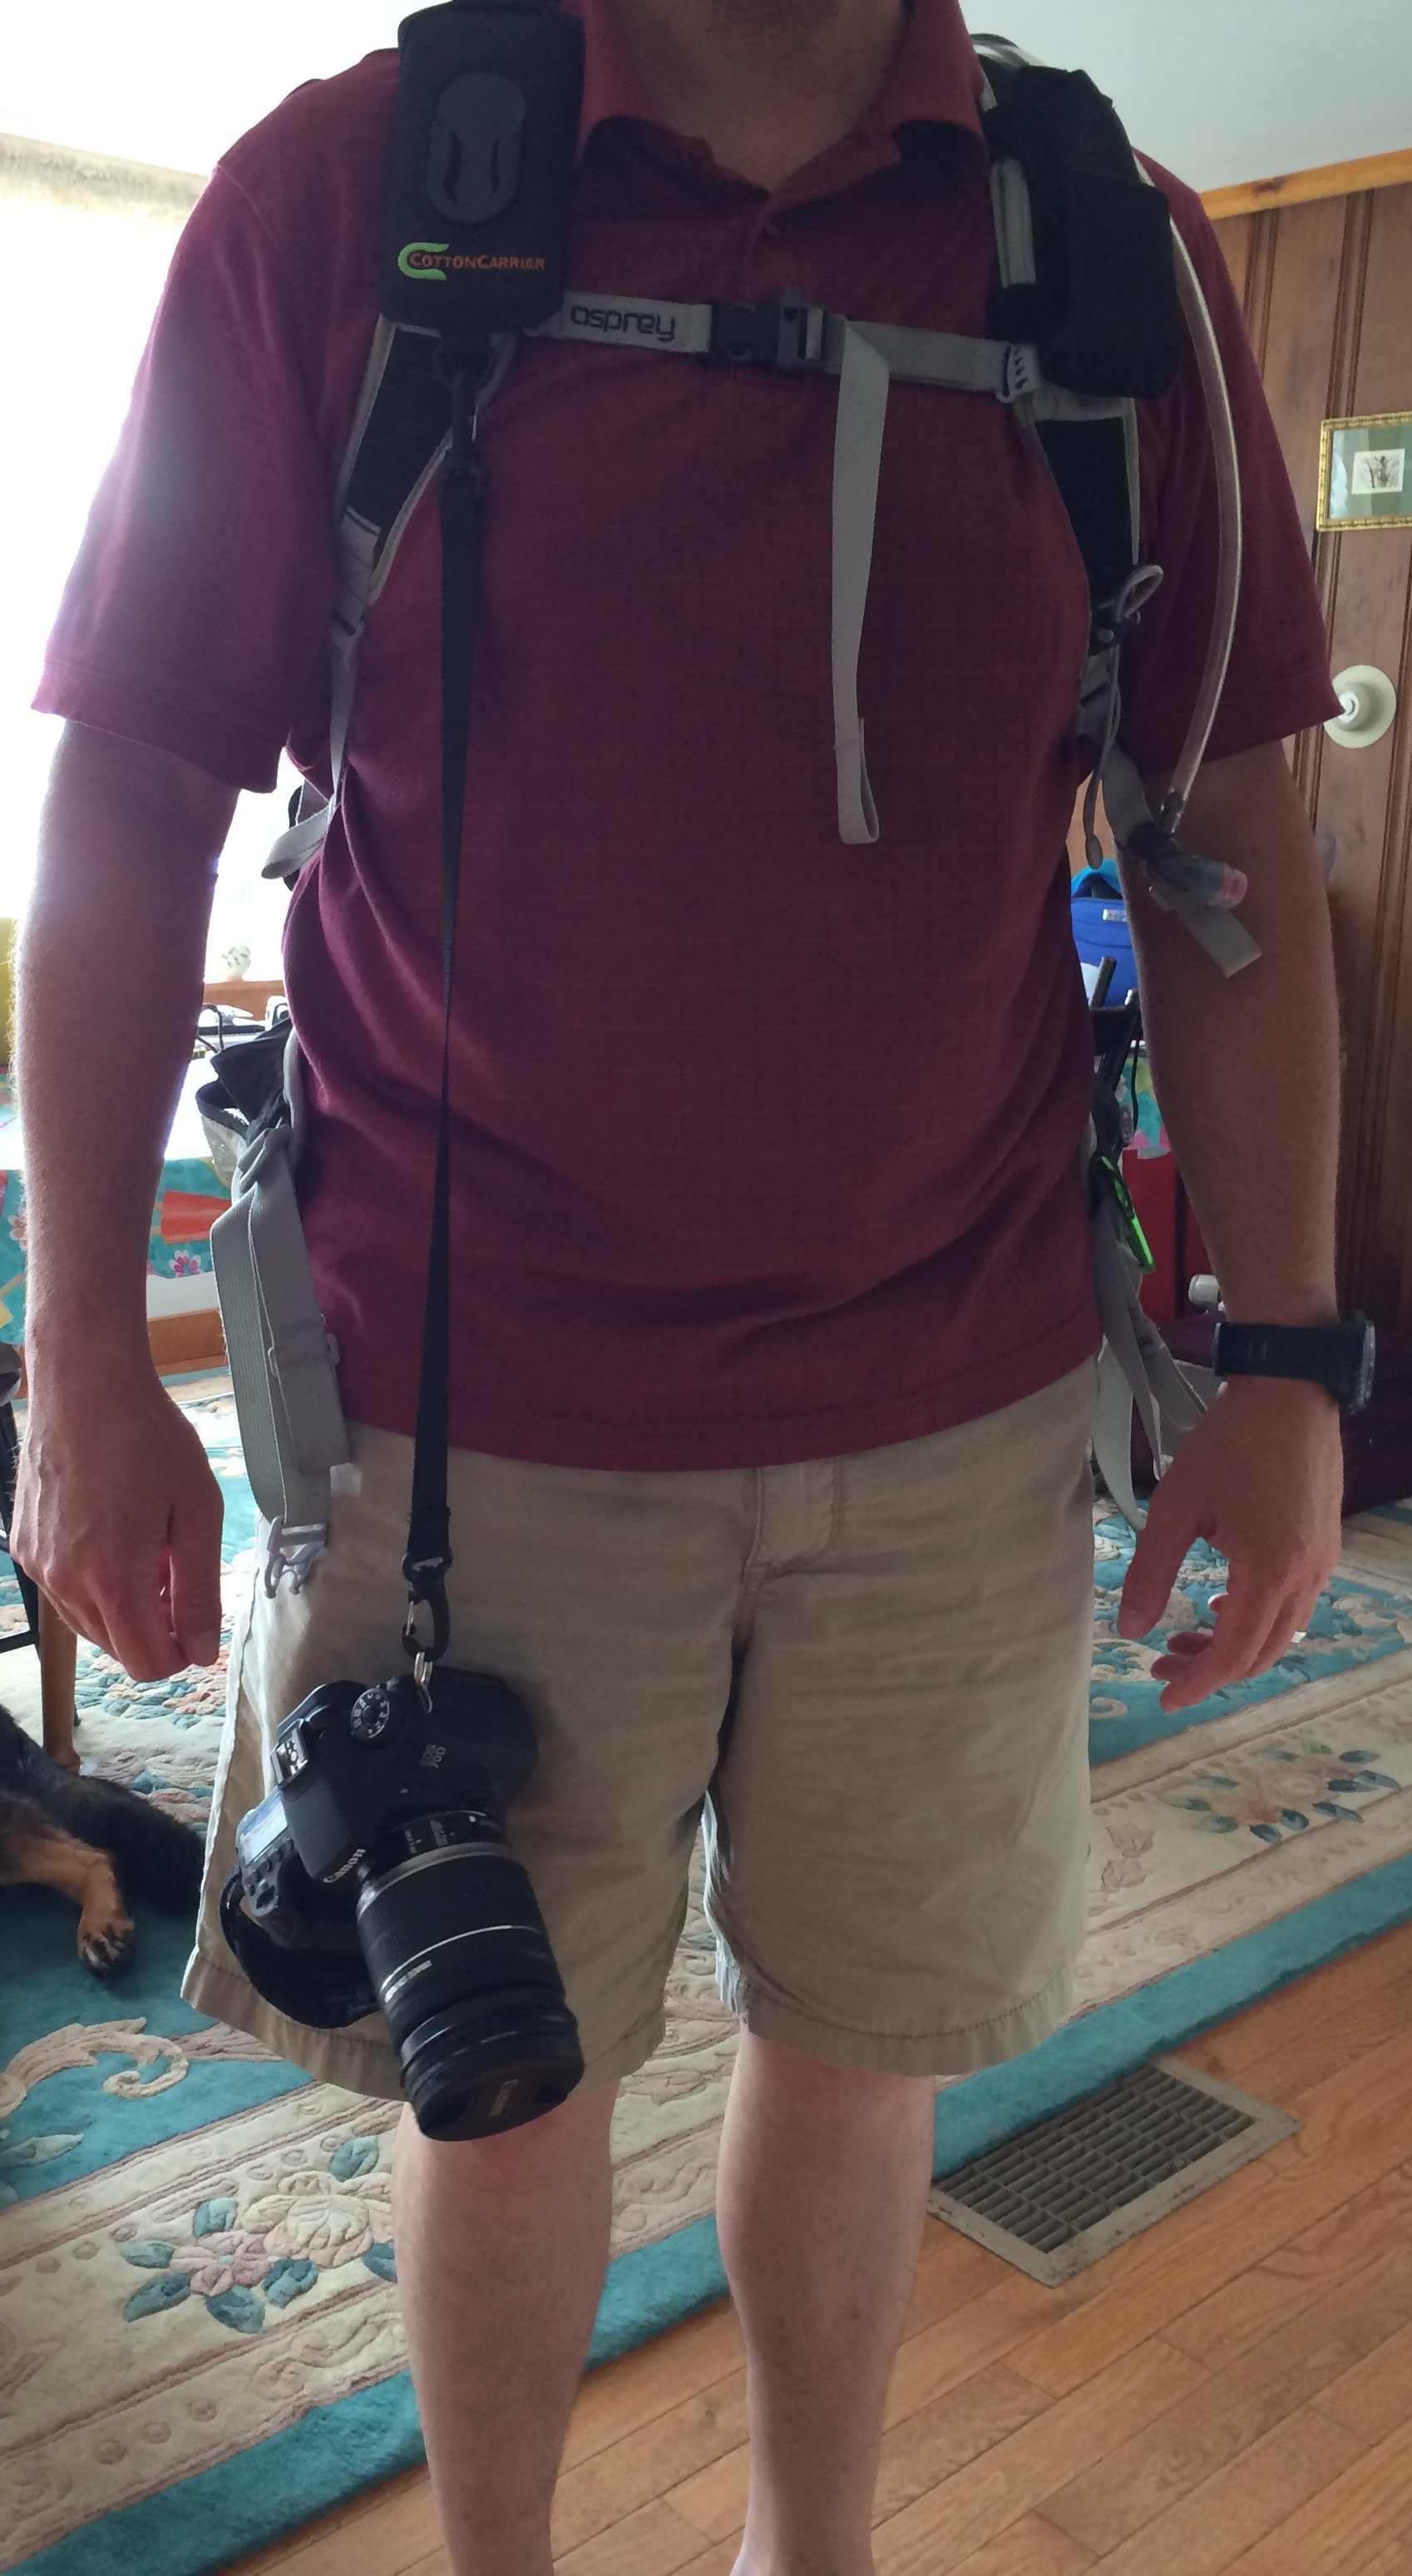
- The design allows the lens to be forward and not hitting the user in the chest. You can see the gap between the camera and body below.

View of space - The connector piece to the camera allows for tripod access. The piece that connect to your camera and allows the camera to sit in the StrapShot, allows you connect a tripod to it. That means no additional adjustments or items! Score!
- No jamming on the connector (camera to strap). It is easy to remove the camera without looking and easy to reconnect it.
- Redundancy for camera safety. You best friend 🙂
- You receive a hand strap for your camera. It’s very helpful.


During, our last hike, we spoke with a professional photographer, who saw the StrapShot and we ended up discussing it with him for sometime. We spent about 5 to 7 minutes walking him through all the functions. He was using a Canon EOS 5d Mark 3 with a current using lens of 25-105mm IS. At the end of the brief conversation, he wanted one and took a picture of the StrapShot to order it. He had to pull the camera out from the bag then place it back in. He was so over it and honestly, I do not blame him.
Here are some images to walk you through what was listed above….
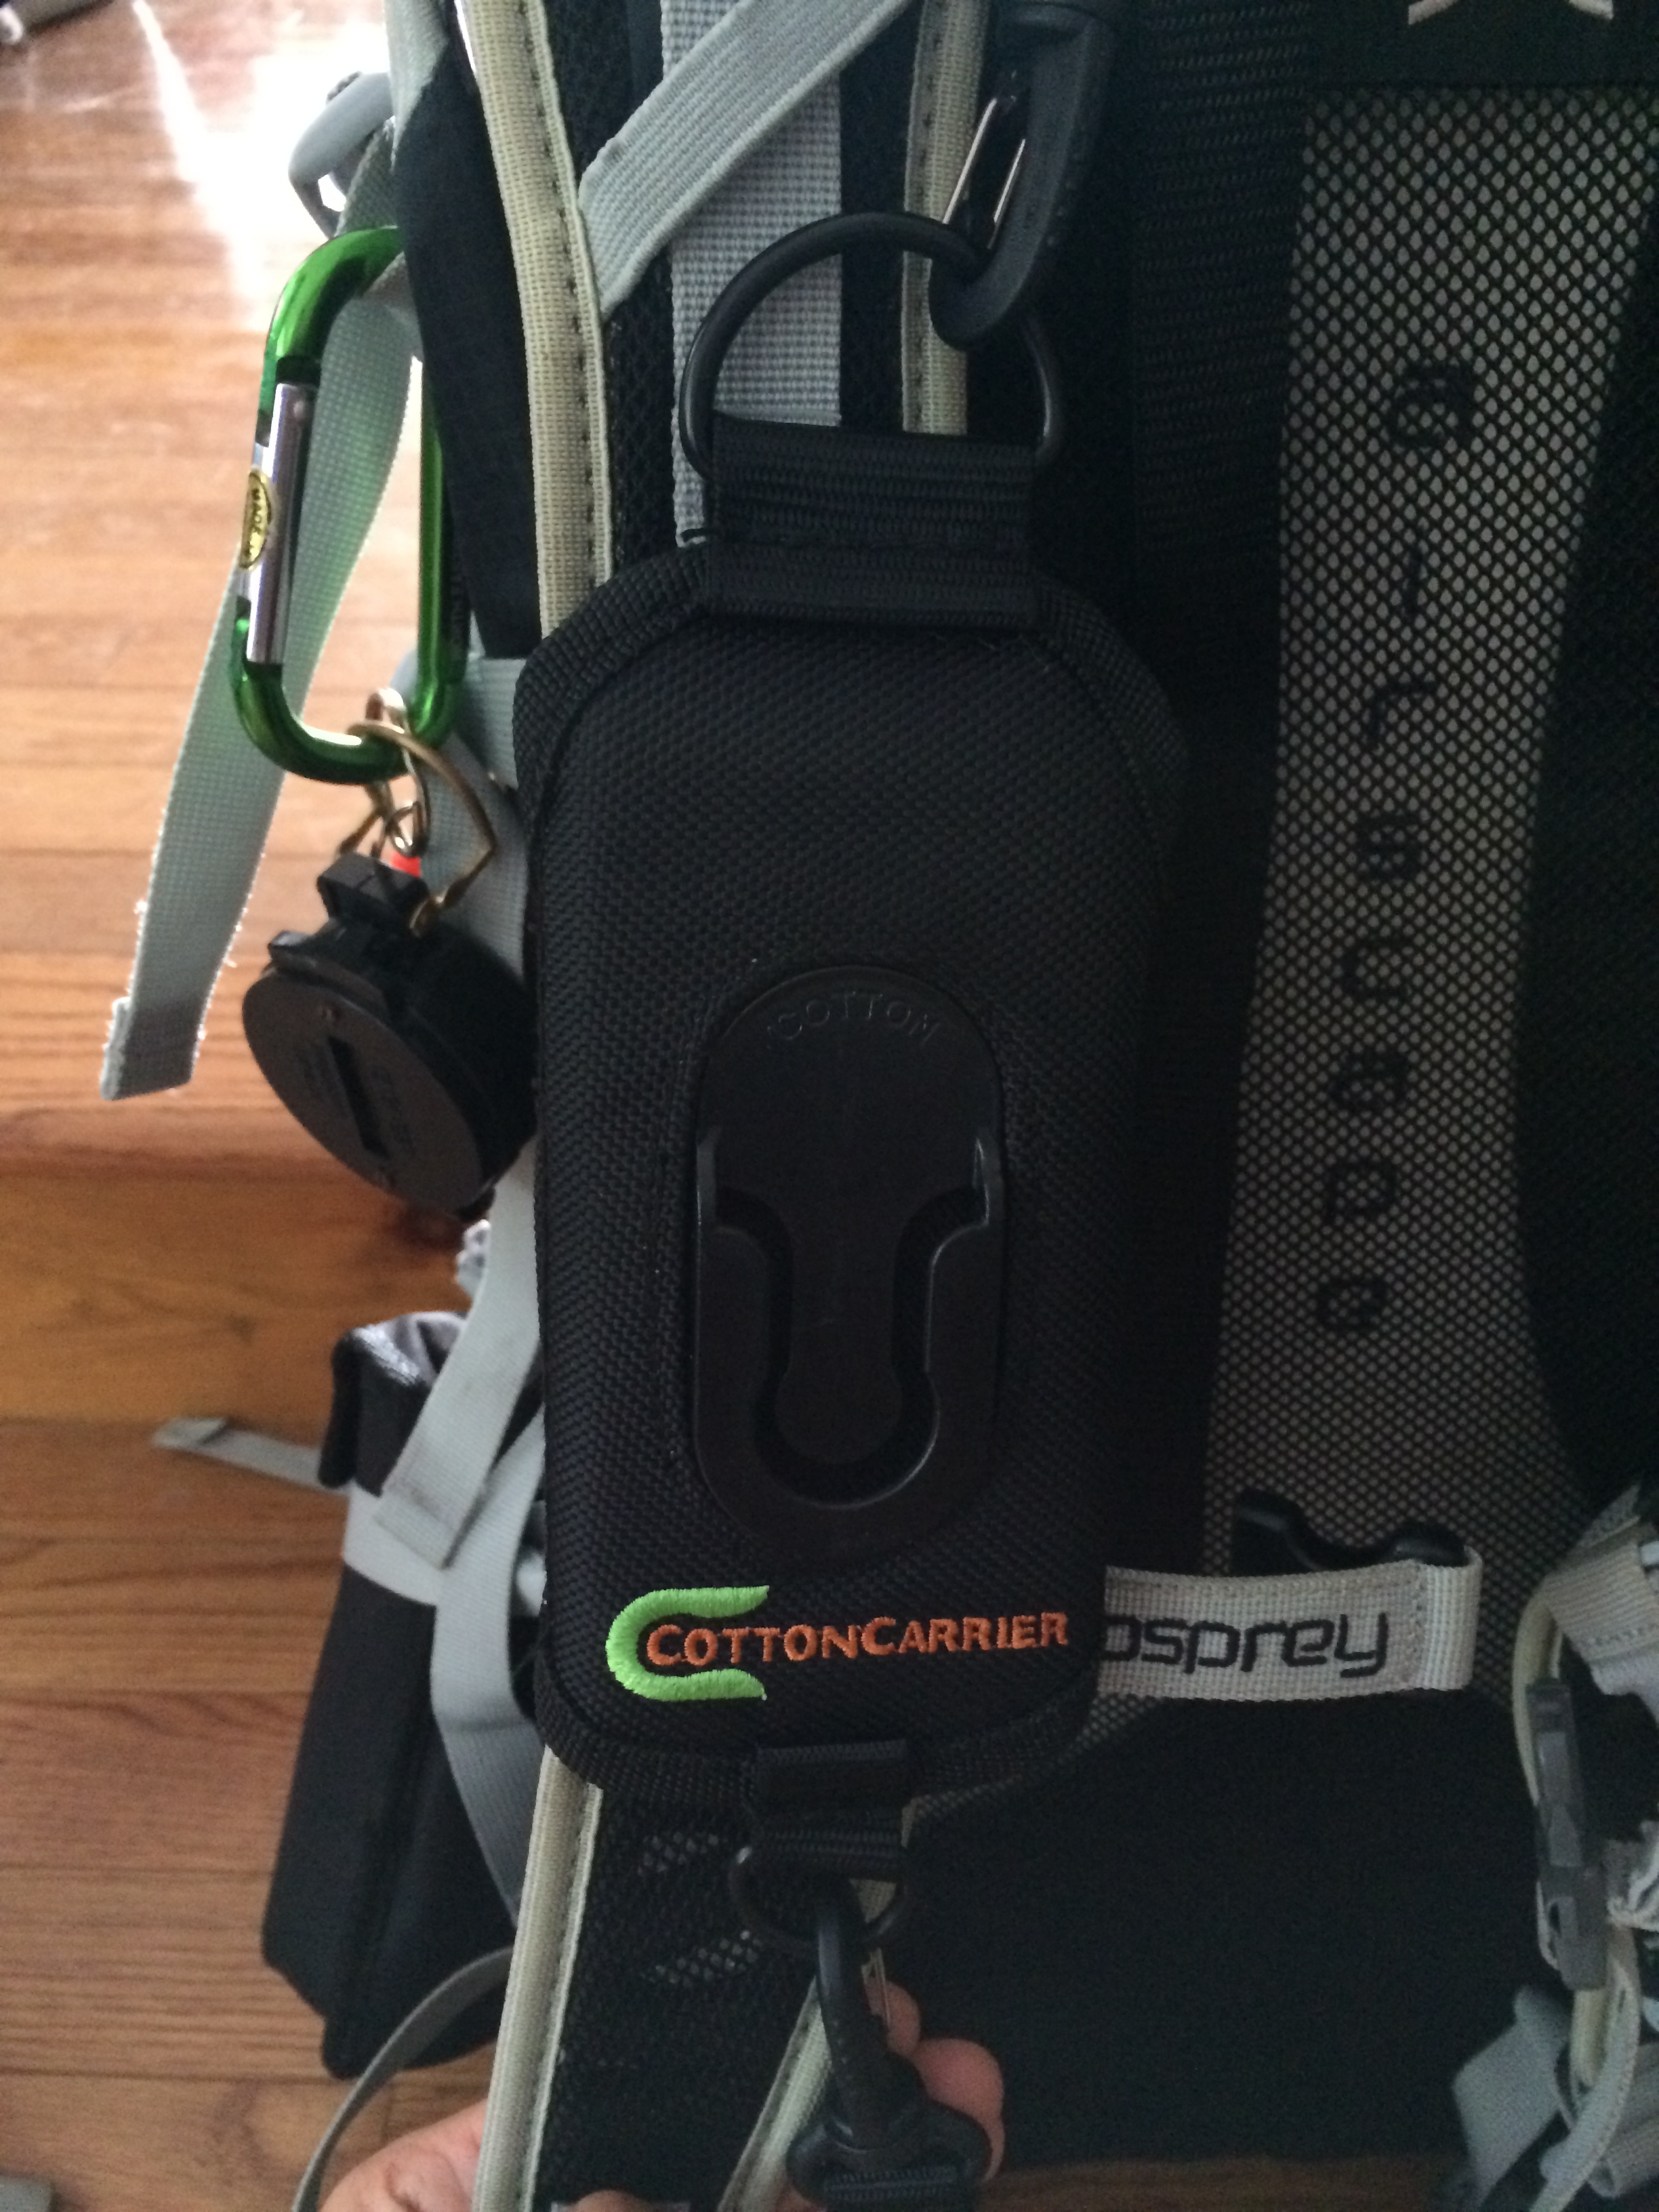
The StrapShot connects directly to your backpack on the shoulder strap.

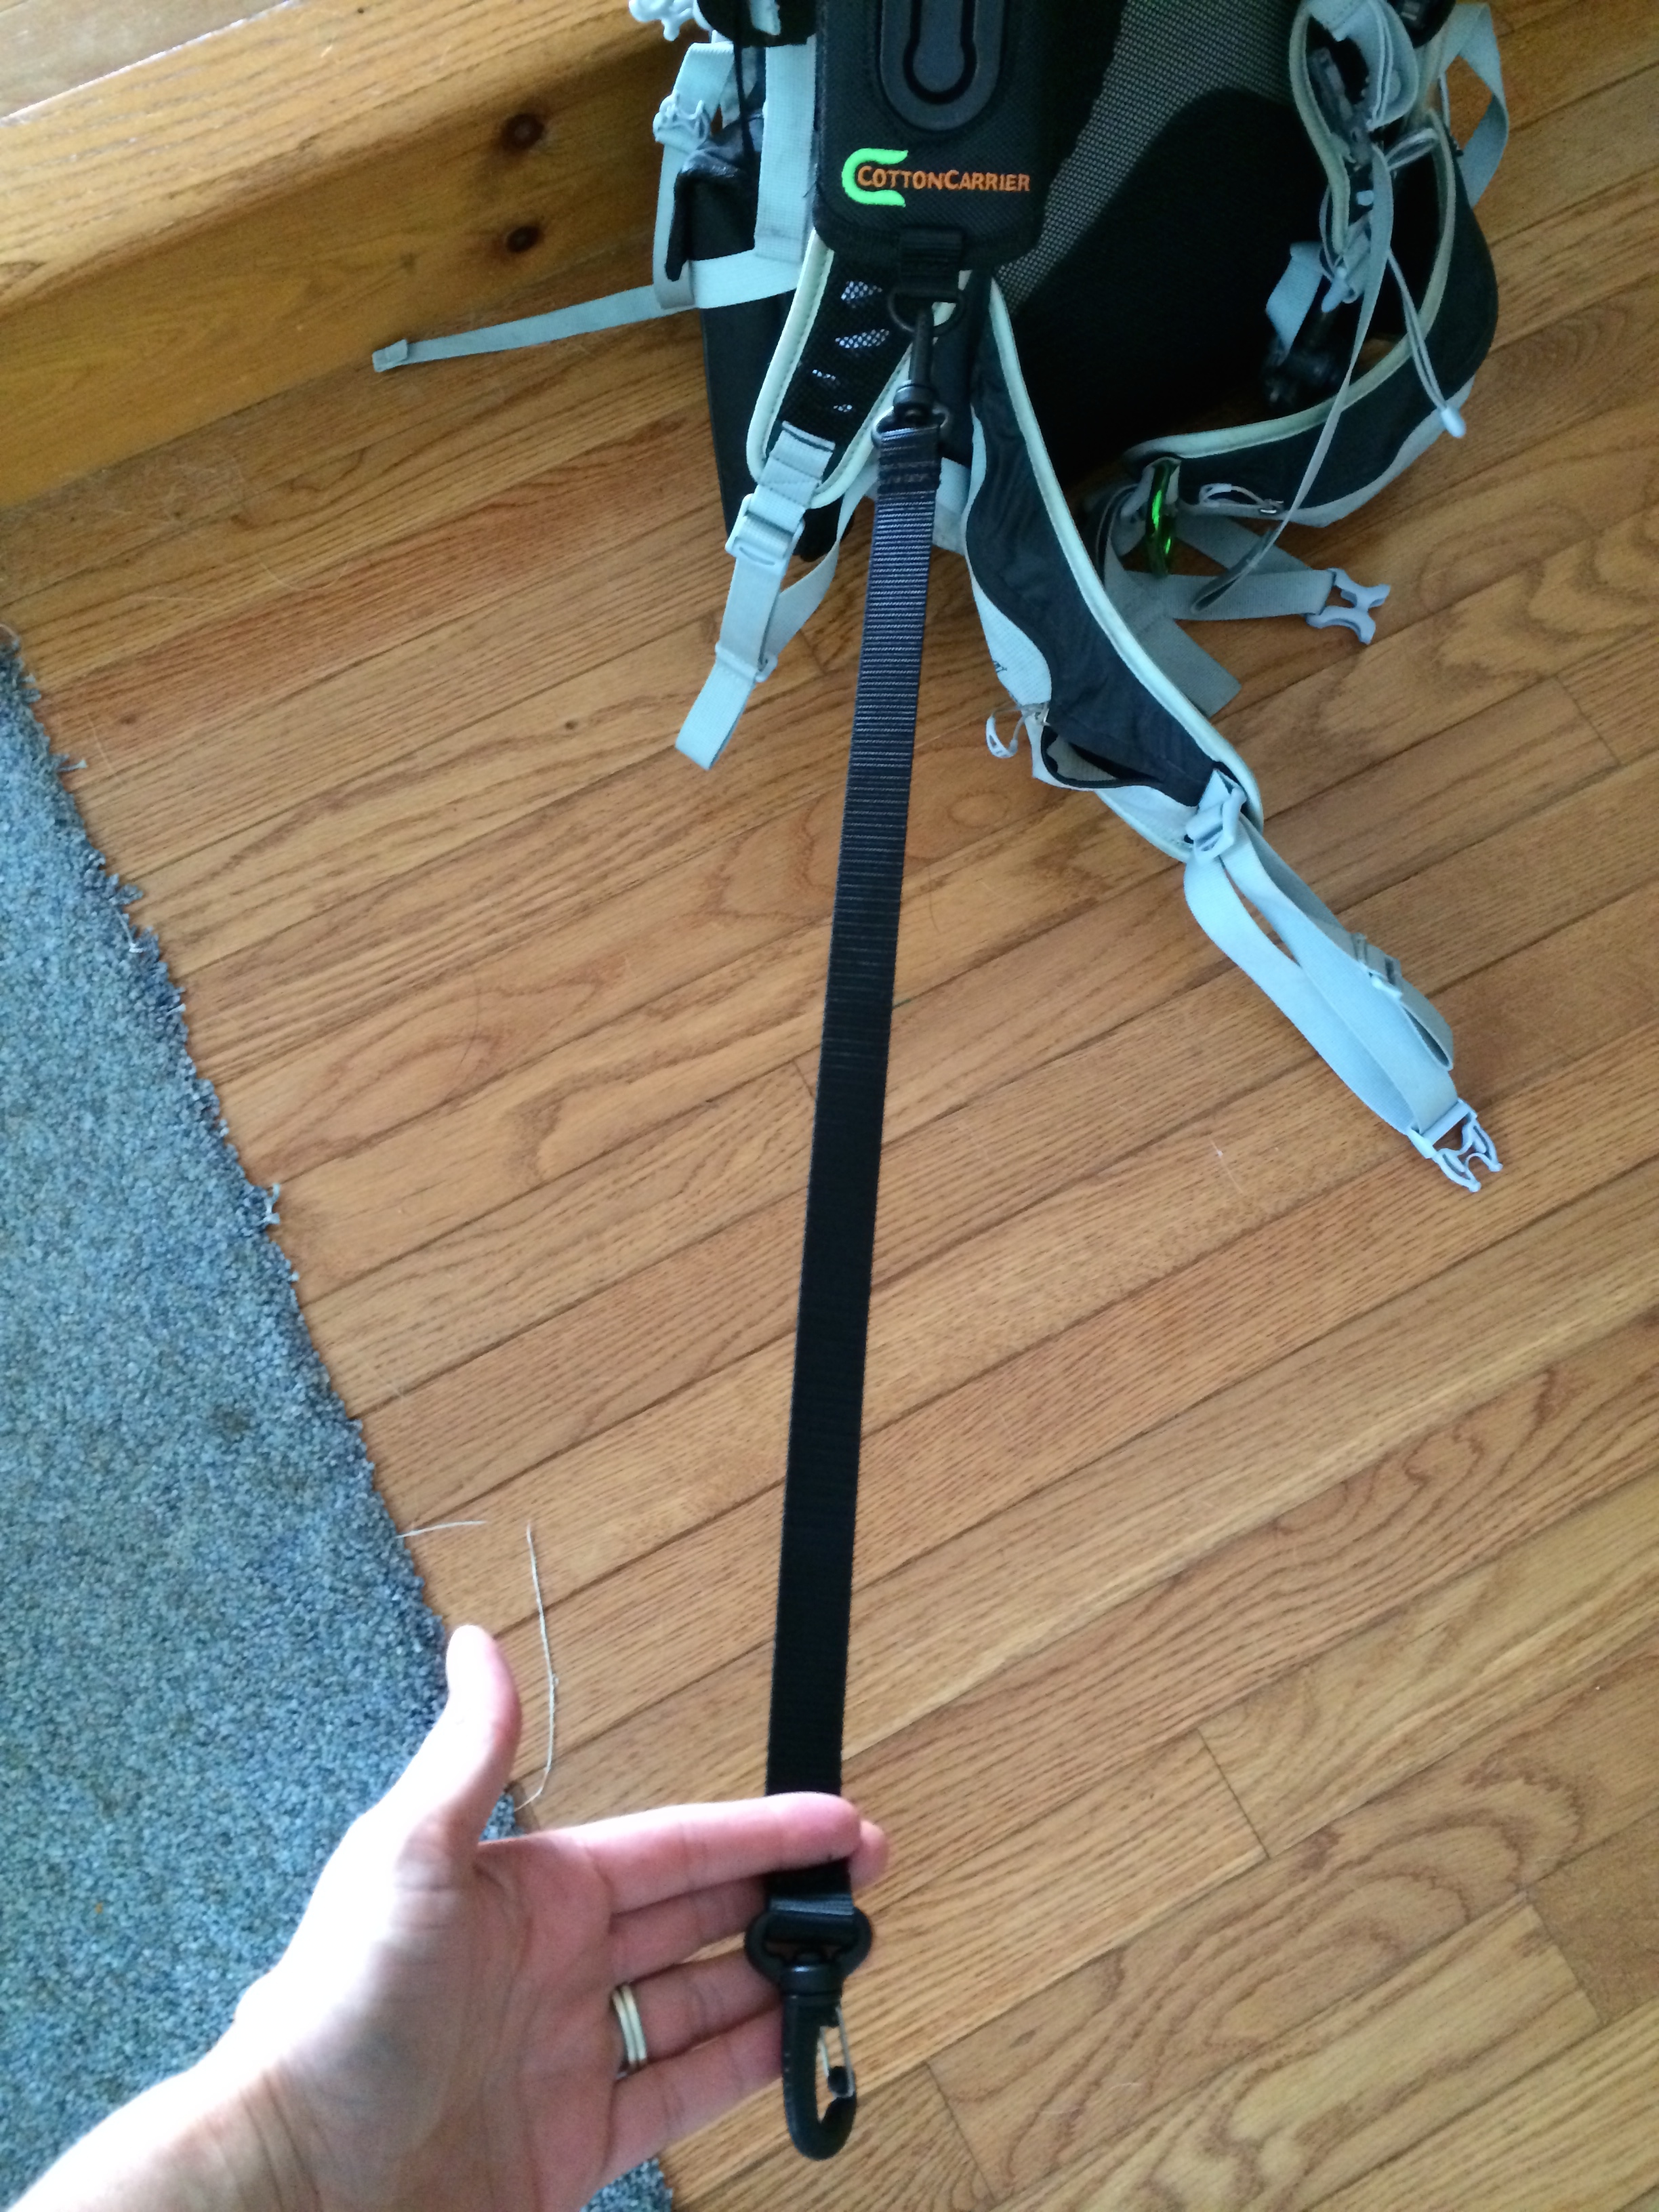
Here are the two security straps for your camera…
First, is the lanyard that connects to the back of your backpack


The second safety strap. Is for all you with butter fingers ( or not) … The strap connects to the StrapShot then to your camera.

To help understand the size of the StrapShot connecting to your pack. This is a side by side image of the StrapShot and a Special Forces 4 inch combat knife folded — its 6 inches long.
*Note the knife sleeve is upside-down on purpose, this allows for easy access.*

In closing, if you hike, want easy access to your camera and security for your camera the StrapShot is the way to go. It is great for wildlife images. Below are two wildlife images from our last hike of Mt. Height and Carter Dome. These would have not happened with any other device.


You can check Cotton Carrier’s website, here. You can check out the StrapShot, here.
