Mount Carrigain is part of the 4,000 footers in New Hampshire. Mount Carrigain is located Grafton County, NH. The mountain is named after Phillip Carrigain, NH Secretary of State (1805–10), and is on the south side of the Pemigewasset Wilderness. There are two main paths to the summit. Desolation trail, which is steeper can be accessed by Carrigain Notch Trail, Nancy Pond Trail and a few other trails. The other option is Signal Ridge Trail, not as steep but still a rough terrain with a steep incline. Signal Ridge Trail can be accessed by Sawyer River Road off of Route 302. *Note: Sawyer River Road is closed during the winter months* We took Signal Ridge Trail, which can be found two miles from turning onto Sawyer River Road from Route 302. The trail is on the right just after a bridge with the parking on the left. In the parking lot area you will see this gem of a tree.
Tree in parking lot.
The trailhead…
Trailhead for Signal Ridge Trail
Note: The trailhead sign misspells “Carrigan”. AMC Link From the trailhead to the junction the trail is rather easy and a pleasant walk minus the mosquitoes. I suggest bringing some repellent. We allowed M to walk some of trail at the beginning because it was that easy.
M on the trail
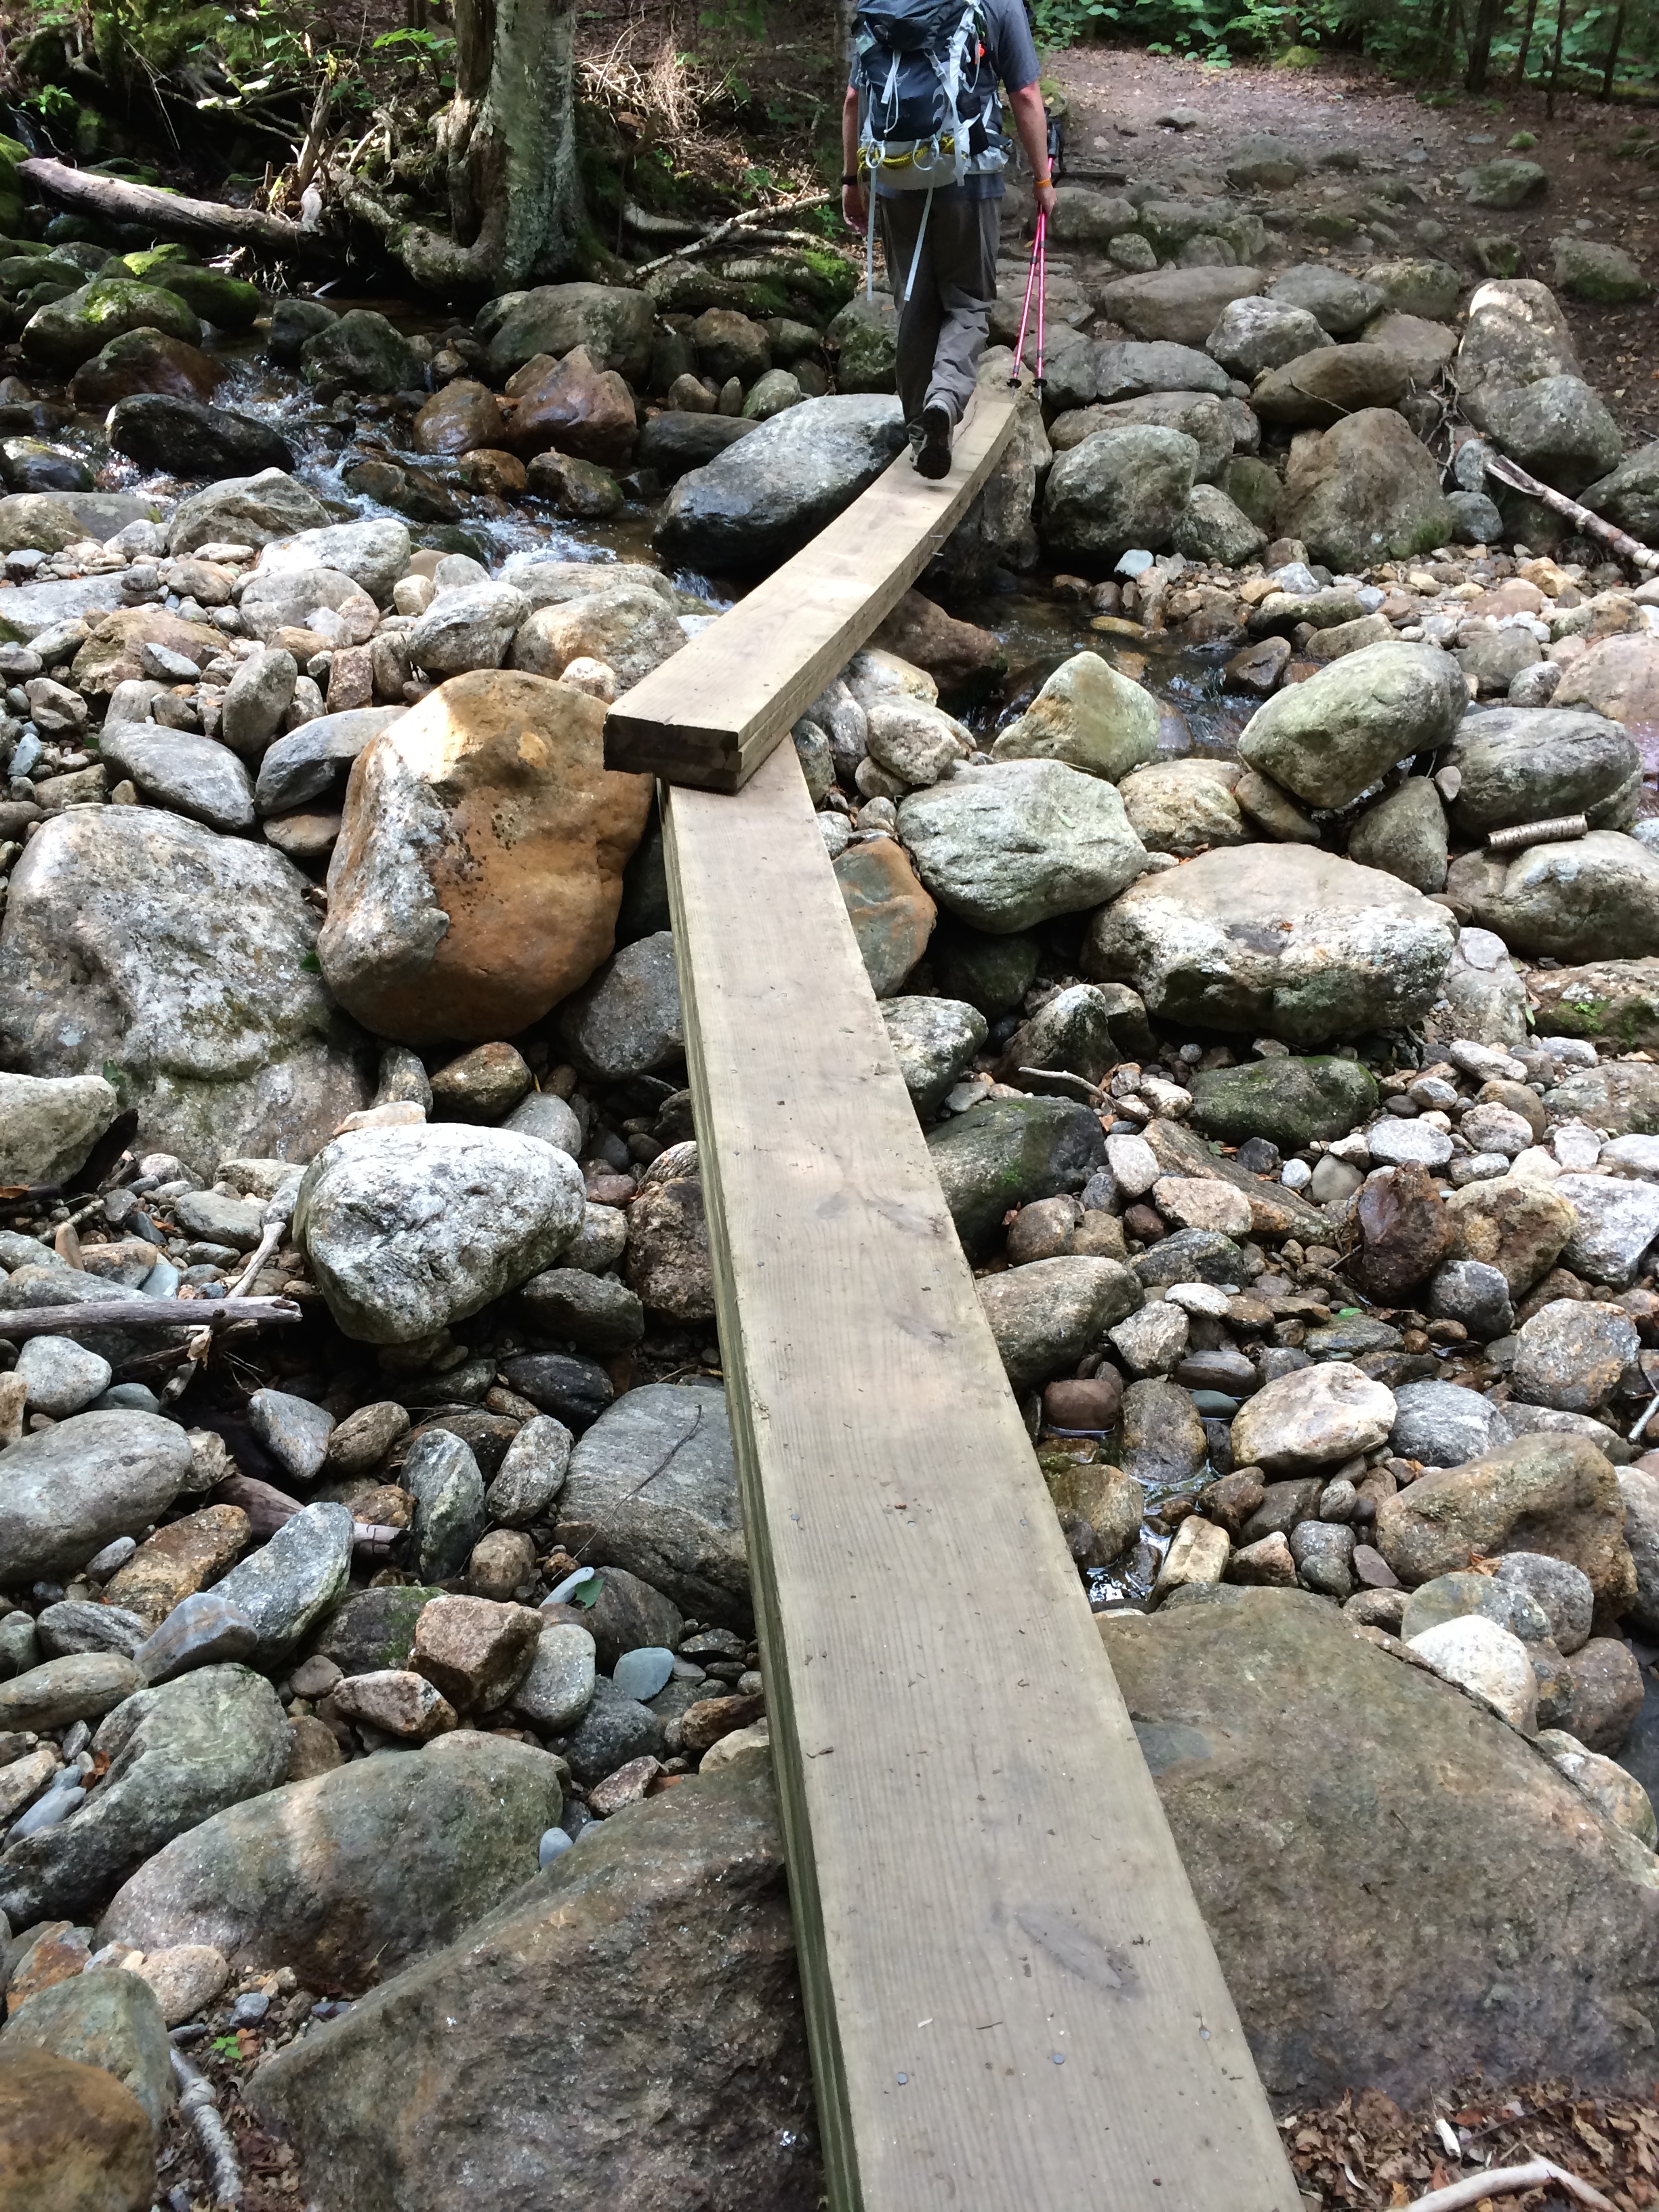
About 1.5 miles into the hike you will have to cross the river. At the beginning of the spring season this crossing could be extremely difficult or impassable. After the river crossing, you have about 0.2 miles to the junction. You will cross some log bog bridges heading to the junction.
At this junction you can either head left to continue Signal Ridge trail or head straight on Carrigain Notch trail. We went left, on Signal Ridge trail and shortly into trail is where the terrain became harder. From the junction, it is 3.3 miles to the summit of Mount Carrigain. The trail offers nothing exciting other than incline and rocks. In some ways, it feels like you are on a ‘death march’ to the summit. But, do not worry the views at the top are amazing and even more amazing on a clear day.
If you hike this trail during rain or after take your time with the climb some careful footing is needed especially when the rocks are wet. There is a section of this hike that is pure rock; not large rocks, but those pesky little rocks. Watch your footing, especially on descend.
Here is a small ‘rock climb’ you will face. It’s rather easy, but with larger backpacks or a small child on your back it will take some maneuvering.
Though, there is really no views or excitement to the summit. There are locations were you get what our family “sarcasm” calls “outdoor a/c”. In other words, you will hit areas, where a nice breeze with come through. Of course, that is more towards the ridge line and summit, but on hot days like our hike, we are thankful for what we are given.
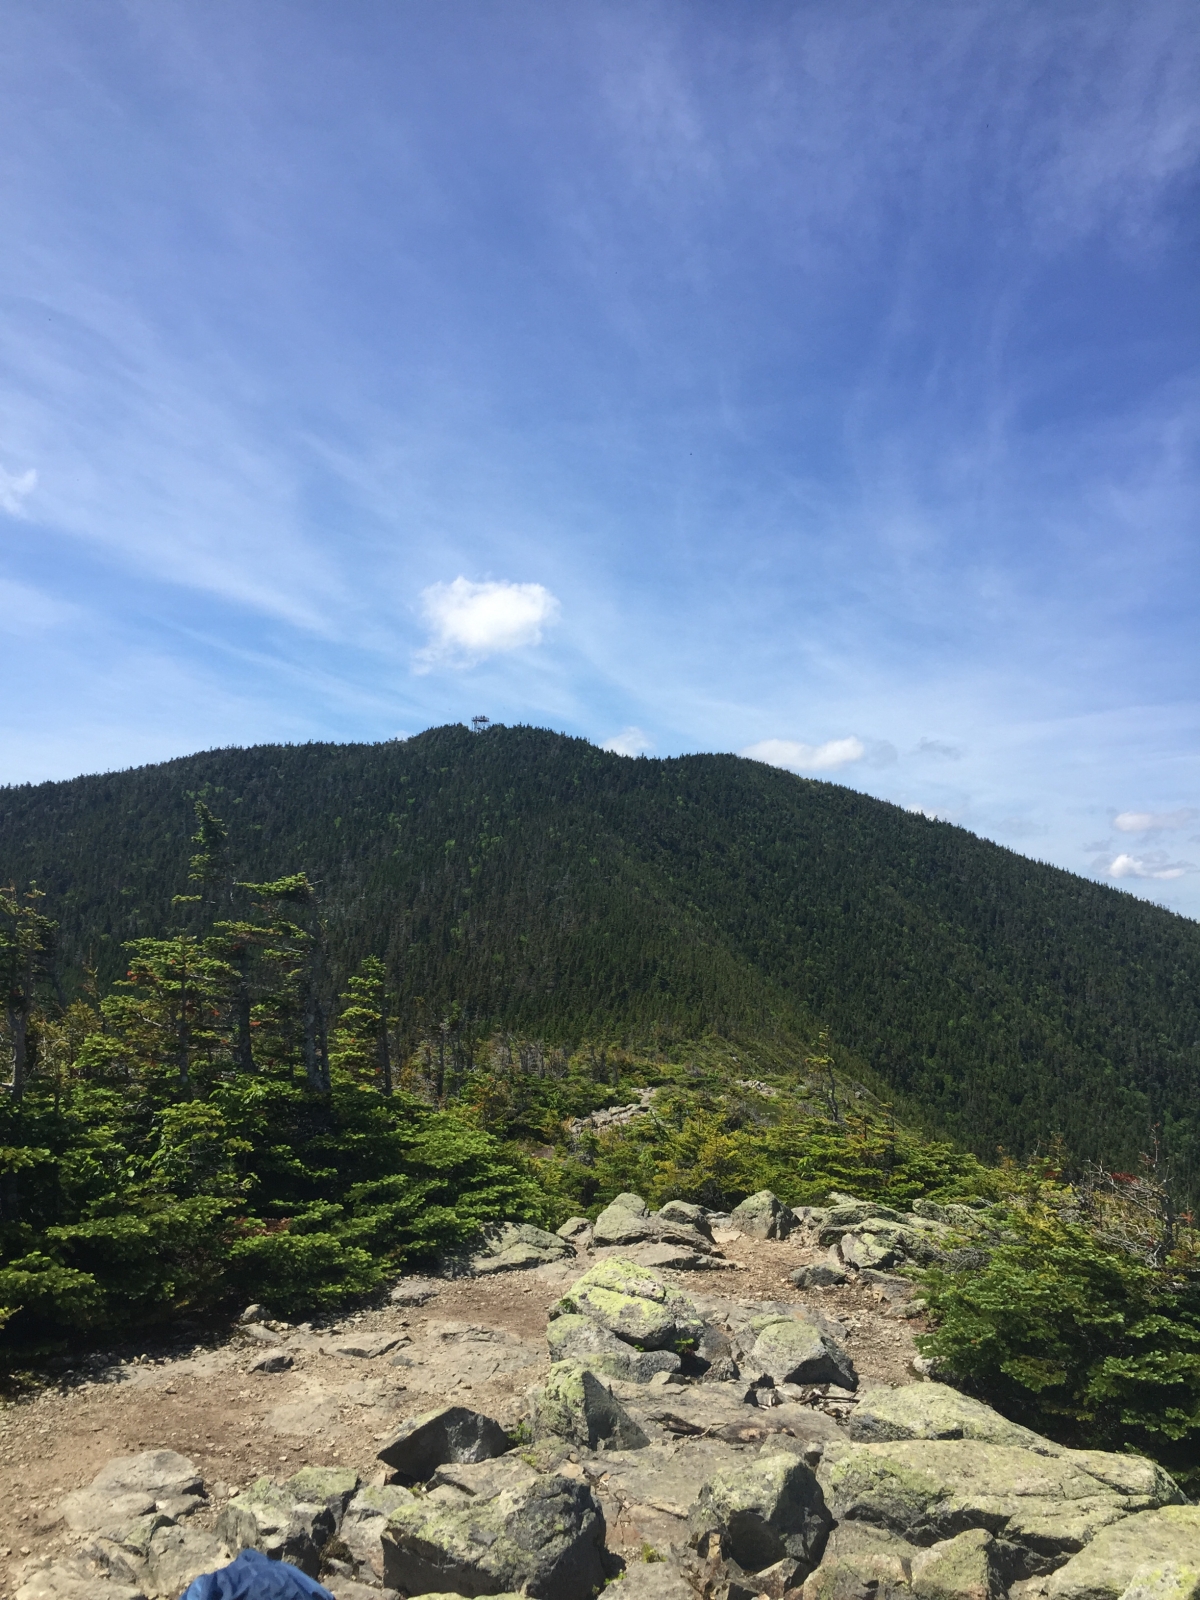
You will reach the Signal Ridge at the 4.5 mile marker. You will know its the ridge because straight ahead of you about a half mile away is the summit of Mount Carrigain and the fire tower, to your left you will be some shrubs and trees and to your right you will see the Presidential Range, Attitash Mountain and on a clear day into Maine.
From the Signal Ridge to the summit of Mt. Carrigain fire tower
**Note: Fire towers or lookout towers provides housing and protection for a person known as a “fire lookout “. It provides housing for those on duty searching for fires. Now a days, it is done by airplane. So, when you climb up, think about those that lived and did their job to keep the forests and wildlife safe in the early 1900s. **
The ridge is a great place to take a moment, rest and regroup. The trip up to the summit is short and after your ‘death march’ climb, its really nothing. But remember what goes up must go down. Here are some images from the ridge and summit.
Mount Washington from Carrigain
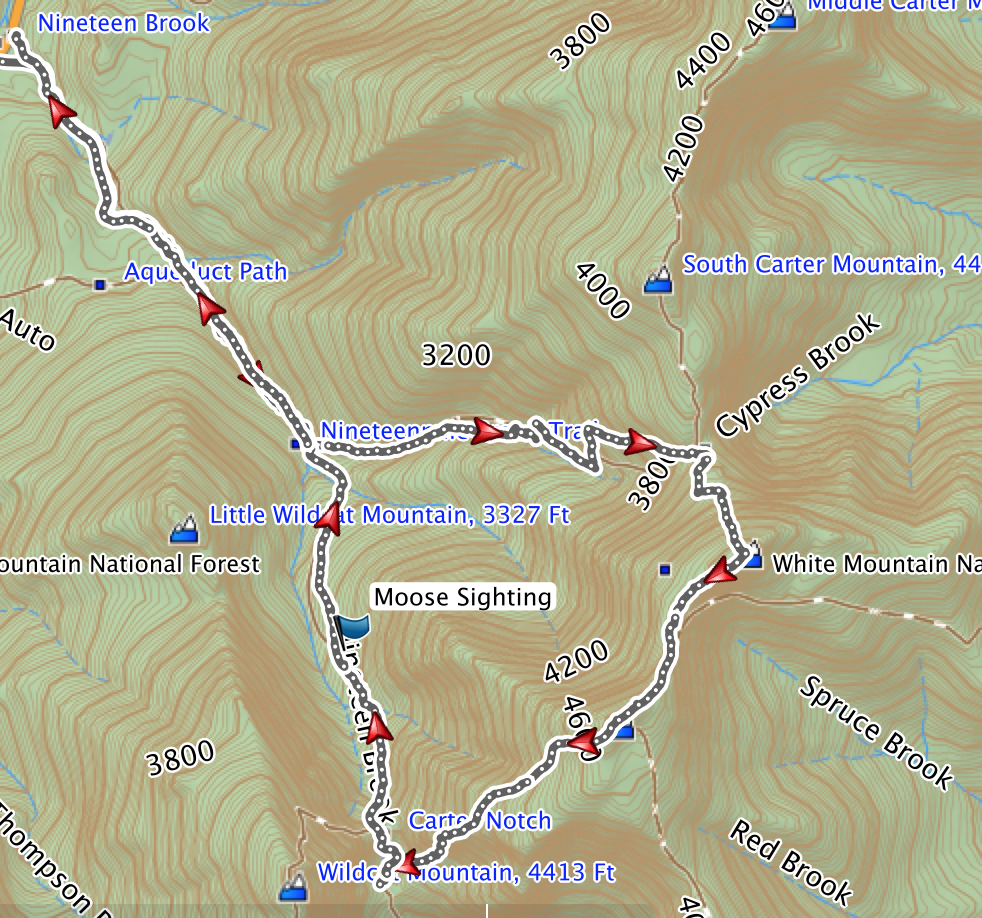
Here are some terrain images by our GPS device. These are after the junction post approaching the ridge and summit.
Basic Map3D Map
Over all this is a great hike. It is a workout, but well worth all of it.
Mount Carrigain in our books, lives up to its name of one of the most un- respected climbs and views of the White Mountains.
End of the year is here, if you can, want to or need to keep Uncle Sam at bay.
Please, donate to one or both of my favorite nonprofit organizations. I have no ties to either. I support them for the work they do and I believe in what they do.
MWOBS studies the weather and does many climate research projects to help give us warning of storms which helps protect what we love. Mt. Washington is known for the worst weather in the world with winds reaching 231 mph. Find out more at http://www.mtwashington.org, here.
Warrior Dog Foundation, is a home for SFO (Special Forces Operation) dogs. They help find a dog home after their service or injury. They work directly with the dog, house them, give them whatever care and training needed. They do all this with the honor the dog deserves. They provide a permanent home for dogs that cannot make the transition. Find out more at http://www.warriordogfoundation.org, here.
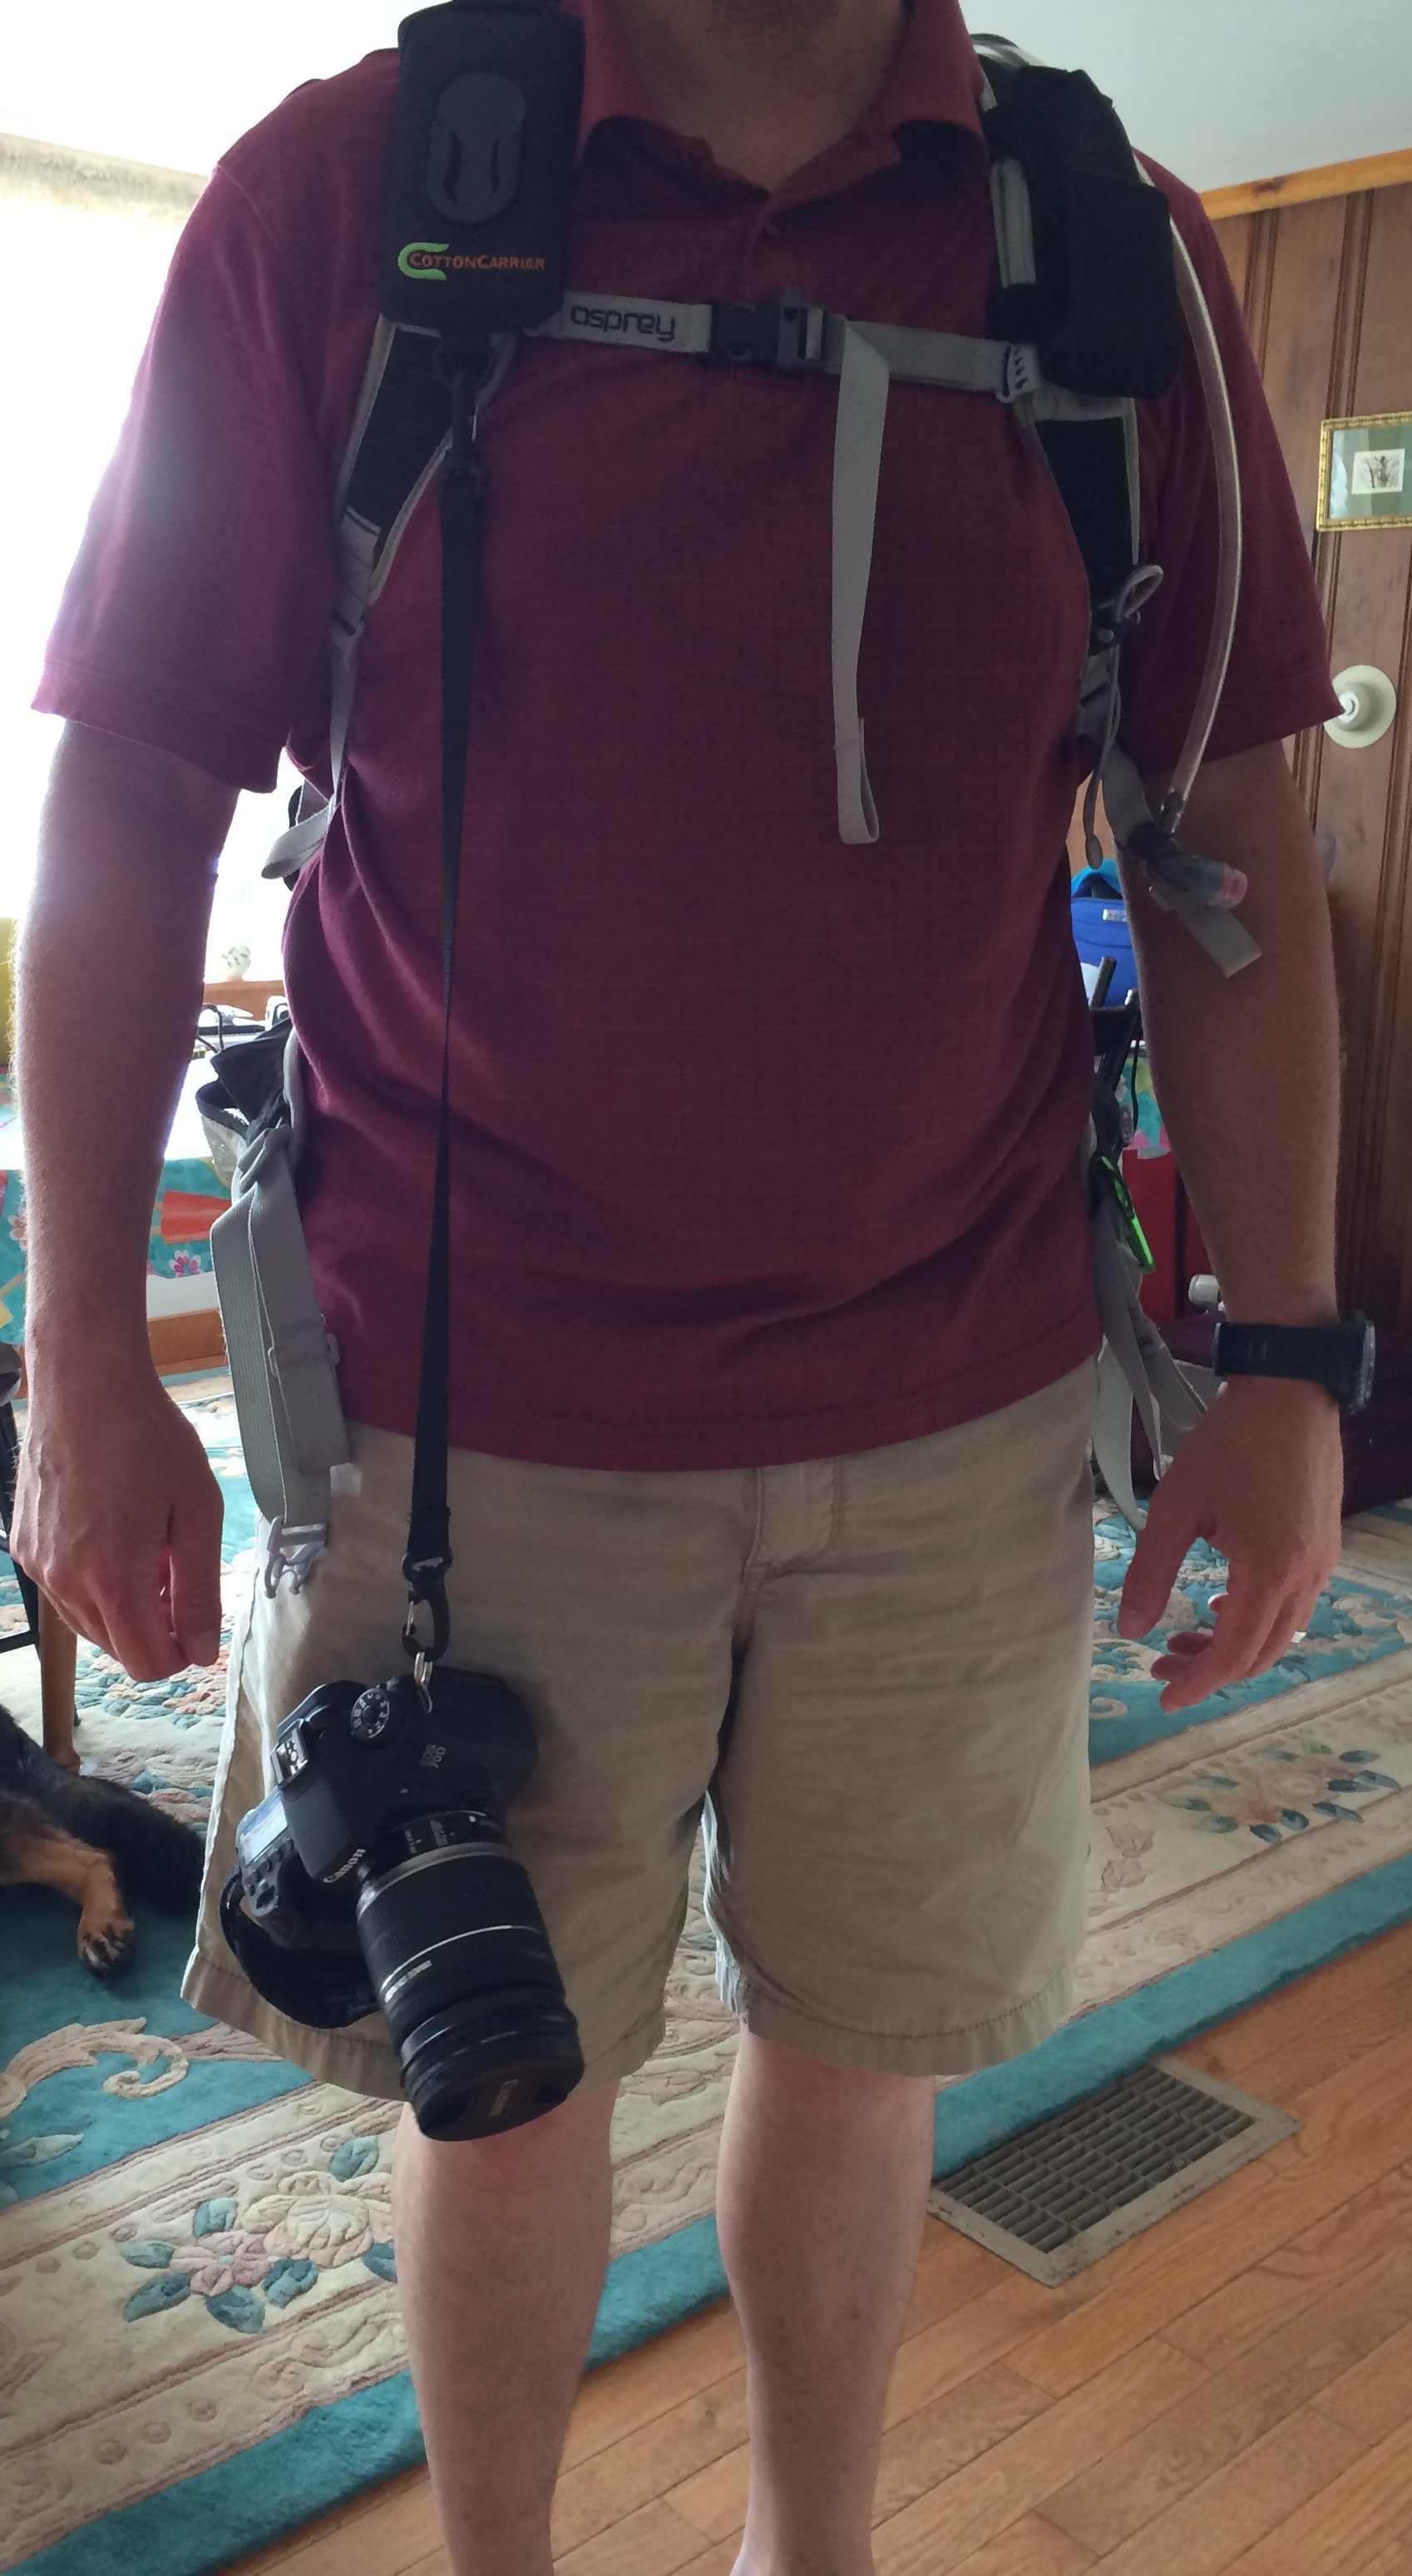
First off, I am not the camera person on our hikes. All the images you see are done by my husband. He is learning as he goes, but has found a great love for photography. Most importantly, it’s the way we capture our moments for our daughter.
The biggest issue for anyone hiking with a camera, outside that of your phone, is how the heck to carry it. You can put it in your bag, which means putting your bag down and get your camera out then putting it back in and moving on. Well, that’s great, if you enjoy doing all that and do not want to take images that happen in under 25 seconds.
You can use a standard neck strap then engineer a way to strap down the camera to your pack or belt, so the camera is not swaying while you move. Depending on the camera, its weight can start stressing your neck and shoulders.
We, more like, J has been looking for a device for his camera when we are hiking. The Strapshot by Cotton Carrier was it. We watched this video that helped us really see the differences and what we needed to help make a purchase. The video is done by Landslide03 via YouTube. You can check out the video, here. It is a little lengthy 27:33, but he walks you through the difference between the StrapShot by Cotton Carrier and the Peak Design Capture Clip V2. It was very helpful for seeing differences and the StrapShot in action.
Here are our reasons for the StrapShot:
*In no order of importance*
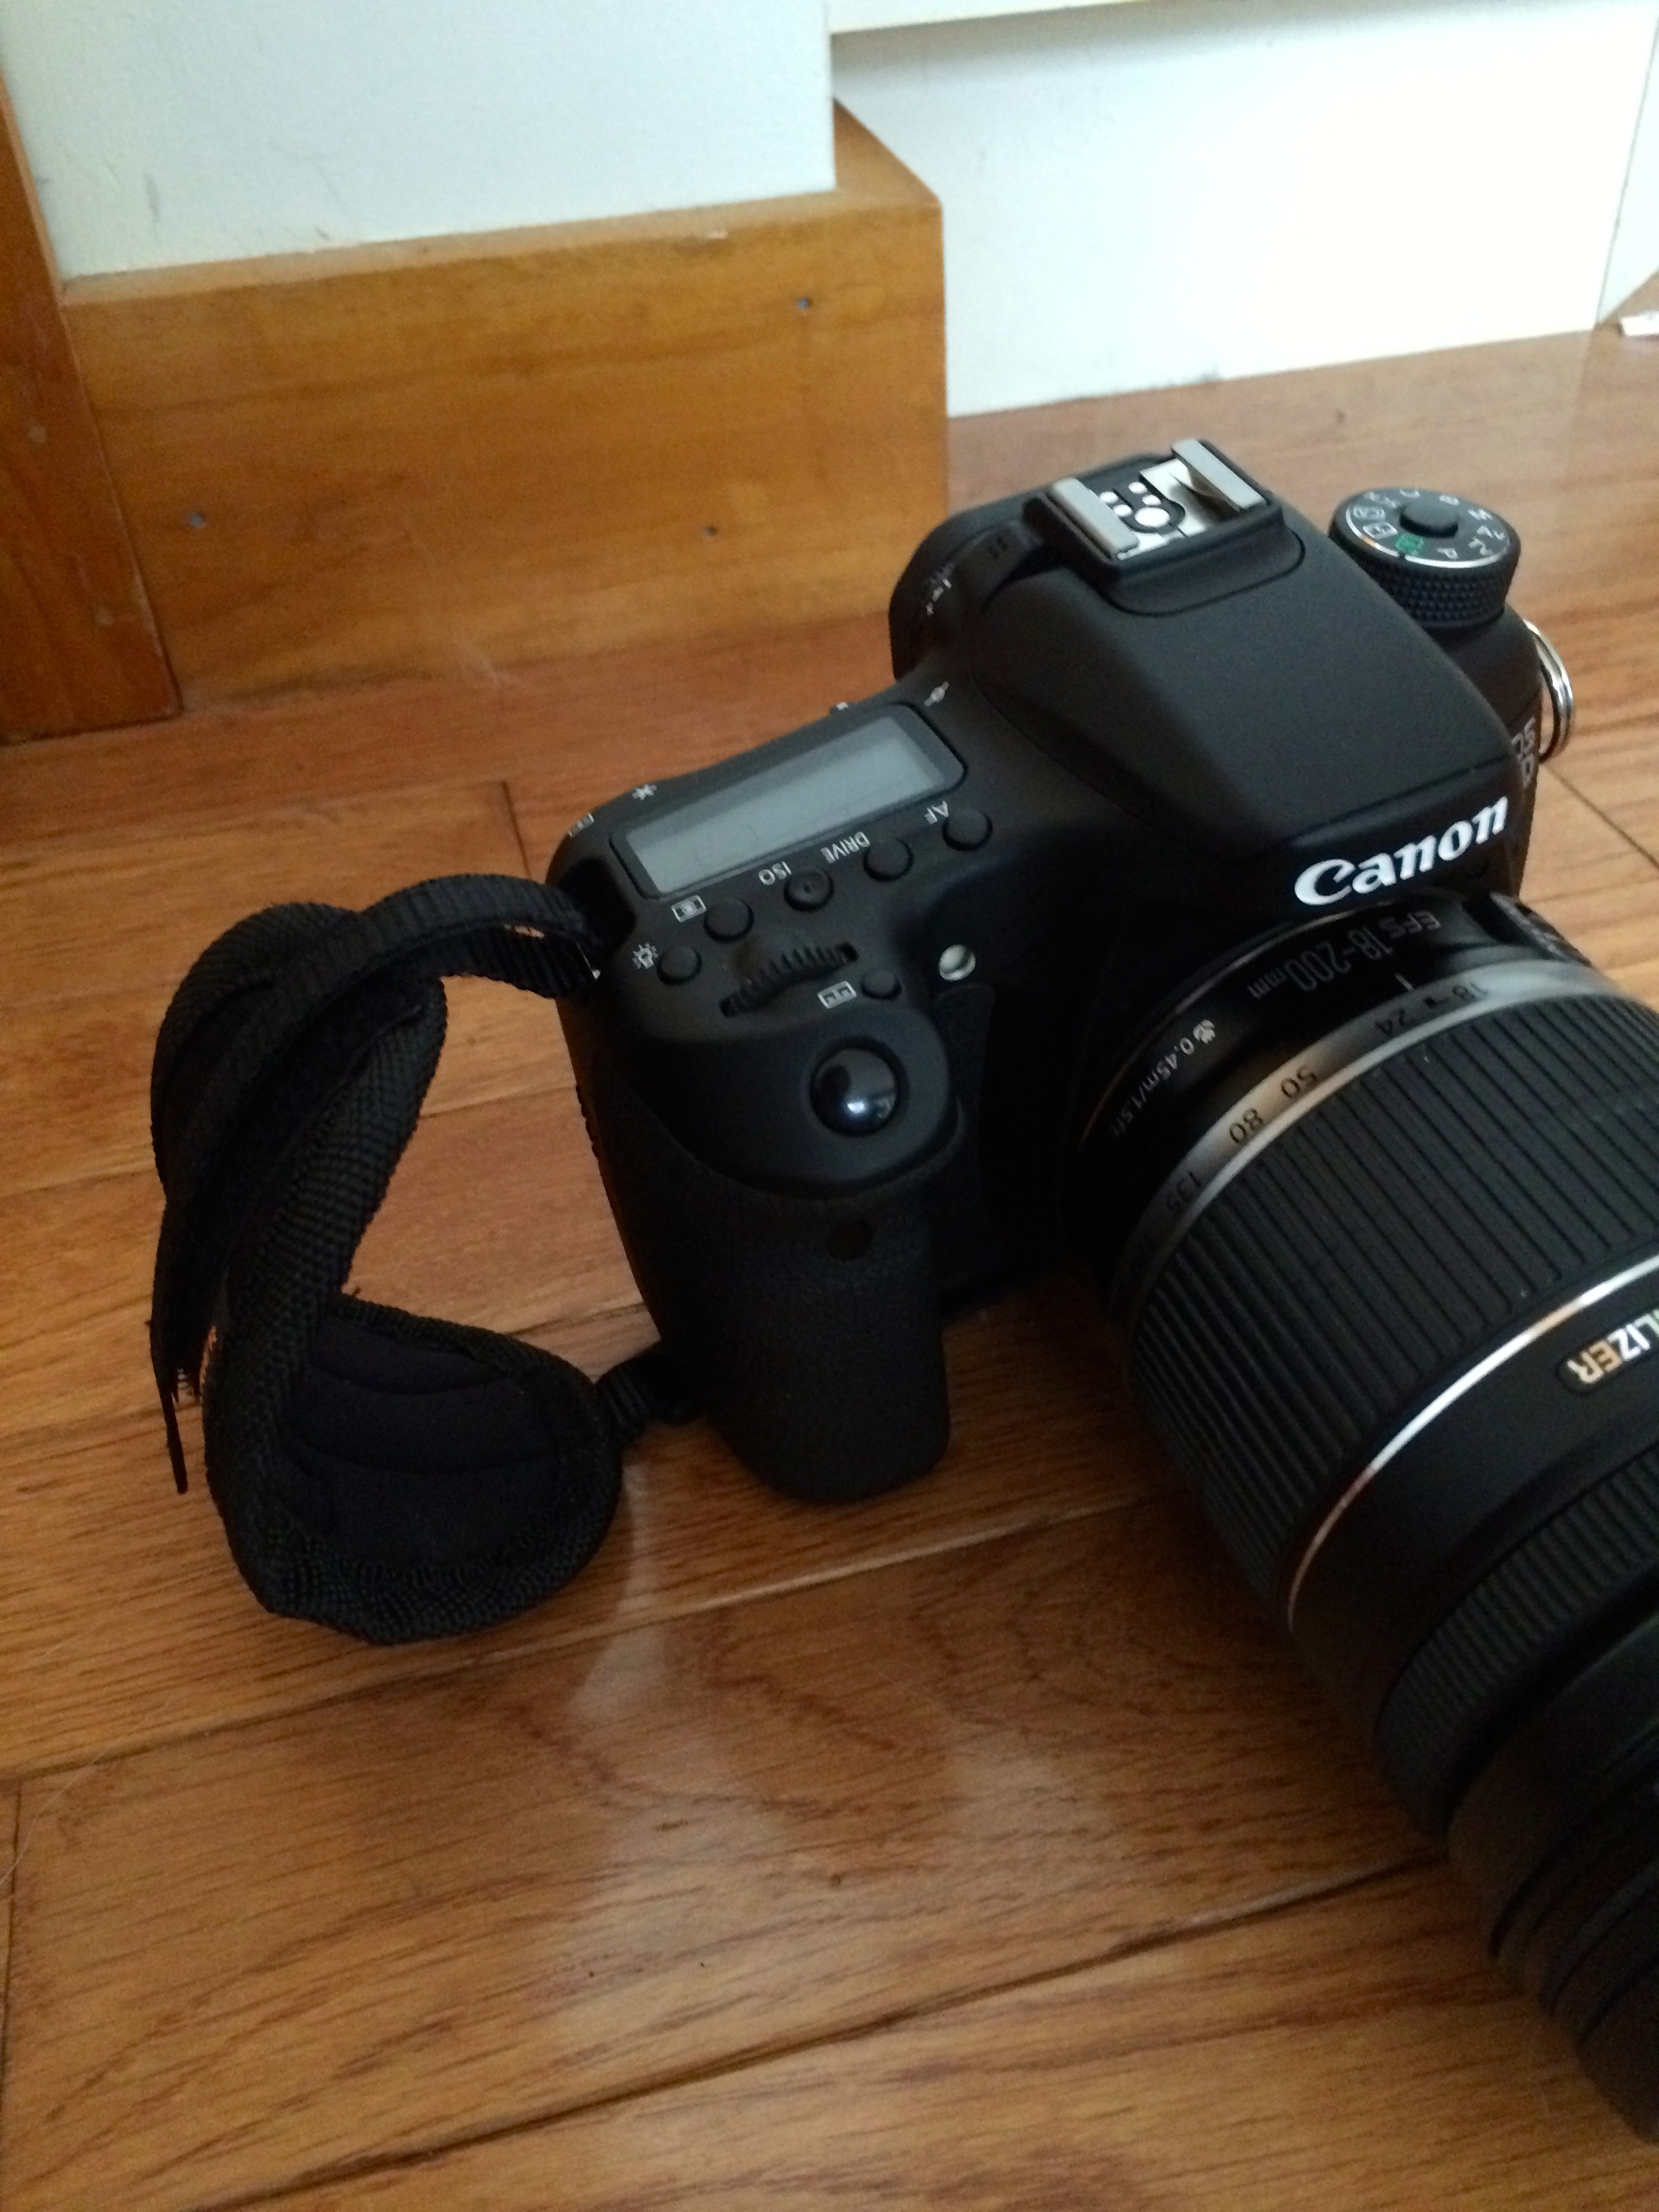
Weight of lens, helps to secure the camera in place. J uses a Cannon EFS 18-200mm IS. The lens weight makes the camera stay in place.
Security straps connected to the camera. After spending time researching this, many other brands do not have this function.
Easy of un-latching the camera from the strap, its is a turn and pull technique.
The design allows the lens to be forward and not hitting the user in the chest. You can see the gap between the camera and body below.
View of space
The connector piece to the camera allows for tripod access. The piece that connect to your camera and allows the camera to sit in the StrapShot, allows you connect a tripod to it. That means no additional adjustments or items! Score!
No jamming on the connector (camera to strap). It is easy to remove the camera without looking and easy to reconnect it.
Redundancy for camera safety. You best friend 🙂
You receive a hand strap for your camera. It’s very helpful.
During, our last hike, we spoke with a professional photographer, who saw the StrapShot and we ended up discussing it with him for sometime. We spent about 5 to 7 minutes walking him through all the functions. He was using a Canon EOS 5d Mark 3 with a current using lens of 25-105mm IS. At the end of the brief conversation, he wanted one and took a picture of the StrapShot to order it. He had to pull the camera out from the bag then place it back in. He was so over it and honestly, I do not blame him.
Here are some images to walk you through what was listed above….
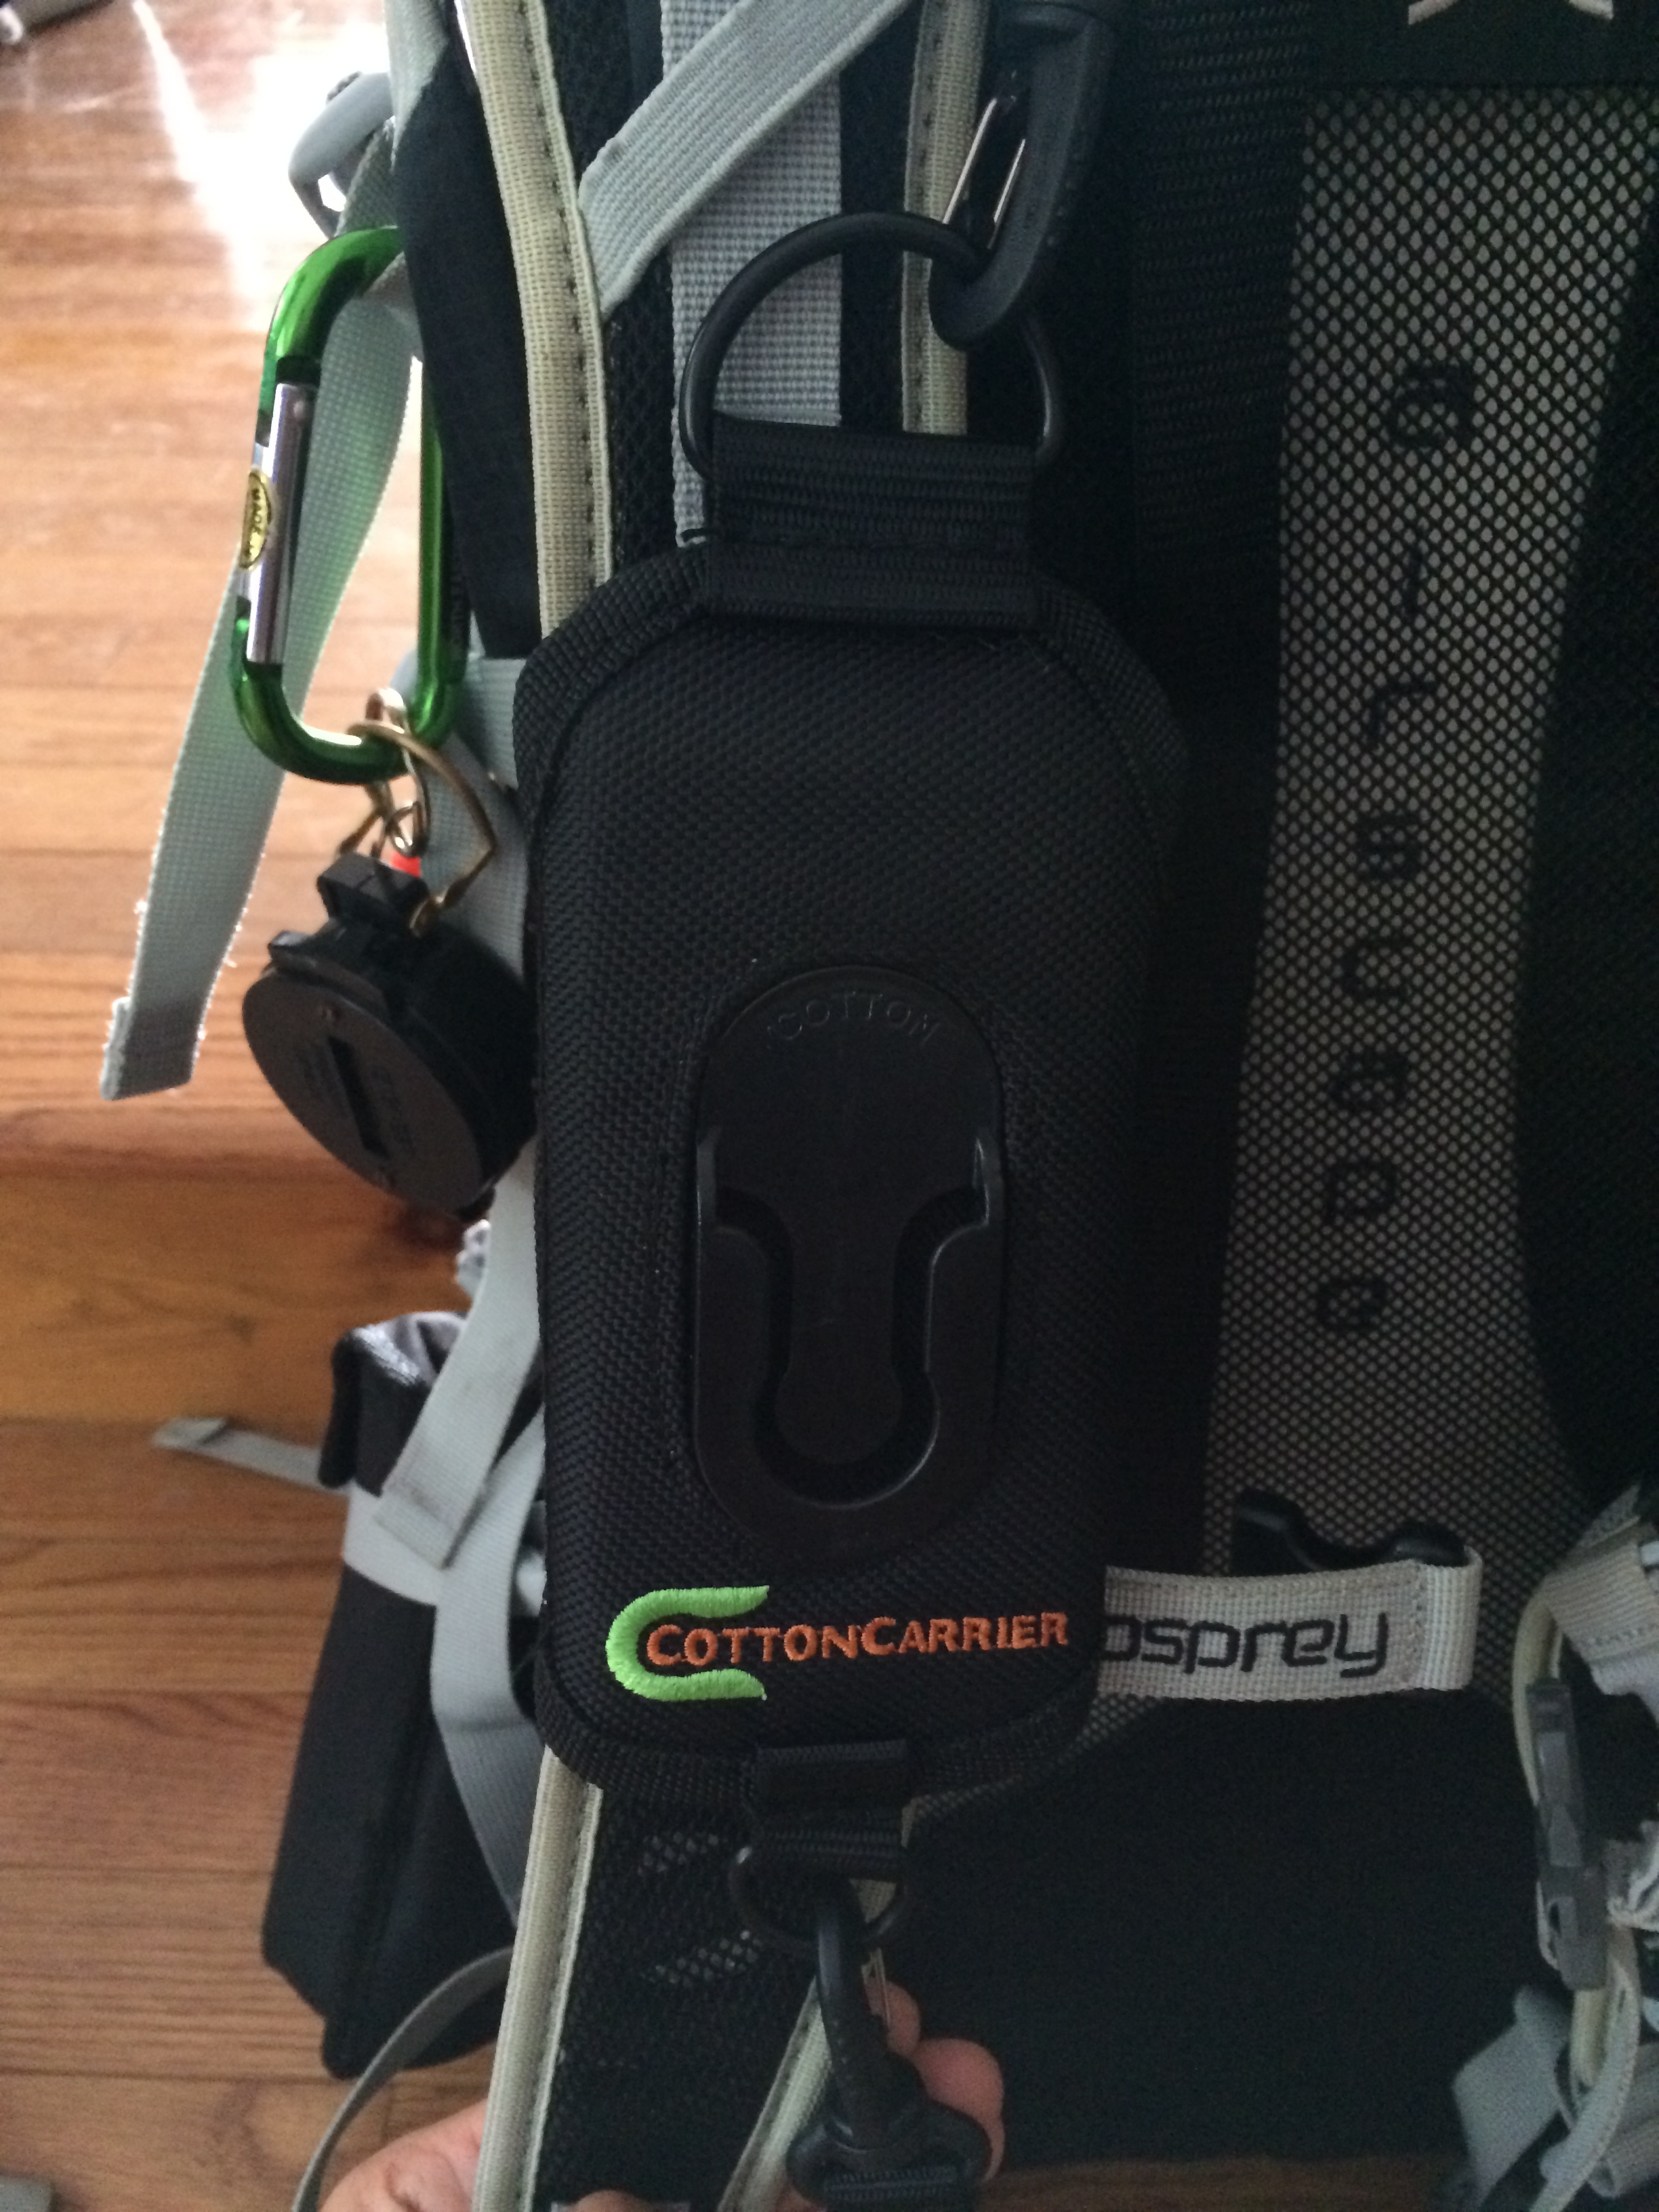
The StrapShot connects directly to your backpack on the shoulder strap.
Front view of the strap connecting to your shoulder strapBack view connecting to your shoulder strap
Here are the two security straps for your camera…
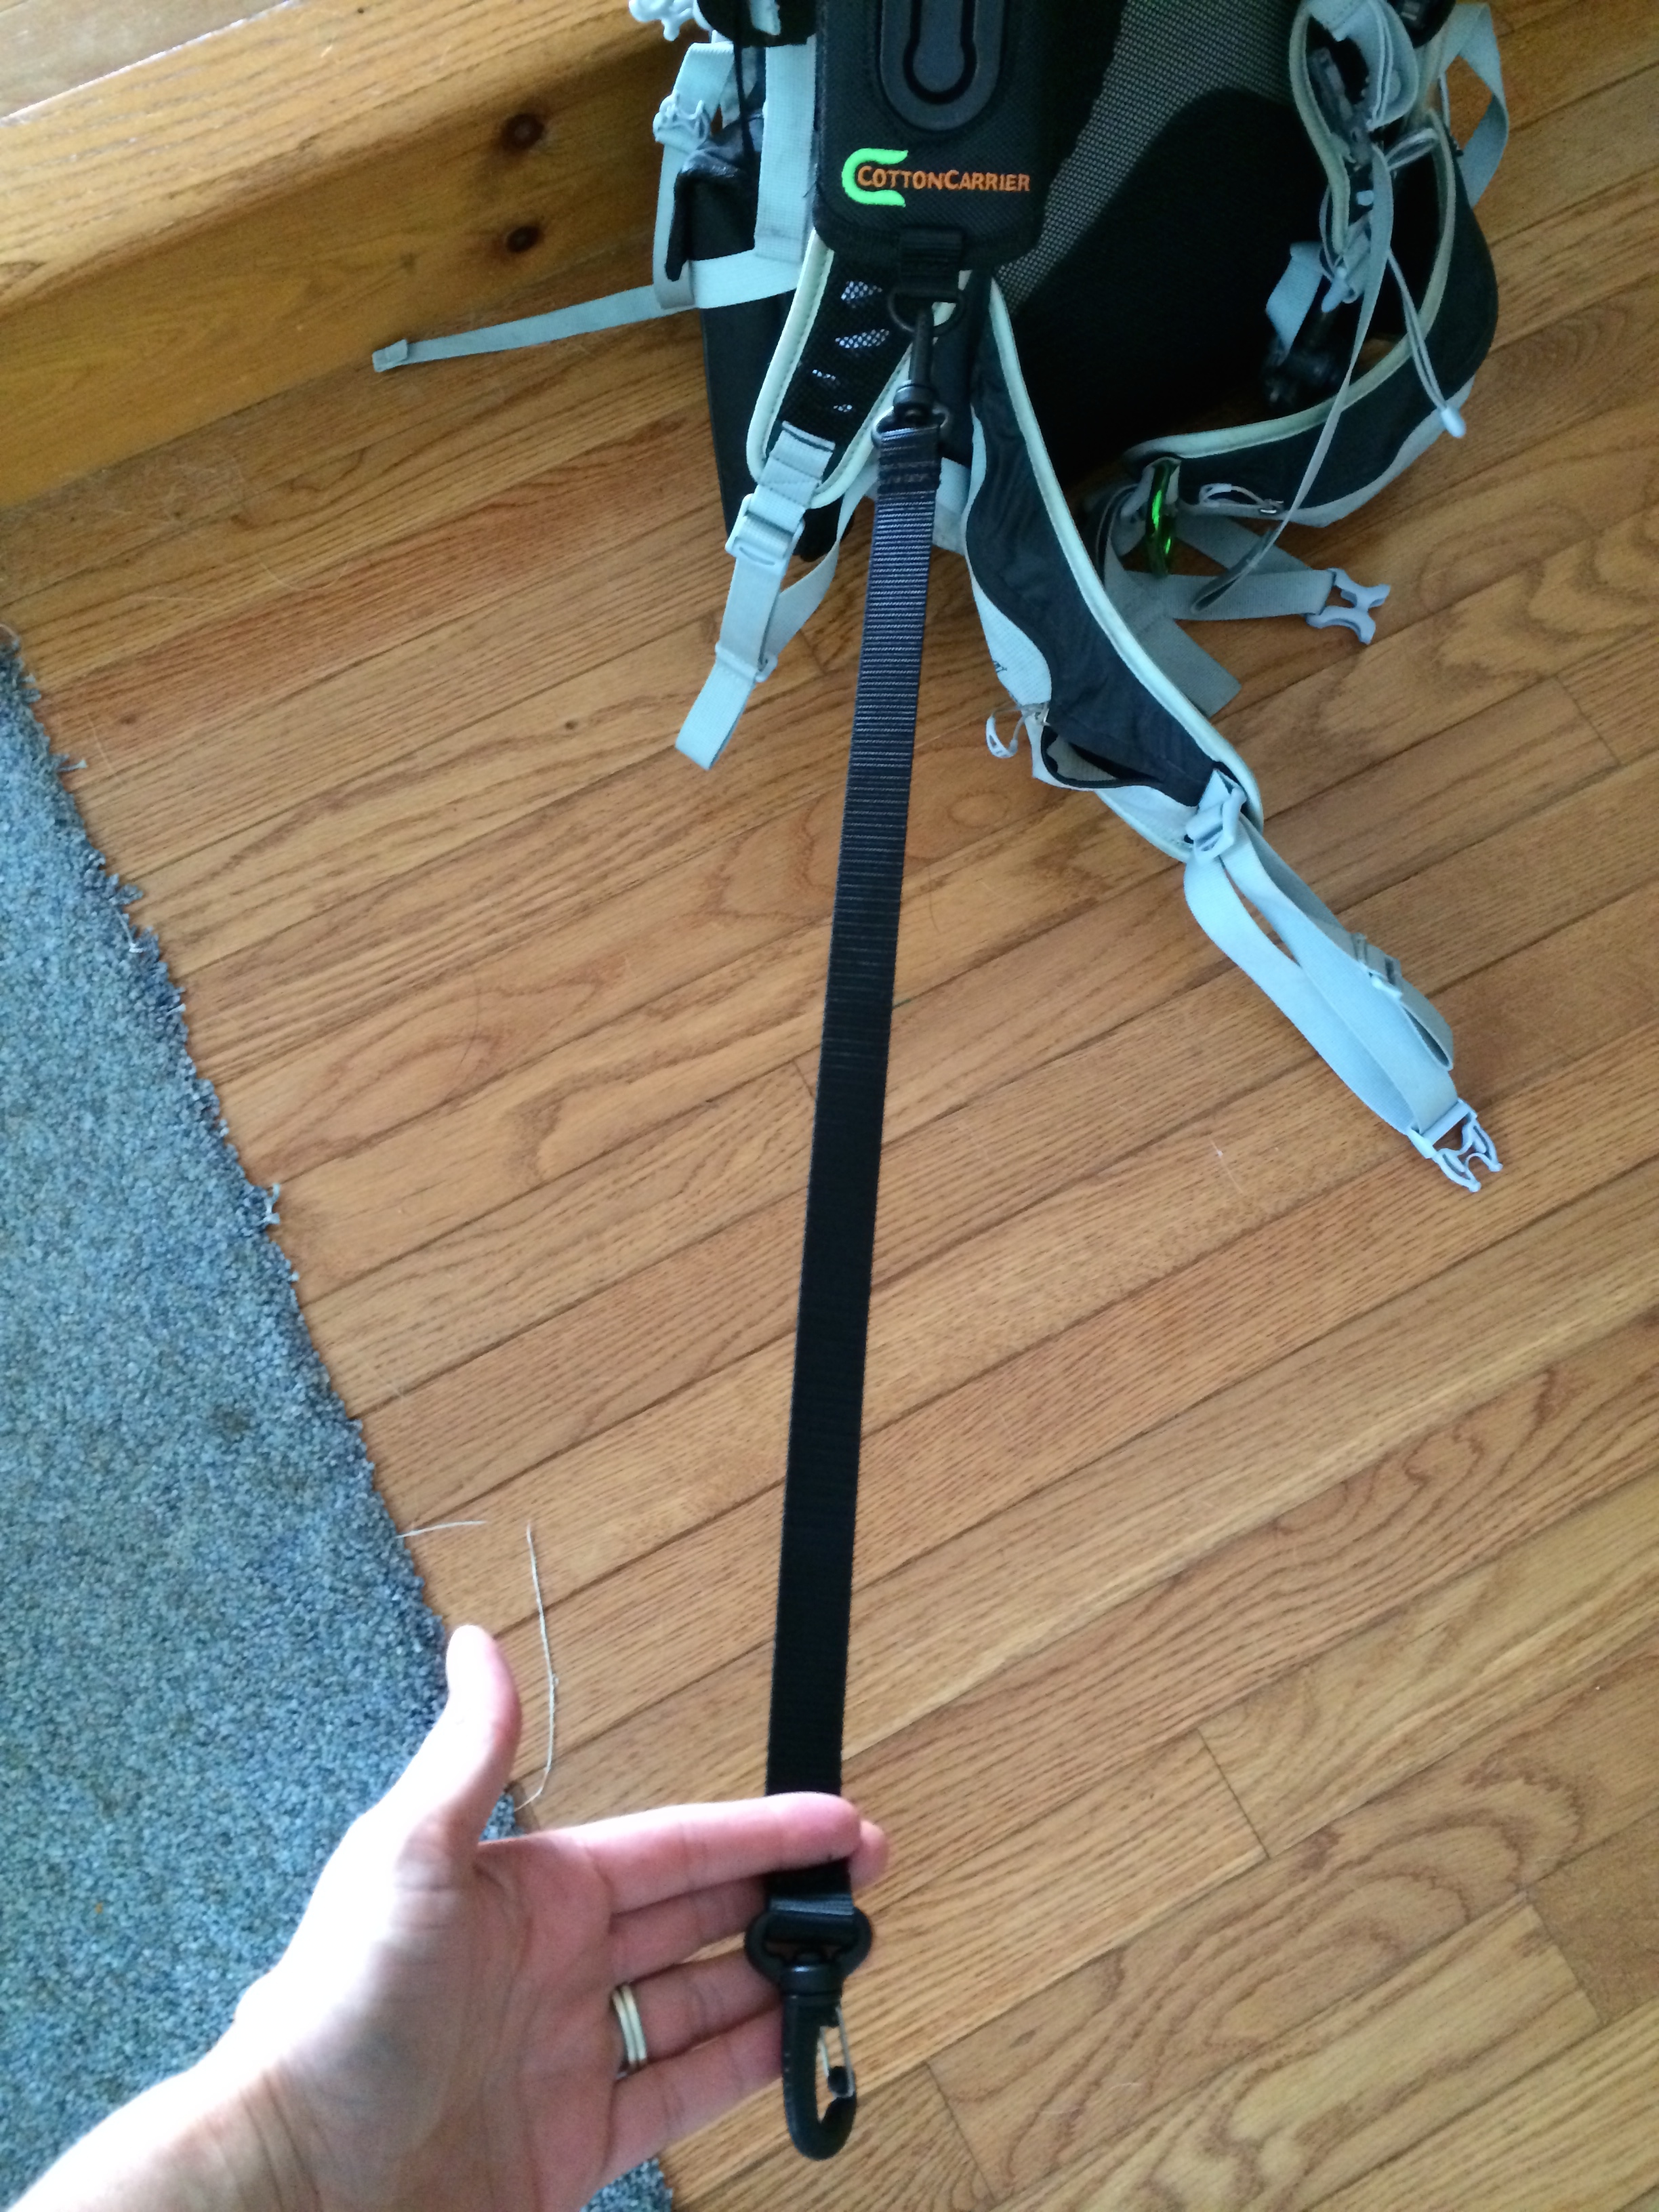
First, is the lanyard that connects to the back of your backpack
The second safety strap. Is for all you with butter fingers ( or not) … The strap connects to the StrapShot then to your camera.
To help understand the size of the StrapShot connecting to your pack. This is a side by side image of the StrapShot and a Special Forces 4 inch combat knife folded — its 6 inches long.
*Note the knife sleeve is upside-down on purpose, this allows for easy access.*
StrapShot compared to knife
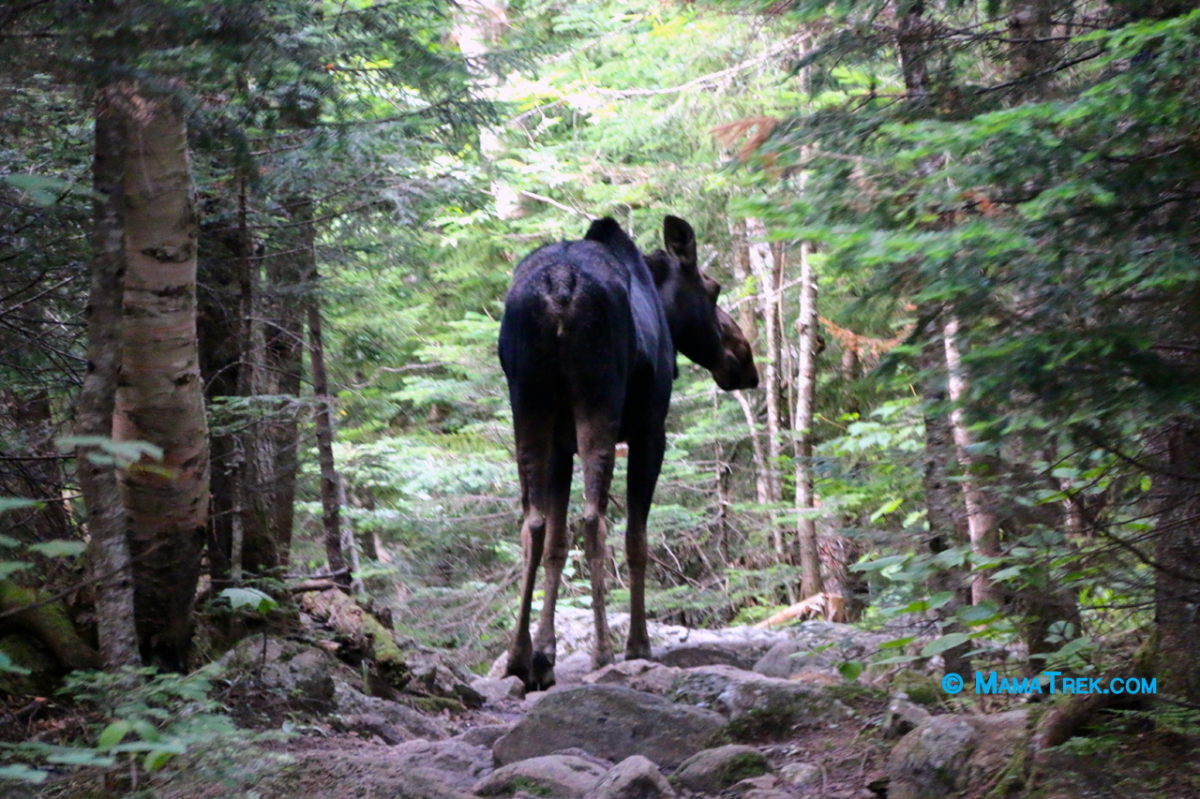
In closing, if you hike, want easy access to your camera and security for your camera the StrapShot is the way to go. It is great for wildlife images. Below are two wildlife images from our last hike of Mt. Height and Carter Dome. These would have not happened with any other device.
You can check Cotton Carrier’s website, here. You can check out the StrapShot, here.
I really wanted to label this post, “Traveling with the Three Stooges” or maybe even “Rocky & Bullwinkle”, but I will stay with tradition and keep it to the Mountains, Huts, and trails.
My reason for the “Three Stooges” is simple, we could not leave the house, nor start our hike without M’s companions. Their real names are Whale, Mr. G and Mickey. When you hike with a toddler there are days, they will need their own items and crew members. It’s small potatoes to us adults, but true deal breakers for them. To keep the loving terrible twos at bay and M happy, we brought them. So, I am thinking this is probably the first time in history a whale, giraffe and mouse climbed up to Mt. Hight, then to Carter Dome, to Carter Notch, to the Carter Notch Hut then back to the car to complete the loop.
This is the second time we climbed this route. Our first time was last year, we ended up cutting the hike short and missing Mt. Hight. I am glad we did this since the weather was cooling and the daylight was falling.
We started at the Nineteen Brook Trail, located off Route 16. If you are coming from 302, Jackson, NH or Pinkham’s Notch, you will pass the Mount Washington Auto Road then travel roughly 5 to 6 miles. The trailhead is on the right side. Honestly, we hiked this last year with M, you can tell it’s the right parking lot because of the cars. It is definitely a popular place to hike. If you are unsure, look for this sign at the trailhead.
Trailhead Sign
We started this hike around 8:00/8:30 in the morning. If you are hiking in the Fall, I would consider starting a little earlier. The ending of sunlight might cause you to push through some great views. Also, without rest you may ended up hurting yourself. All the trails are marked well and well used. You will walk along the Nineteen Mile Brook for some time. Then you will cross over the brook before the trail splits.
Brook crossingMom and M crossing the nineteen mile brook
When you reach the trail junction, to head up to Mt. Hight (directly) you will go left and take the Carter Dome Trail. If you are hiking to Carter Notch Hut, you will continue on the 19 Mile Brook Trail. If you need to take a break, this is a good location to pull up a log or rock. It is a bit more roomy than anything you see face for roughly another two miles.
We went to the left and traveled up Carter Dome Trail for about 1.9 miles to another trail junction. The trail junction continues up to Mt. Hight and Carter Dome or you will take a ‘left’ to South Carter, Middle Carter, North Carter and Mt. Moriah.
This trail junction, this a great place for a break and many hikers use this location for just that. We met a two different groups of hikers here. Of course, they were thrilled and in awe to see us taking M up to the summit. This is where the game of “Whale” came about. Our little Miss M is a bit shy and tends to hide behind her stuffed animals and other items. With all the attention, she wasn’t sure what to do, so she created a way to say “hi” with Whale like she was waving, but every time anyone went to shake it or touch Whale, she would hide him. So, now this Whale game took place throughout the hike and carried into our next one. I am sure it will continue, since we cannot leave Whale at home.
After this break with a great group of hikers, we carried on up to Mt. Hight. You will travel along Carter-Dome Moriah Trail then take a left onto the Zeta Pass to climb up Mt. Hight. The first three-quarters to Mt. Height is pretty normal, but the last push to the summit is not for amateurs carrying a toddler or heavy weight. It requires climbing, some very large step ups onto rock facings, some balancing and without a doubt strong legs. I will say climbing up is safer than climbing down. You can continue on to Carter Dome then take the trail to Mt. Hight, if that works for you.
Mt. Hight was worth the climb and another good spot for rest. We did not take a rest there. We did snap some pictures then headed down to Carter Dome for lunch. Mt. Hight has some locations for children to walk around, but Carter Dome has a larger cleared area.
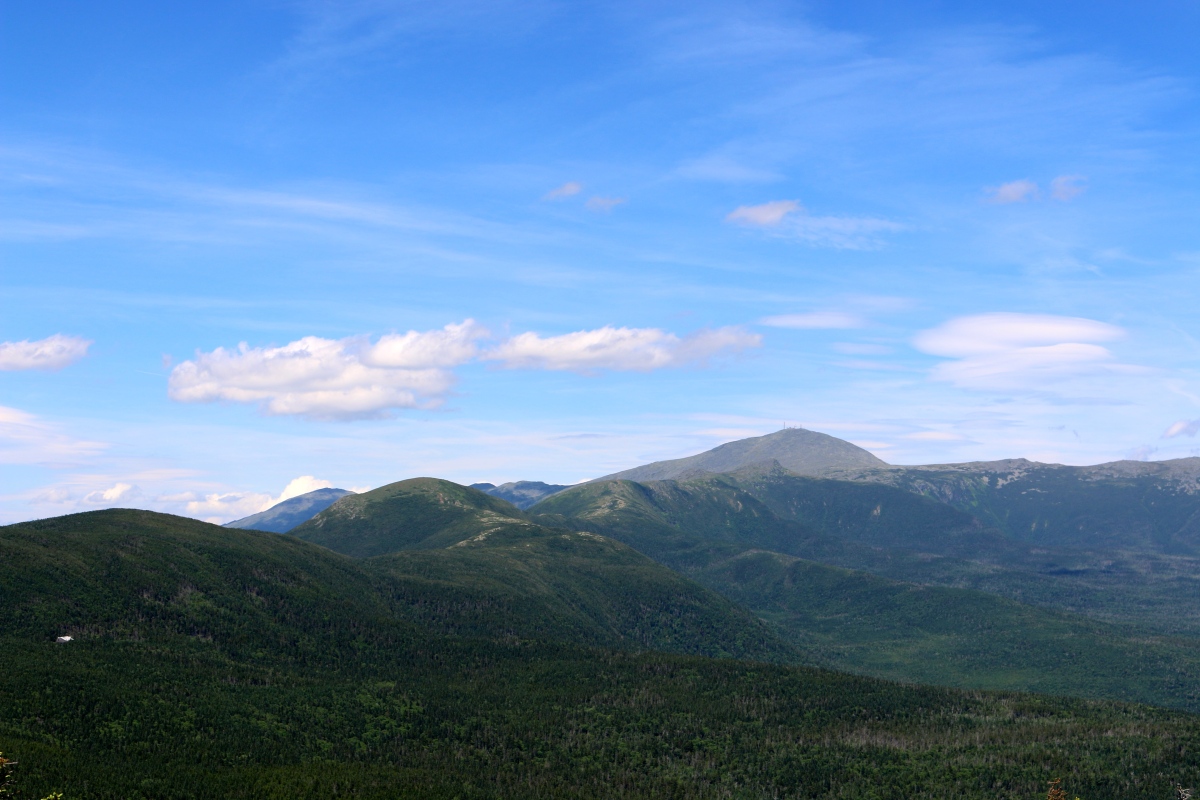
At the Summit of Mt. HightMt. Hight Summit, Mt. Washington in the background, Whale is on the attack with Mr. G (giraffe) readyMt. Washington from the summit of Mt. Hight
The descent from Mt. Hight to Carter Dome is easy and the walk over to Carter Dome summit is perfect after the climb up to Mt. Hight. Mostly, a straight wooded path.
Heading over to Carter Dome
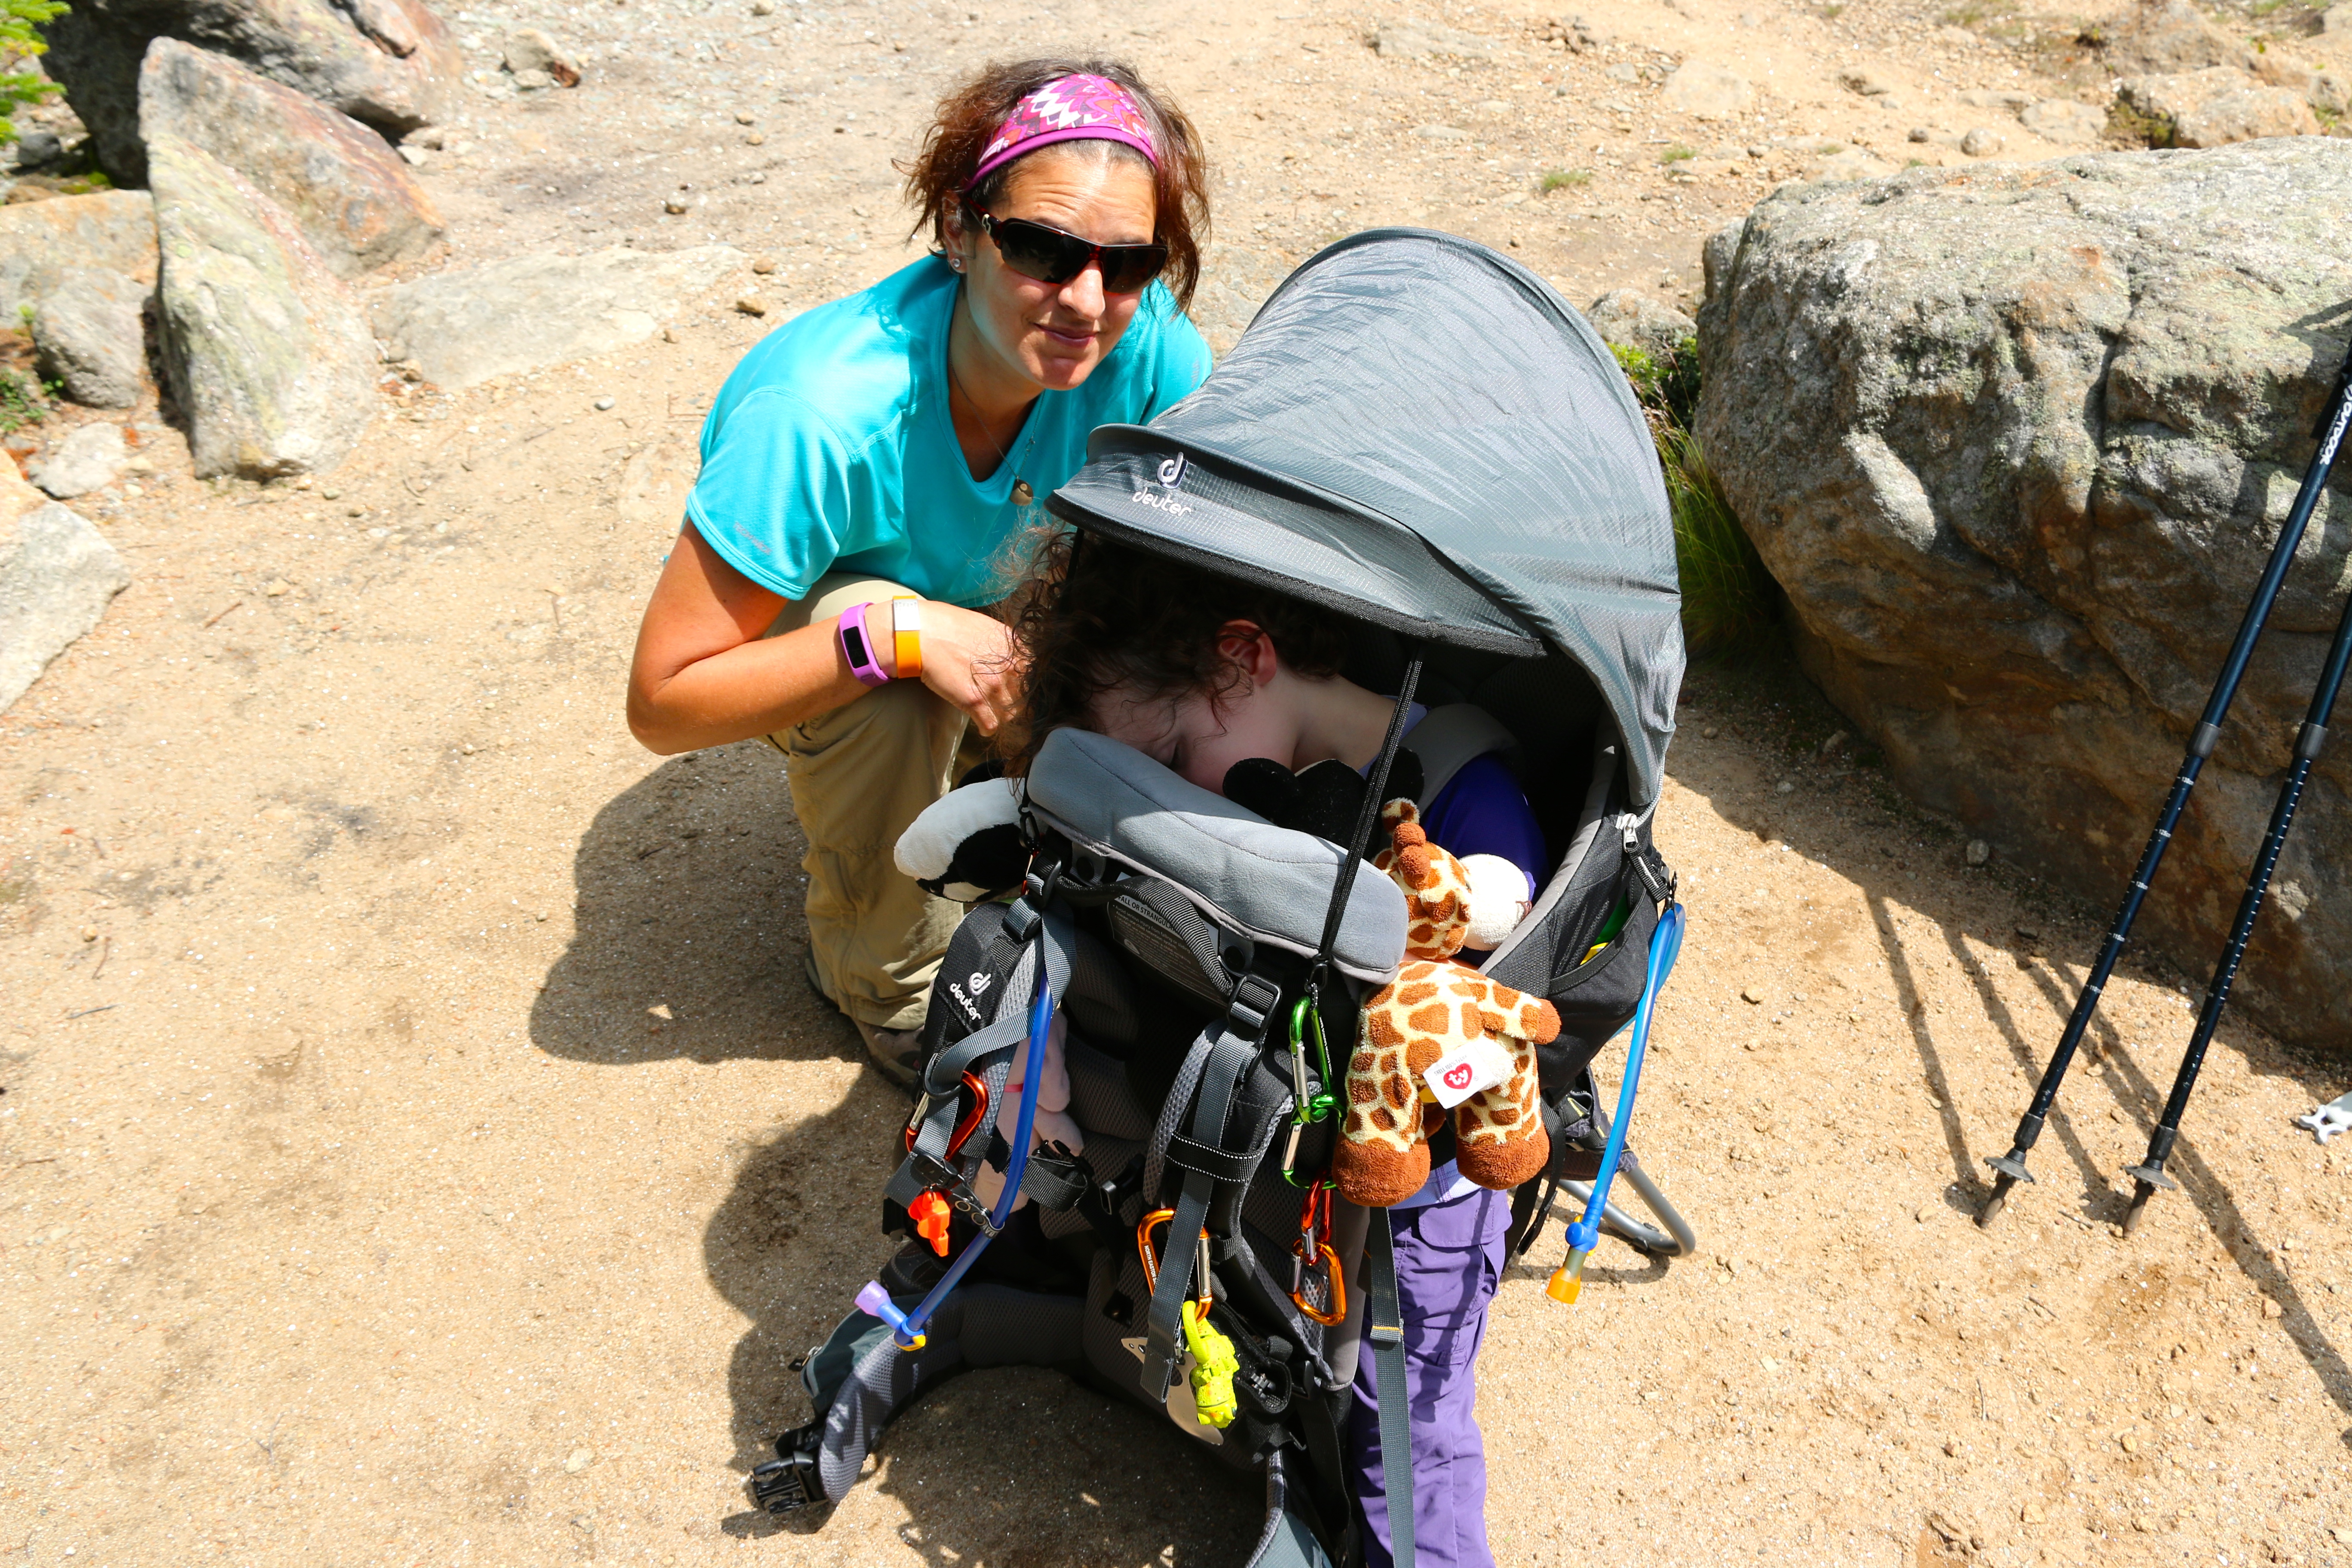
By the time, we reached Carter Dome, I heard something that sounded like a little snore with my mirror I saw M passed out. With care and help J, got me out of the carrier and M was still sleeping. In fact, she napped through our lunch break on Carter Dome.
Miss M napping, Love this pack!Miss M enjoying all the functions of the Deuter Kid Comfort III
We took about a 30 minute break here. We knew the climb down Carter Notch would be challenging. This is where your training really kicks in. Being fit is not about how much you can carry for a distance or how far you can go. Fitness is your rate of recovery. By the end of the lunch, I felt like I was just starting the day on fresh legs. Thank you off-season training.
M slept through getting back on my back and for her second summit picture of Carter Dome. This is where sleeping training for your child and helping them feel comfortable on a hike is worth its weight in gold.
Second Summit of Carter DomeFirst summit of Carter Dome
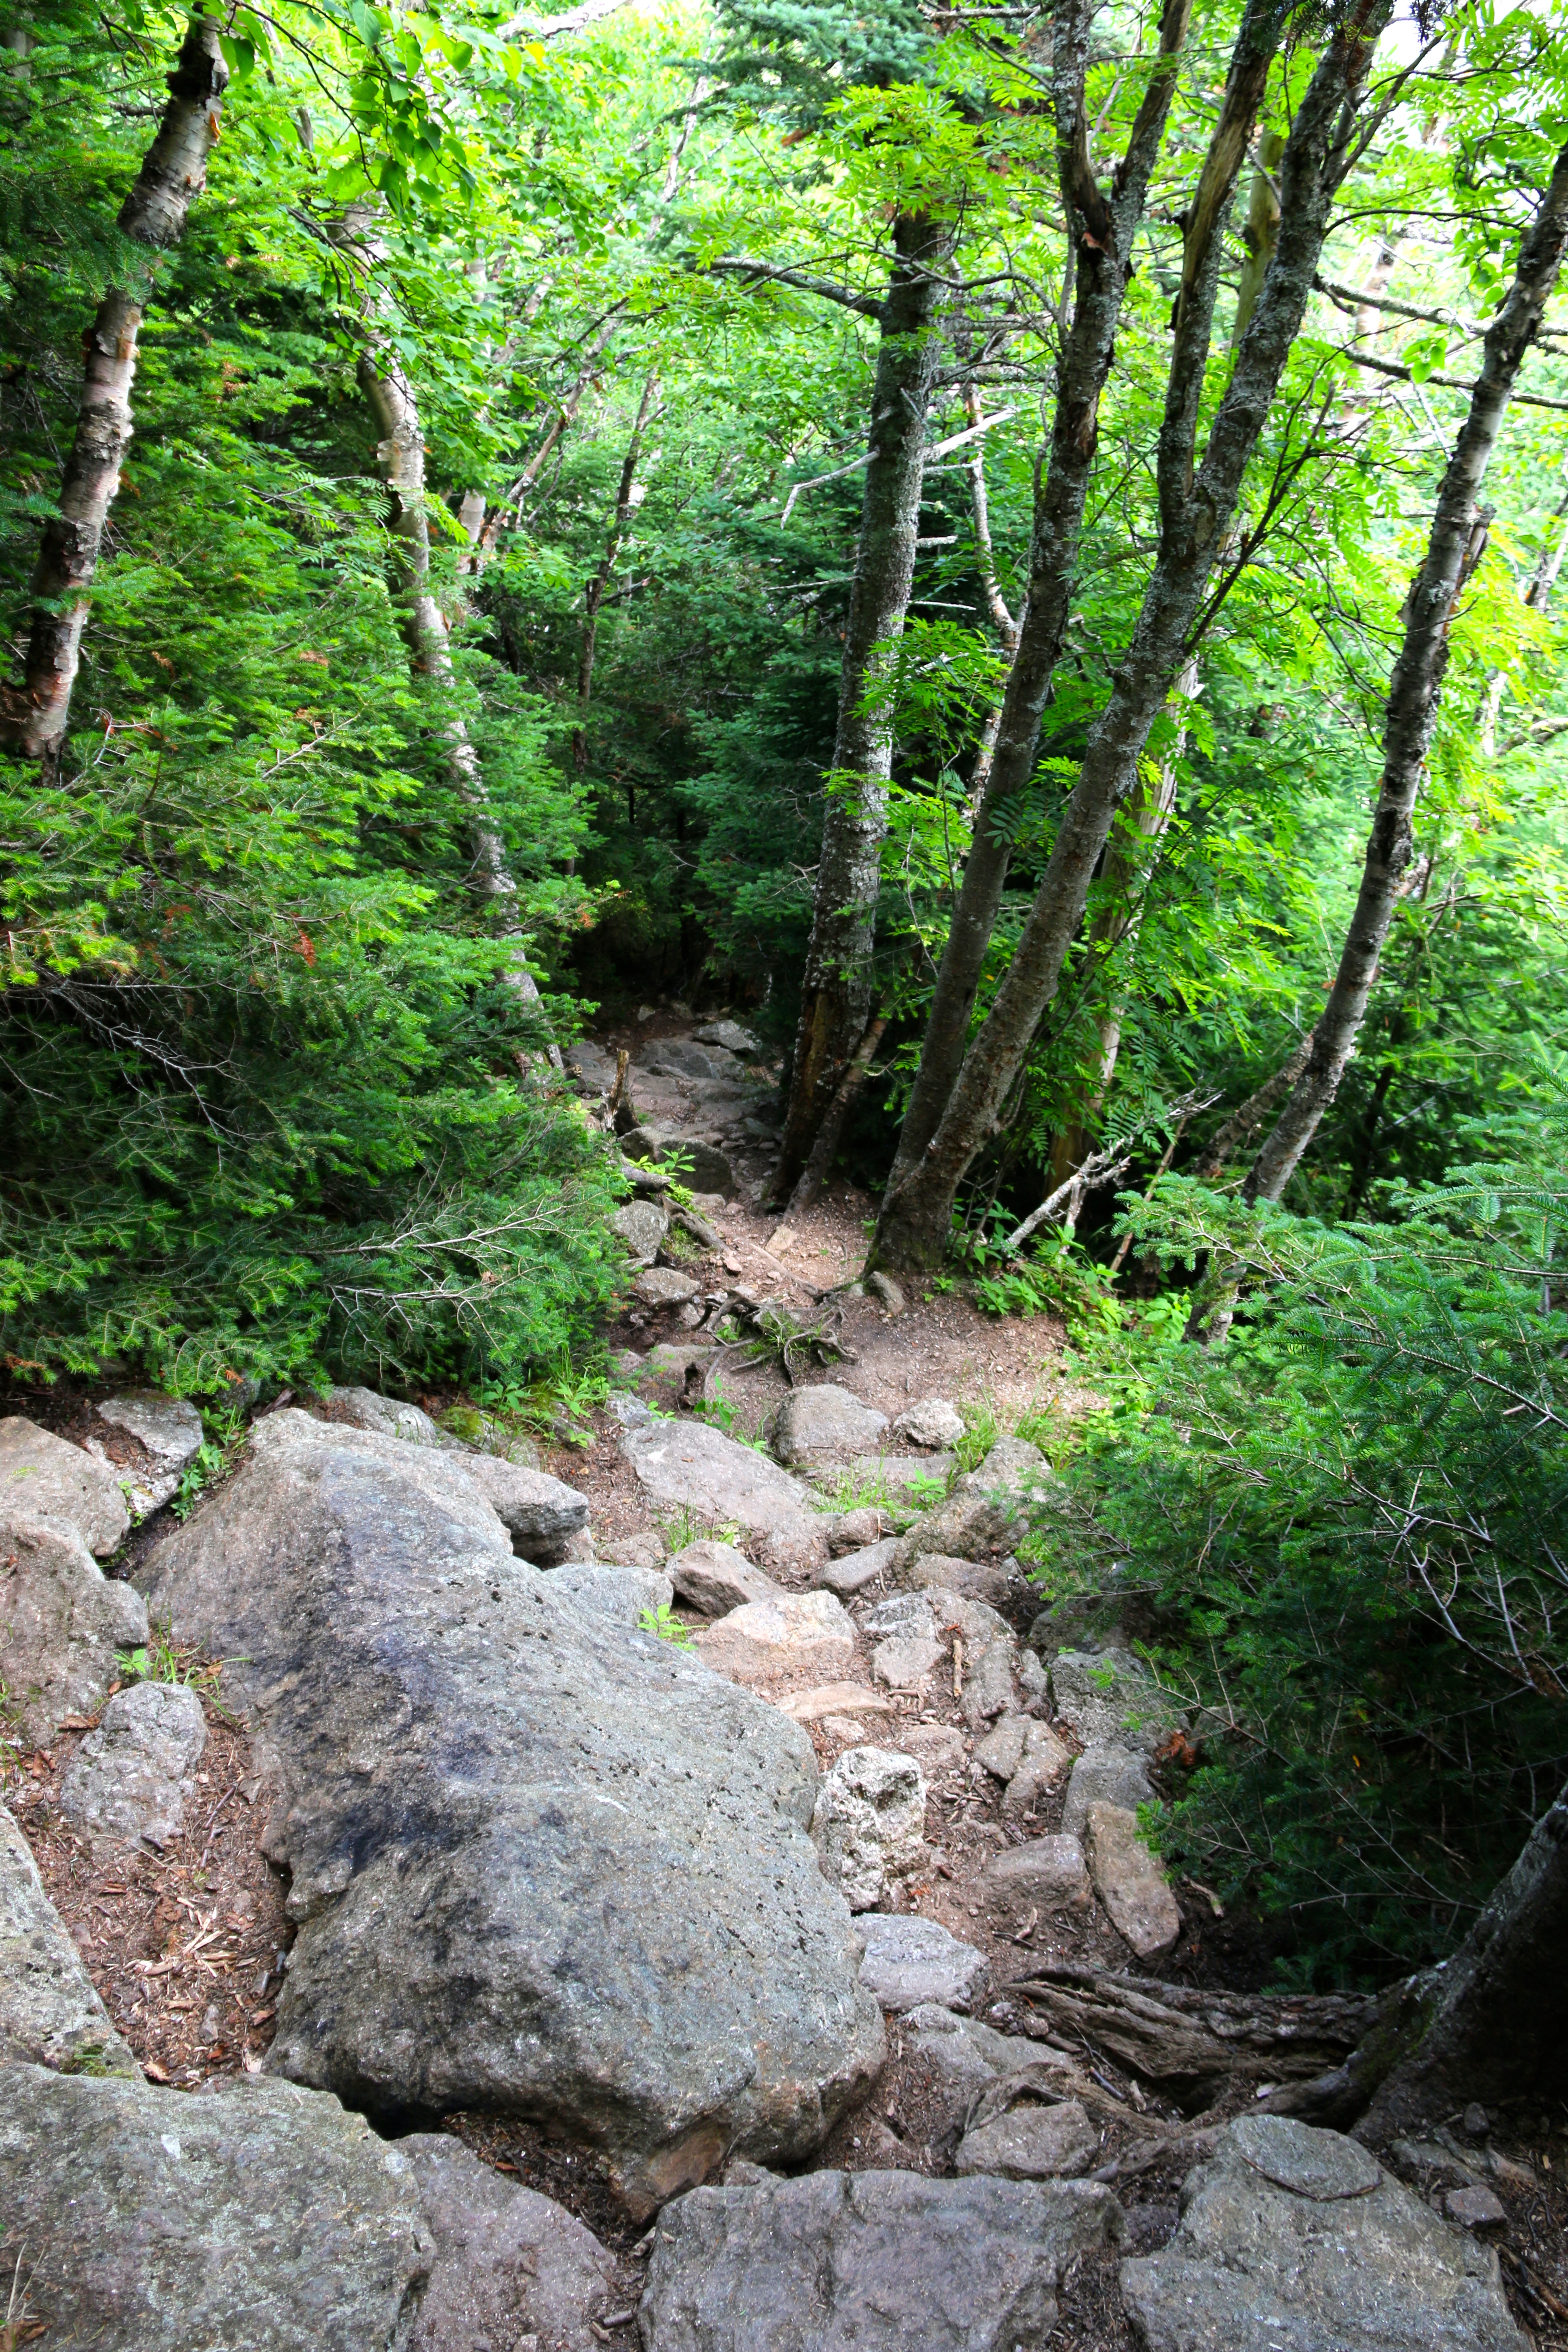
After the nice rest at Carter Dome, we headed down to Carter Notch making our way to our next break at the Carter Notch Hut. You will follow the Carter-Moriah Trail to the hut. The climb to the notch is a simple descent. At Carter Notch, you will be climbing down rocks almost to the hut. My free advice is to take your time. If you planned your trip well, took your breaks, this climb is nothing. If you are tired and hungry this can be tricky and lead to injury. There are some great areas to take some pictures and to look out.
Carter Notch
When you ask yourself, “Really, how much more of this before the hut?”. My answer is you are about half way there. Your climb down to Carter Notch Hut is absolutely worth it.
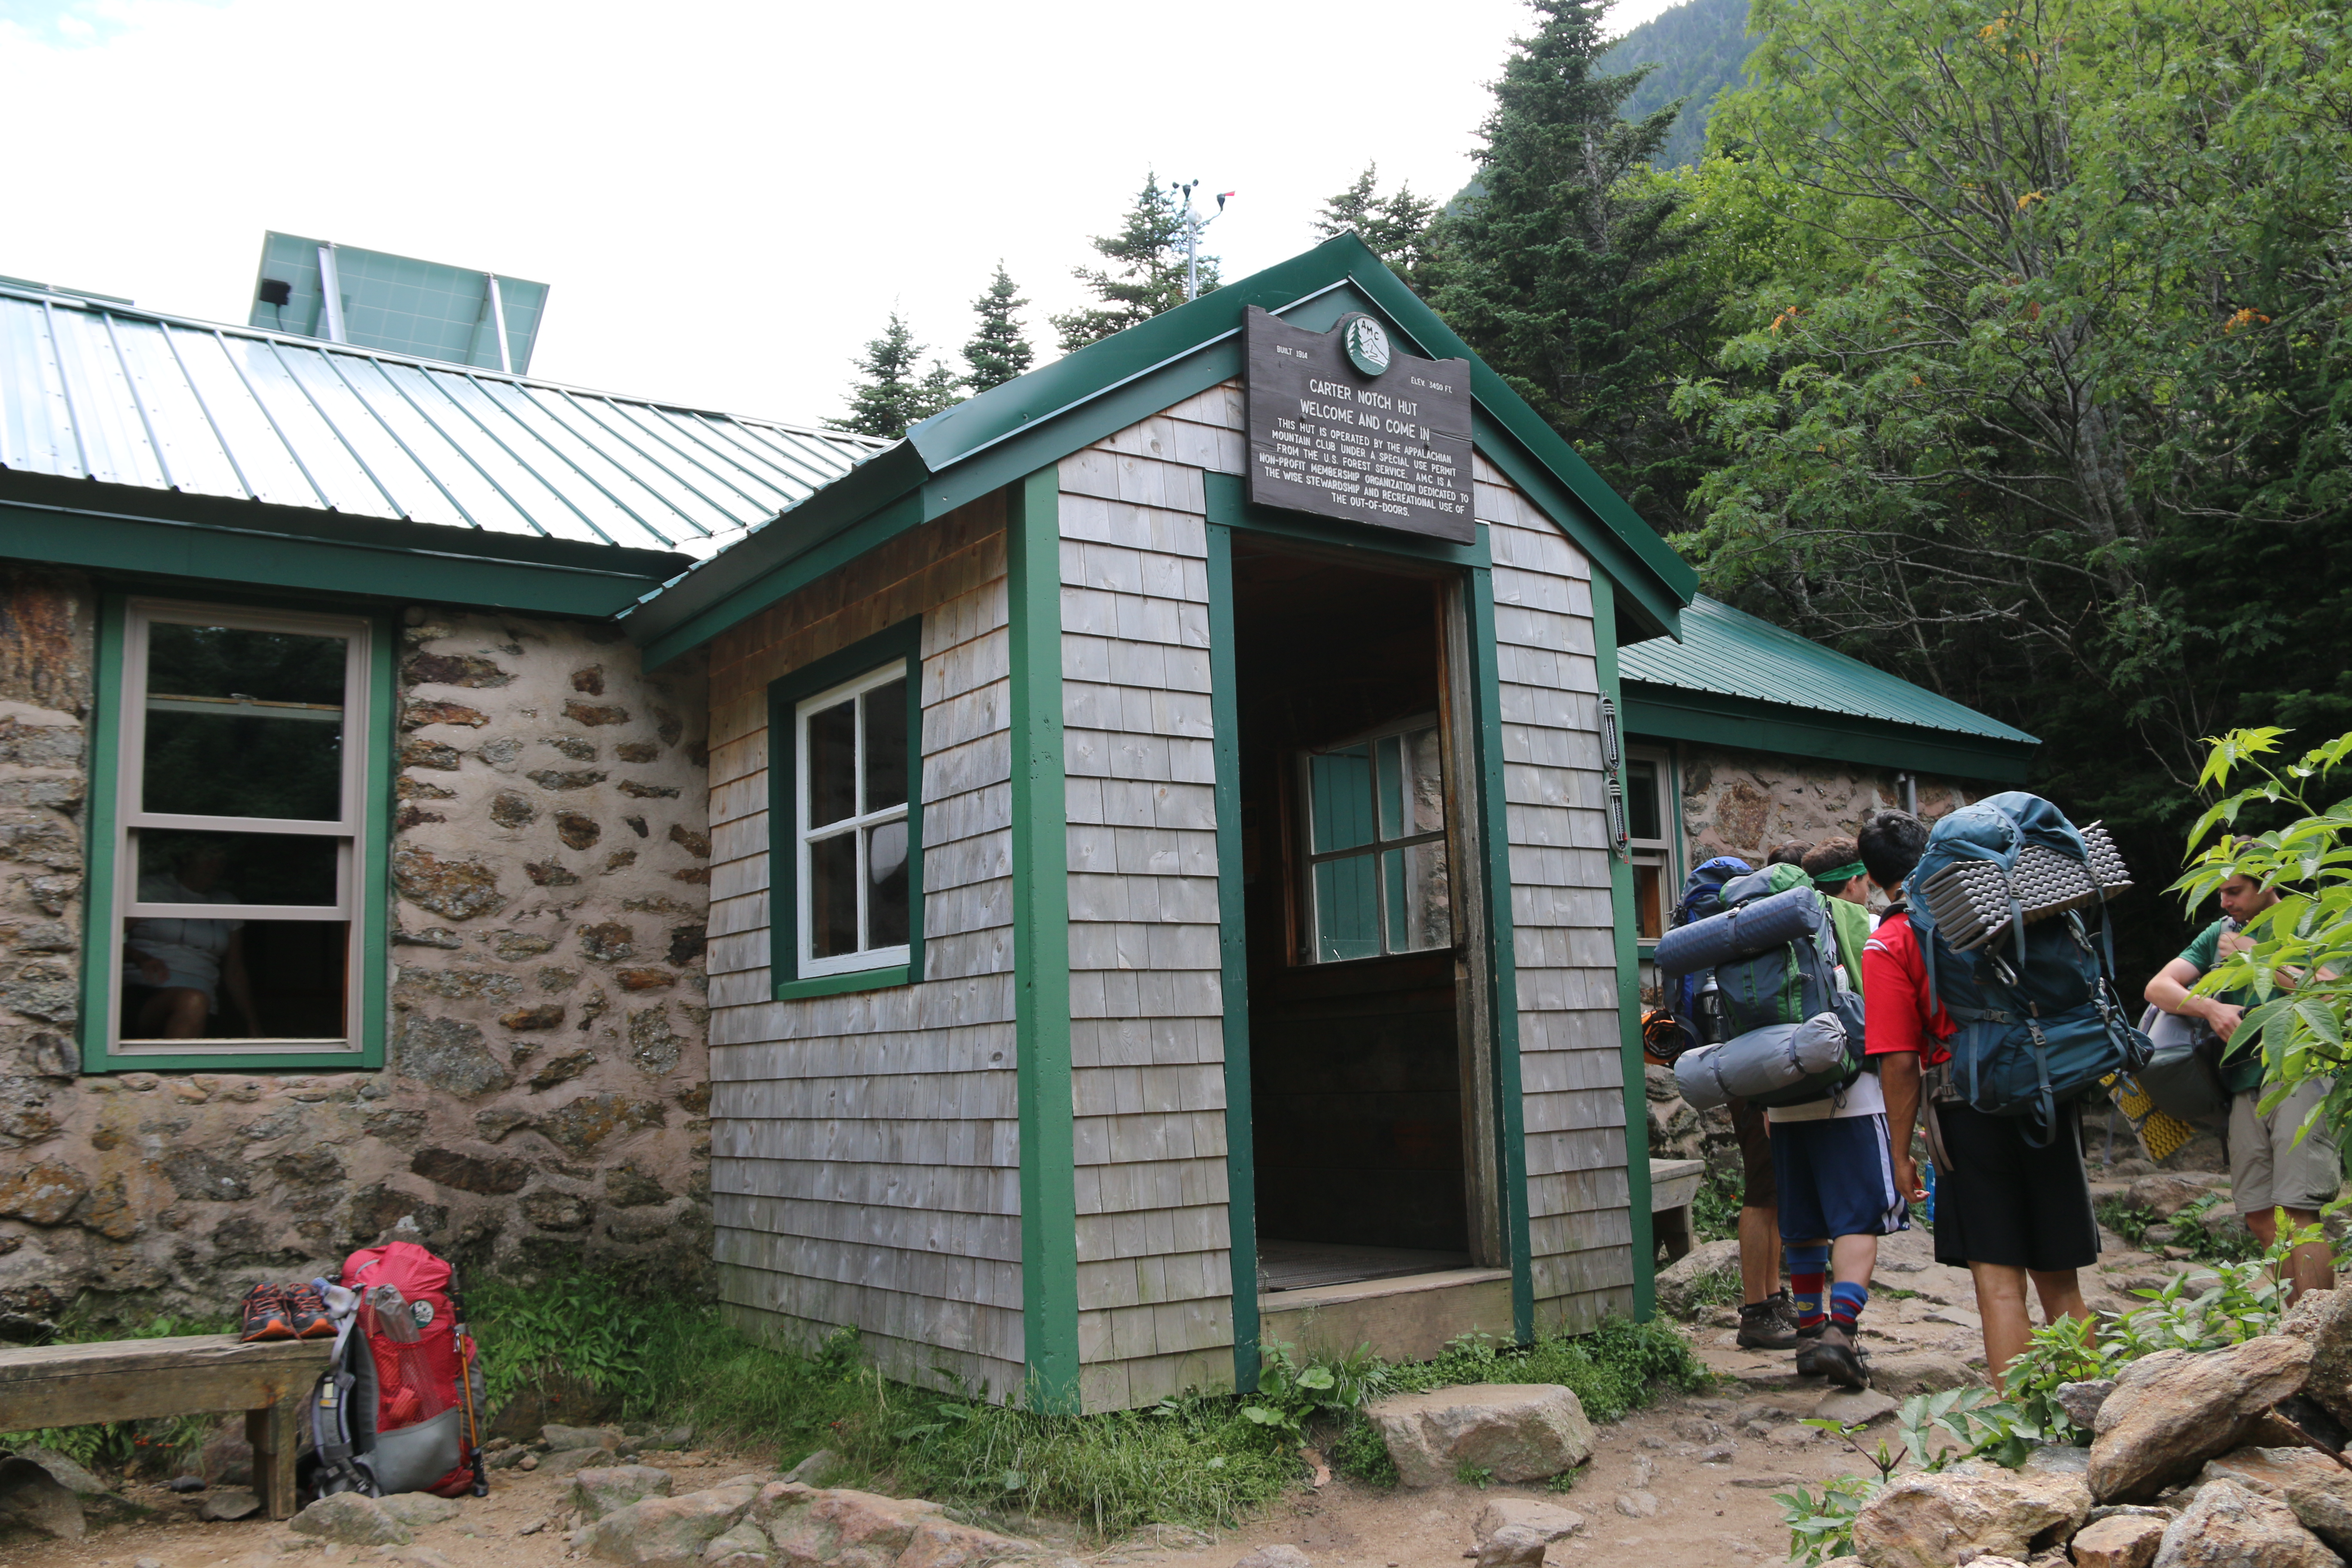
Carter Notch HutOn the Tranquil Mountain LakesTranquil Mountain Lakes from Carter Notch Hut
We had a lovely time at this hut. The crew at the hut was fanstatic. I suggest carrying some cash with you for some of their treats and meals. Our first step into the hut was like stepping into grandma’s house. They were cooking chili for dinner, had brownies and lemonade. My mouth still waters thinking of the smell. Miss M was up by the time we hit the hut and ready to eat anything and everything insight.
She enjoyed her sandwich while she talked and entertained the crew and two hikers we met way back at the trail junction at Carter-Moriah and Zeta Pass.
Miss M eating her sandwich at Carter Notch Hut
The Carter Notch Hut is a perfect place for overnight stays, water refills, bathrooms, food and rest. The above pictures should help you grasp the beauty. You probably want to book ahead for a stay and dinner or you may find yourself without a bed and seat. This link, here, should help you.
After our visit at the hut, we carried on back to Route 16 via Nineteen Brook Trail. After, Carter Notch descent the rest of the hike is pretty easy. The only thing you will may face is your mind kicking in asking when you will be done. Well, you have over 3 miles to go. So, use your break wisely.
On our descent, I needed some time to reset my mind, so I played some low volume music for myself and J. Well, after 3 songs, “Days Go By” by Dirty Vegas came on. I had the iPhone player set to random, I have over 2k songs loaded. I have a membership through MegaBoon.com, 10 cents a song. It beats iTunes, if you aren’t in a rush for the song. Anyhow… the proceeding conversation took place…
“Days Go By” by Dirty Vegas comes on …
J: Hey, do you think there is a Moose out there bee boopin to this song? You know, eating it’s dinner and dancing?
Me: Yeah, I am sure. And there is a Squirrel right next to it enjoying a nut.
J: Oh really, you watched “Rocky & BullWinkle”????
Me: Yes, re-runs…
J: I wonder if M would like it.
A few minutes pass on the trail then I get the hand signal to turn everything off, quiet Miss M and stay put. I am thinking is crap we crossed paths with a momma bear and cubs. But no, this beautiful animal walked right on the trail like she heard our conversation.
Cow on the trail
Well, we had nothing to do but play “follower the leader”. She led the way for about a half mile then went into the forest to the right. Not far off the trail, we heard her walking and then eating. What an incredible sound. We hung out for a bit. We didn’t know if she had any family in the area. But in about 4 minutes, she walked back on the trail and lead the way for another quarter-mile before turning off into the woods.
I got nothing. I am Irish, but this luck is purely beyond that. I am amazed but the cow’s actions and honored that she stepped out on the trail. We let every hiker we knew traveling up the 19 Brook Trail to be alert for a moose. We are not sure, she crossed paths with them or not.
After another quarter-mile, we crossed paths with a squirrel in the middle of the trail. Yup, you got it, sitting there eating a nut.
Rocky eating its acorn, in the middle of 19 Mile Brook Trail
I got nothing, again. But I do know J cannot say he never saw a moose or a squirrel eating an acorn.
But, in all seriousness, when you hike down from Carter Notch Hut is basic and very pretty. This trail will lead to back to the first bridge crossing. The location of my first suggestion for a break.
If you hike the trail in the latter afternoon, I suggest keeping an eye out for whatever wildlife that may cross your path. I never would have thought a Cow would just walk out of the woods and hang out like she did.
Another weekend…. another hike with my two favorite people. We spent our 4th of July at the Mt. Washington Resort. It is full of history, fun, great service and food. The weekend was worth every penny. Our visit there will be in another post.
Again, we had a late start for our hike. We are two-for-two on late starts, I am hoping it will not be a trend for this year. At least, this time it was for a good reason. J needed new hiking boots and EMS (Eastern Mountain Store, located in North Conway, NH) had them ready for us on Sunday at 830AM. We did an in-store pick up via EMS’ website. Thank you, EMS for keeping it simple and efficient. The other nice surprise was a new kid carrier by Deuter — the Kid Comfort III. It’s everything we need and all the upgrades from the Kid Comfort II, we were wanting. I will do another write up soon all. I have read too many poor reviews of the pack because people do not know how to use it and set the straps correctly.
On to the task at hand…. Mt. Jackson, located in White Mountains range of NH. Here are some facts about the mountain.
There are a few places to park, but the best place depends on your plan for the day. The up and back route to the summit (Jackson or Webster) or the Webster – Jackson loop trail, you will be coming back to the same location you started. This means you can park close to the trailhead or across the street at the Crawford’s Depot/Visitor Info parking lot. The other location is up at the Highland Center, which is a great if you are coming down the Crawford’s Path. Actually, if you don’t mind the short walk from the trailhead (about a quarter mile) I would suggest to park at the Highland Center. The Highland Center has bathrooms, food and drink, lodging, trail notifications, hiker log book, etc. Its a nice hiking center in Crawford’s Notch.
We have had breakfast, lunch and dinner there and surprisingly, it was very good food. They offer discounts for AMC members and those lodging at the center. My free advice is to plan your route and your back-up route then pick your parking location. Just beware when crossing Rt. 302, I know you are not a child, but Rt. 302 curves through that area and drivers don’t have a good line of sight for people crossing the road.
When hiking Mount Jackson or Mount Webster you will start in the same location on the path called Webster-Jackson Trail. I know, pretty creative name. 🙂 Make sure you are not taking the Saco Lake trail, which starts by crossing the bridge. Jackson-Webster Trailhead is the trail after the Saco Lake. That is if you are coming from the Depot/Visitor Info or Highland Center. When coming from Silver Cascades and the Flume Cascades it will be the first trailhead you see.
The Webster-Jackson Trail will probably be wet rock, mud and puddles. We hiked the trail two days after rain. It’s all passable, so no need to pack a boat and paddle. It does dry out when you get to the spilt of the trail. At the trail spilt, left leads to Mt. Jackson and right leads to Mt. Webster. Before the trail splits, there are some good inclines all rock and a nice cliff to view your progress up the mountain.
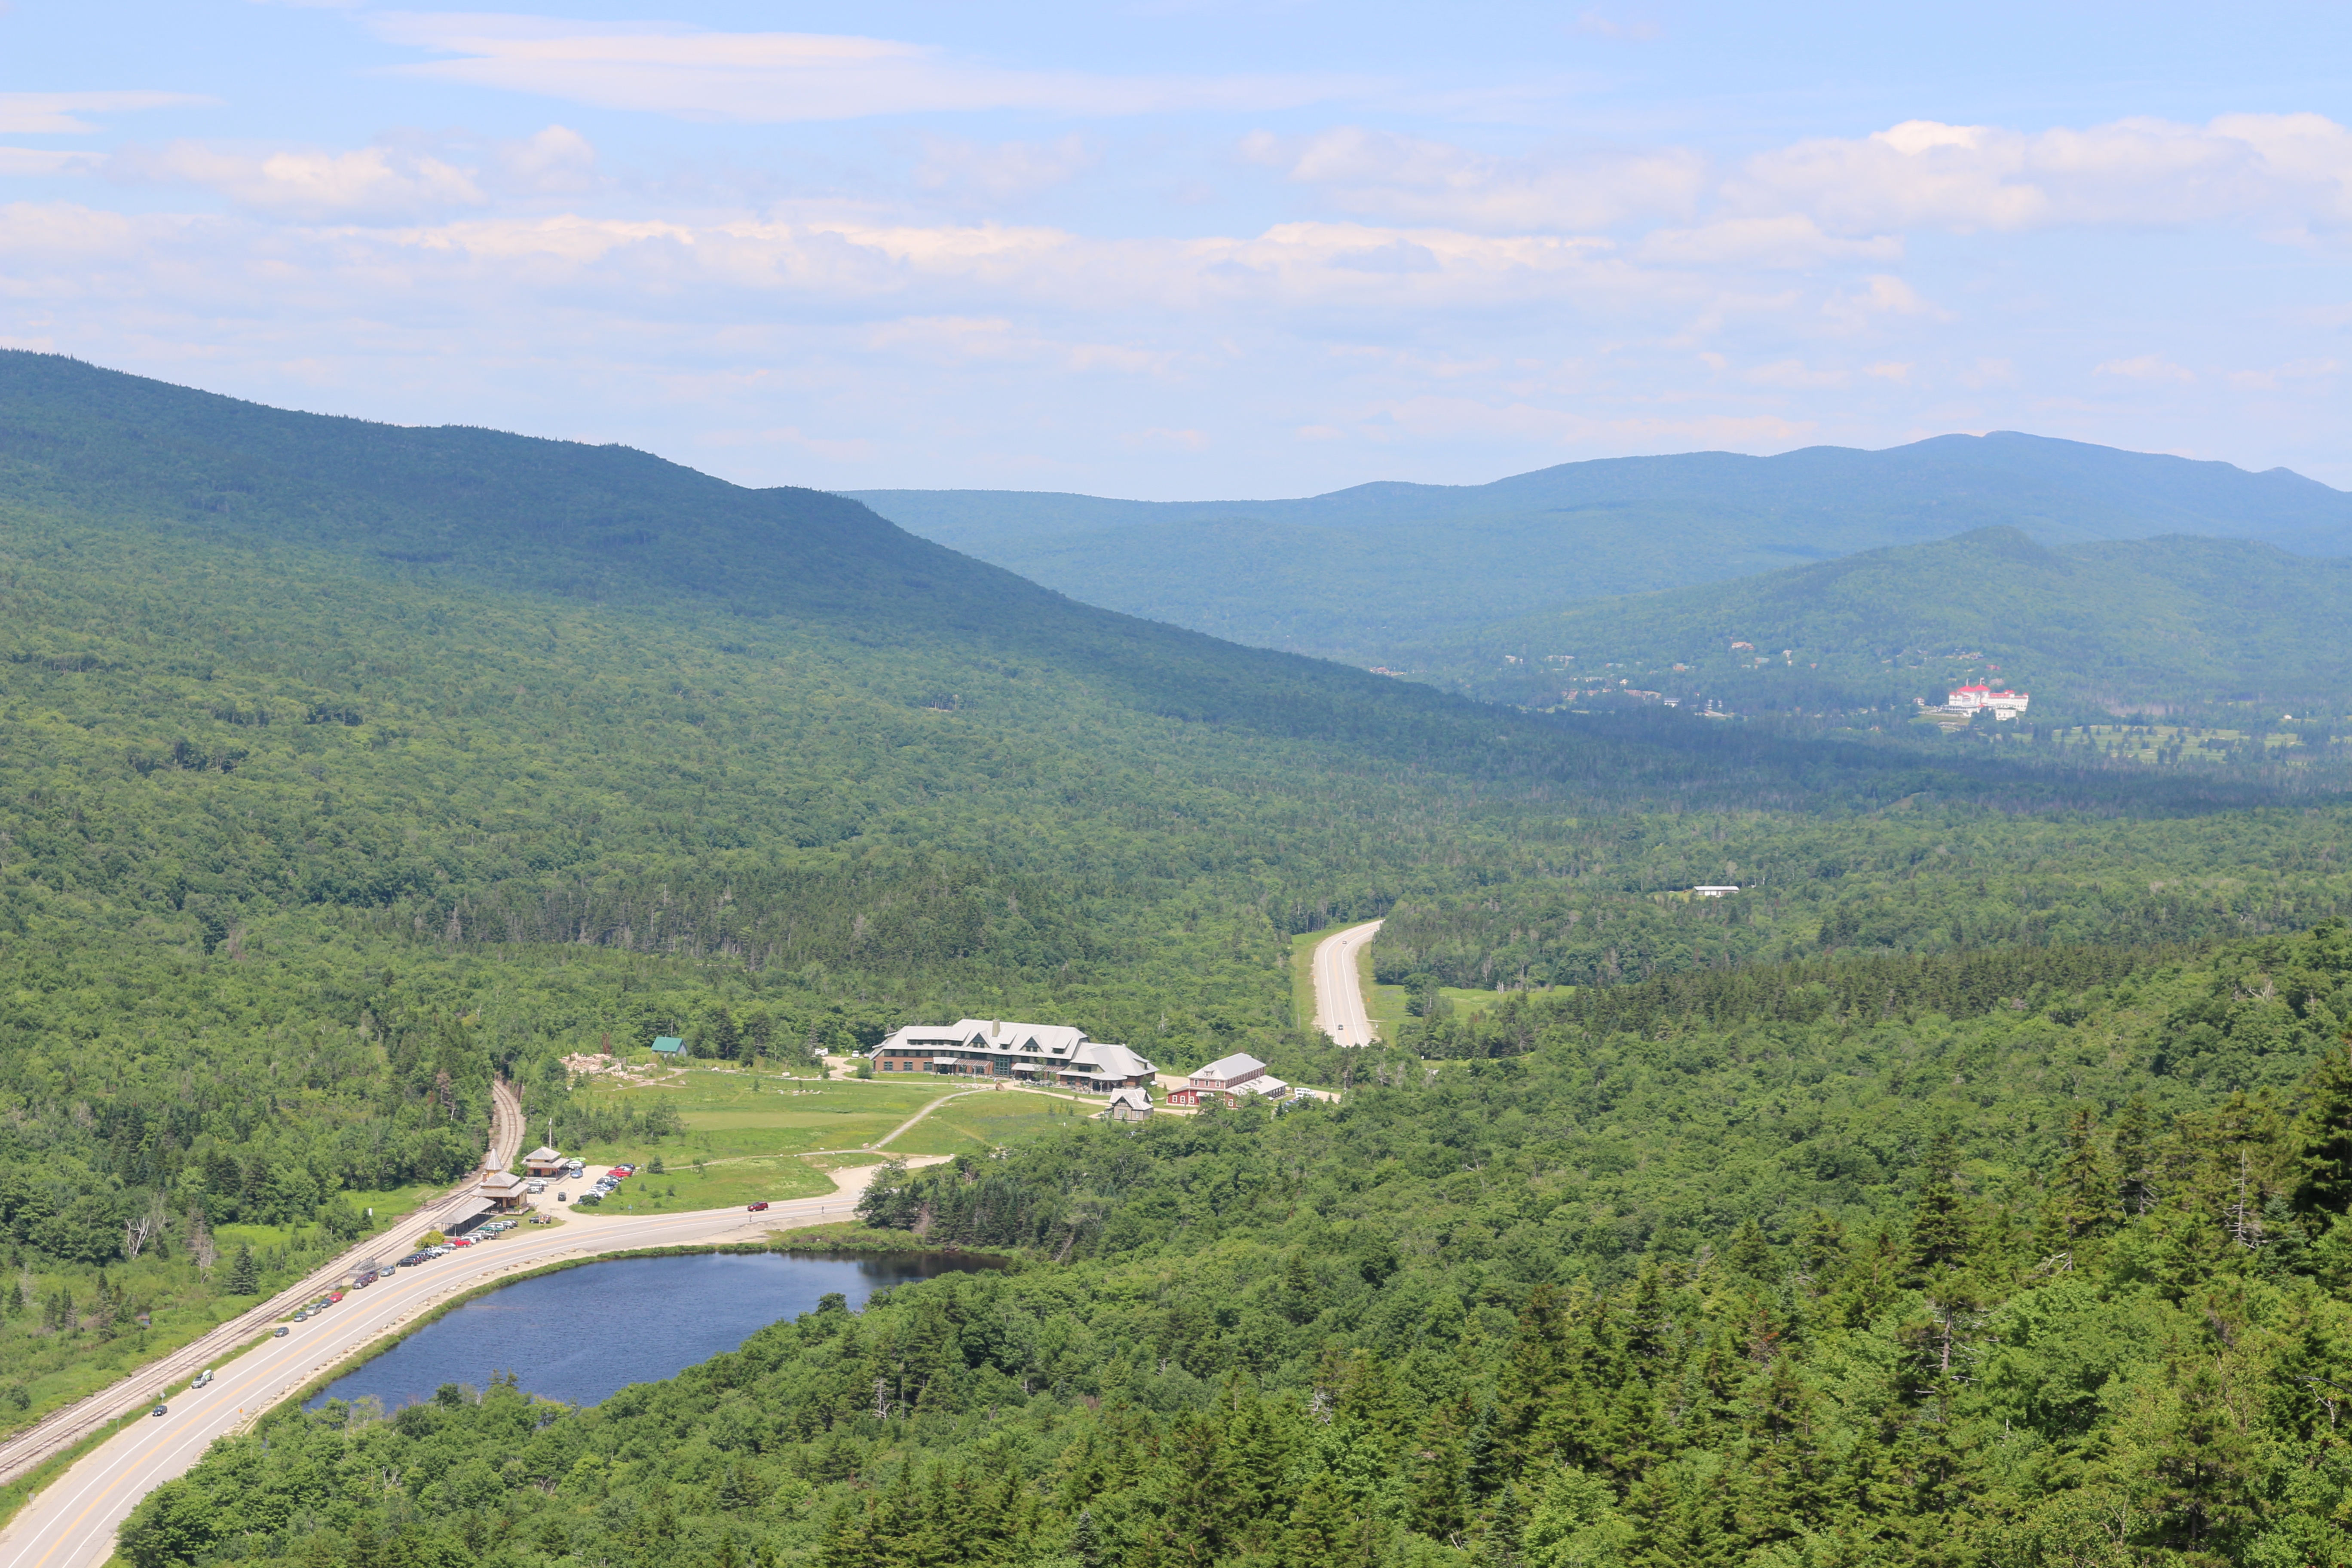
The cliff is called Bugle Cliff, the walk is about 0.1 miles (if that) away from the trail. The cliff overlooks Rt. 302, you can see the Highland Center along with the Mt. Washington Resort and Bretton Woods. It’s an awesome location for fall hiking pictures, you will capture the fall foliage, perfectly. Here are some images from the cliff…
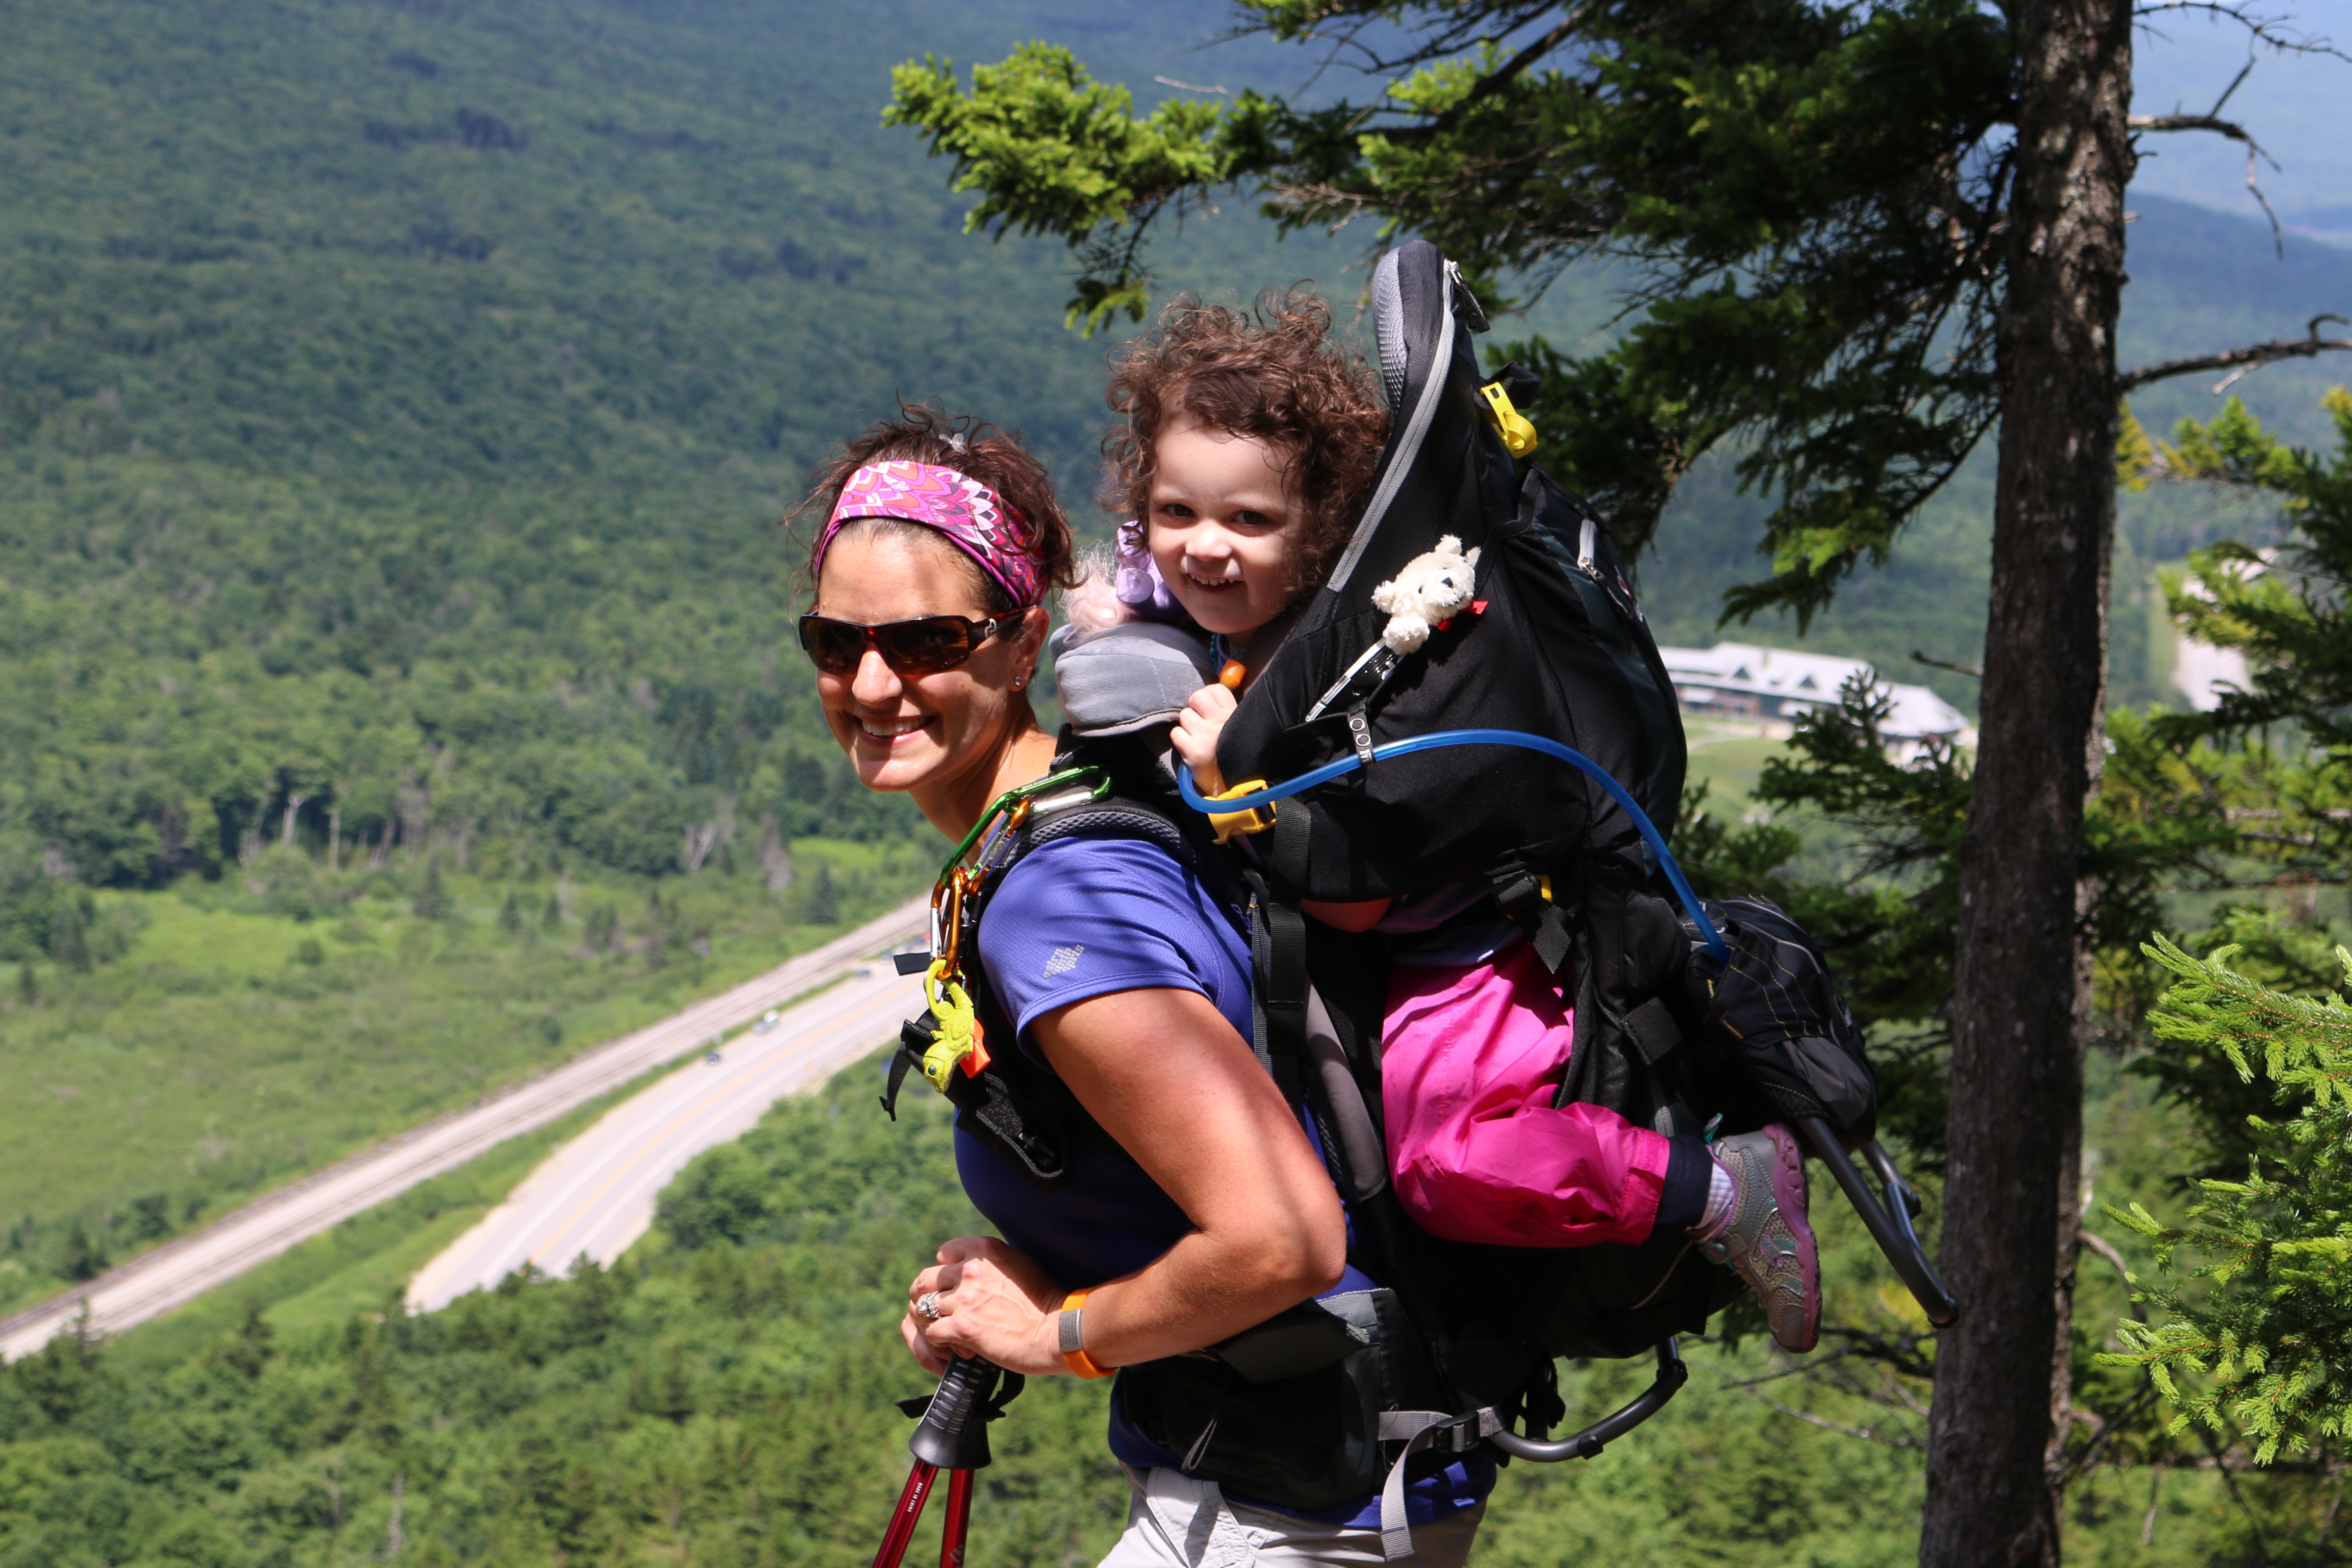
Cliff outlook, Rt. 302, Highland Center and Mt. Washington ResortMom and Daughter on the Cliff
The cliff is about a half to three quarters mile from the split.
Here is an image to help you get an idea of the climb to the trail spilt.
Rock stepping up Webster-Jackson Trail
At the spilt, we took the Jackson trail, which is about 1.1 miles from the summit. You will face climbing that is not for novices. It’s a good climb with rocks and log steps, but the final 750 ft is true climbing and the incline is at its toughest. You will be climbing up rock facings. There are locations to place your feet and hands and at times there will be no helping points. At those points, your own strength and balance will be needed. Just know what you can handle and what you are capable doing, if you have to turn back, do so.
This is the incline report from our hiking Garmin GPS.
Mt. Jackson incline report
On the Jackson Trail, we crossed over the Silver Cascades. Depending on the season, this crossing can be tricky or not passable. After a good rain, the cascade will be running higher than normal. There are several locations to cross, so pick your location and cross. Hopefully, you do so without getting a boot or two wet. 🙂
As you continue upward, you will start to face, rock and log steps with a few switchbacks. Ironically, the song “Stairway to Heaven” was on repeat in my head during this part of the climb. It’s rather fitting, so just keep stepping up. You will know you have reached the last switchback when you come across your first warm-up climb onto a rock facing.
And yes, it is just a warm-up, the rock facing right after is your biggest challenge. Both are doable. At the second rock facing climb, I ended up moving a rock, so I could step up on the rock then onto the rock facing and use a nearby tree to pull myself up. Remember, I am carrying a 41lbs pack and it moves. With the guidance of J, I ended up turning so my back so I was using my legs to push up and onto part of the rock facing.
After, those two climbs, its all rock facing to the top. The summit is just around the corner. Either walk right on up or do some hand-over-hand climbing. I did the latter, since M gets a kick out of it. Plus, it was windy, about 35 to 45 mph. In the winy condition, I find it easier to be closer to the rock.
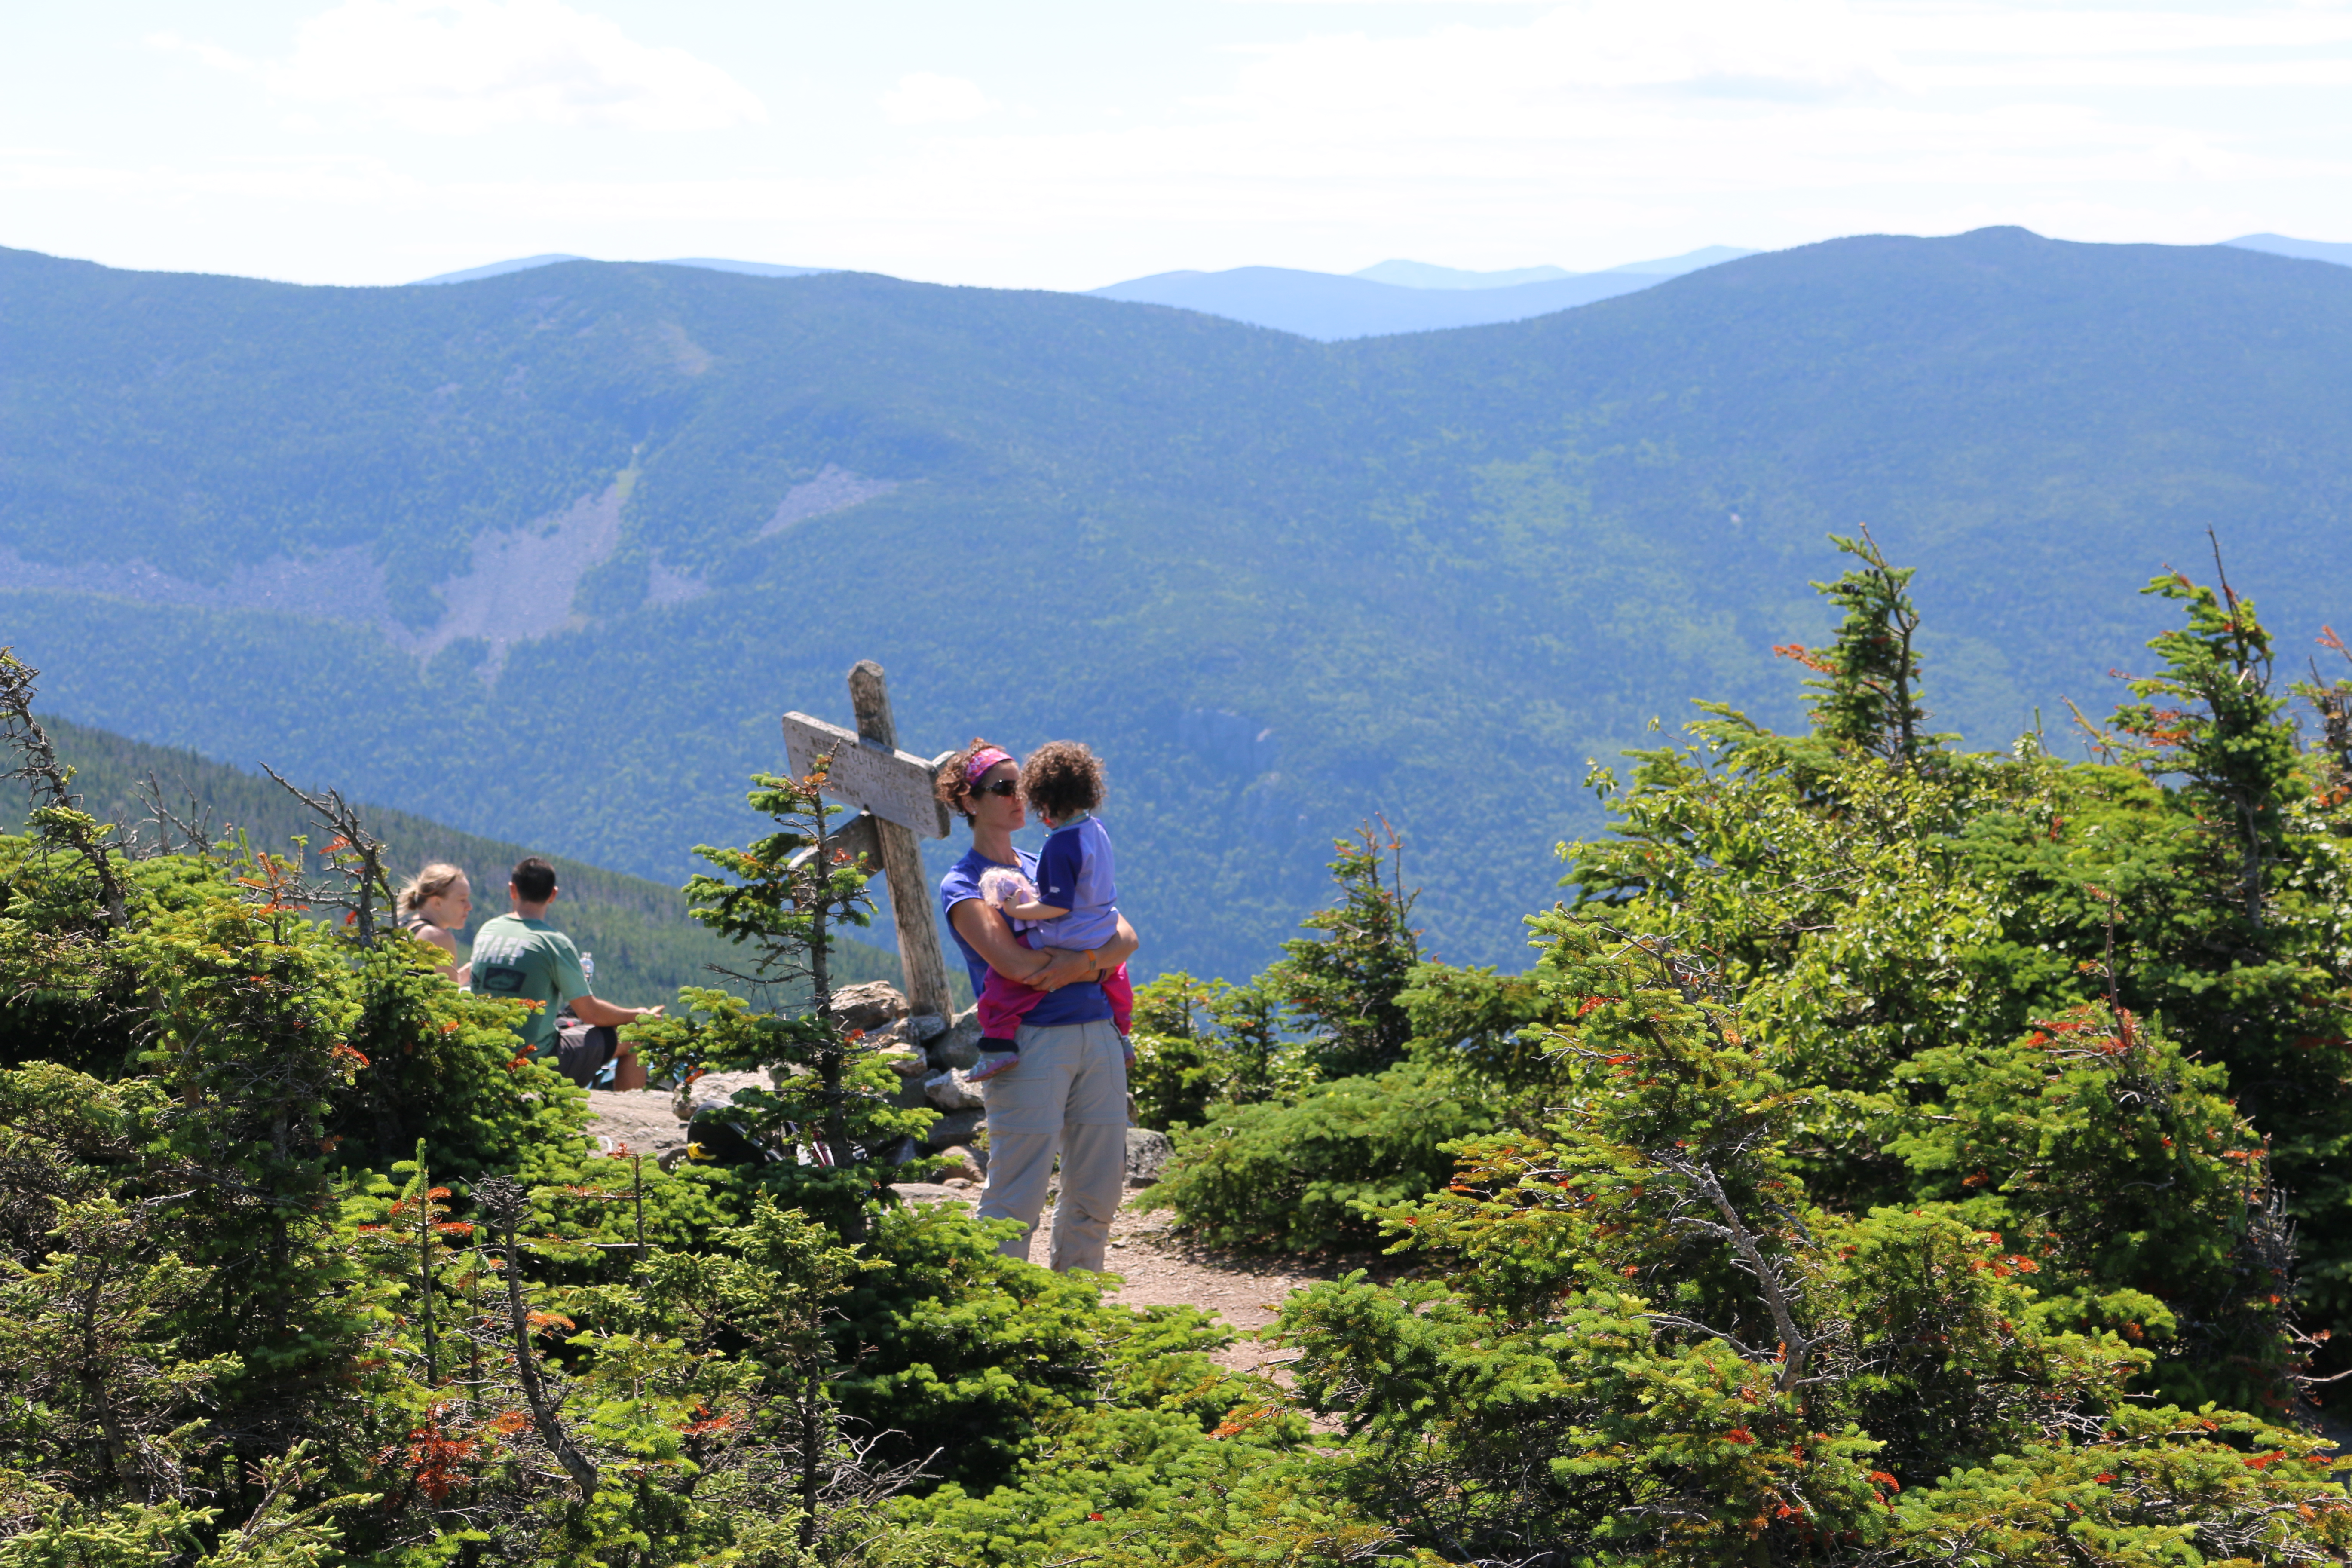
The view waiting for you at the summit is amazing….
Mom & M at the summit of Mt. JacksonWebster Cliff Trail PostWhistle Practice, still needs to learn how to blow harder but we are off to a good start.Mom and Daughter at the summit Mt. JacksonMt. Washington in the clear for once!Checking my gear with Mt. Washington in the background
After our lunch break and re-coup time. We decided it was best to take the trail to Mizpah Hut then down Crawford’s Path. Our first plan was to hike the loop, but with the high winds we decided the best and safest route for us was to take the path to Mizpah Hut.
The descent from Mount Jackson using the Mizpah hut is the easiest of all three trails (Webster Cliff Trail, Mount Jackson Trail and Mizpah Hut). A few minor rock facing descents and into the forest you head. The trip to Mizpah Hut is rather simple and not too exciting. After your climb up Mount Jackson, it is a walk in the woods. (No pun intended) You will pass over some bog bridges and rolling hills nothing hard on the legs. It’s a nice break after your climb and before you get to Crawford’s Path. The hike to the Hut is a little over a mile. Mizpah Hut does offer lodging, bathrooms, drinking water and food at mealtimes. There is a location for tent camping, too. The hut takes reservations for lodging then its a first come, first serve. If you are using the Mizpah Hut plan accordingly.
Mizpah HutMizpah Hut
After our little break at the hut, we continued on the Mizpah Cutoff for 0.7 miles until we connected with Crawford’s Path. Again, this trail is rather easy and it can be a bit wet.
Once you hit, Crawford’s Path it is 1.9 miles to Rt. 302. Crawford’s Path is pretty rocky. The climb down can be a bit rough depending on how tired you legs are. When you reach Gibbs Fall, you still have 0.2 miles to the end of the trail. Crawford’s Path ends/starts across the street from the parking lot of the Highland Center.
This was a longer loop, 7.83 miles, than what was planned, but its a very nice climb and walk down. The Mizpah Hut is a location for hikers to regroup and meet up on the trail. Below is the loop, we took. You can see the distance between where we started at the Webster -Jackson Trail and where we ended, Crawford’s Path, is not that far apart. We parked at the Highland Center, since we knew we were going to use their facility.
There are numerous items to consider when hiking with an infant or toddler. The ranking of an importance is based on each unique family. My family and your family are different, but there are general needs that I hope this article will help to get your family better prepared for your hike. This article is not meant to scare or derail a family from hiking with their child or children. There are many things to consider before heading out the door to climb a mountain and each item should be weighed and considered in detail.
Depending on where you hike, your pack load will be different. My family has hiked in New Hampshire along the White Mountains and Kangamangus, in Virginia in the Shenandoah region, on various plane crashes off untraditional marked paths, and the Black Mountains of NC. I am sure the west coast of the US and other areas, such as, in the Colorado Mountains, the conditions are different. Each area has its own obstacles. I am writing this article based on the worst weather and terrain changes that we have faced throughout our hiking. As a parent and for our family, we plan for the worse case scenario. I hope it will never come to pass, but we rather be prepared for it than not. Without further adieu… let’s get down to business.
First item to consider, if you are a single parent, who will be your hiking partner. Hiking alone with an infant or toddler carries the same classic precautions as SCUBA diving alone. In other words, it is not advisable to do so. There are too many variables that can take place and doing it alone the probably of error is higher. Without a partner, you and/or your child’s survival is at stake. For example, in the White Mountains, the weather can change in an instant, it can and has snowed in August. Also, hiking above the alpine zone, which various by location can make weather conditions worse and terrain more difficult to navigate.
The next question to answer is who will be carrying the child and any additional items in that pack? This is not a gender topic. This is a question of what works best for your child. In our family, I, the mother, carry our child. My child needs to be close to me and we can communicate without seeing each other, but our child needs to see her father. You can always change who carries them, but for us mom does the carrying up and down the mountain. It’s what serves our child’s needs the best. And as her mother, I am physically fit to carry her, which brings me to the next item to consider.
Fitness. How in-shape are you and your hiking partner? You do not have to be a pro athlete, endurance fanatic or a gym rat, but you can’t decide to hike up a side of mountain with your child on your back after spending years on the couch or at your desk staring at the computer screen. I say you can’t, but there are those that have and I am sure there will be more. I am 100% sure the few days after the hike they are in some pain. Hiking with an infant or toddler is strenuous activity, its nothing like running a few times around the block or walking around the neighborhood. There are many trails where you will be walking over roots, crossing over a stream/river/brook, stepping up on rocks, walking on rock facings and at times rock scrambling. It is tough work and if anything happens you need to be prepared to care for the situation. Being in shape helps make the whole hiking experience more enjoyable.
Being in shape is part of the battle. You will need to be familiar with your trail understanding the Hiking Terrain Terminology and color codes in very helpful. This will assist you in making informed decision about what paths to take and the ones to avoid. Those contour lines are not to make the map look pretty. The closer they are together the steeper it is. Always bring a printed map of your hike along with you in a plastic zip lock bag or another map protector, in case it rains and to help protect it against your sweat. Yup, you will sweat.
Always pack two First Aid kit. One for the adults and one for your child. Hiking with your child means carrying band aids, gauges, medical tape, etc. that fits them. In addition to the kits, pack Tylenol, Motrin, or Advil with dosing instructions for your child’s age and weight. When you are tired and hungry, dosing instructions may be hard to remember. Don’t forget to pack any prescription medication, always pack an extra day or two. Winter hiking usually means a longer rescue period than that of the summer. Pack a blanket incase one is injured. Pack a compass, as in, the old fashion type, know how to make one, and if possible a GPS made for hiking. But do not strictly rely on your GPS device. One item I highly recommend, is RoadID, the information carried on it makes any rescue much easier. For its cost, membership and number of lives it has saved — Definitely, worth it. Several of these items, I will address further in a later.
Since, we are talking about planning. Let’s discuss the topic of planning what to pack for your child. This depends on the age of your toddler. For example, an infant cannot regulate their own body temperature which means you need to pack various types of clothing for them. Keep in mind, the higher you climb the cooler the weather becomes and the longer the trip. If your hike takes you into the Alpine Zone you will most likely be above the tree line where dwarf trees and other smaller plans live, so you and your child will be exposed to the wind, rain/snow and the sun. This means plan to pack sunscreen and probably a long sleeve shirt and pants to guard against a sunburn and wind burn. I suggest packing clothing that can dry quickly if wet and clothes that will help keep your child warm. Again, be cautious and prepared for the worst weather in the hiking region.
In addition to clothing and the basics, water and food, you will need to pack diapers and wipes. Yes, that means changing a diaper on a rock, bed of leaves, dirt area, etc. So, what do you really need? Let me answer, your question by opposing a few other questions. Honestly, how good of a diaper changer are you? Does your child get an upset tummy easy when stressed? How long is your hike and how many diapers does your child go through in 8-12 hours? By answering those questions, you can pack to what fits your family the best. I have at least a day and a half worth of diapers depending the length, terrain and season of the hike. As for wipes, we carry with us a “travel case” full of them or one of those portable ones you find at local grocery or drug store. Wipes are so versatile so its great to have extra. Since, we change our little one anywhere we find an open area we do not carry a mat sometimes we use a packed towel or jacket depending on the open area. Lastly, there are no trash cans on a hiking trail and I do not recommend littering. So, placing the diaper in something you can carry down the mountain is helpful. We use a Glad kitchen bag scented with Febreze for trash we create.
I know what you are thinking, where are you going to pack all this and carry our child. There are numerous kid carriers with room to store items and some have water bladders. I suggest getting into a store that specializes in child carrying and outdoor activities or at a place that meets one of those requirements. This is a topic that requires its own article, which is what I will write about next. Choose your carrier wisely, know what type of hiker you are or one that you plan to become. No matter what, make sure you test out as many as you can, put your child into each one and place each one on the carrier(s). Make sure to walk around the store to test it out, bend down a few times, step up and step down if you can.
No matter the brand of carrier you go with, you will need to make a few extra stops along the way. All carriers at a certain point will cause some sort of circulation restriction for you child. It’s always good to stop and let them out to stretch and walk around. Plus, it will give you a break and time to recoup. This means adding some extra time on your hike. You will be happy you planned for it. Also, make sure you add some extra time if you plan to summit, so everyone can enjoy what you all have accomplished. Take some pictures!
Lastly, a few items to consider for the end of the hike and the day after. Pack your car with a change of clothes for everyone. There is nothing like a fresh clean clothes after a hike that includes comfy shoes. Plus, a diaper or two. Keep a cooler with water and snacks for the end of the hike. Depending on your drive back home, pack a thermos with coffee or tea. Before you leave for your hike, I recommend stocking the frig with healthy foods. Your body will need to recover and heal itself, keeping healthy foods loaded with vitamins, proteins, fats, etc. will help during your recovery time.Your recovery time is directly related to your fitness level. Again, this is based on the length and terrain of your hike. But without doubt, comfy shoes are a must.
These are a few items of a long list that should be considered when hiking with your infant/toddler. Each and every family is different and so is every hike, but we all love of child/children, we want the best for them and want to be around when they are older. Hiking comes with its own risks. There are various rescues made throughout the year, so take the time to plan your hike. Plan for worst case scenario in every area. You may hike 100 times before the worst comes true…. at least you will be prepared.
In closing, Conrad Anker, said it best about George Mallory’s climb to summit Everest in 1924, but it is something we all as hikers and climbers should take to heart…..”being a good climber is knowing when you’re at too much of a risk and it’s time to turn back.” No hike nor climb is worth a life. There is always tomorrow. I say that with a handful of hikes in which we turned back due to weather, injury, an upset child, fatigue or difficulty. We were disappointed, but were able to redo the hike.