First off, I am not the camera person on our hikes. All the images you see are done by my husband. He is learning as he goes, but has found a great love for photography. Most importantly, it’s the way we capture our moments for our daughter.
The biggest issue for anyone hiking with a camera, outside that of your phone, is how the heck to carry it. You can put it in your bag, which means putting your bag down and get your camera out then putting it back in and moving on. Well, that’s great, if you enjoy doing all that and do not want to take images that happen in under 25 seconds.
You can use a standard neck strap then engineer a way to strap down the camera to your pack or belt, so the camera is not swaying while you move. Depending on the camera, its weight can start stressing your neck and shoulders.
We, more like, J has been looking for a device for his camera when we are hiking. The Strapshot by Cotton Carrier was it. We watched this video that helped us really see the differences and what we needed to help make a purchase. The video is done by Landslide03 via YouTube. You can check out the video, here. It is a little lengthy 27:33, but he walks you through the difference between the StrapShot by Cotton Carrier and the Peak Design Capture Clip V2. It was very helpful for seeing differences and the StrapShot in action.
Here are our reasons for the StrapShot:
*In no order of importance*
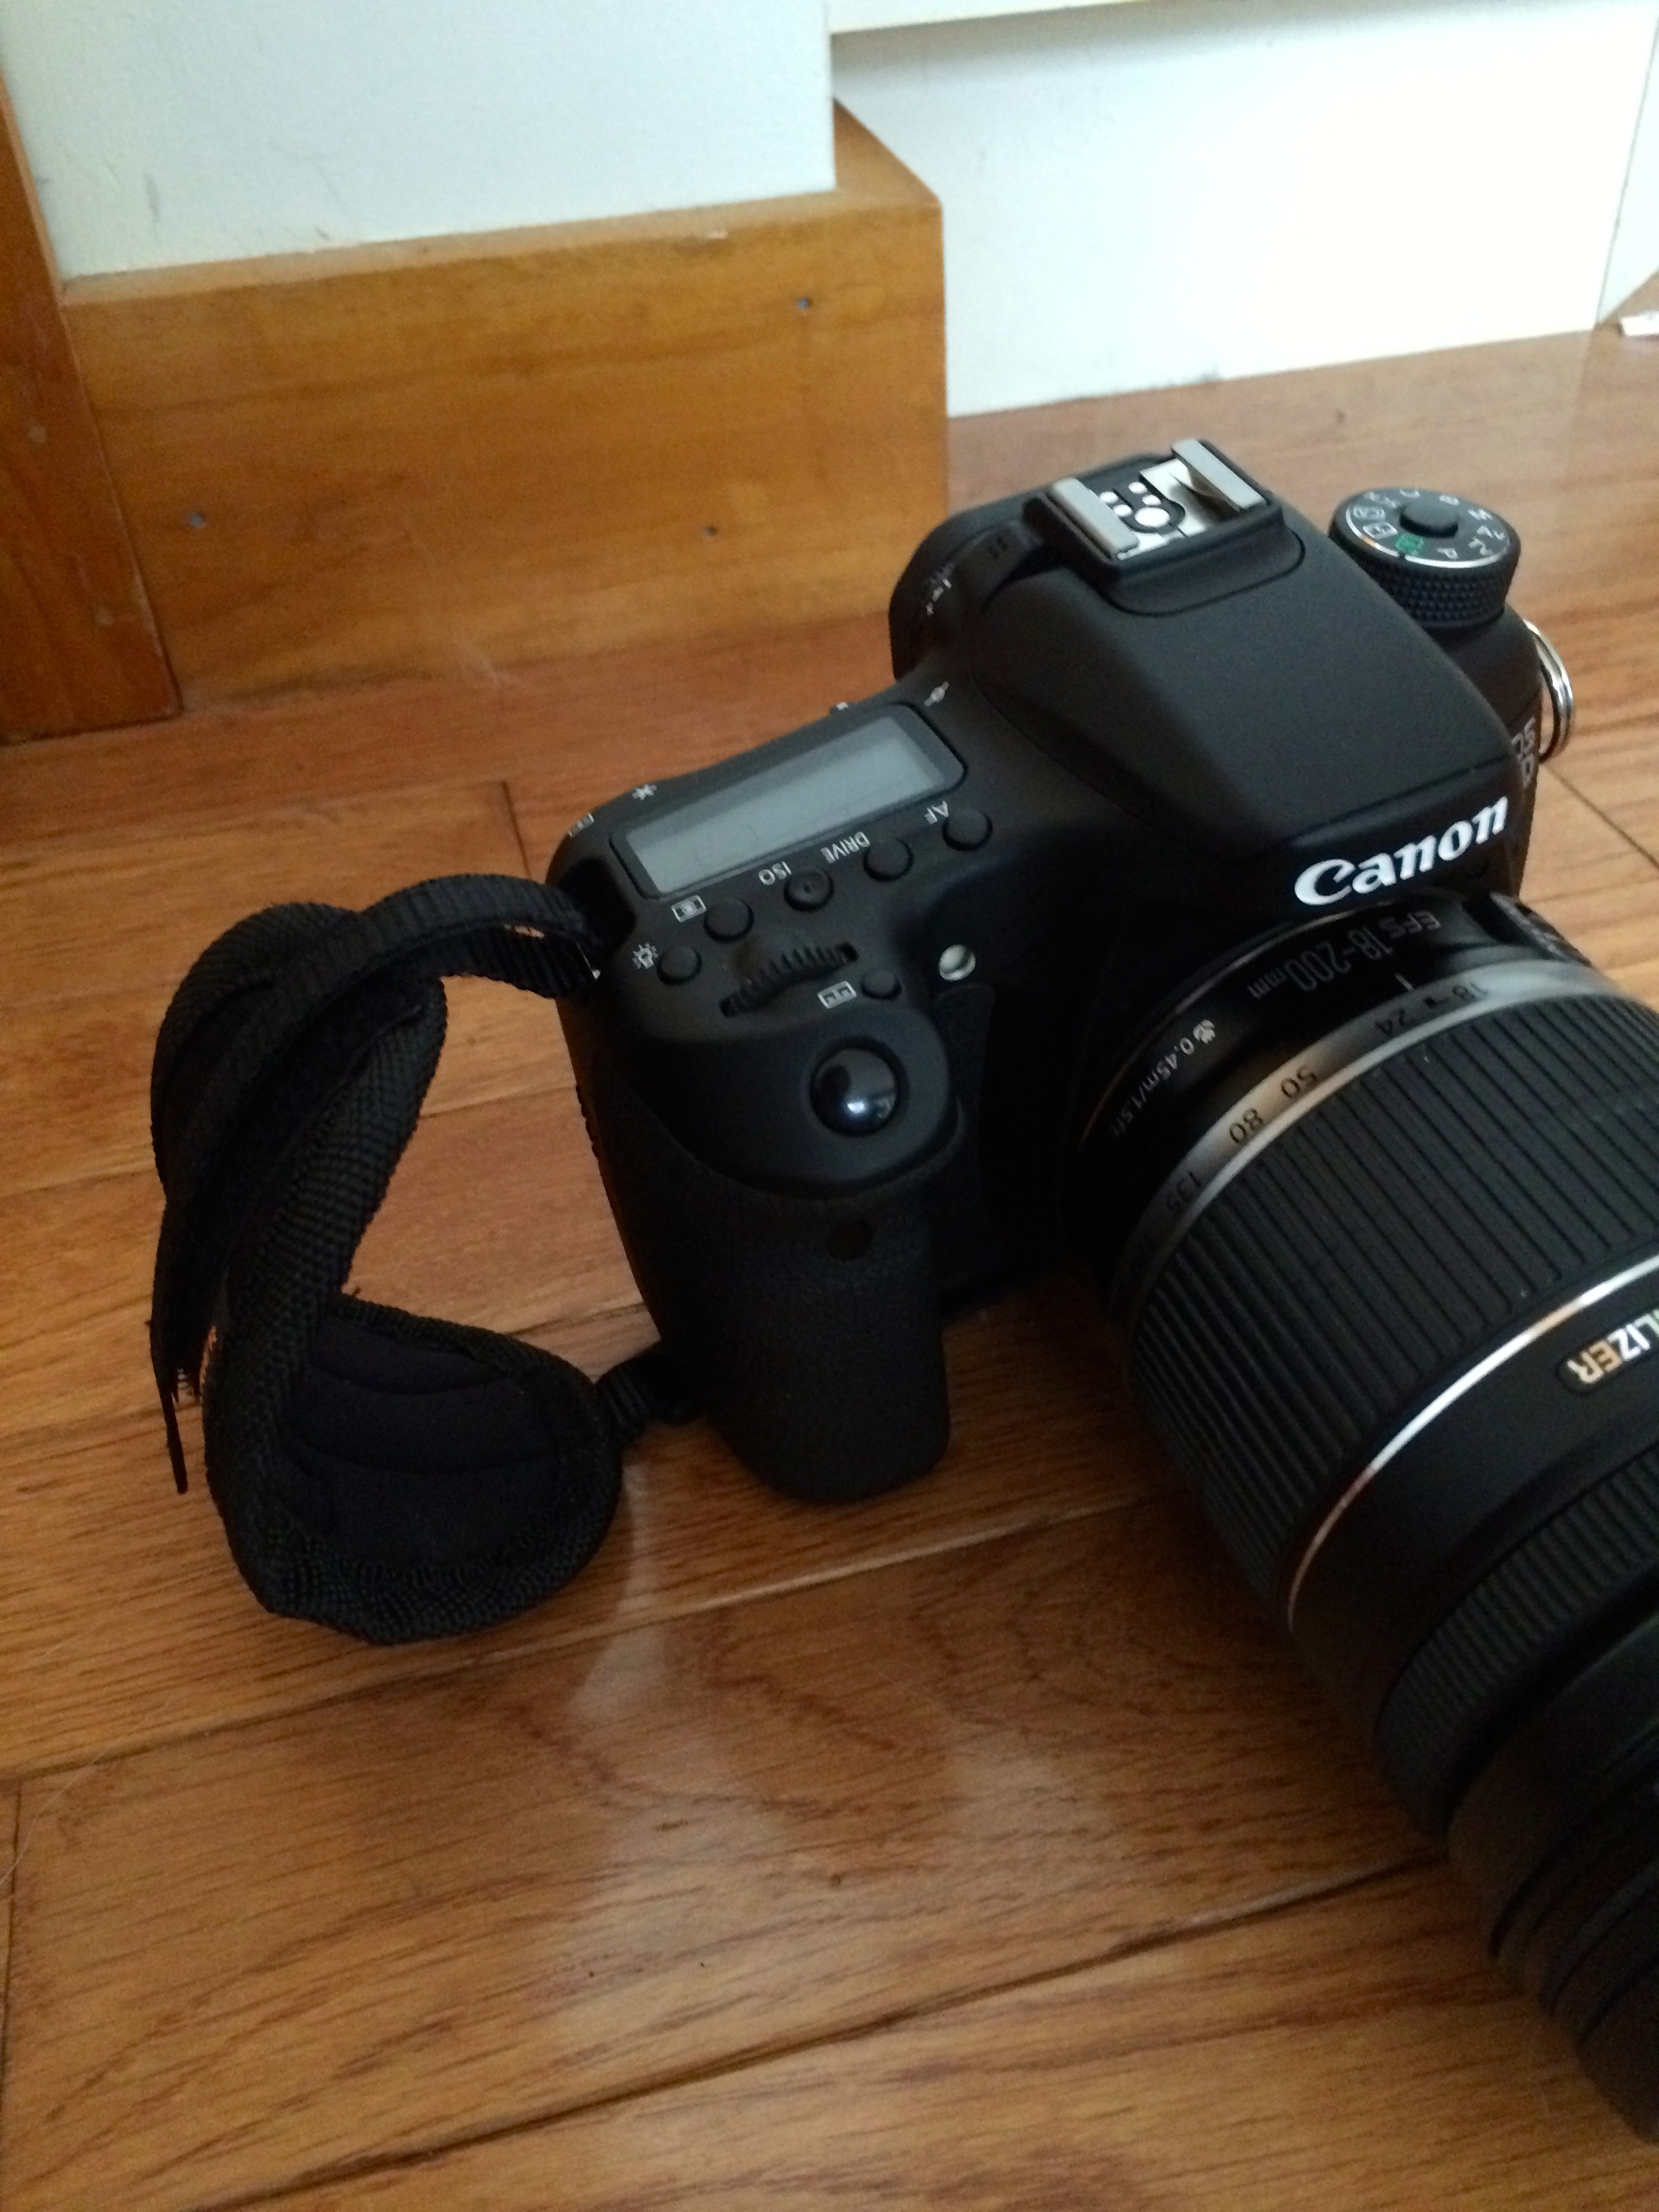
Weight of lens, helps to secure the camera in place. J uses a Cannon EFS 18-200mm IS. The lens weight makes the camera stay in place.
Security straps connected to the camera. After spending time researching this, many other brands do not have this function.
Easy of un-latching the camera from the strap, its is a turn and pull technique.
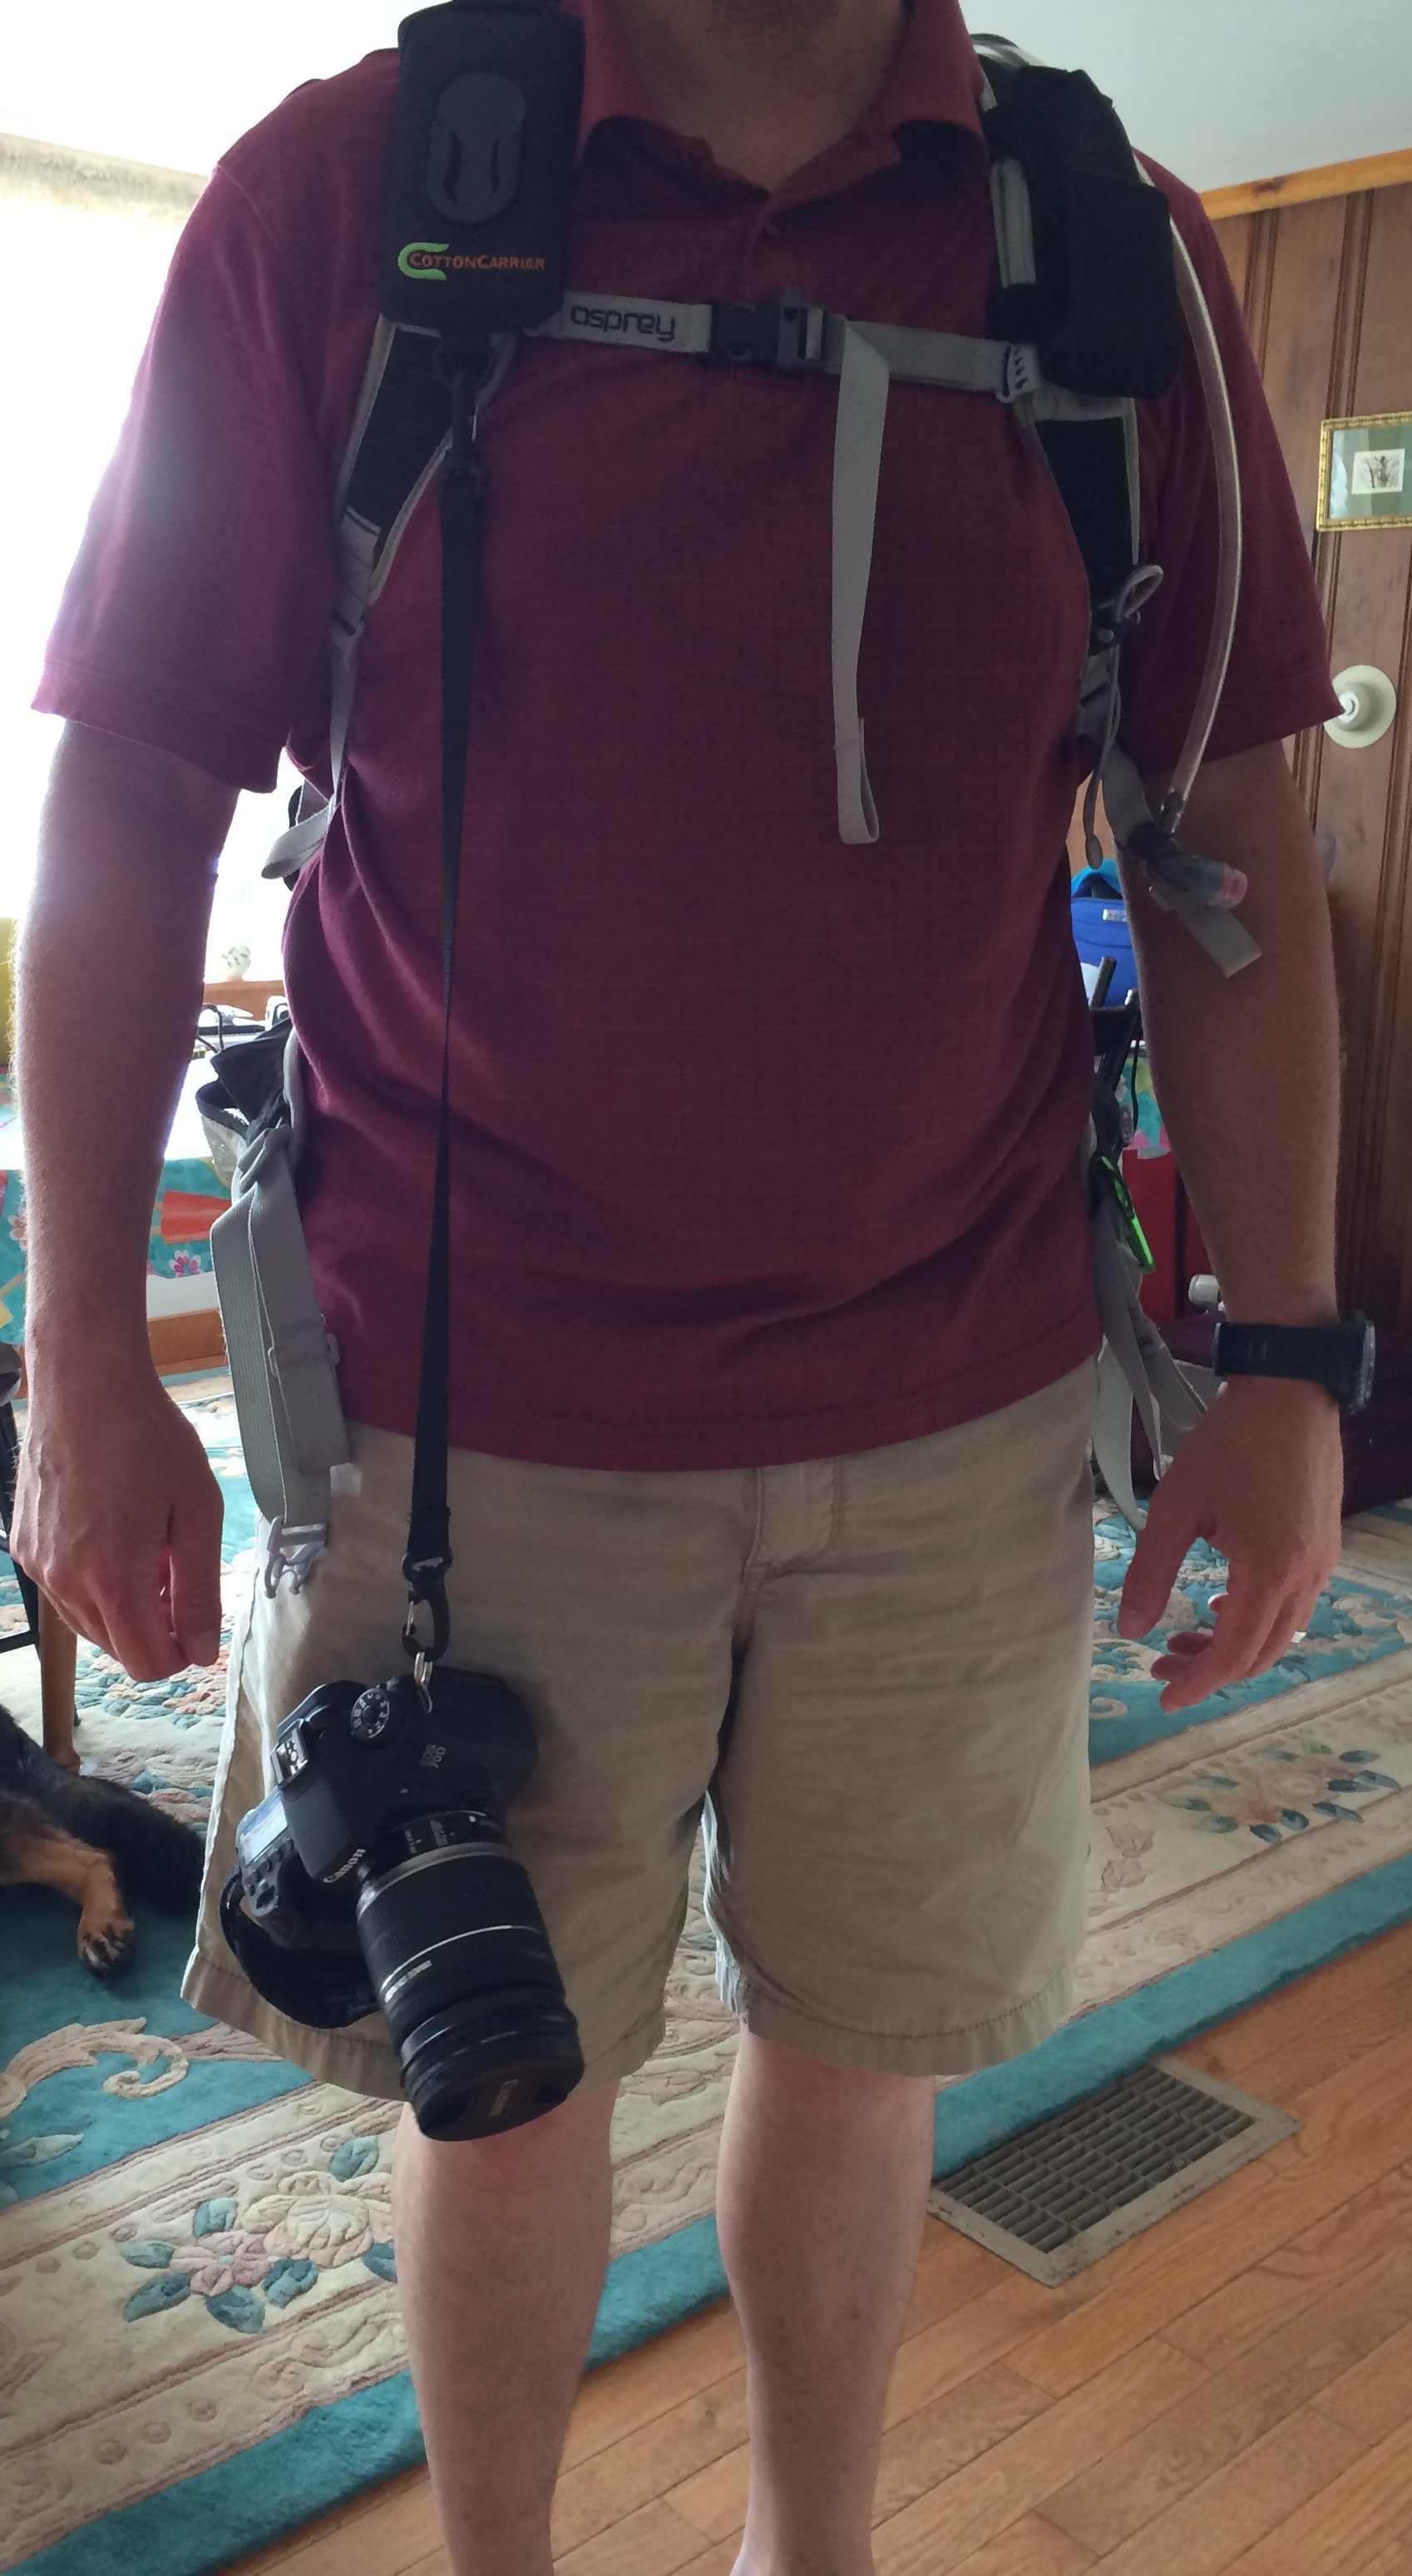
The design allows the lens to be forward and not hitting the user in the chest. You can see the gap between the camera and body below.
View of space
The connector piece to the camera allows for tripod access. The piece that connect to your camera and allows the camera to sit in the StrapShot, allows you connect a tripod to it. That means no additional adjustments or items! Score!
No jamming on the connector (camera to strap). It is easy to remove the camera without looking and easy to reconnect it.
Redundancy for camera safety. You best friend 🙂
You receive a hand strap for your camera. It’s very helpful.
During, our last hike, we spoke with a professional photographer, who saw the StrapShot and we ended up discussing it with him for sometime. We spent about 5 to 7 minutes walking him through all the functions. He was using a Canon EOS 5d Mark 3 with a current using lens of 25-105mm IS. At the end of the brief conversation, he wanted one and took a picture of the StrapShot to order it. He had to pull the camera out from the bag then place it back in. He was so over it and honestly, I do not blame him.
Here are some images to walk you through what was listed above….
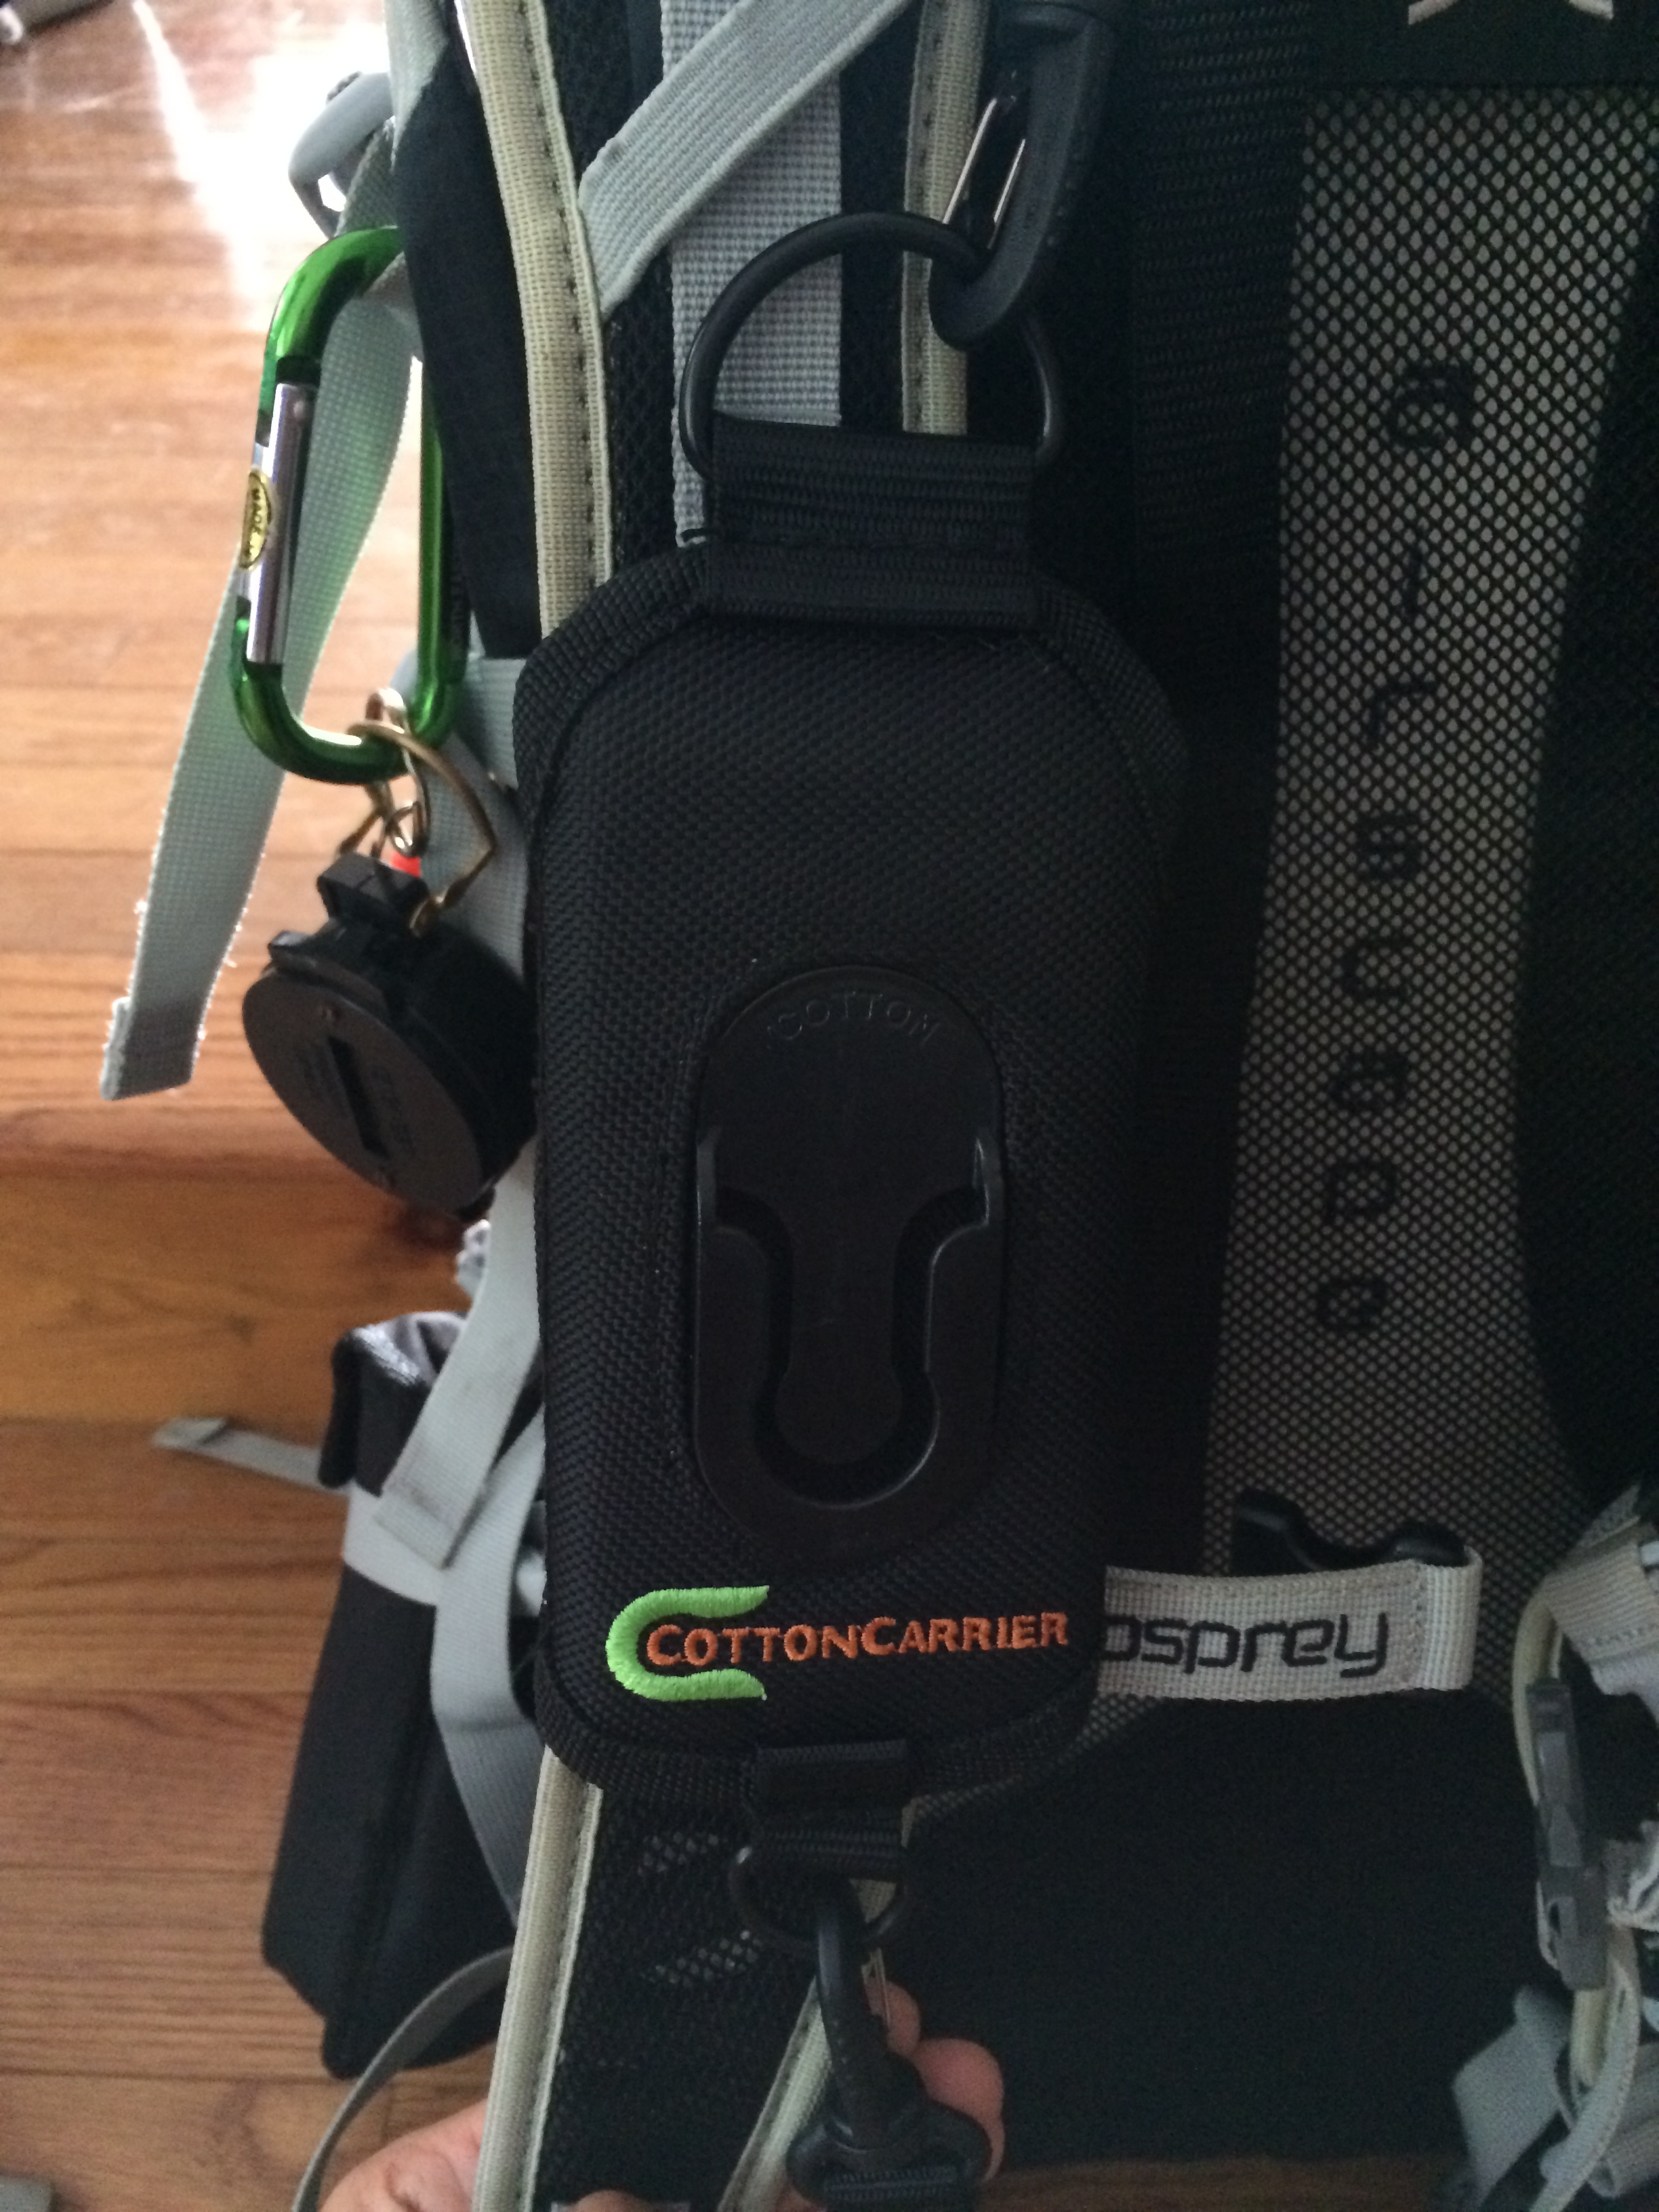
The StrapShot connects directly to your backpack on the shoulder strap.
Front view of the strap connecting to your shoulder strapBack view connecting to your shoulder strap
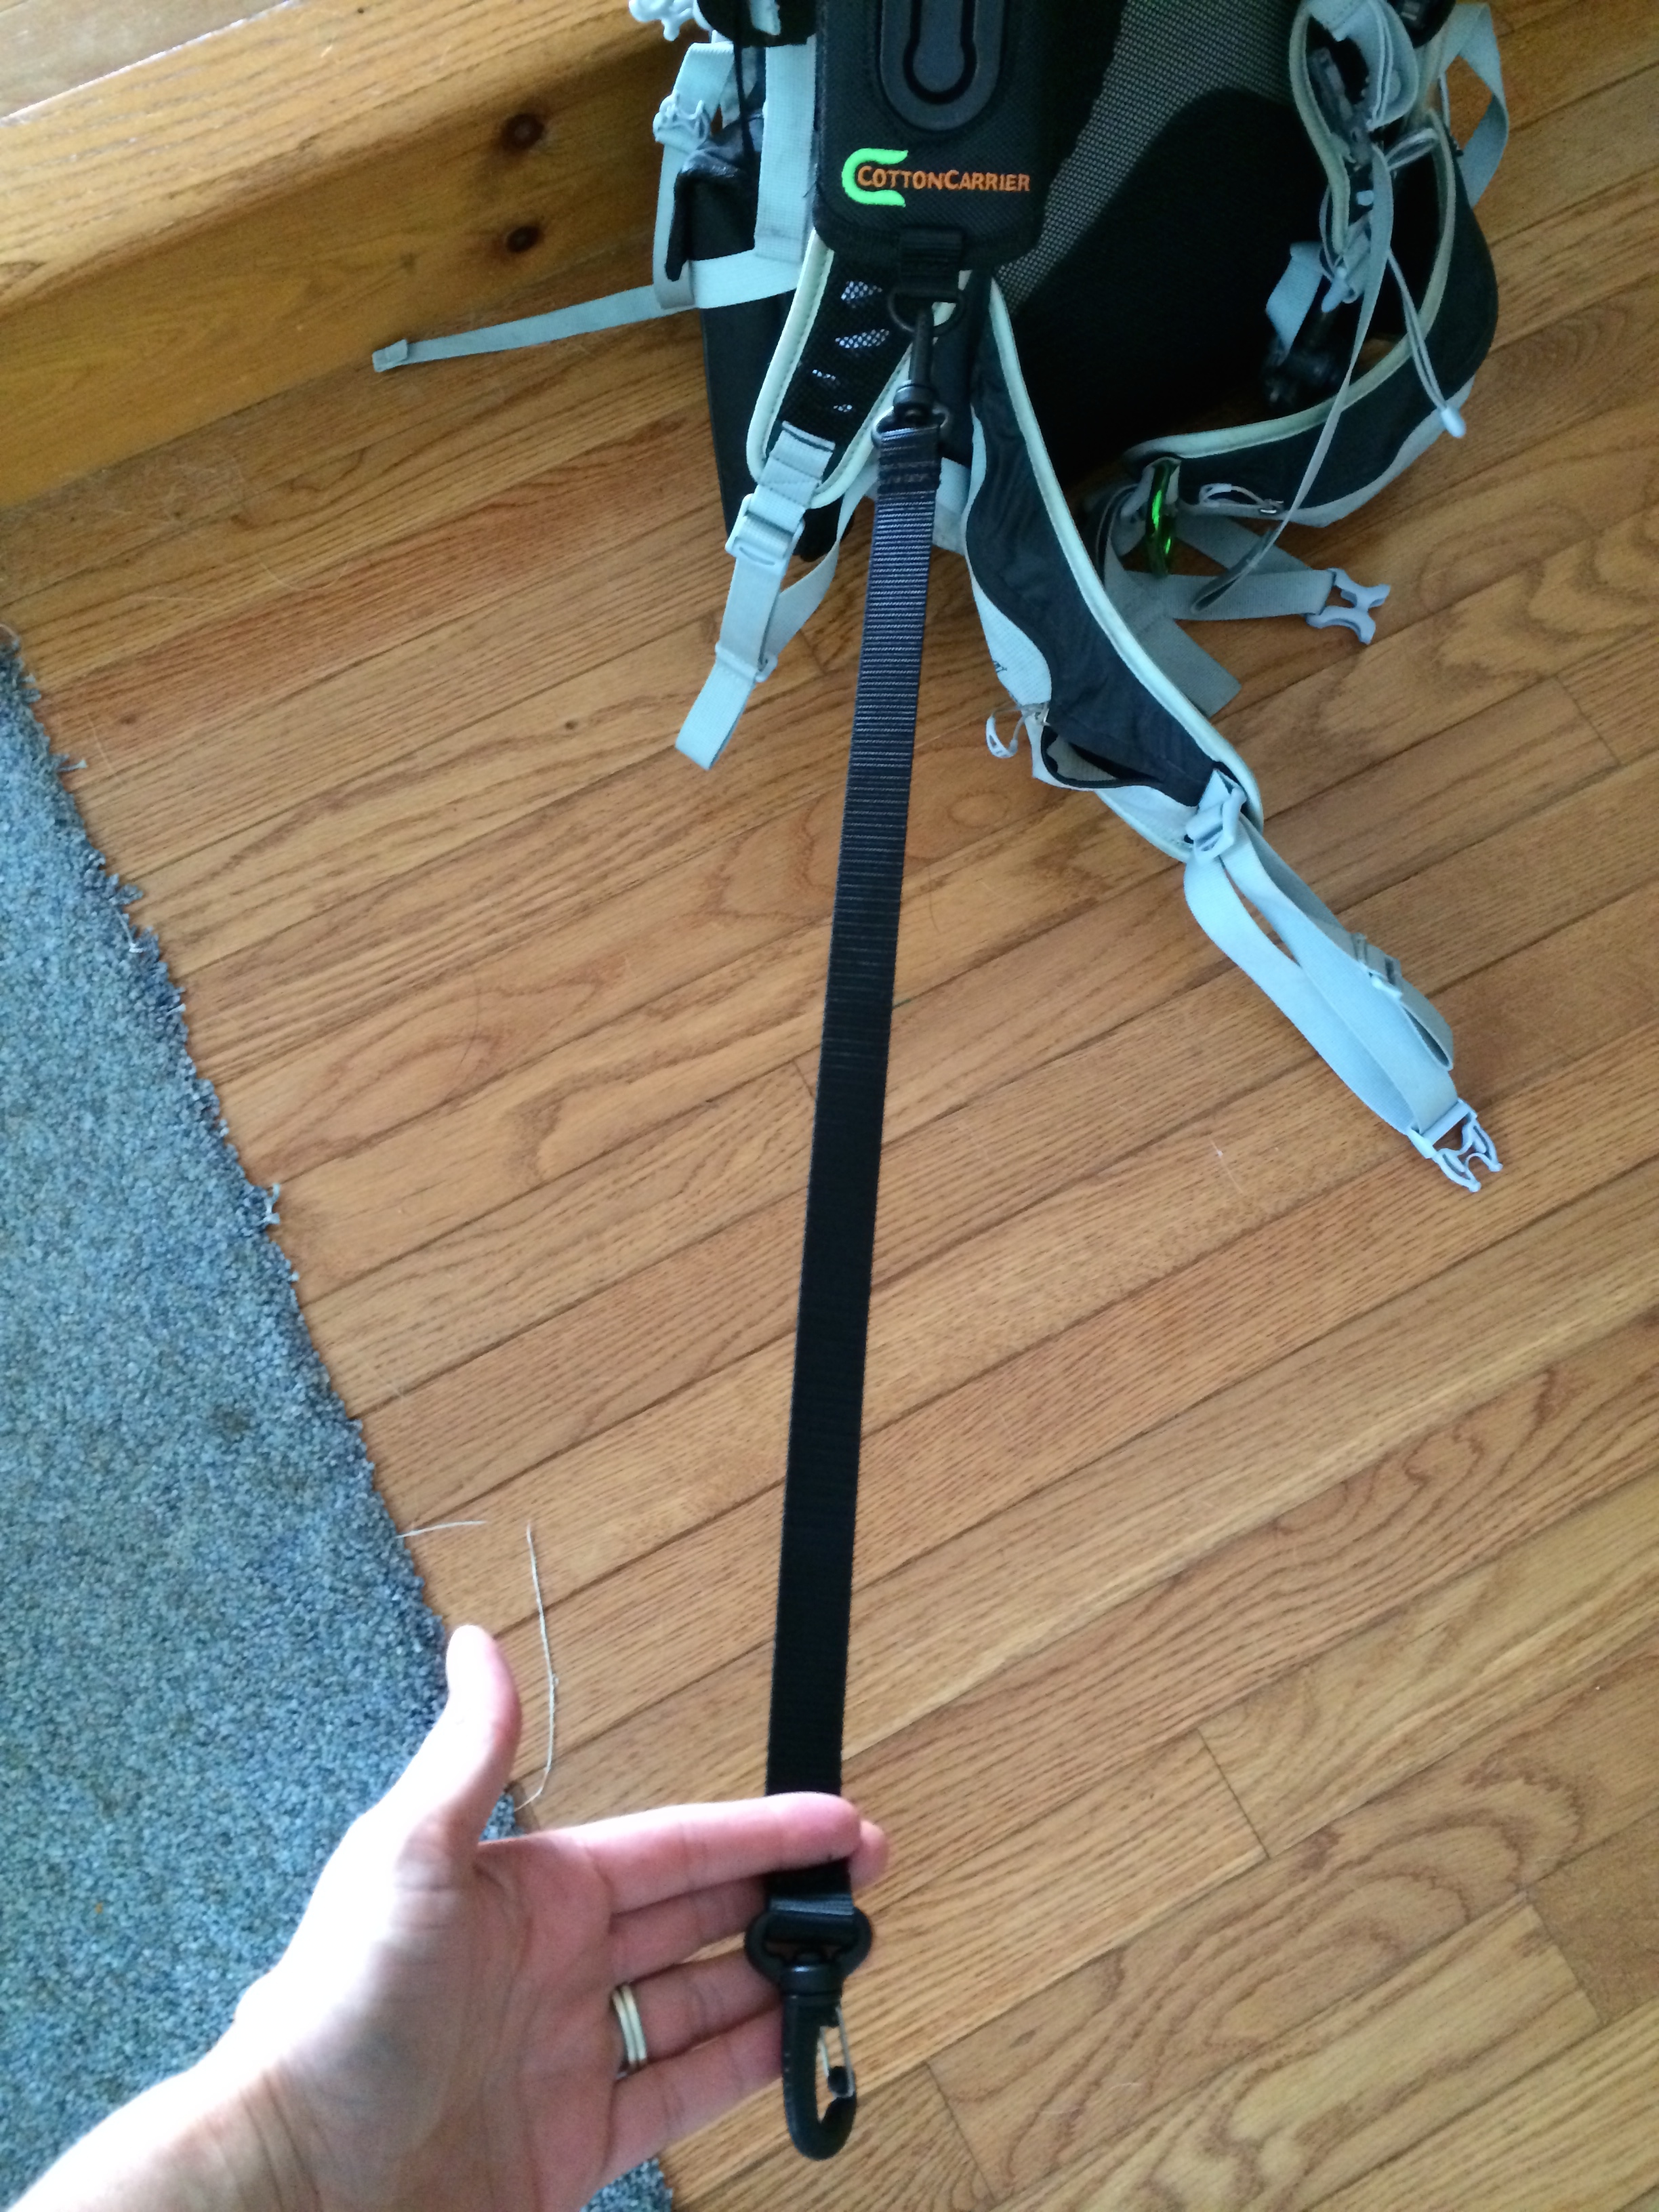
Here are the two security straps for your camera…
First, is the lanyard that connects to the back of your backpack
The second safety strap. Is for all you with butter fingers ( or not) … The strap connects to the StrapShot then to your camera.
To help understand the size of the StrapShot connecting to your pack. This is a side by side image of the StrapShot and a Special Forces 4 inch combat knife folded — its 6 inches long.
*Note the knife sleeve is upside-down on purpose, this allows for easy access.*
StrapShot compared to knife
In closing, if you hike, want easy access to your camera and security for your camera the StrapShot is the way to go. It is great for wildlife images. Below are two wildlife images from our last hike of Mt. Height and Carter Dome. These would have not happened with any other device.
You can check Cotton Carrier’s website, here. You can check out the StrapShot, here.
I really wanted to label this post, “Traveling with the Three Stooges” or maybe even “Rocky & Bullwinkle”, but I will stay with tradition and keep it to the Mountains, Huts, and trails.
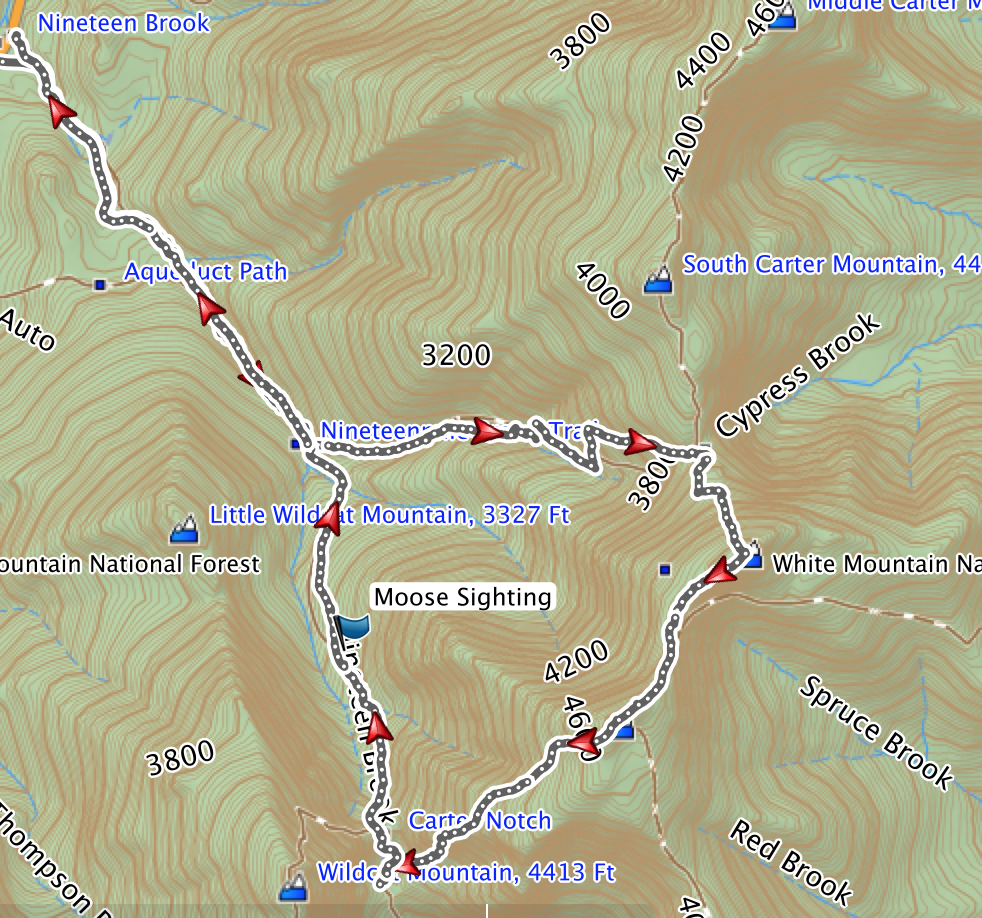
My reason for the “Three Stooges” is simple, we could not leave the house, nor start our hike without M’s companions. Their real names are Whale, Mr. G and Mickey. When you hike with a toddler there are days, they will need their own items and crew members. It’s small potatoes to us adults, but true deal breakers for them. To keep the loving terrible twos at bay and M happy, we brought them. So, I am thinking this is probably the first time in history a whale, giraffe and mouse climbed up to Mt. Hight, then to Carter Dome, to Carter Notch, to the Carter Notch Hut then back to the car to complete the loop.
This is the second time we climbed this route. Our first time was last year, we ended up cutting the hike short and missing Mt. Hight. I am glad we did this since the weather was cooling and the daylight was falling.
We started at the Nineteen Brook Trail, located off Route 16. If you are coming from 302, Jackson, NH or Pinkham’s Notch, you will pass the Mount Washington Auto Road then travel roughly 5 to 6 miles. The trailhead is on the right side. Honestly, we hiked this last year with M, you can tell it’s the right parking lot because of the cars. It is definitely a popular place to hike. If you are unsure, look for this sign at the trailhead.
Trailhead Sign
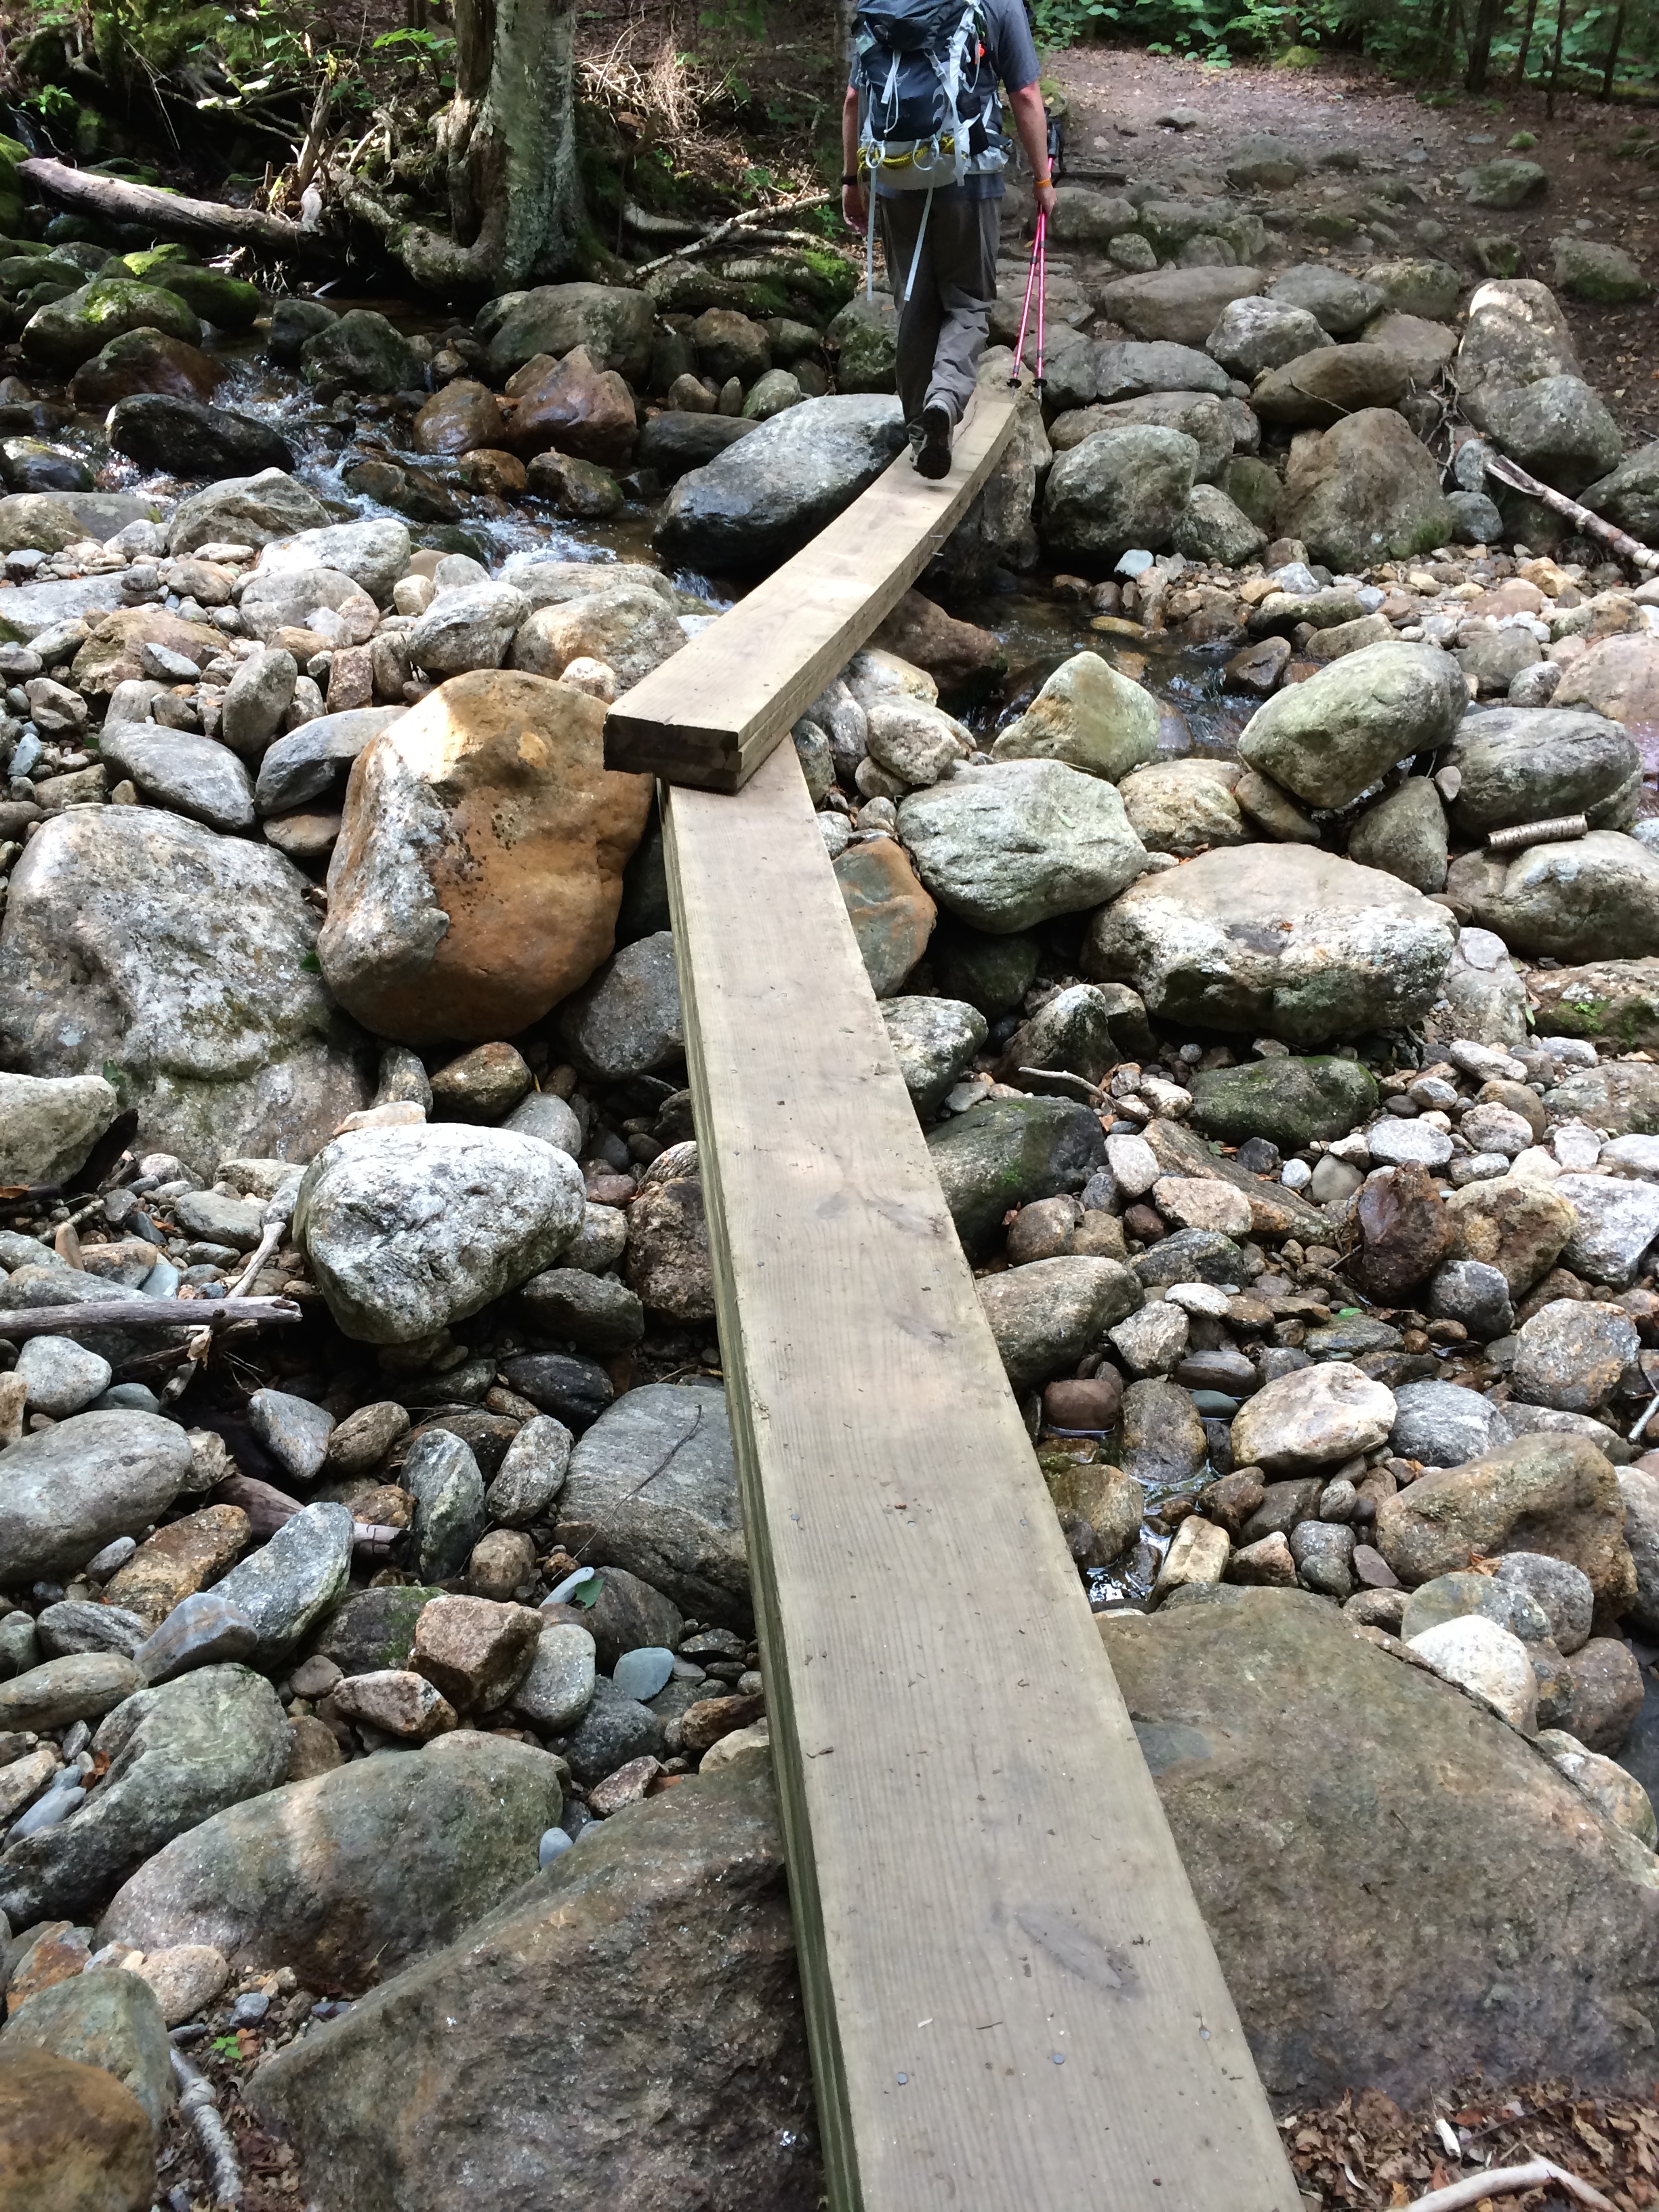
We started this hike around 8:00/8:30 in the morning. If you are hiking in the Fall, I would consider starting a little earlier. The ending of sunlight might cause you to push through some great views. Also, without rest you may ended up hurting yourself. All the trails are marked well and well used. You will walk along the Nineteen Mile Brook for some time. Then you will cross over the brook before the trail splits.
Brook crossingMom and M crossing the nineteen mile brook
When you reach the trail junction, to head up to Mt. Hight (directly) you will go left and take the Carter Dome Trail. If you are hiking to Carter Notch Hut, you will continue on the 19 Mile Brook Trail. If you need to take a break, this is a good location to pull up a log or rock. It is a bit more roomy than anything you see face for roughly another two miles.
We went to the left and traveled up Carter Dome Trail for about 1.9 miles to another trail junction. The trail junction continues up to Mt. Hight and Carter Dome or you will take a ‘left’ to South Carter, Middle Carter, North Carter and Mt. Moriah.
This trail junction, this a great place for a break and many hikers use this location for just that. We met a two different groups of hikers here. Of course, they were thrilled and in awe to see us taking M up to the summit. This is where the game of “Whale” came about. Our little Miss M is a bit shy and tends to hide behind her stuffed animals and other items. With all the attention, she wasn’t sure what to do, so she created a way to say “hi” with Whale like she was waving, but every time anyone went to shake it or touch Whale, she would hide him. So, now this Whale game took place throughout the hike and carried into our next one. I am sure it will continue, since we cannot leave Whale at home.
After this break with a great group of hikers, we carried on up to Mt. Hight. You will travel along Carter-Dome Moriah Trail then take a left onto the Zeta Pass to climb up Mt. Hight. The first three-quarters to Mt. Height is pretty normal, but the last push to the summit is not for amateurs carrying a toddler or heavy weight. It requires climbing, some very large step ups onto rock facings, some balancing and without a doubt strong legs. I will say climbing up is safer than climbing down. You can continue on to Carter Dome then take the trail to Mt. Hight, if that works for you.
Mt. Hight was worth the climb and another good spot for rest. We did not take a rest there. We did snap some pictures then headed down to Carter Dome for lunch. Mt. Hight has some locations for children to walk around, but Carter Dome has a larger cleared area.
At the Summit of Mt. HightMt. Hight Summit, Mt. Washington in the background, Whale is on the attack with Mr. G (giraffe) readyMt. Washington from the summit of Mt. Hight
The descent from Mt. Hight to Carter Dome is easy and the walk over to Carter Dome summit is perfect after the climb up to Mt. Hight. Mostly, a straight wooded path.
Heading over to Carter Dome
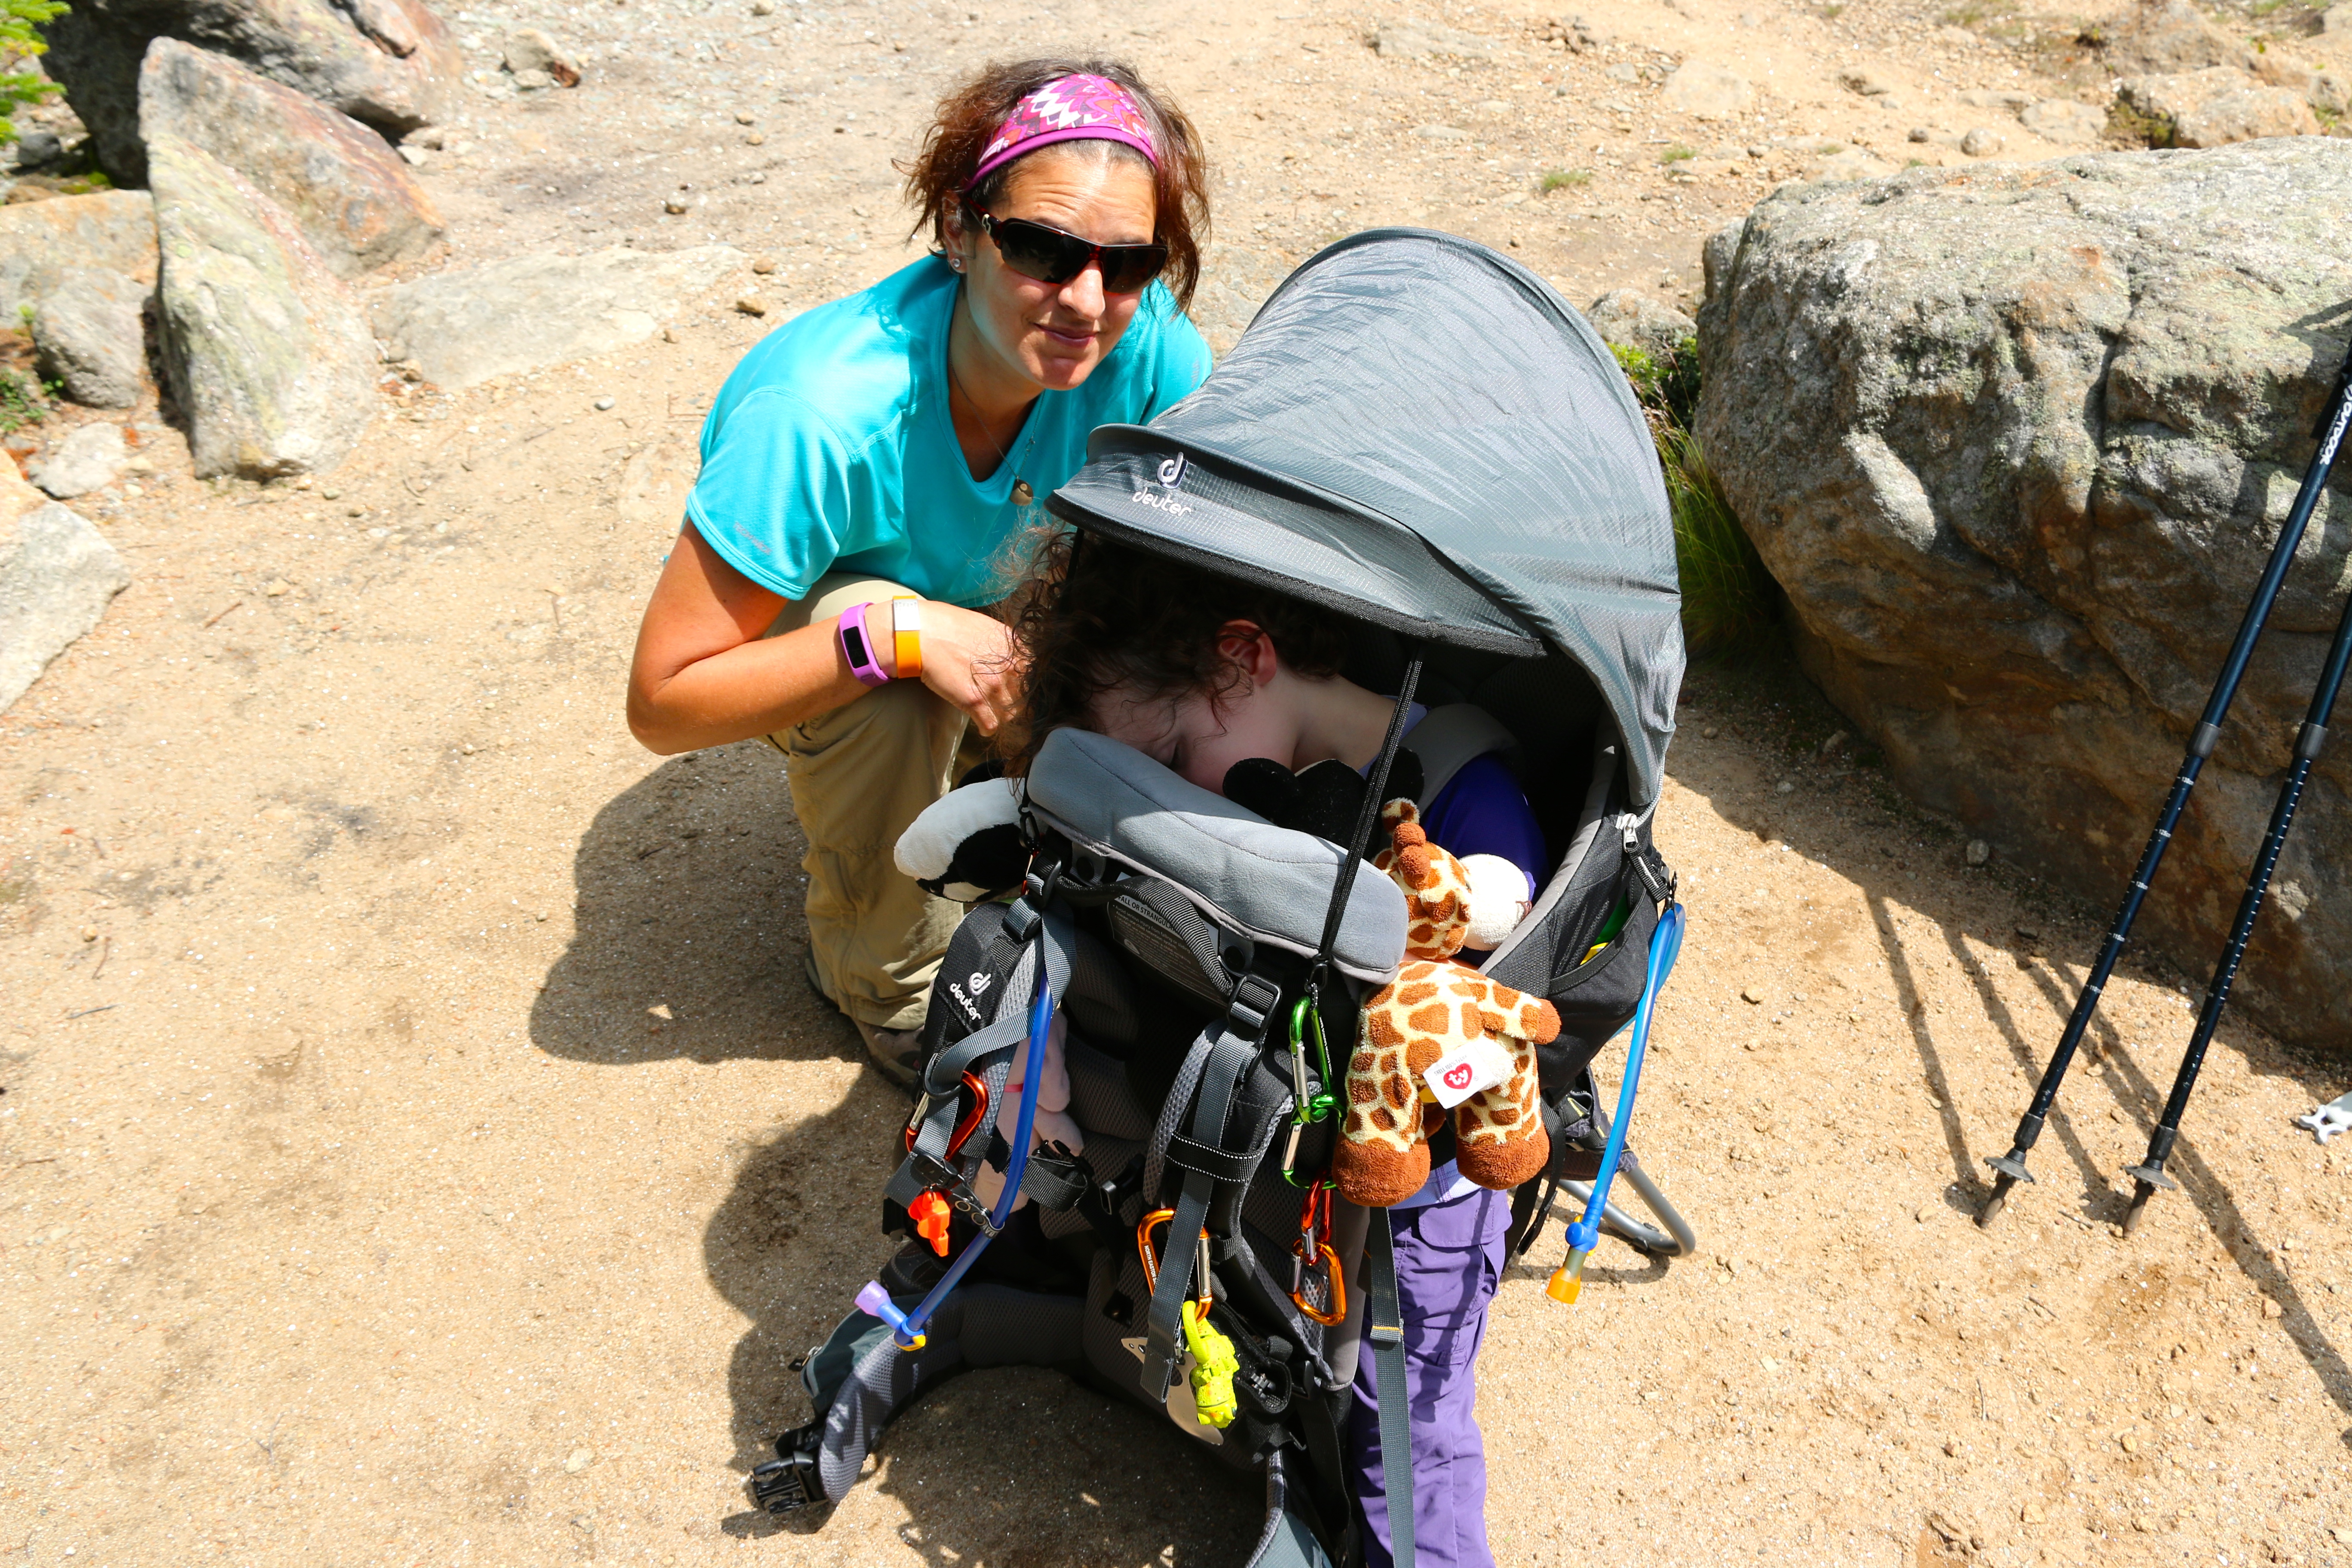
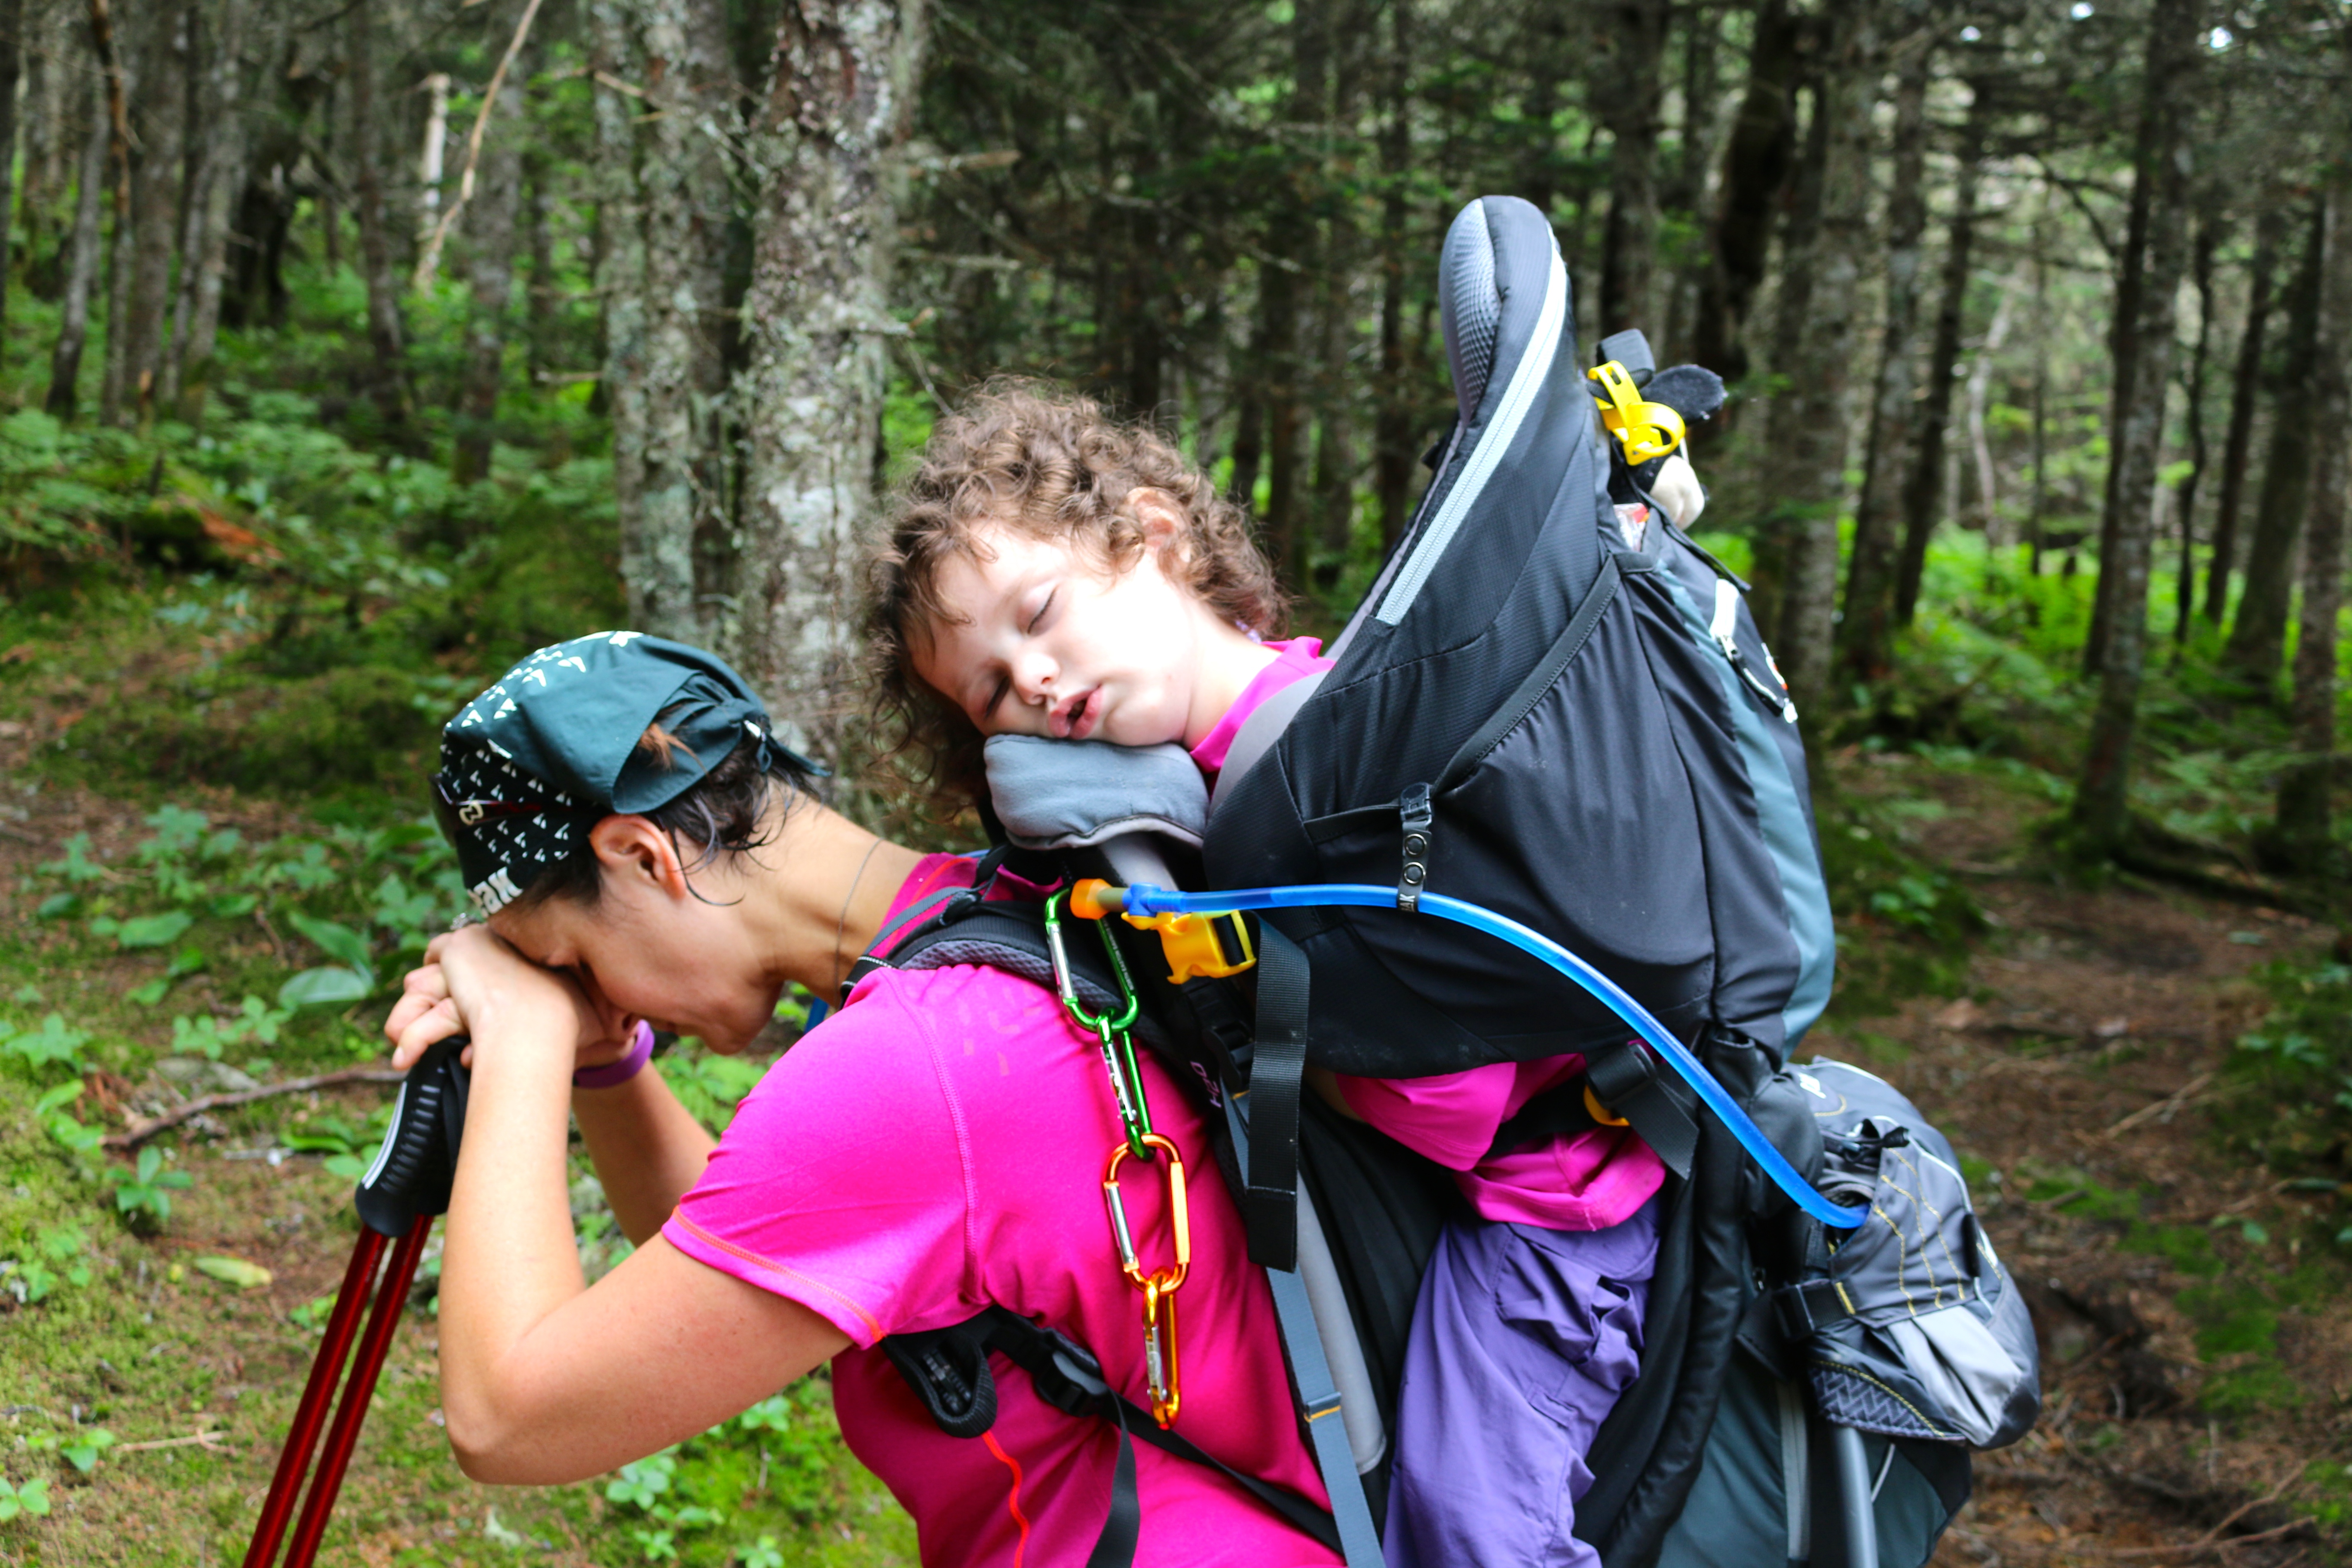
By the time, we reached Carter Dome, I heard something that sounded like a little snore with my mirror I saw M passed out. With care and help J, got me out of the carrier and M was still sleeping. In fact, she napped through our lunch break on Carter Dome.
Miss M napping, Love this pack!Miss M enjoying all the functions of the Deuter Kid Comfort III
We took about a 30 minute break here. We knew the climb down Carter Notch would be challenging. This is where your training really kicks in. Being fit is not about how much you can carry for a distance or how far you can go. Fitness is your rate of recovery. By the end of the lunch, I felt like I was just starting the day on fresh legs. Thank you off-season training.
M slept through getting back on my back and for her second summit picture of Carter Dome. This is where sleeping training for your child and helping them feel comfortable on a hike is worth its weight in gold.
Second Summit of Carter DomeFirst summit of Carter Dome
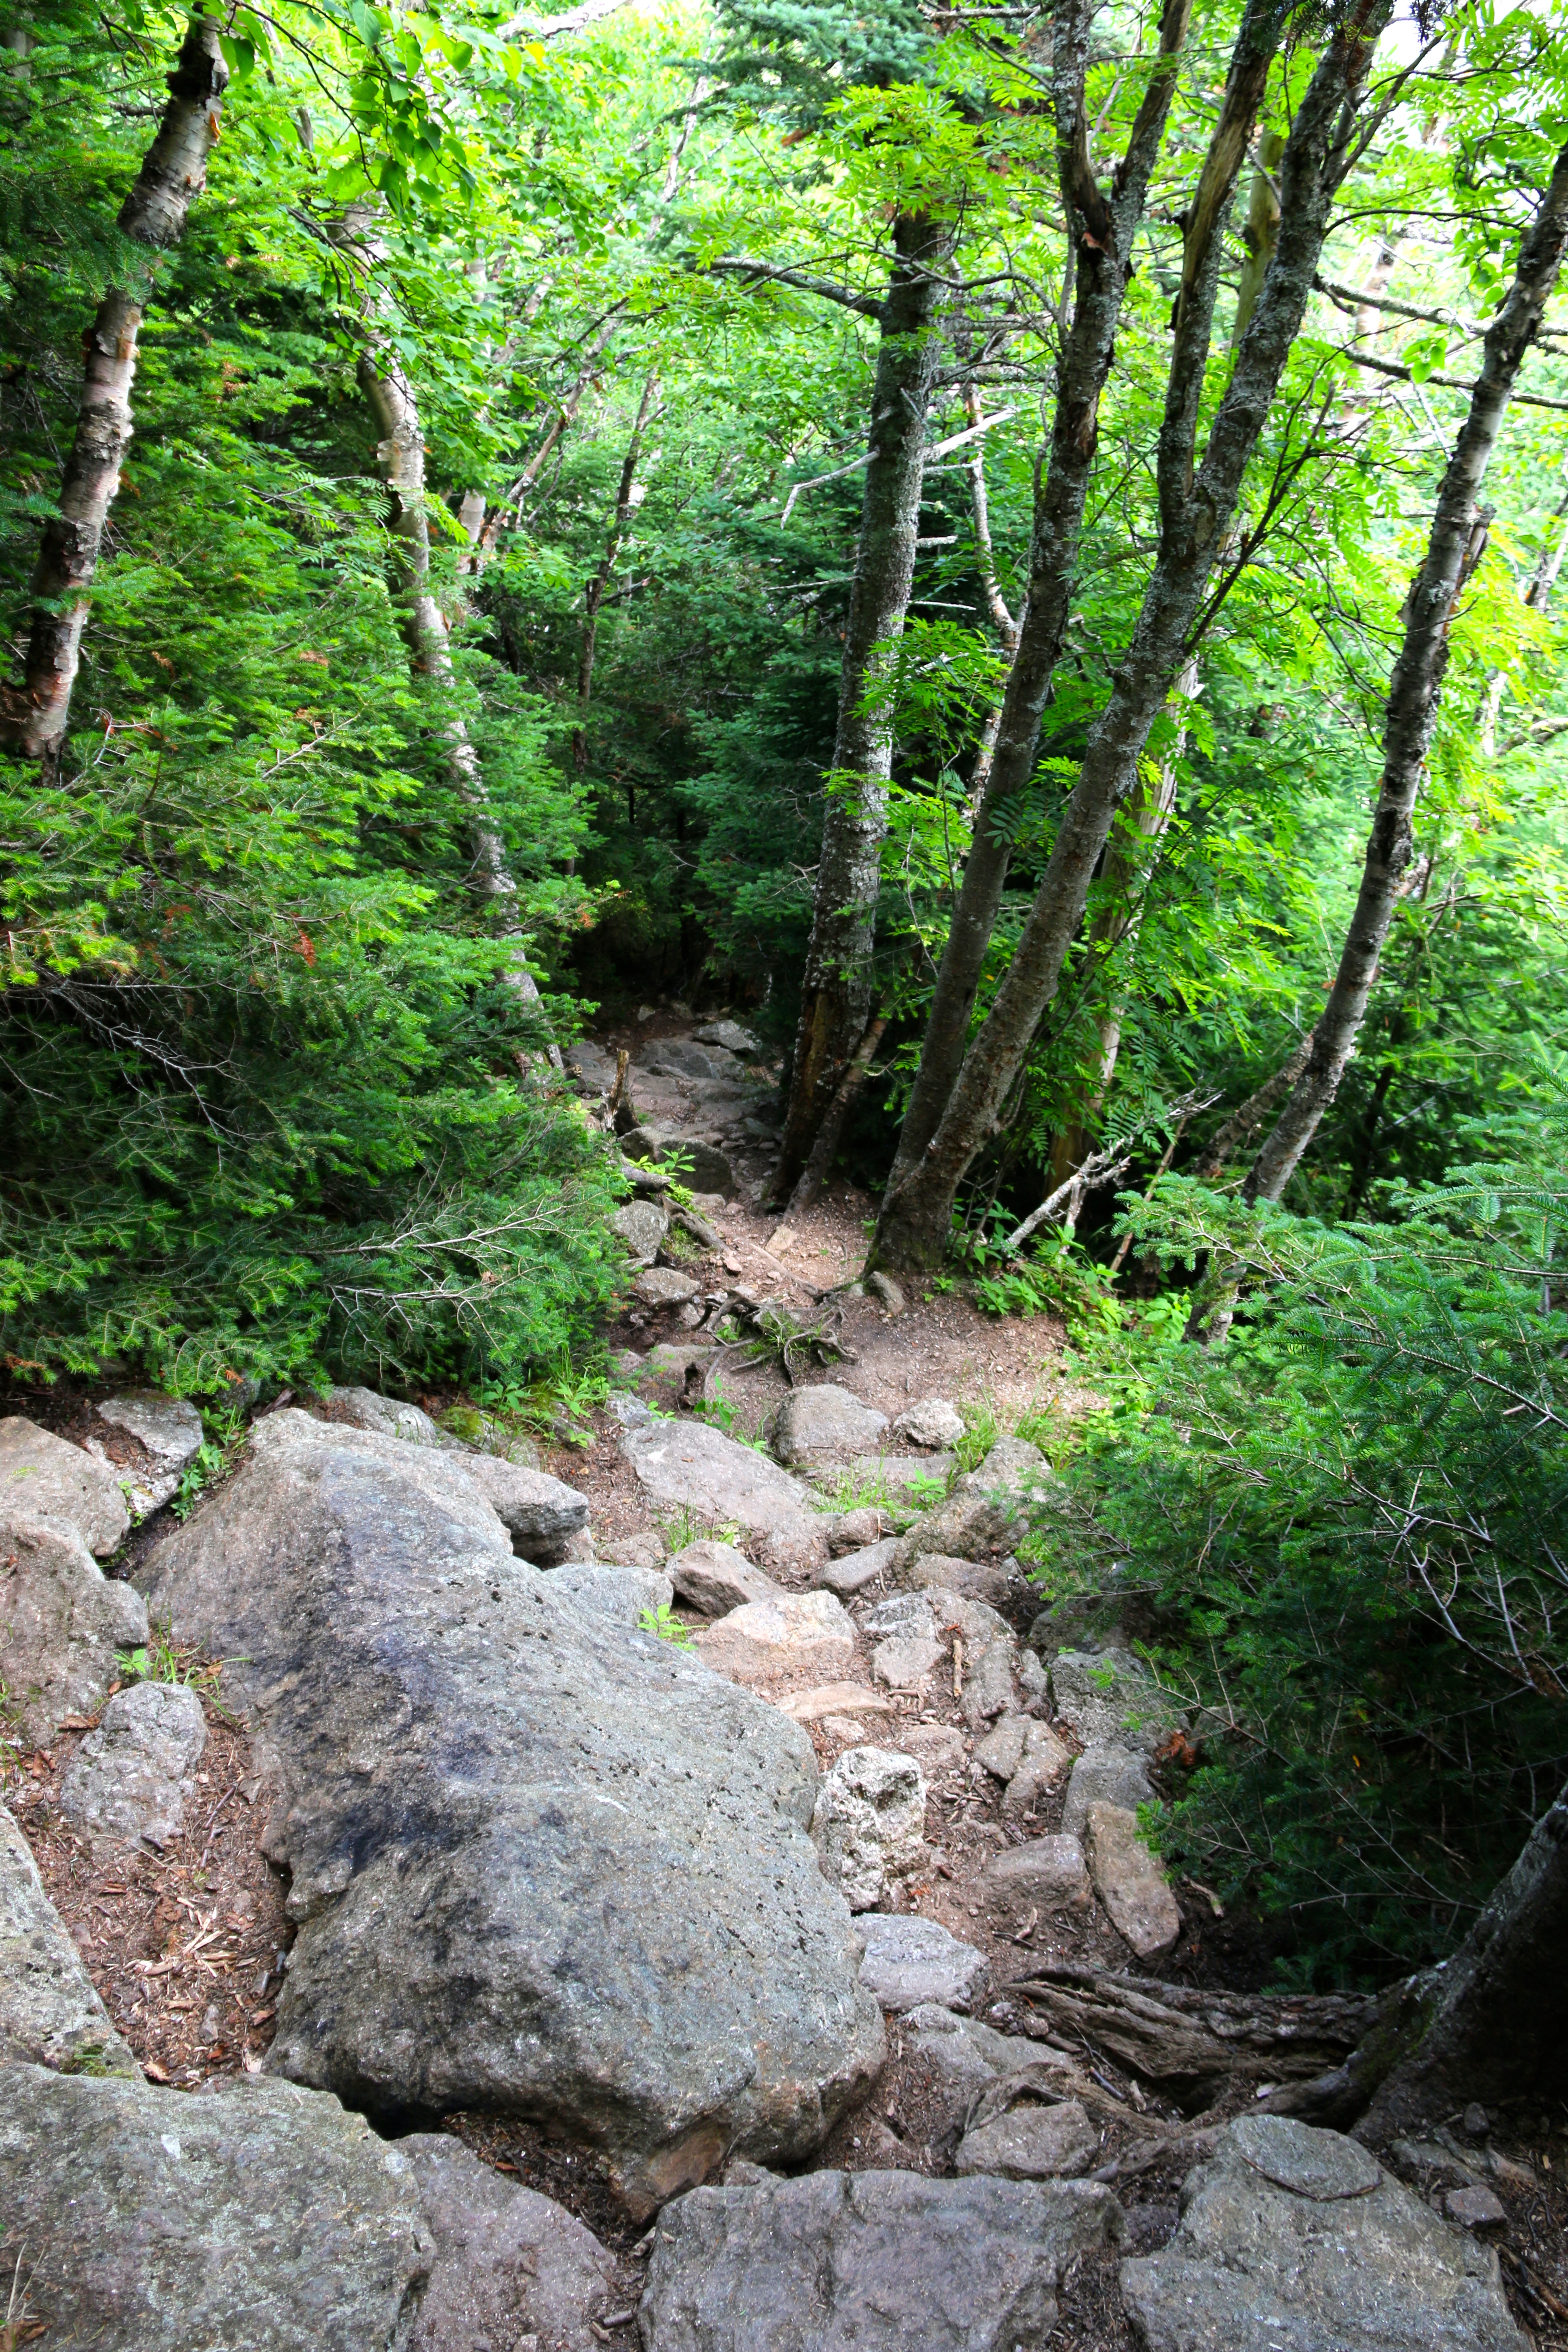
After the nice rest at Carter Dome, we headed down to Carter Notch making our way to our next break at the Carter Notch Hut. You will follow the Carter-Moriah Trail to the hut. The climb to the notch is a simple descent. At Carter Notch, you will be climbing down rocks almost to the hut. My free advice is to take your time. If you planned your trip well, took your breaks, this climb is nothing. If you are tired and hungry this can be tricky and lead to injury. There are some great areas to take some pictures and to look out.
Carter Notch
When you ask yourself, “Really, how much more of this before the hut?”. My answer is you are about half way there. Your climb down to Carter Notch Hut is absolutely worth it.
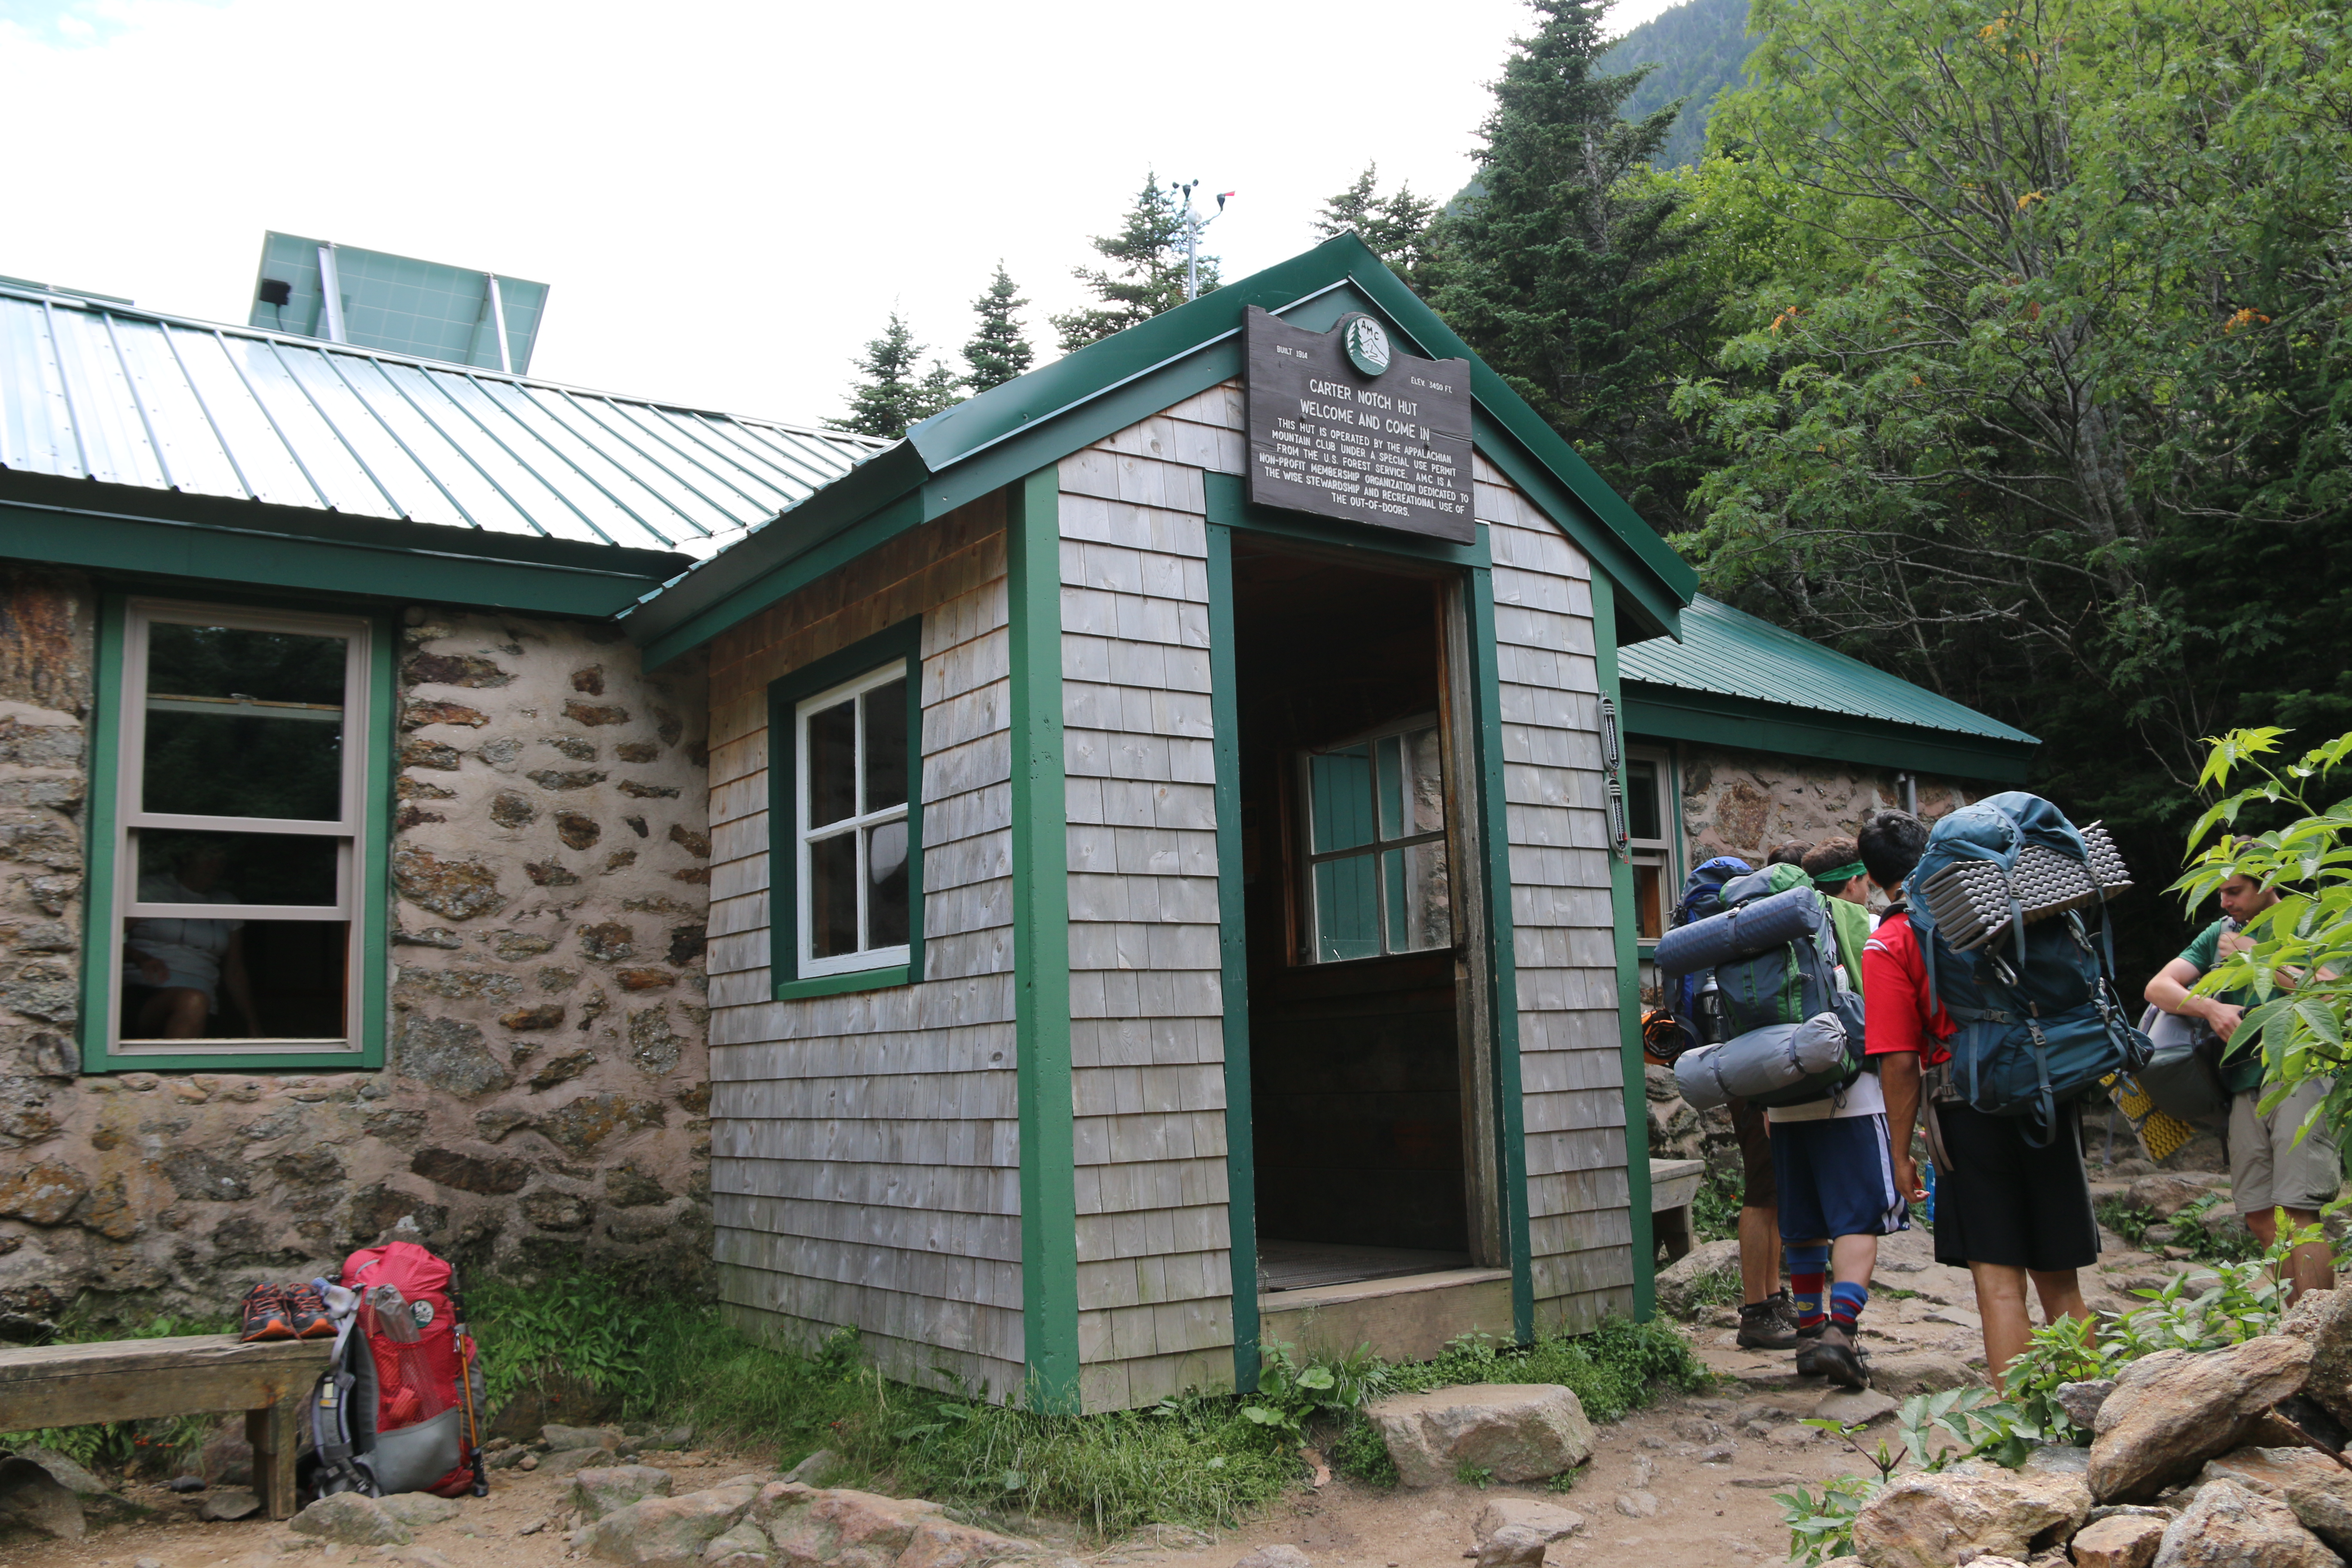
Carter Notch HutOn the Tranquil Mountain LakesTranquil Mountain Lakes from Carter Notch Hut
We had a lovely time at this hut. The crew at the hut was fanstatic. I suggest carrying some cash with you for some of their treats and meals. Our first step into the hut was like stepping into grandma’s house. They were cooking chili for dinner, had brownies and lemonade. My mouth still waters thinking of the smell. Miss M was up by the time we hit the hut and ready to eat anything and everything insight.
She enjoyed her sandwich while she talked and entertained the crew and two hikers we met way back at the trail junction at Carter-Moriah and Zeta Pass.
Miss M eating her sandwich at Carter Notch Hut
The Carter Notch Hut is a perfect place for overnight stays, water refills, bathrooms, food and rest. The above pictures should help you grasp the beauty. You probably want to book ahead for a stay and dinner or you may find yourself without a bed and seat. This link, here, should help you.
After our visit at the hut, we carried on back to Route 16 via Nineteen Brook Trail. After, Carter Notch descent the rest of the hike is pretty easy. The only thing you will may face is your mind kicking in asking when you will be done. Well, you have over 3 miles to go. So, use your break wisely.
On our descent, I needed some time to reset my mind, so I played some low volume music for myself and J. Well, after 3 songs, “Days Go By” by Dirty Vegas came on. I had the iPhone player set to random, I have over 2k songs loaded. I have a membership through MegaBoon.com, 10 cents a song. It beats iTunes, if you aren’t in a rush for the song. Anyhow… the proceeding conversation took place…
“Days Go By” by Dirty Vegas comes on …
J: Hey, do you think there is a Moose out there bee boopin to this song? You know, eating it’s dinner and dancing?
Me: Yeah, I am sure. And there is a Squirrel right next to it enjoying a nut.
J: Oh really, you watched “Rocky & BullWinkle”????
Me: Yes, re-runs…
J: I wonder if M would like it.
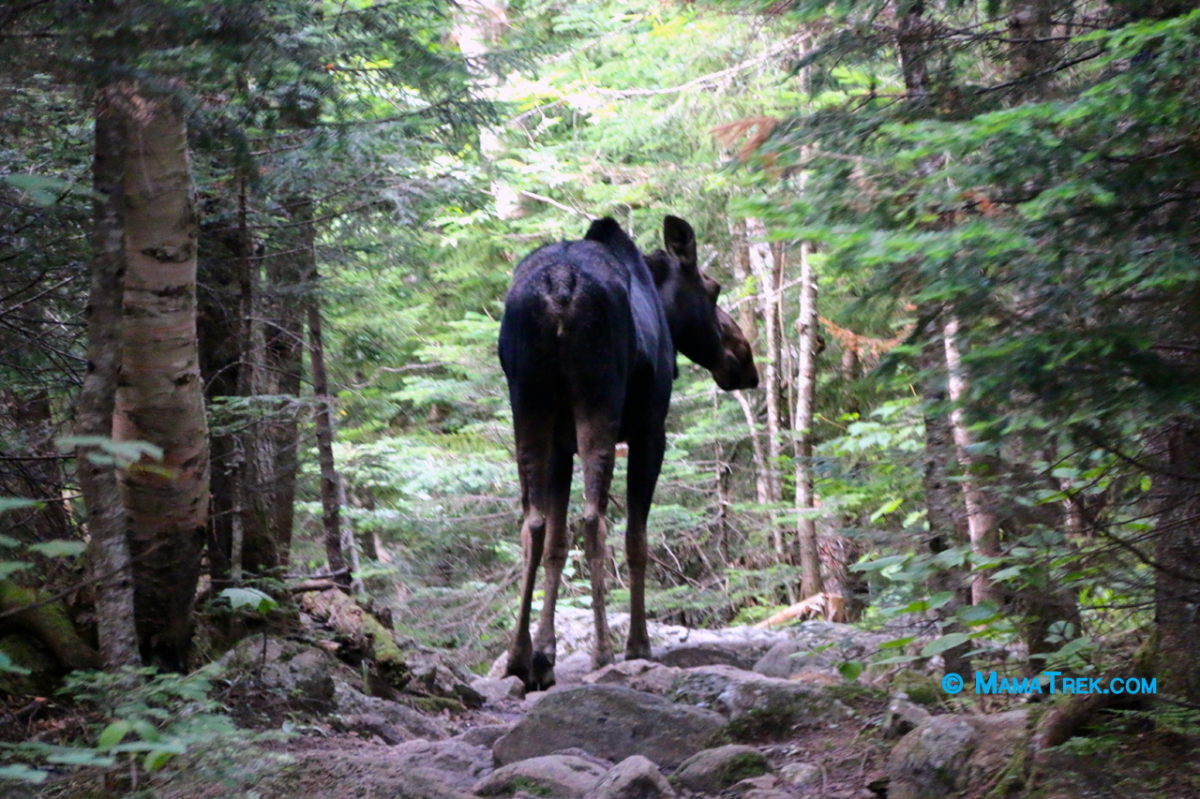
A few minutes pass on the trail then I get the hand signal to turn everything off, quiet Miss M and stay put. I am thinking is crap we crossed paths with a momma bear and cubs. But no, this beautiful animal walked right on the trail like she heard our conversation.
Cow on the trail
Well, we had nothing to do but play “follower the leader”. She led the way for about a half mile then went into the forest to the right. Not far off the trail, we heard her walking and then eating. What an incredible sound. We hung out for a bit. We didn’t know if she had any family in the area. But in about 4 minutes, she walked back on the trail and lead the way for another quarter-mile before turning off into the woods.
I got nothing. I am Irish, but this luck is purely beyond that. I am amazed but the cow’s actions and honored that she stepped out on the trail. We let every hiker we knew traveling up the 19 Brook Trail to be alert for a moose. We are not sure, she crossed paths with them or not.
After another quarter-mile, we crossed paths with a squirrel in the middle of the trail. Yup, you got it, sitting there eating a nut.
Rocky eating its acorn, in the middle of 19 Mile Brook Trail
I got nothing, again. But I do know J cannot say he never saw a moose or a squirrel eating an acorn.
But, in all seriousness, when you hike down from Carter Notch Hut is basic and very pretty. This trail will lead to back to the first bridge crossing. The location of my first suggestion for a break.
If you hike the trail in the latter afternoon, I suggest keeping an eye out for whatever wildlife that may cross your path. I never would have thought a Cow would just walk out of the woods and hang out like she did.
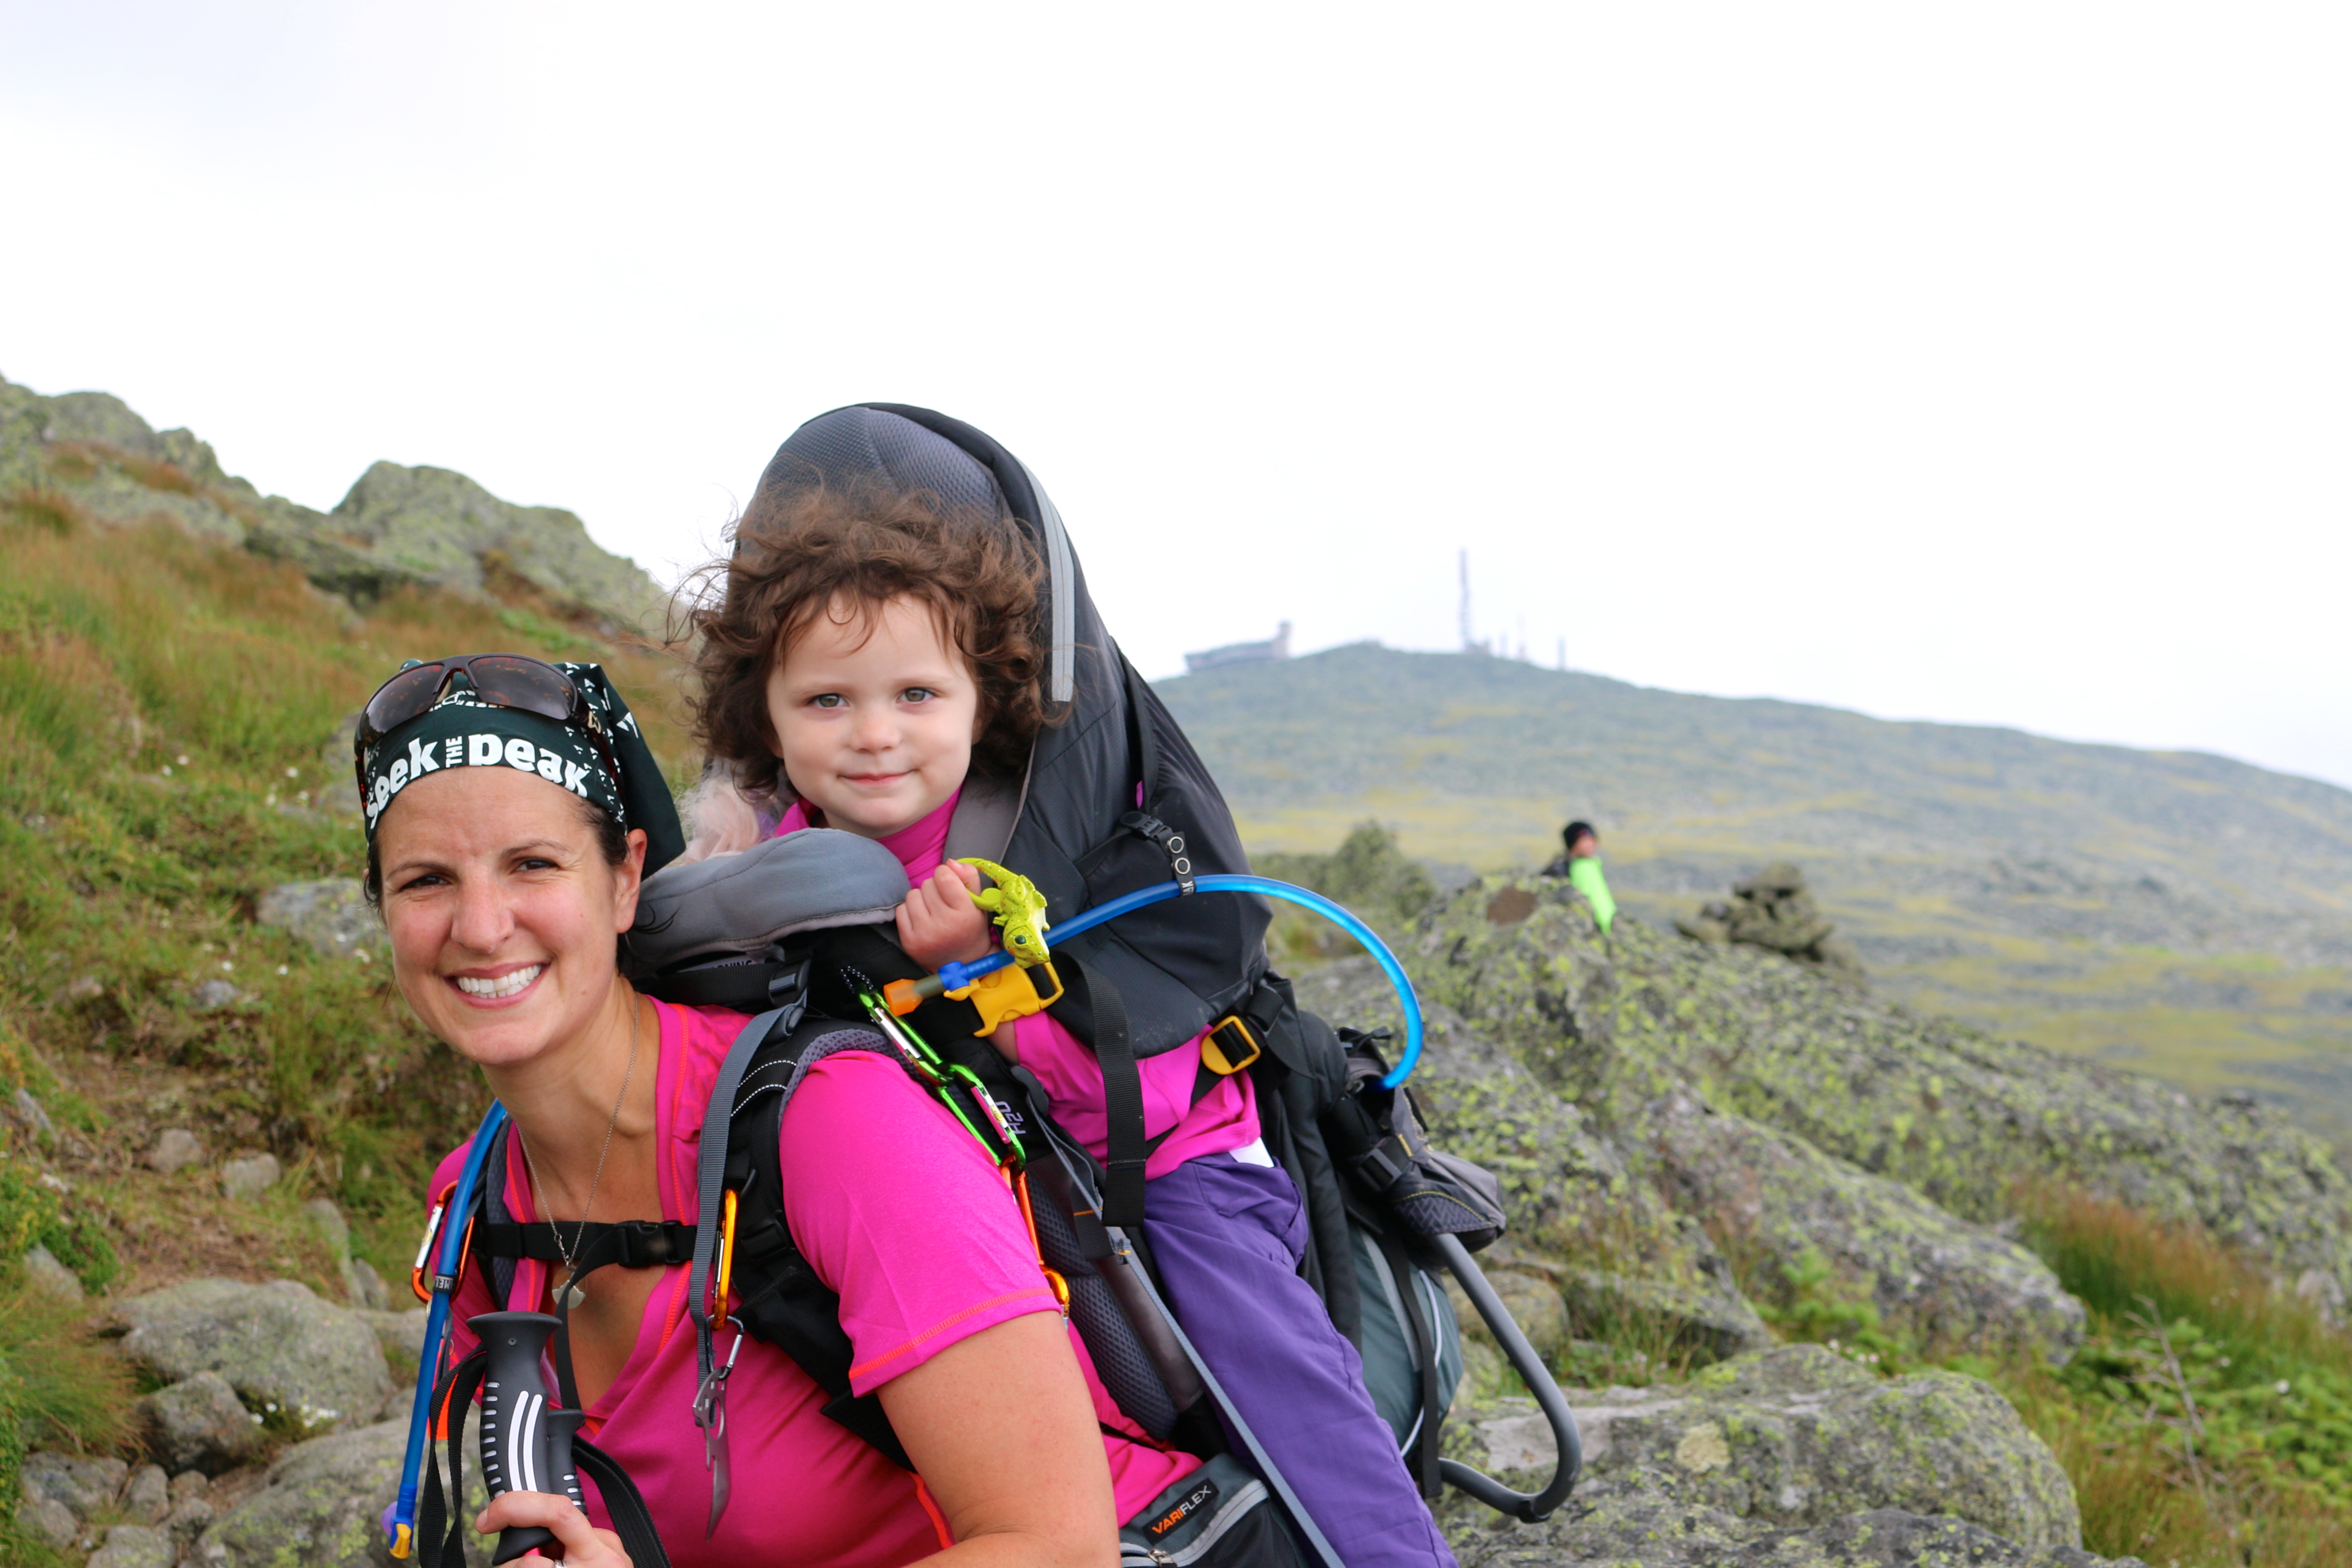
First off, I want to say congratulations to everyone that helped make “Seek the Peak” such as wonderful event. We enjoyed our time on the mountain and had a wonderful time that the events put on. So, thank you. We will definitely to do it again next year. And to all those that donated, thank you!
I recommend this event for any hiker looking to be part of something, this is a great event to take part in. You can check out more about “Seek the Peak”, here
Here’s a quick rundown of the event;
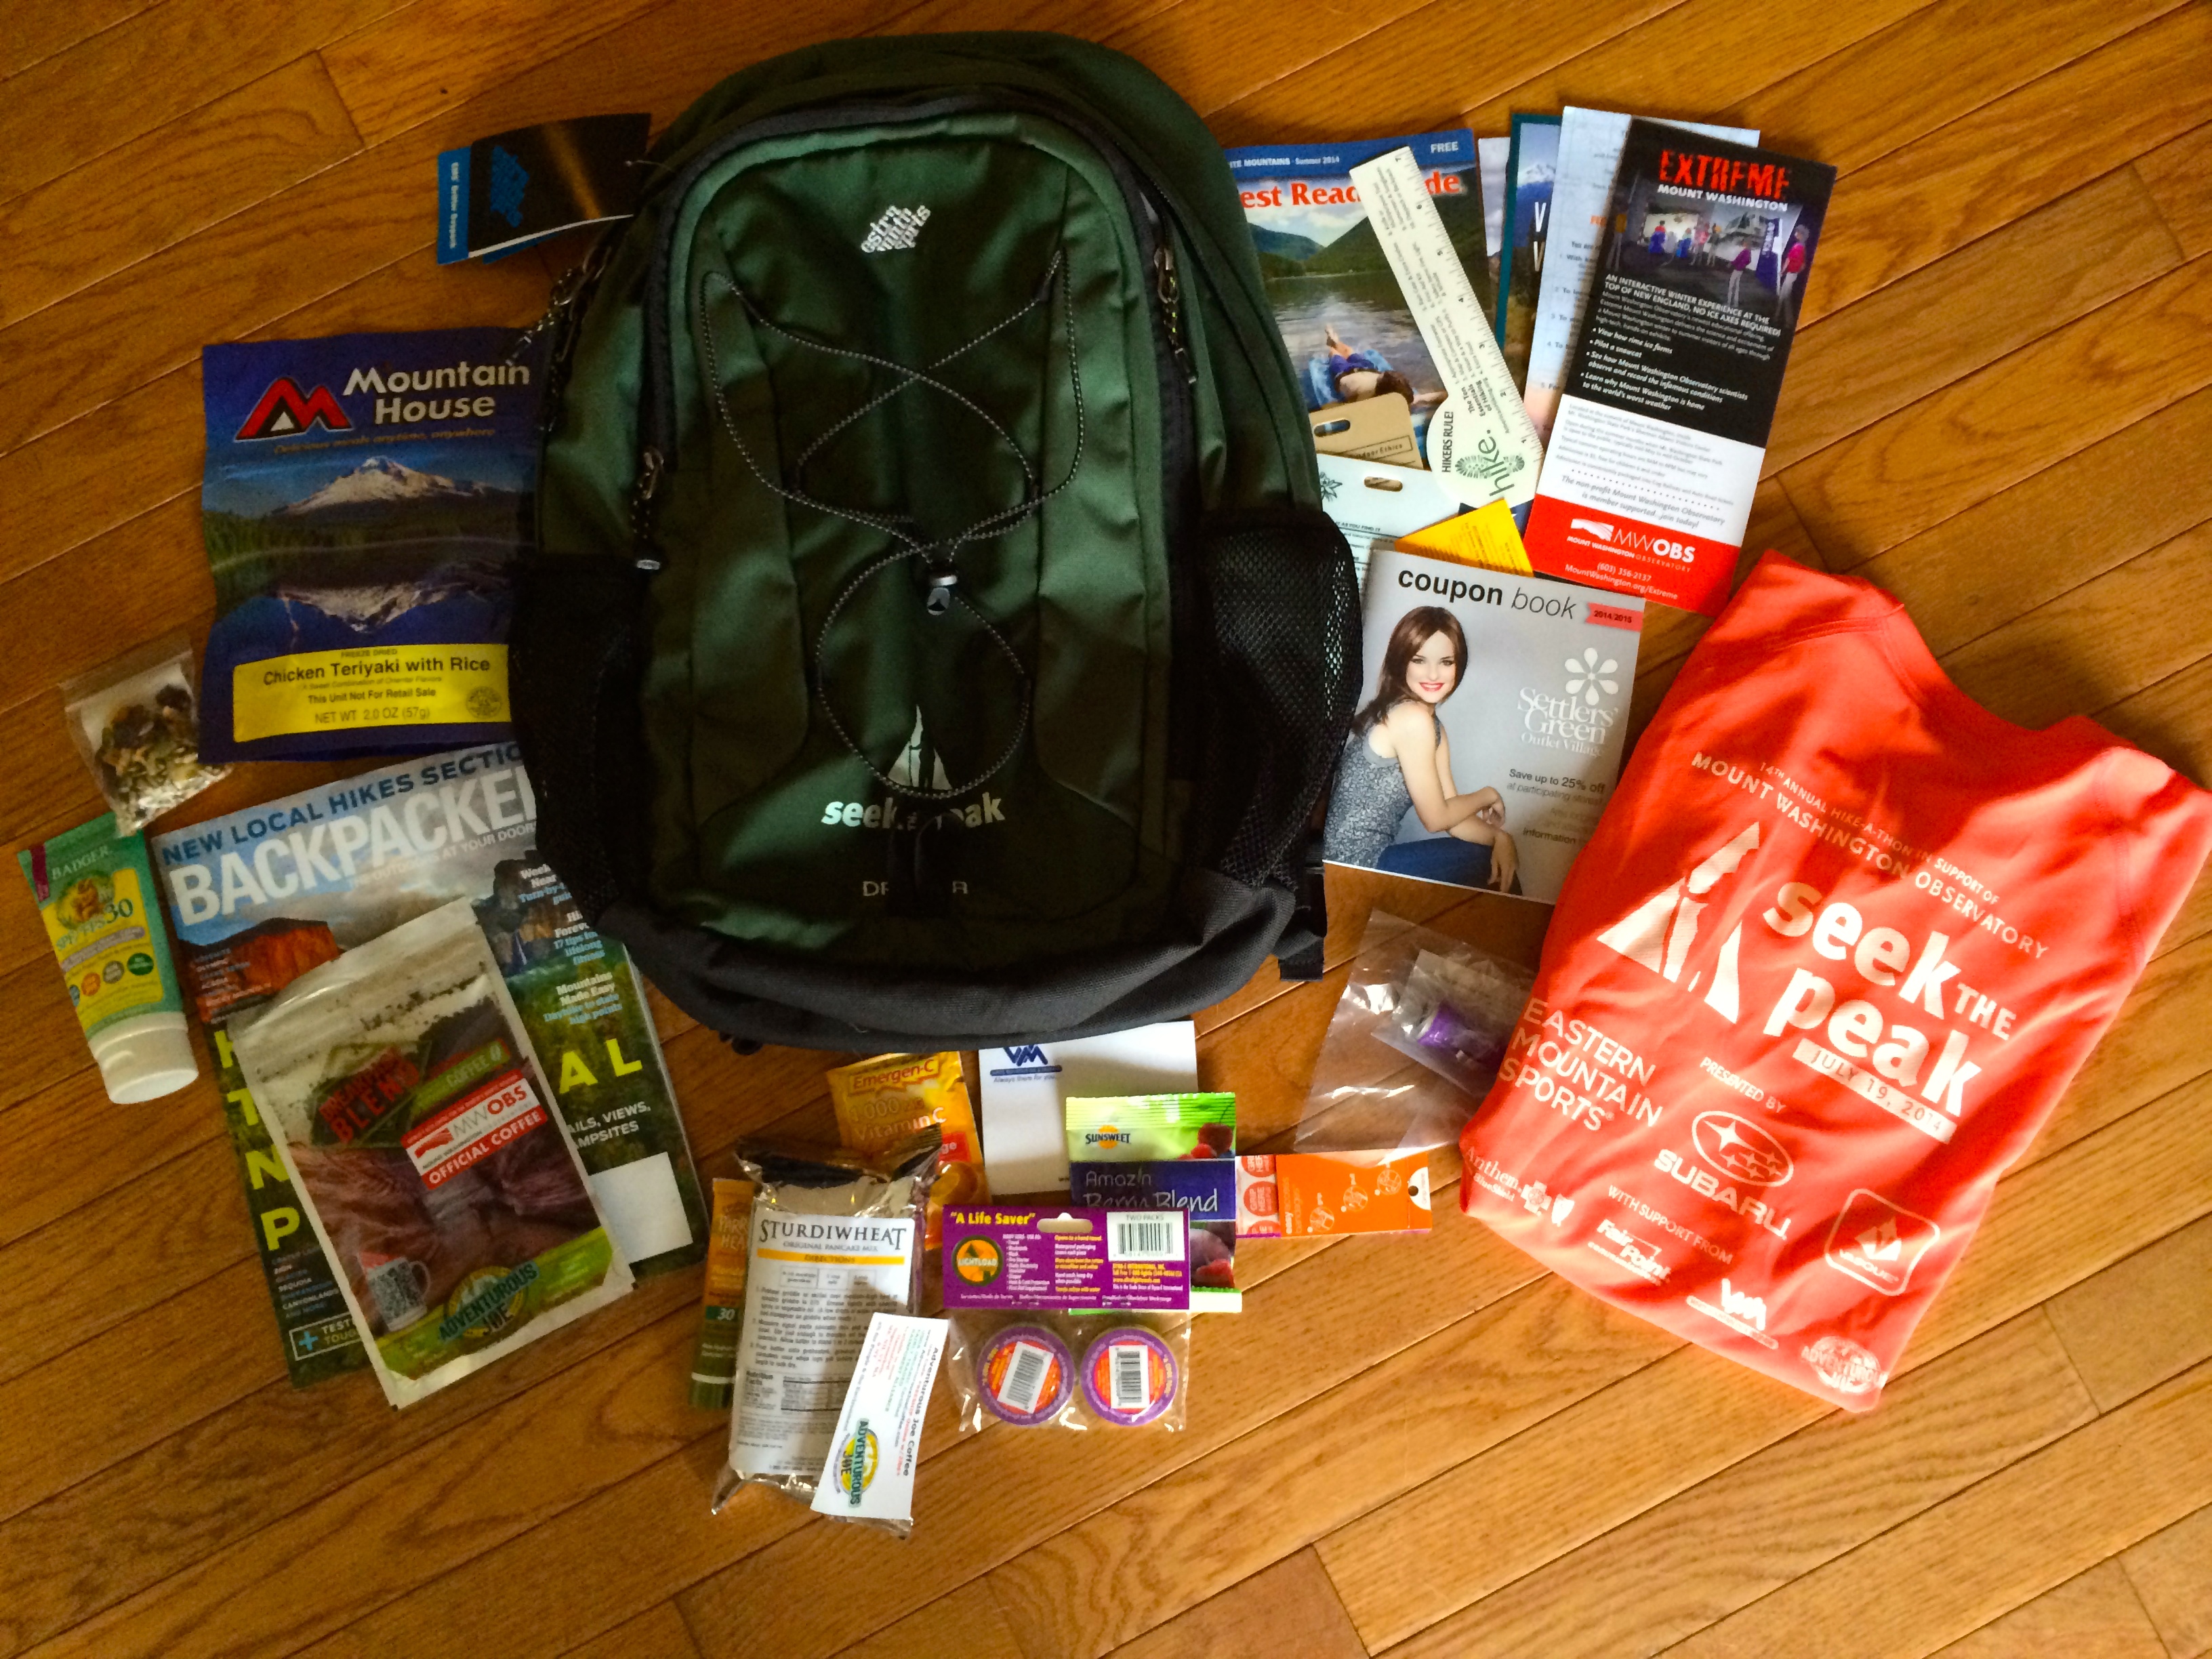
The night before your supported hike, you get to pick up your goodie bag if you meet the minimum goal of $200.00, similar to that of a runner’s packet for race, but this goodie bad is loaded.
Goodie Bag from Seek the Peak
When you pick up your bag, you will have the opportunity to spend time at the Mt. Washington Observatory Weather Discovery Center, have some food and meet with seasoned hikers to help you decide what trail is best. It’s a great Kick-Off Party. You will be asked about which trail you plan to take and reminded to sign in and sign out at the trailhead with the “Seek the Peak” personnel.
The after-party is the same day of the hike and located on the east-side of mountain in the Mount Washington Auto Road entrance. This is the place with free food, raffles, vendors, etc. Just remember to bring you wristband that you receive when you pick up your goodie bag. 🙂 We didn’t spend too long there, since we had our daughter. After a long day of hiking, it was time for downtime and bed.
We decided to travel up the west-side of the mountain to the summit via “Jewell Trail”. The Jewell Trail is one of the longest trails up Mount Washington. You can find some more information on the trail, here. It is one of the easiest trails up to the summit, but we find it also the safest. An added benefit is that we have hiked this path before if poor weather or clouds came in, we had a good understanding of the terrain.
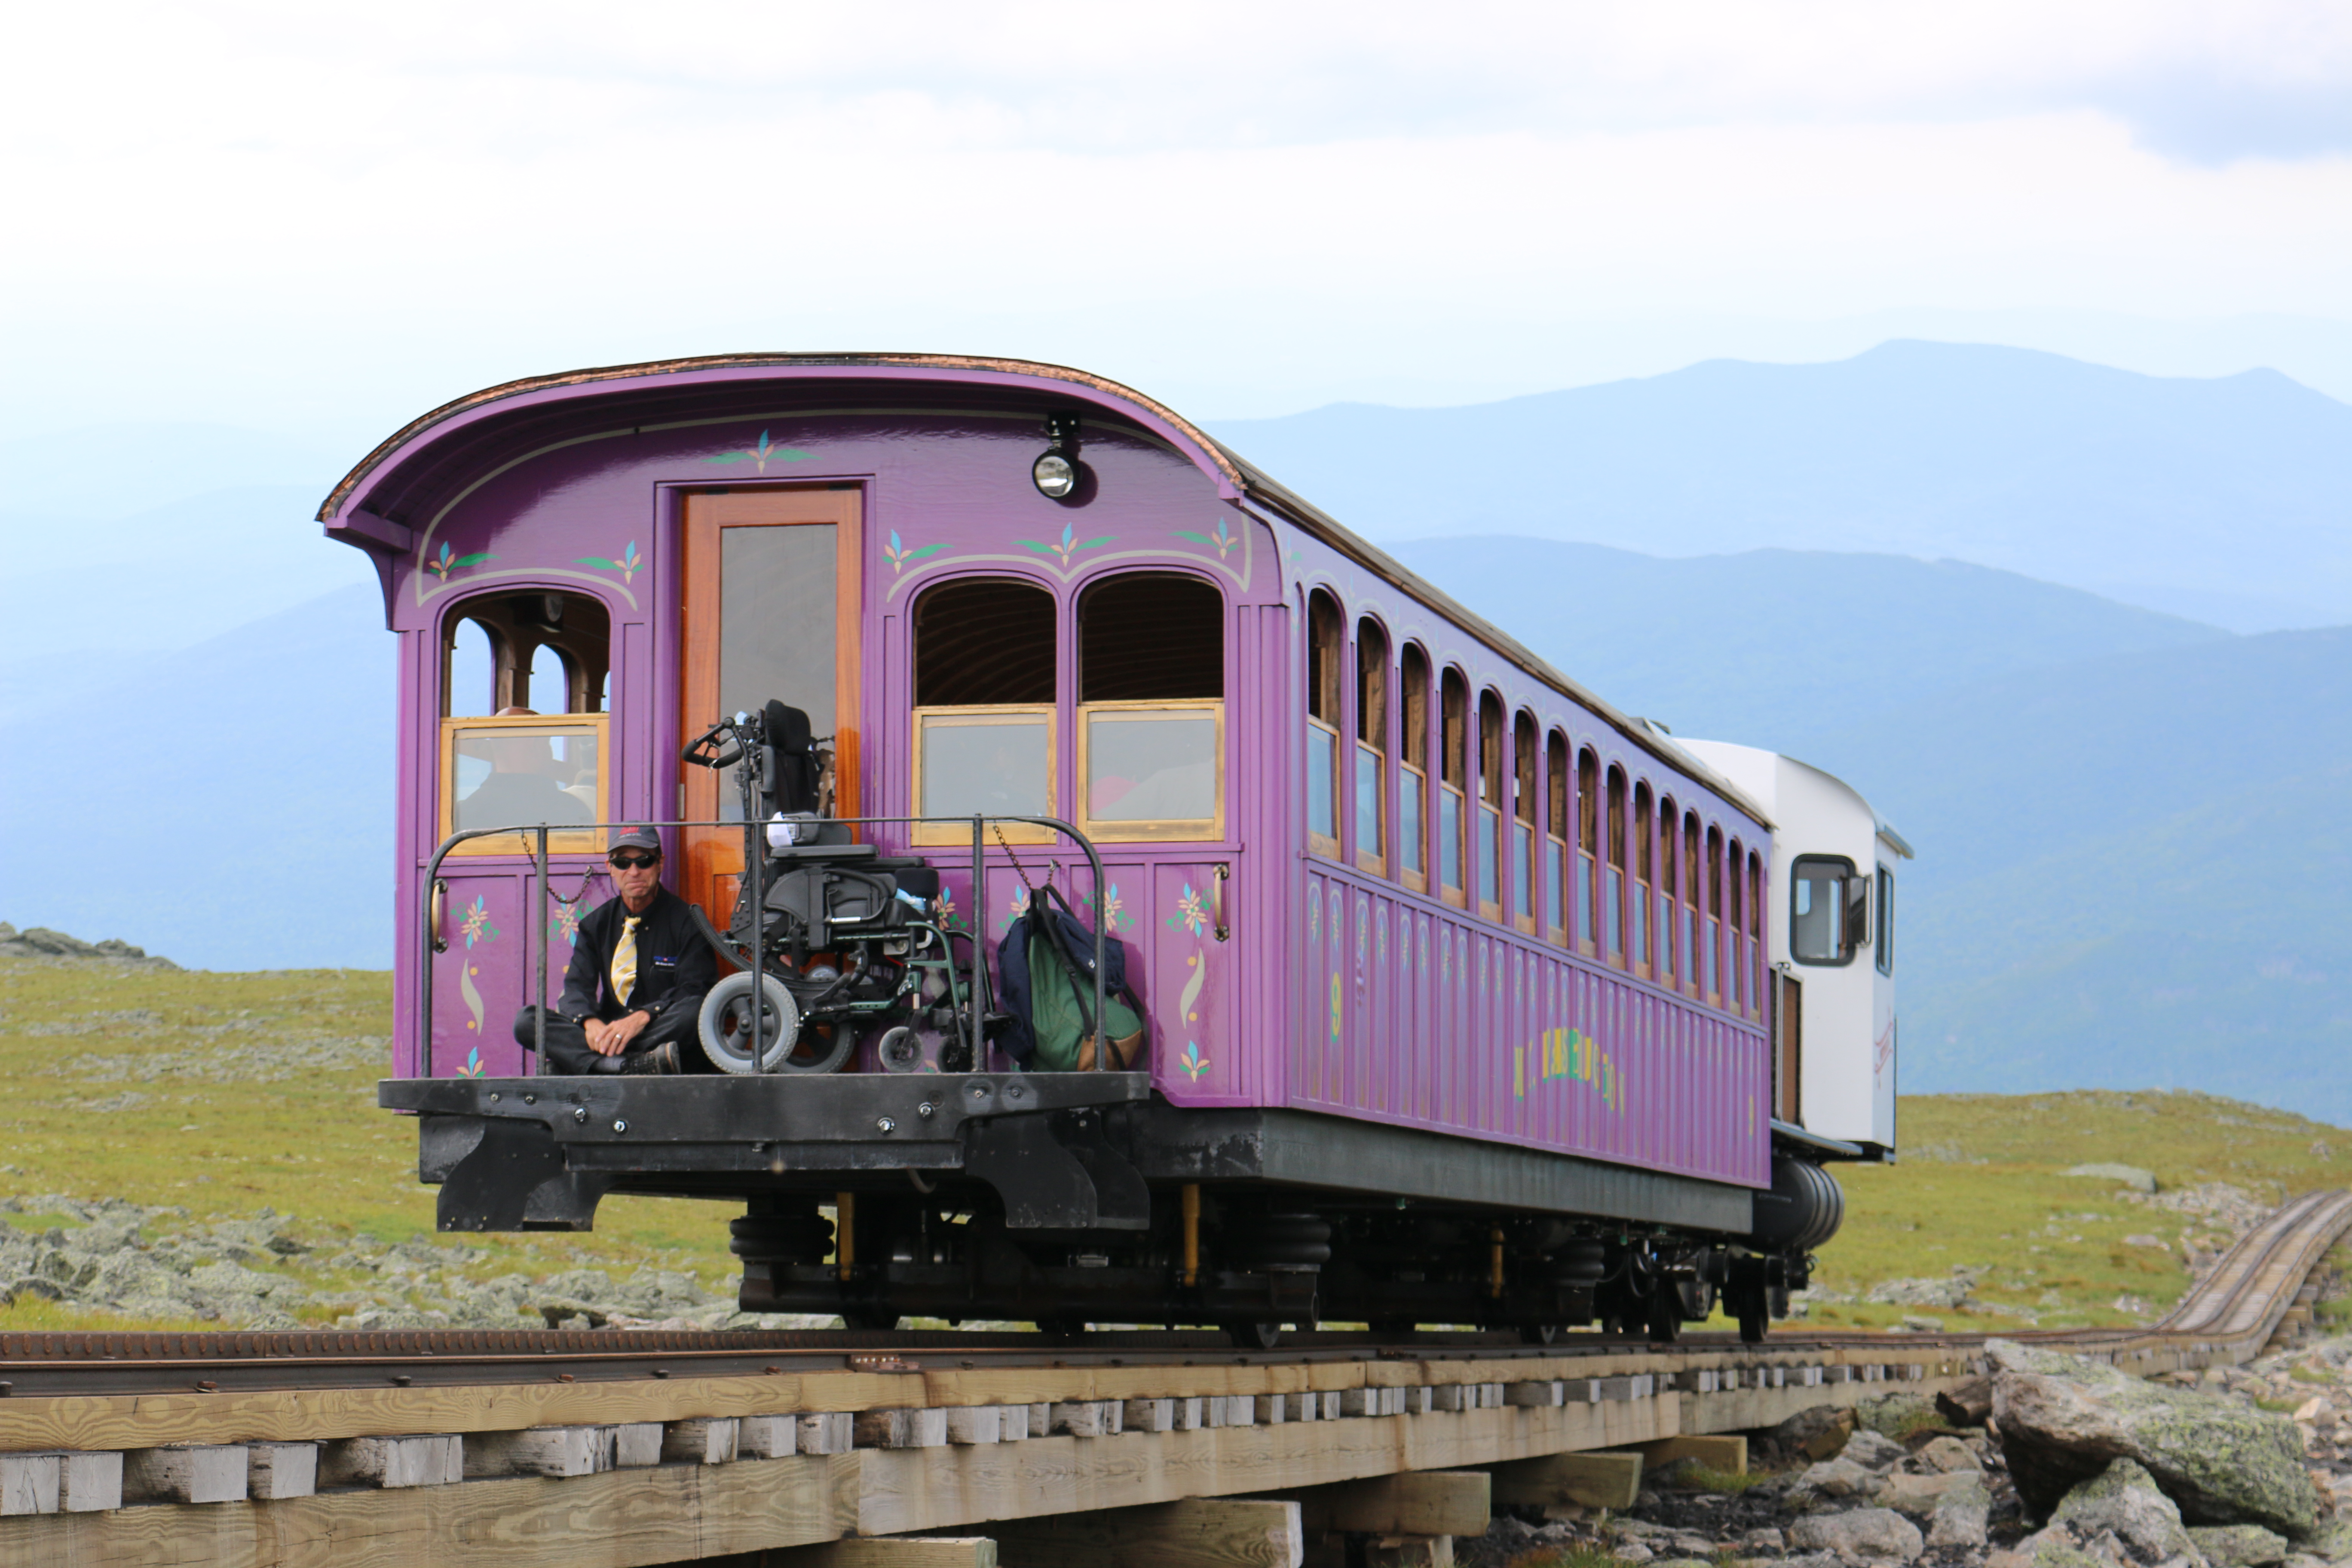
The trailhead starts across the tracks of the Cog Railroad. This is one of the other benefits of hiking this trail, if needed you can take the Cog Railroad down to your car. It is a little pricey, $45 per person, but worth it. Just remember to bring some cash with you. There is an ATM, but it does run out of money. 🙂 The Cog Railroad is another great piece of history for the Mount Washington area. Here is a link to their website. You can use that site for directions to the trailhead.
The Cog Railroad, Jewell Trailhead
One of the big changes, that I love with using this trail is that parking for hikers is now free. As you approach, the Cog Railroad you will see a sign for “Hiker Parking”, use that. If you drive up to the Cog, you will have to pay for parking. You can looking at a 3 to 5 minute walk depending on your pace to the trailhead.
Again, the trailhead starts across the tracks, look for a staircase going down and cross the tracks. Just look out for trains. 😉 The first thing you will have to do is cross the Ammonoosuc River. It’s easy, just use the bridge. You will start climbing rather quickly, but at a moderate incline. Around the first mile, you will cross over Clay Brook. The climbing up is rather easy, it’s a good workout but not strenuous. When you start your first switchback, you are about half-way to breaking the tree-line.
Heading up the Jewell Trail
As you approach, you will know you are about to break the tree-line when you see a nice little area on your left with a log bench and small fire pit. This is a great location to stop and take a break.
Break time for Mom & Nap time for M
I may look pretty tired, but I am actually getting focused for when we break the tree-line. I have a love-hate relationship with spending time above the tree-line. Minus the direct exposure to weather, I have a little trouble with heights. Yes, I know one would figure I would find another hobby. Well, that’s not me, I am the person that takes my fears head-on. This is one way to do it and its step one in the process of reaching my goal.
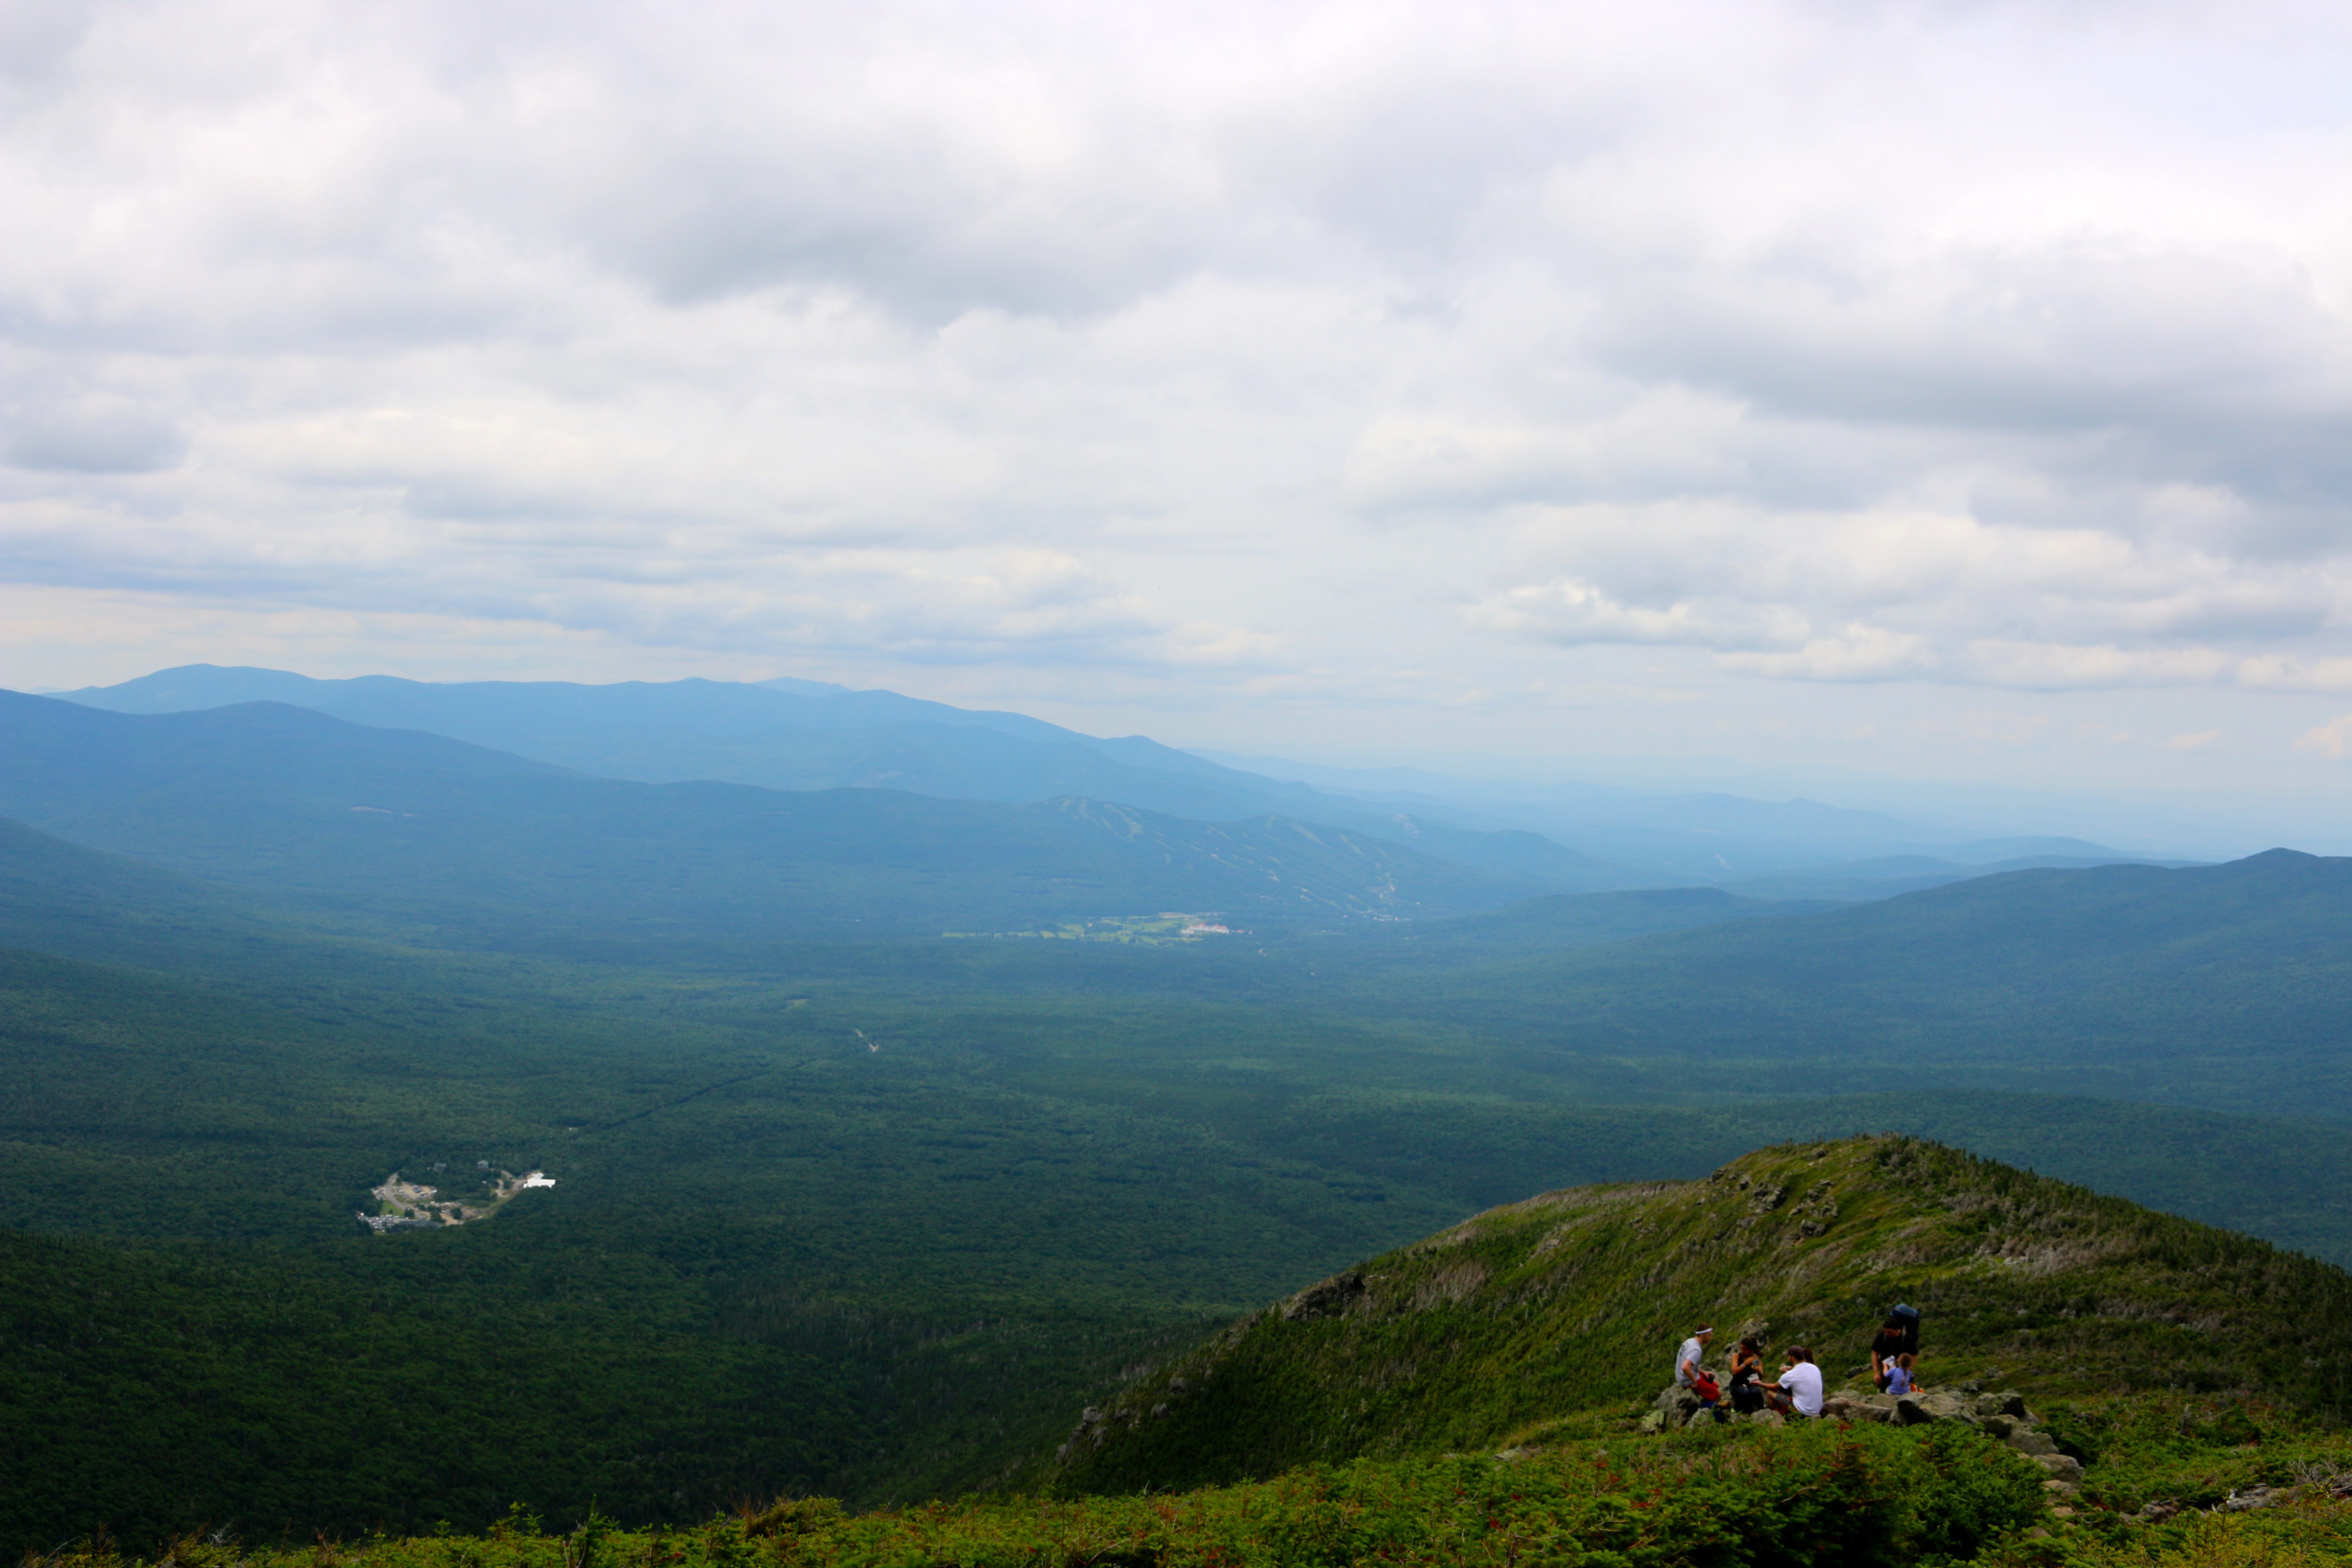
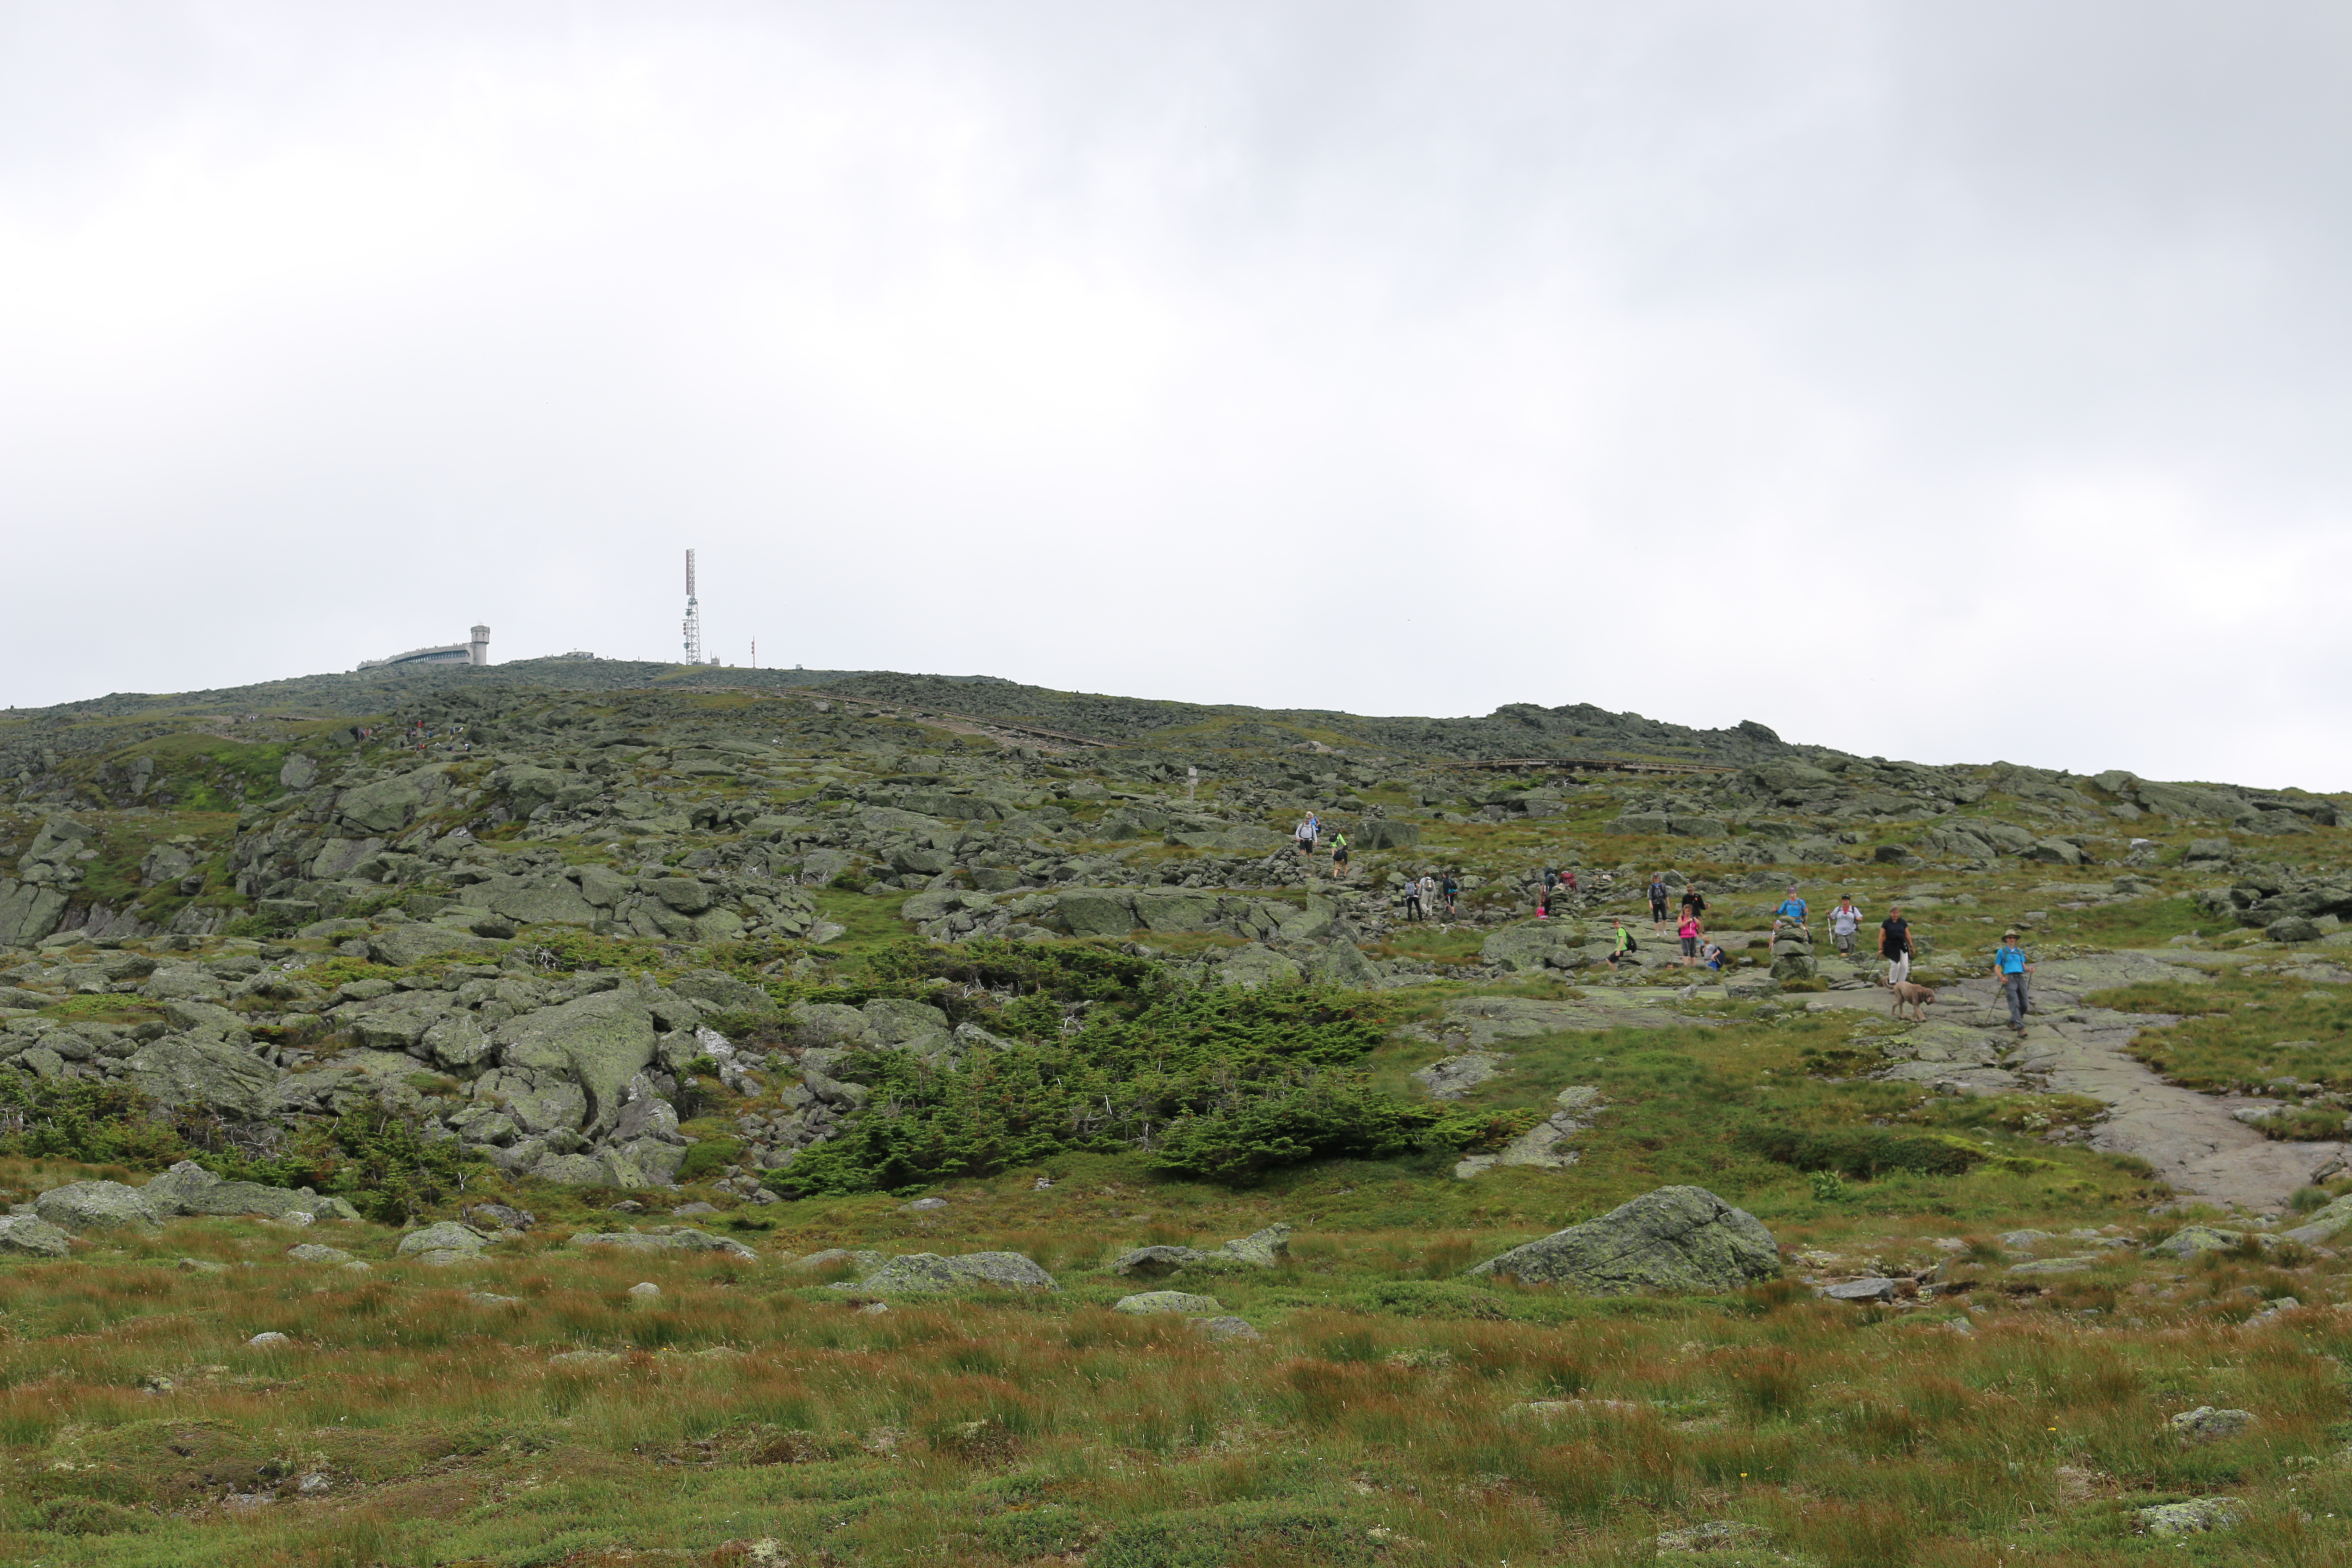
When you break tree-line (around mile 3) you will get to see Mount Washington to your right, it looks like it across the way, it is, but you have a few more miles of climbing before you are standing on the observation deck. For your second view, you can turn around and see the Cog Railroad, where you started.
View back down to the Cog RailroadM & me with Mount Washington in the distance
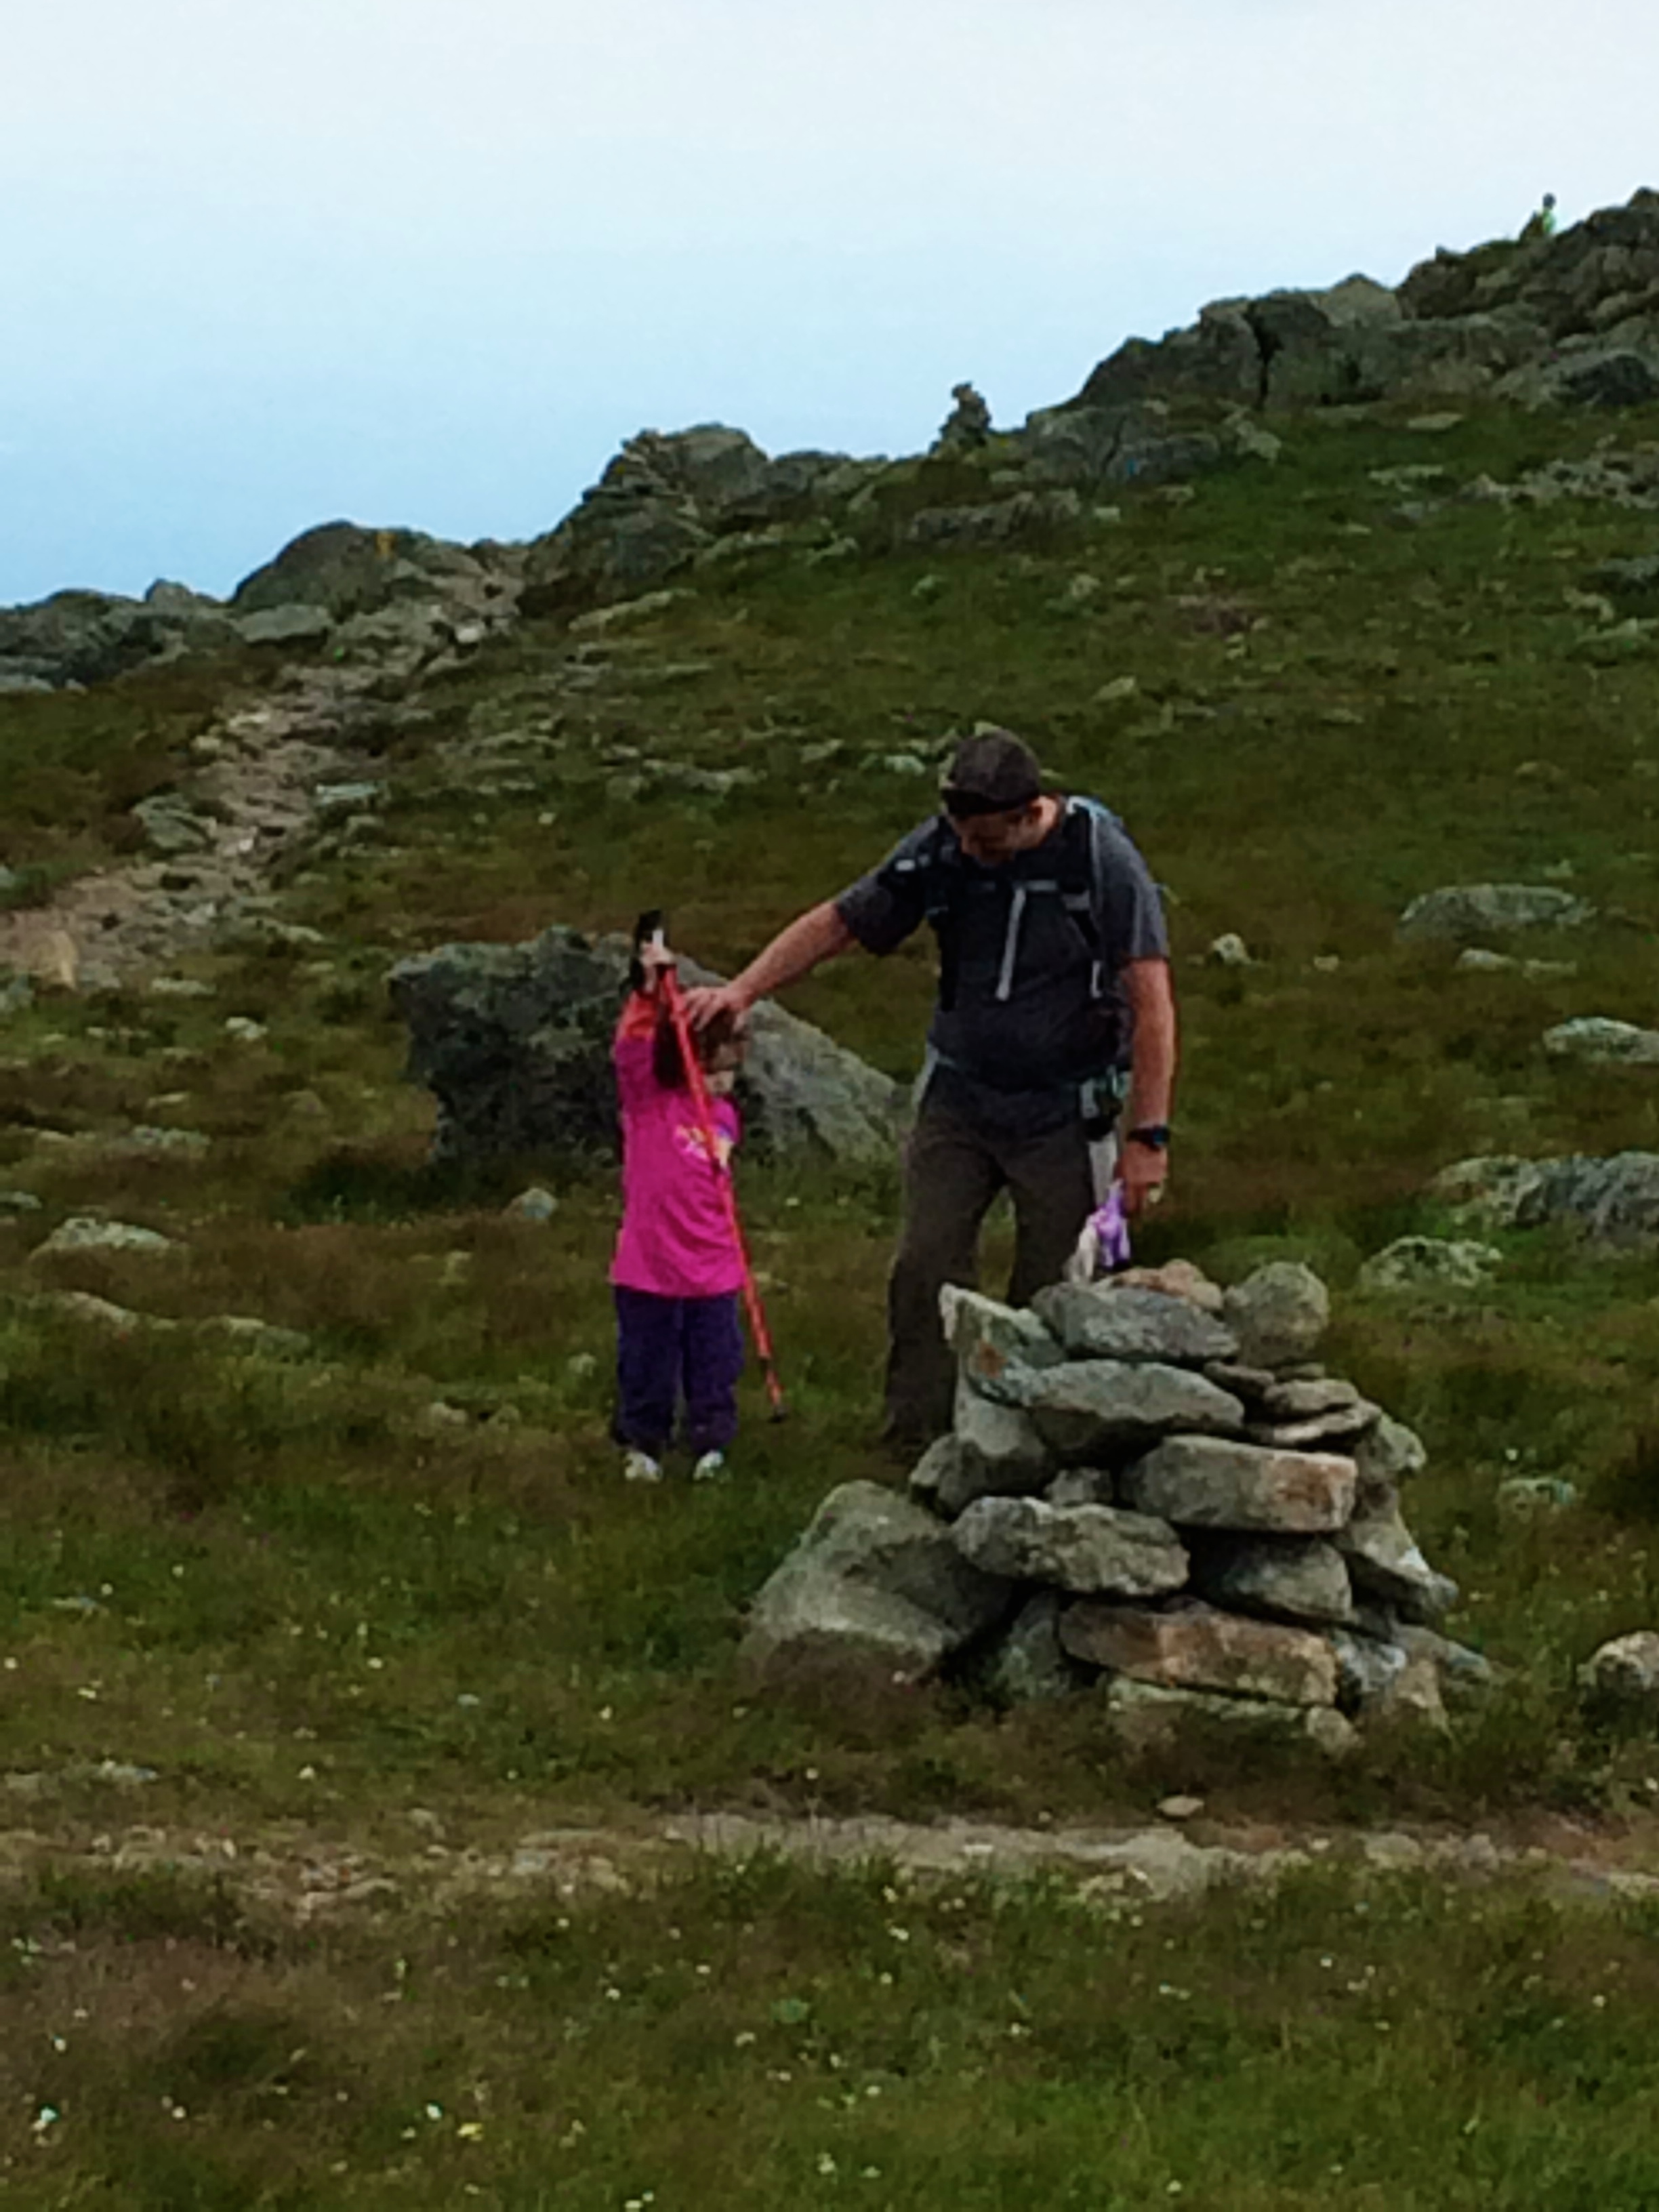
This section of the trail is rock to rock, with some small areas of earth path. Keep to the trail by following blue trail markers and cairns, also read your trail signs. The Jewell Trail will “end” and you will follow the Gulfside Trail (AT = Appalachian Trail). There is a nice large flat-ish area after the Jewell Trail ends and you pick up the Gulfside Trail its about 0.3 miles from the end of the Jewell Trail. Below, is the trail junction sign, this is where we let M out to play for a bit. Excuse the bee, M decided to bring it along this with “Navigational” Pony this hike.
Trail Junction Sign, location of playtimeView from playtime area to Mount WashingtonM practicing with Dad
There are few paths you can take to get to the summit. We took the Gulfside Trail then followed the Cog Railroad up to the summit our first time. This time we followed the Gulfside Trail, crossed over the Cog Railroad and connected with Crawford’s Path and up to the summit. The views looking out from the trail are amazing.
View over my left shoulder
As mentioned, you can hike along the side of the Cog Railroad or across over the tracks. Just be aware of the trains.
Cog RailroadCog on its way down
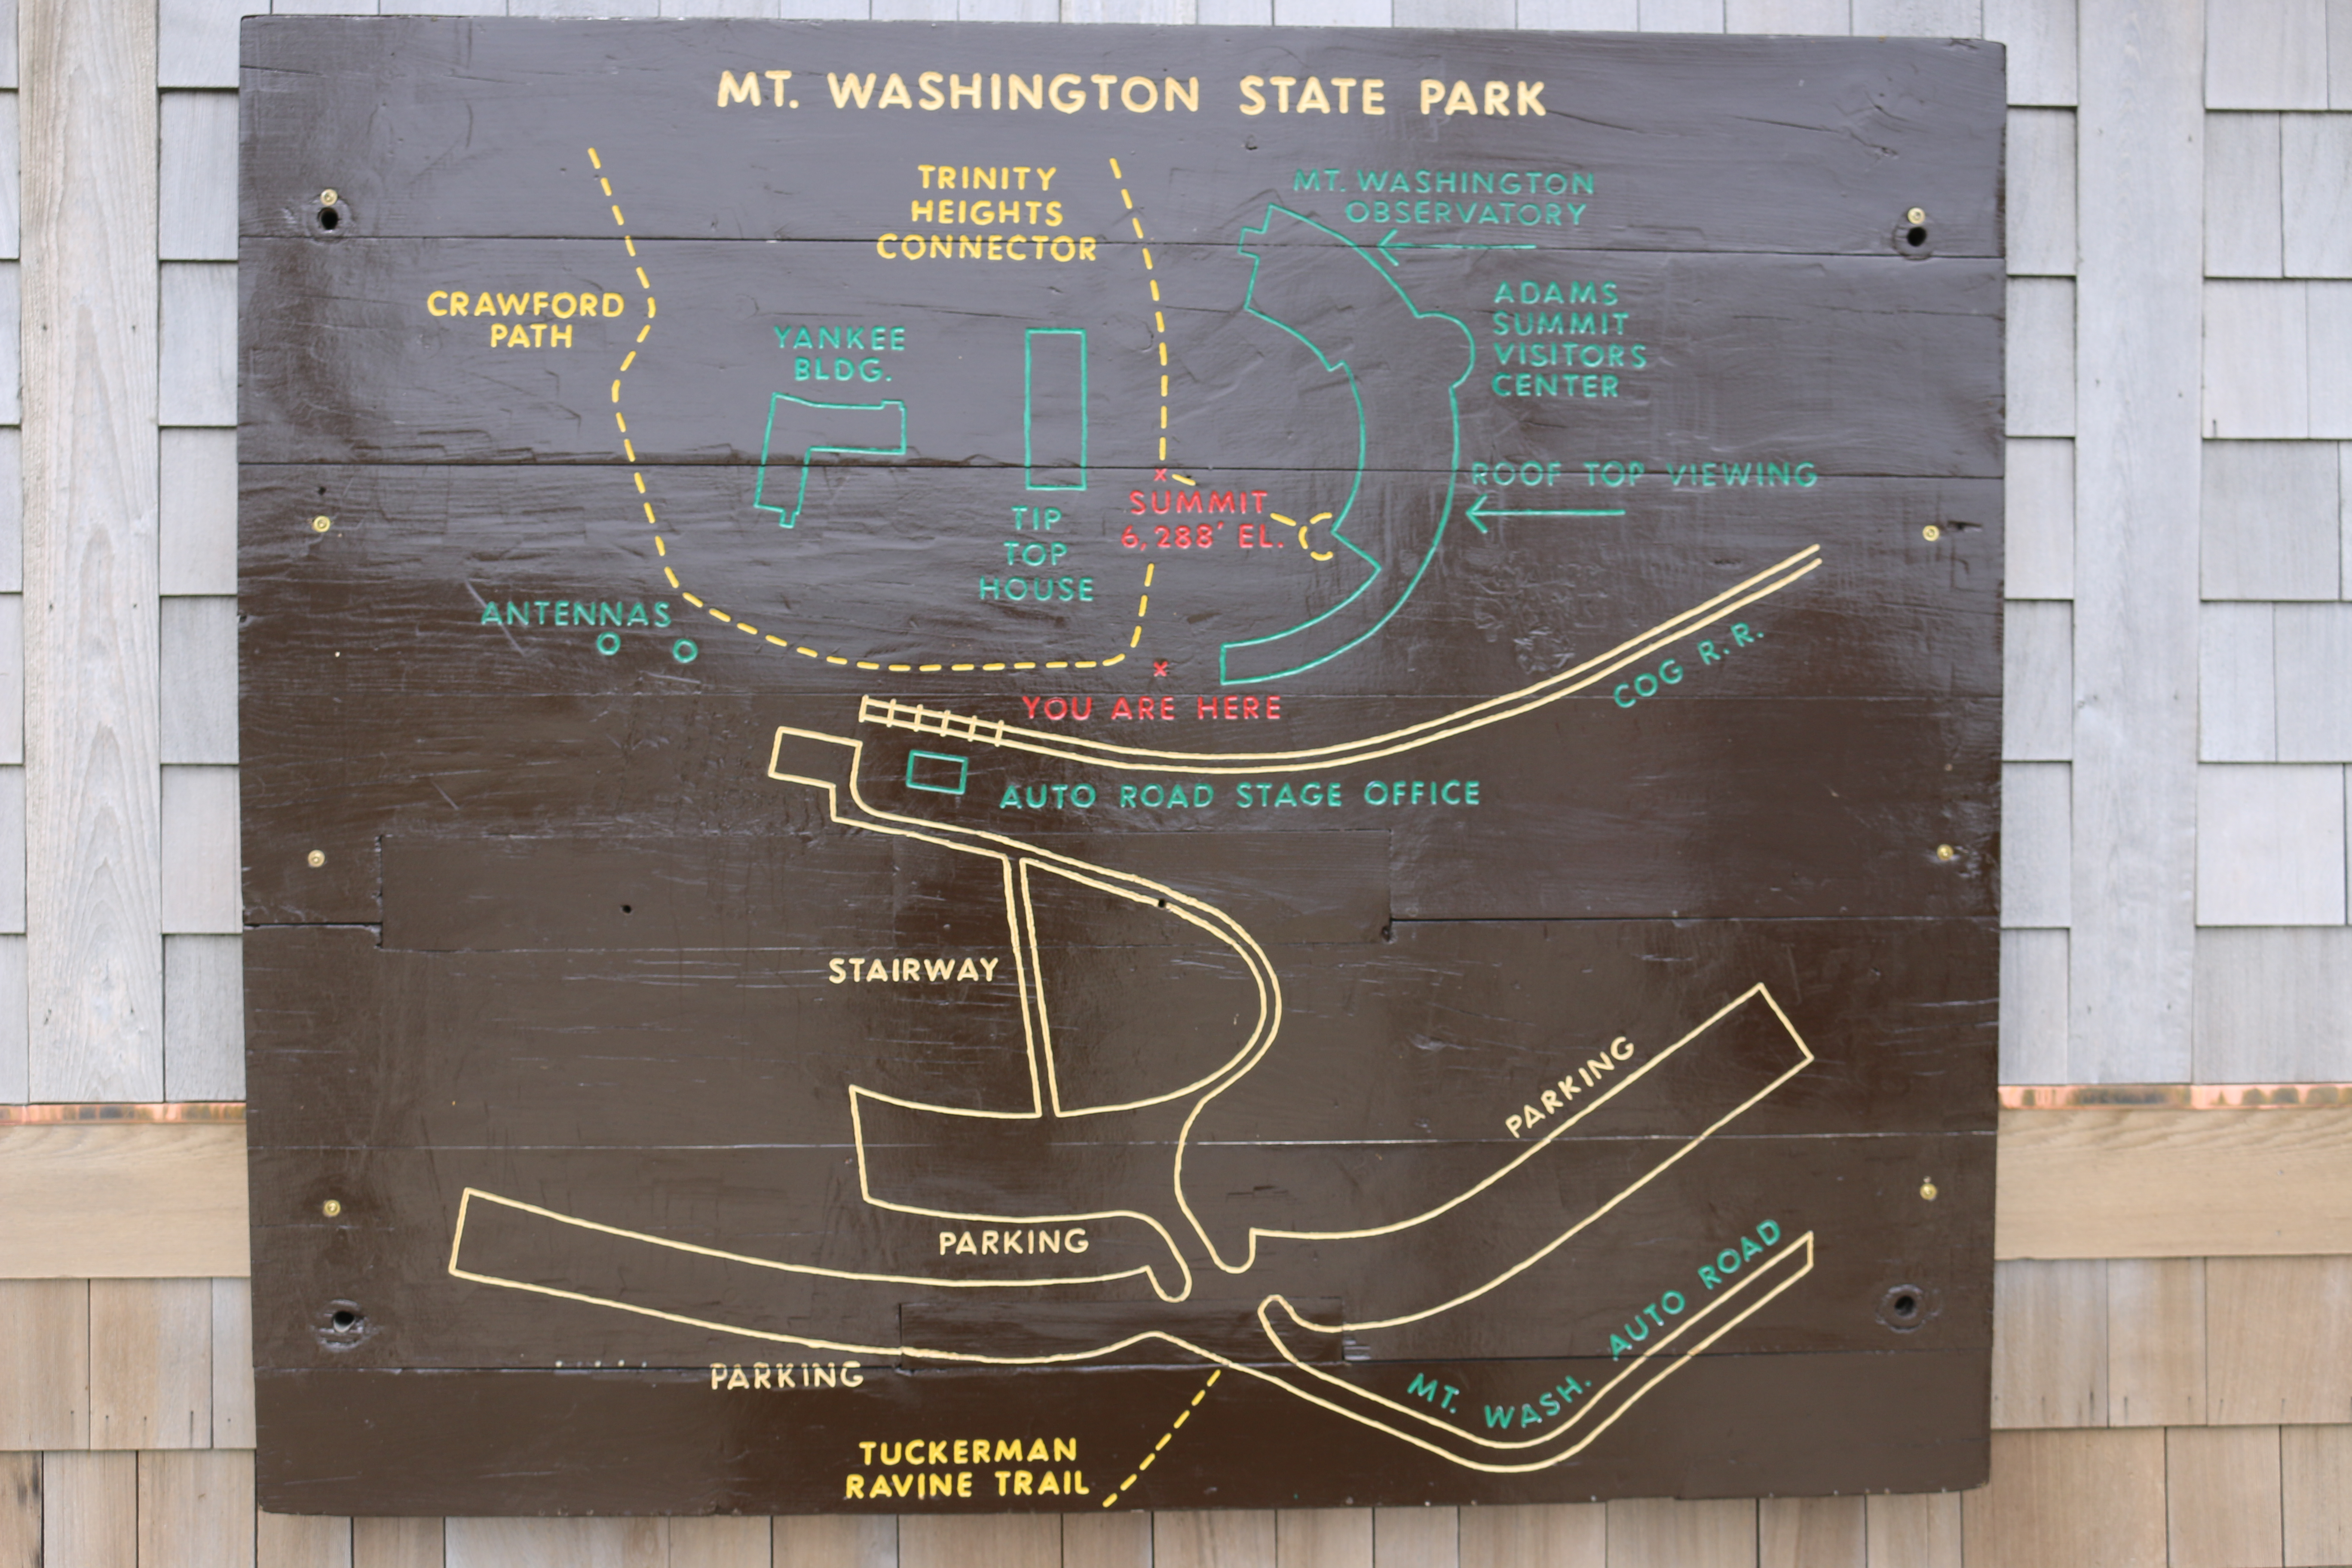
At the summit of Mount Washington there are various locations to see and do, such as, the Tip Top House, Sherman Adams Building, stop by the Observation Deck, of course get your picture at the summit post. The Sherman Adams Building is where you will find a gift shop, cafeteria, Post Office, bathrooms, location to purchase your cog ticket (if needed). Some areas at the summit are under construction, but this does not affect what they have to offer. You can find more out at this link.
Here are some images for the summit
Crawford Path MarkerMt. Washington State Park Map
Just a closing note, inside the Sherman Adams Building you will see a wall that lists out the causalities on Mt. Washington. You may start your hike on a clear and sunny day, but half way through or during your time at the summit a front or low clouds may come through. Please, check here for Mt. Washington summit weather. You can also find a weather report twice an hour on New Hampshire Information radio station, 95.3 FM.
No matter what, be prepared for anything, have plans and routes for bad weather or injury. Be smart, you don’t want your name added to the list. Plan smartly.


