I'm a runner, hiker, mother, wife and dog owner of a GSD and Malinois. I have been hiking with my daughter since she was 6 months old. She has summited 25 mountains over 4,000ft, including Mt. Washington in NH. I've have ran over a dozen half marathons and numerous shorter distance. I have taken my little one on many long distance training runs. Some where between all that I graduated with a BSBA in Marketing Management and Information Technology.
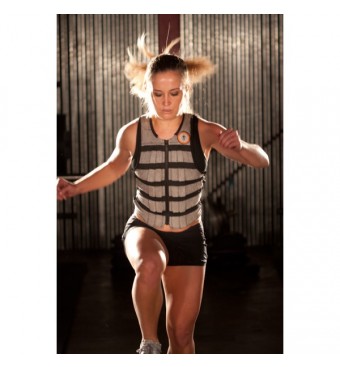
After several weeks of researching for the correct weight vest, we went with the Hypervest. I say, we because, I really relied on J to help with making this purchase. J knows some things about carrying weight, running with weight for training, and carrying weight in real-life situations. Instead of reinventing the wheel, I did the smart thing and welcomed having the extra knowledge and help for this purchase. It has completely paid-off, I couldn’t be happier with this weight vest.
I have been using the Hypervest for 5 to 6 years and I have absolutely no complains nor does J. You can check them out, here. I love them for several reasons. Here is why:
Zips in the front, for easy on and off. There are days I don’t want to have to un-clip this then that. Pull over my head or pull off over my head. It’s just like zipping up your jacket. Well, a jacket that is just a “wee-bit” heavier than the jacket in your closet.
Sides have drawstrings with locking mechanisms that help secure the vest. This is helpful for many reasons, especially with running. The drawstrings help secure the vest when you run, this means the vest is not bouncing up and down too much, which can lead to bruising. I say too much because, the vest will move like everything else on and in your body. You cannot prevent this, but it does limit the movement. This drawstrings create a comfortable fit and does so without extra effort. What I mean by the extra effort, once its set, its set. No extra effort for putting it on or taking it off. You don’t have to loosen the drawstring to take off or put on the vest.
Weight Plates are increments of 1/7 of a pound, which helps prevent injury and allows for proper muscle-building and cardio vascular strength building without over stressing your body.
Ease of adding and removing weight plates. It is a little tasking, as in, trying to rush placing in or taking out weights to get a workout in before your child wakes up from his or her nap. But if you plan accordingly that is not a problem. The plates slide in and our easy. With a little practice, you will be a pro.
Breathable material. The material isn’t like your wicking t-shirt, shorts, etc, but it allows for cooling and sweat better than vests. I sweat a lot and I have no additional issues with rubbing injuries or anything like that.
You can make the weight equal in front and back or when fully loaded there is more weight in the back. Again, this is to prevent injury. It is extremely helpful for keep form while running or doing whatever activity you choice to do with the vest. More weight in the front means you will be pulled forward. Think what they will do to your back muscles.
**Warning Female Reason** No problems with hurting the ta-tas. I have used this vest with Cs to DD cups. Yes, I used this vest when given the “okay” from my doctor after M was born. I nursed M until she was two. Hence, the range in cup sizes. So, yeah, no ta-ta pain.
As a side note, for those mother’s that are working out and nursing. Remember, that the body maximum level of lactic acid is 90 minutes AFTER your work out. So, plan feedings accordingly, some babies don’t have issues with the taste and some do. These issues range from refusal to nurse to feeding and throwing up. Just plan accordingly and read your baby. I fed M within the hour before a workout out then depending on M’s age within 10 minutes or after two hours after the end of the work. As an infant, M did not want anything to do with salty (sweat) taste or acidity as she grew she did not mind the salt taste. I never retried the acidity. There are just some things that aren’t worth the retrial as a parent.
If you want to be able to carry weight up a mountain, while running or in other situations then you have to train to do so. It’s really that simple. The advice, I was given was, “Start light move to heavy. Build your body first then increase your tensity of the work. Then add weight, adjust, increase intensity. Repeat”. Starting light means 5 to 8 lbs for about 5 or 6 workouts. Find where you need to start with the weight. Some women, maybe able to handle more weight ( 7 to 10lbs) simply because of the fluctuations of water weight during the monthly cycles. Remember, it may take two days for the workout to effect your body. Best advice, again start light move to heavy. I have lived by it and its paid off. I have carried 40 to 45lbs up and down mountain sides max miles covered in a single day has been 15 with rest periods of 5 to 15 minutes every 2 to 3 miles and a lunch break of 25 minutes. Also, I have carried 25 lbs on a 10 mile run at a pace of 830 minutes per mile. Getting to that point was rather grueling and definitely filled with my inner monologue going “WTF?!?! Just quit! Stop” and definitely other profanities. So, if you run into that saying (no pun intended 🙂 ) have a plan to fight through it. Mantra works, pick a distant object get there than pick another one, do the same with time, whatever works. Just know the difference between having to stop due to pain and that of mental/physical training barriers. If you are a hiker or backpacker. Getting a weight vest is helpful for training, especially if you can use the vest on a stair stepper or treadmill. The only true way to get your body to adjust to carrying weight up incline is to do so. The only other advice I have while wearing the vest is to make sure no matter what you are doing, running, walking, climbing, weight lifting, day-to-day activities keep your form. It is so important, if you don’t, you will have one heck of a sore back and maybe have additional issues. I have not had any issues in this area, since form as beat into my head from playing sports to dance classes. Make it a habit to check your form. That’s means even now while you read this post. What is your form like? Slouching over or are you stilling up back straight, shoulders over your hips? Stomach muscle engaged? Practice makes perfect. 😉 All and all another great product to help your train to the next level. I highly recommend it.
Put a fork in me, I am done. This was a hard week, not just the workouts, but the solo parenting with a child that is hitting the “terrible threes”. The latter made it more important than ever I get the workouts in. This week was just overly challenging. Great news, next week will be, too. At least, I am prepared and ready for Thanksgiving week. 🙂
This week focused on lifting weight to muscle fatigue with a good amount of cardio (tempo and speed work). So, here we go… week 3 breakdown.
Sunday – 6 miles with 4 at tempo
Monday – Easy 6 miles with core & back work, chest, back, triceps and biceps for weight lifting. Remember to work your whole chest then your triceps then to back to biceps. Always work a-posing muscle groups. Hence, the need to work abs then back. Each weight lifting exercise was done 3 times with 12 reps with the last rep being to muscle fatigue. IE, if I did another up and down I would either pull a muscle or not make it. If you have not been there, go an additional 2 to 4 times from the point you think you can’t.
Chest workout
Flat bench chest press
25 crunches and 25 reverse crunch
Superman 25 times.
Incline chest press
Repeat Ab and Back work
Dumbbell Pullovers, I do this move with only my shoulders on a bench, keep your spine inline abs in gauged, knees 90 degrees, feet flat on the floor. After your last set move directly to tricep presses right over your chest as many as you can do.
Repeat Ab and Back work
Triceps
Seated Tricep Extensions
Repeat Ab and Back work
Tricep Kickbacks
Repeat Ab and Back work
Back (Thank you to Jack for this workout, he created the workout with dumbbells. Great guy, very helpful and excited to help and even followed up on the workout to make sure it was working). The fact he is a ‘Bama fan is just an added bonus! 🙂 You can find him on twitter here and his website here, Jack’s website.
Single dumbbell bent over row
Body weight squats 10
Double dumbbell bent over rows (performed standing, no bench involved)
Body weight squats 10
Bent-over double dumbbell lat fly
Body weight squats 10
Bent over Dumbbell pull-backs
Body weight squats 10
Biceps
Hammer curls
Body weight squats 10
Biceps curls
Body weight squats 10
Greatest way to know you lifted correctly is move directly into push up position, if you are not shaking during the execution or if you just can’t even perform the push up, you reached your muscle fatigue. Depending on your recovery rate you may be able to do a push up or two. If you are handling this easily, you are stronger than you believe and you need to adjust your lifting to reach the point of muscle fatigue.
Tuesday – Shoot me now, 10 miles on the treadmill followed by 25 8-count body builders. The body builders took me some time, I was a little sore from the day before. Plus, I really really, did I mention really hate body builders. I mean really, who came up with this god forsaken workout, a form of a burpee set to a rhythm count. If I ever met this person, I am not sure I would punch or hug him/her. Either way… another, lovely workout J taught me. The run on the treadmill was tough mentally. The only thing that got me through this run was “From Paris With Love”. Yes, the weapons fire, explosions, and awesome character playing by John Travolta made 10 miles seems like a walk in the park.
One of my favorite quotes from the movie is, “Kitchen staff!?! What kitchen staff ?!? Kitchen staff doesn’t shed lead like that.” Anywhos…..I highly recommend the movie if you have not seen it. Great effects with some awesome movie liners like the one above.
Wednesday – No cardio, just repeat of Mondays weight lifting. Plus, yoga and stretching. I wasn’t overly sore. Weight lifting then cardio helps work out the lactic acid build up. Plus, the more efficient your body becomes the better the recovery.
Thursday – First off, I am so stoked I completed this. (8.5 miles total) I learned this workout from J. It was a workout he did some many moons ago. Well, half of it. I just repeated the cycle.
Block 1
Easy warmup one and a half miles. You can make this a mile if you want. I said easy for a reason.
Block 2
Four quarter-mile sprints with 30 second working recovery* between each set — you can make the rest period up to 45 seconds
45 to one minute working recovery after your last quarter-mile sprint.
Two half mile sprints with 60 second working recovery* between each set — you can make the rest period up to 90 seconds
Block 3
Working recovery* for one mile.
Block 4
REPEAT Block 2
Try and maintain the same pace of your first round of Block 2. By the third half mile repeat or maybe the first half-mile repeat you should be swearing and pushing yourself through the “I want to quit” stage. Just remember, the saying “Pain is inevitable, suffering optional.” You choose suffer through it or push forward. I use a mantra when things get real tough, I find it’s a way to calm my mind and body, it’s rather simple. Be Strong, Be Confident, Believe. Short simple and repeated whenever I need it.
Block 5
One mile cool down. Add whatever miles you need for cool down. I did 1.5. I have an A-Type personality and the warm up and cool down need to match and the cool down needs to make the total mileage complete or at a half mile. IE after the decimal the number needs to be 0 or 5.
Finished up with core & back work and another 15 8 count body builders **insert sour loving face**.
Friday – Easy 5 mile run.
Saturday – As always family day. I am truly blessed to have a man or maybe a vampire man in my life that when his flight is cancelled on Friday night, he will get a rental car and drive all the way home to arrive Saturday morning for family day. He did this knowing that early Sunday morning like 4AM he was heading back out to the airport and heading back to the location he just left. Saturday’s adventures were very basic, we picked up our fresh turkey from a local family farmer, we did a little more Christmas shopping, of course watched some football, enjoyed building some great architectures, pig piled on the bed for a few Christmas films, made time for J and M to have play time, followed by Abby getting some solo couch time with J and I got 75 minutes of almost uninterrupted peace and not so much quiet time to do adult things. The time flew by, but we will take it. It is about quality over quantity.
*What I mean by working recovery is that you are still moving jogging or at an easy run pace. You are allowing your body to recovery and take in more oxygen at a reduction in intensity, but you are not standing still or allowing your heart rate to drop completely, I stay within 60 – 65% of max heart rate. The Thursday workout is all about working at a high intensity with minor breaks then back to high intensity. You are training you cells to recovery after high intensity and also training your mind to influence your body. Remember, fitness is not how skinny, built, how far you can run/hike/climb/swim or how much you can carry for a certain distance and/or altitude. Fitness is your rate of recovery. The better your fitness rate, the faster you recover, the faster your body returns to homeostasis. The place it wants to be. In times of stress that being fight or flight, work shit, family BS, disagreement with your loved one, you name it, the faster your body and your mind can make the adjustments and return to normal the better for you and your body.
I had to make some changes to my plan. This week we had a sick household. Everyone, but the dogs, got ‘the crud’. M had a low-grade temperature for several days, so we were the good parents and kept her home from pre-school and kept ‘the crud’ all to ourselves. The good news is we all are over ‘the crud’ and ready to face week three with all cylinders firing at maximum power.
Week Two Workouts:
Sunday: Off. It was supposed to be 8 miles, but ‘the crud’ and a minor hive outbreak made things a little tough. The latter is getting overly exhausting.
Monday: 6 miles
Tuesday: 6 miles and one hour spin class (HIIT workout) — Did not do the spin class.
Wednesday: 5 mile run with a 16lb weight vest and 1 mile 15% incline walk with 16lb weight vest
Thursday: Started off with hives, but did my circuit training, which breaks down as follows:
Each round of exercise is done 3 times for 40 minutes with 20 second recovery then 60 minute recovery between each round. This week was about making friends with the floor for plank position and push ups. Here are the exercises:
Round One
Grab a step (like the ones they use in step class) with 2 or 4 rises for each side or a low bench, stand to one side then place one foot up on the step towards the middle, bend to 90 degrees, jump up and return to bent position. Keep the landing light, soft, as quiet as you can. Keep your form, break when you need.
Bent over rows
Down the floor, plank position, execute a push up. If you cannot do a push up with perfect form, then do a modified push up with perfect form. Return to plank position, then right leg, knee to chest, then another push up, then left leg, knee to chest. Repeat as many times as you can. Remember you form. Form is most important. If you do the modified push up, move back to the plank position and then knee to chest and back down. No harm and dropping to modified or starting at modified push ups. We all start somewhere, we all have our weaknesses. With that said, we are all stronger in another area. So, don’t get down on yourself if you can’t maintain or start with a push up.
Round two
Back to Step, straddle it, bend over and place hands on the far end of the step, then jump your feet up onto the step, landing on your toes and back down to the floor. Controlled and soft landings.
Deadlifts
Down to the floor for swimmers. Lay on your stomach, leg out (feet a little wider than hip width, arms out in front of you) pull your chest and hips off the floor as high as you can. Both arms and legs up and down as fast as you can while maintain the distance you just pulled up off the floor. This works your hamstrings and back.
Round Three
Squats with overhead press
Down to the floor, again. Back to plank position for ‘around the world’. From plank position, lift left arm, left leg, right arm, then right leg. Repeat. You can do a left arm/right leg lift then right arm/left leg. If needed, go down to your elbow and perform the ‘around the world’.
Front raises, keep your stomach contracted, if needed place one foot slightly in front of the other to protect your back or bend over.
Round Four
Jumping jacks with 2.5 lb plate. Arms — in and out for 20 seconds then arms up to should height and down for 20 seconds. As many as you can. The jacks with in and out arms may require a bit more focus then your regular jacks. 😉
Friday: 6 mile run with stretching. Later that afternoon, a 3 mile walk with my weight vest. The three miles broke out like this;
Mile one at 7% incline
Mile two at 11% incline
Mile three at 15 % incline
I wanted to run 4 miles at a 4% incline. But I toned it down to just sweat at low intensity and work the cold out of my system.
Saturday: Rest day — FAMILY DAY 🙂 It included, Christmas shopping, ‘The Incredibles’ with puzzles, building blocks, play-dough, M barking out commands to Abby and time as family piled on the couch. I’m amazed how two adults, one toddler and two large dogs find a way to fit on the couch. At nap time, J & I watched the Alabama Football game. Roll Tide! Yes, I am from the north, but I married a man from Mobile, AL. When ‘Bama is on, I’m watching the game. I have no complaints. ZERO. When the Pats are on, he is game for watching it with no complaints. The joys of being married. Compromise. 🙂
My mileage was a wee-bit better. I did not like cutting out my spinning class, but the chest congestion really made cardio at high rates a wee-bit tricky. The circuit training suffered do to the chest congestion, so I made the next day’s cardio a bit easier.
The weight vest training went well. Honestly, 16 lbs is a walk in the park, but with the cold the double session was tough. If you are starting out with a weight vest, stay within 2 to 5, maybe 8 lbs max for a few weeks. Work on your form. Weight carrying while running requires very good form and knowledge on how to use it. If not, you will end up with some or sever lower back pain.
There are many items to consider when purchasing a weight vest for running and other workouts. I will write-up a post later this week on the one I use and why. It’s been my lifesaver when training to carry M up and down mountains.
Oh, it’s that time again. Time to start building for hiking, rock climbing, training for two half-marathons, a 5k for a local SPCA and a Thanksgiving run or race.
Week One Workouts:
Sunday: Easy 6 miles
Monday: Stretching, Hatha Yoga.
Tuesday: 4 miles and one hour spin class (HIIT workout)
Wednesday: 5 miles, stretching
Thursday: Circuit Training, which breaks down as follows:
— Each exercise is done once, but 3 times for 60 minutes with 20 second recovery then 2.5 minute recovery between each exercise. Here is the exercises:
Curtsy lunges with 5 lbs plates in each arm raise up to shoulder height on down of the lunge.
Bench Presses
Star Jacks
Bent over rows to shoulder shrugs.
Squats with barbell
Crabs with altering hand and foot. Get into the crab position, like you would if you were ‘crab-walking’. Contract your abs then Left foot to right hand (feet and hand meet in air above belly button) then right foot left hand. Make sure to keep your hips up and abs contracted. The stronger you get the easier it becomes, but NO, DEFINITELY NO, V shape from shoulders to knees. If you are at a V shape, strengthen your body. You can do so by raising your left hand, then right leg, then left hand then right leg. Just remember keep you hips up and stomach contracted.
Band strap jacks.
Place a resistant band around your ankles, bend knees, jump out and in (like you are doing jumping jacks) Straight knees do build nothing. Bend like a squat, out and in, as fast as you can, remained as low as you can for the full 60 seconds.
Deadlifts
Burpees with jumps. Oh yeah, my second most hated exercise saved for the end, dead arms, dead legs. All mental. As many in the 60 seconds as you can. Jump as high as you can.
Friday: 6 mile run with stretch and home yoga.
I took 8 classes in college my second to last semester before I graduated. I took one class, yoga, Hatha to be more exact. It was how I kept my sanity with a loaded semester. Through that class, I learned a ton enough to run my own class, so home yoga is focused and highly structured.
Saturday: Rest day ——> FAMILY DAY 🙂 Play Day. Enjoyed our normal route, we do very Saturday, no plans, just play and spend the day as a family. I can say it involved some play-dough, tons of dog kisses, buildings made out of blocks, walks, and Mickey Mouse Musketeers.
Overall, not a bad first week. I was a little sore Friday and Saturday. For week one and starting training this week was basic and will be built upon every week. My mileage was very low this week, but it was needed to allow my body to adjust other exercises. Basically, this week and week two (maybe week three) will be used to help my body rebuild its cellular function for increased exercise, intensity and duration.
This weekend is summed up as the weekend of firsts. First time, running with someone during a race, first time meeting L (after 7-8years of emails, phone calls and texts), first time not really training for a race and first time just running a race for fun. A weekend full of firsts and every single one of them were great.
I did start off training for this race with a goal of breaking 50 minutes. It is rather doable, in fact, I believe I can get down into the 48 minutes, but a few urticaria outbreaks and a really bad chest infection made training or any type of physical activity problematic. I was out for a good solid 3 weeks. In addition, my friend, L, PR’d her half marathon the weekend before, so we both needed a good solid fun run.
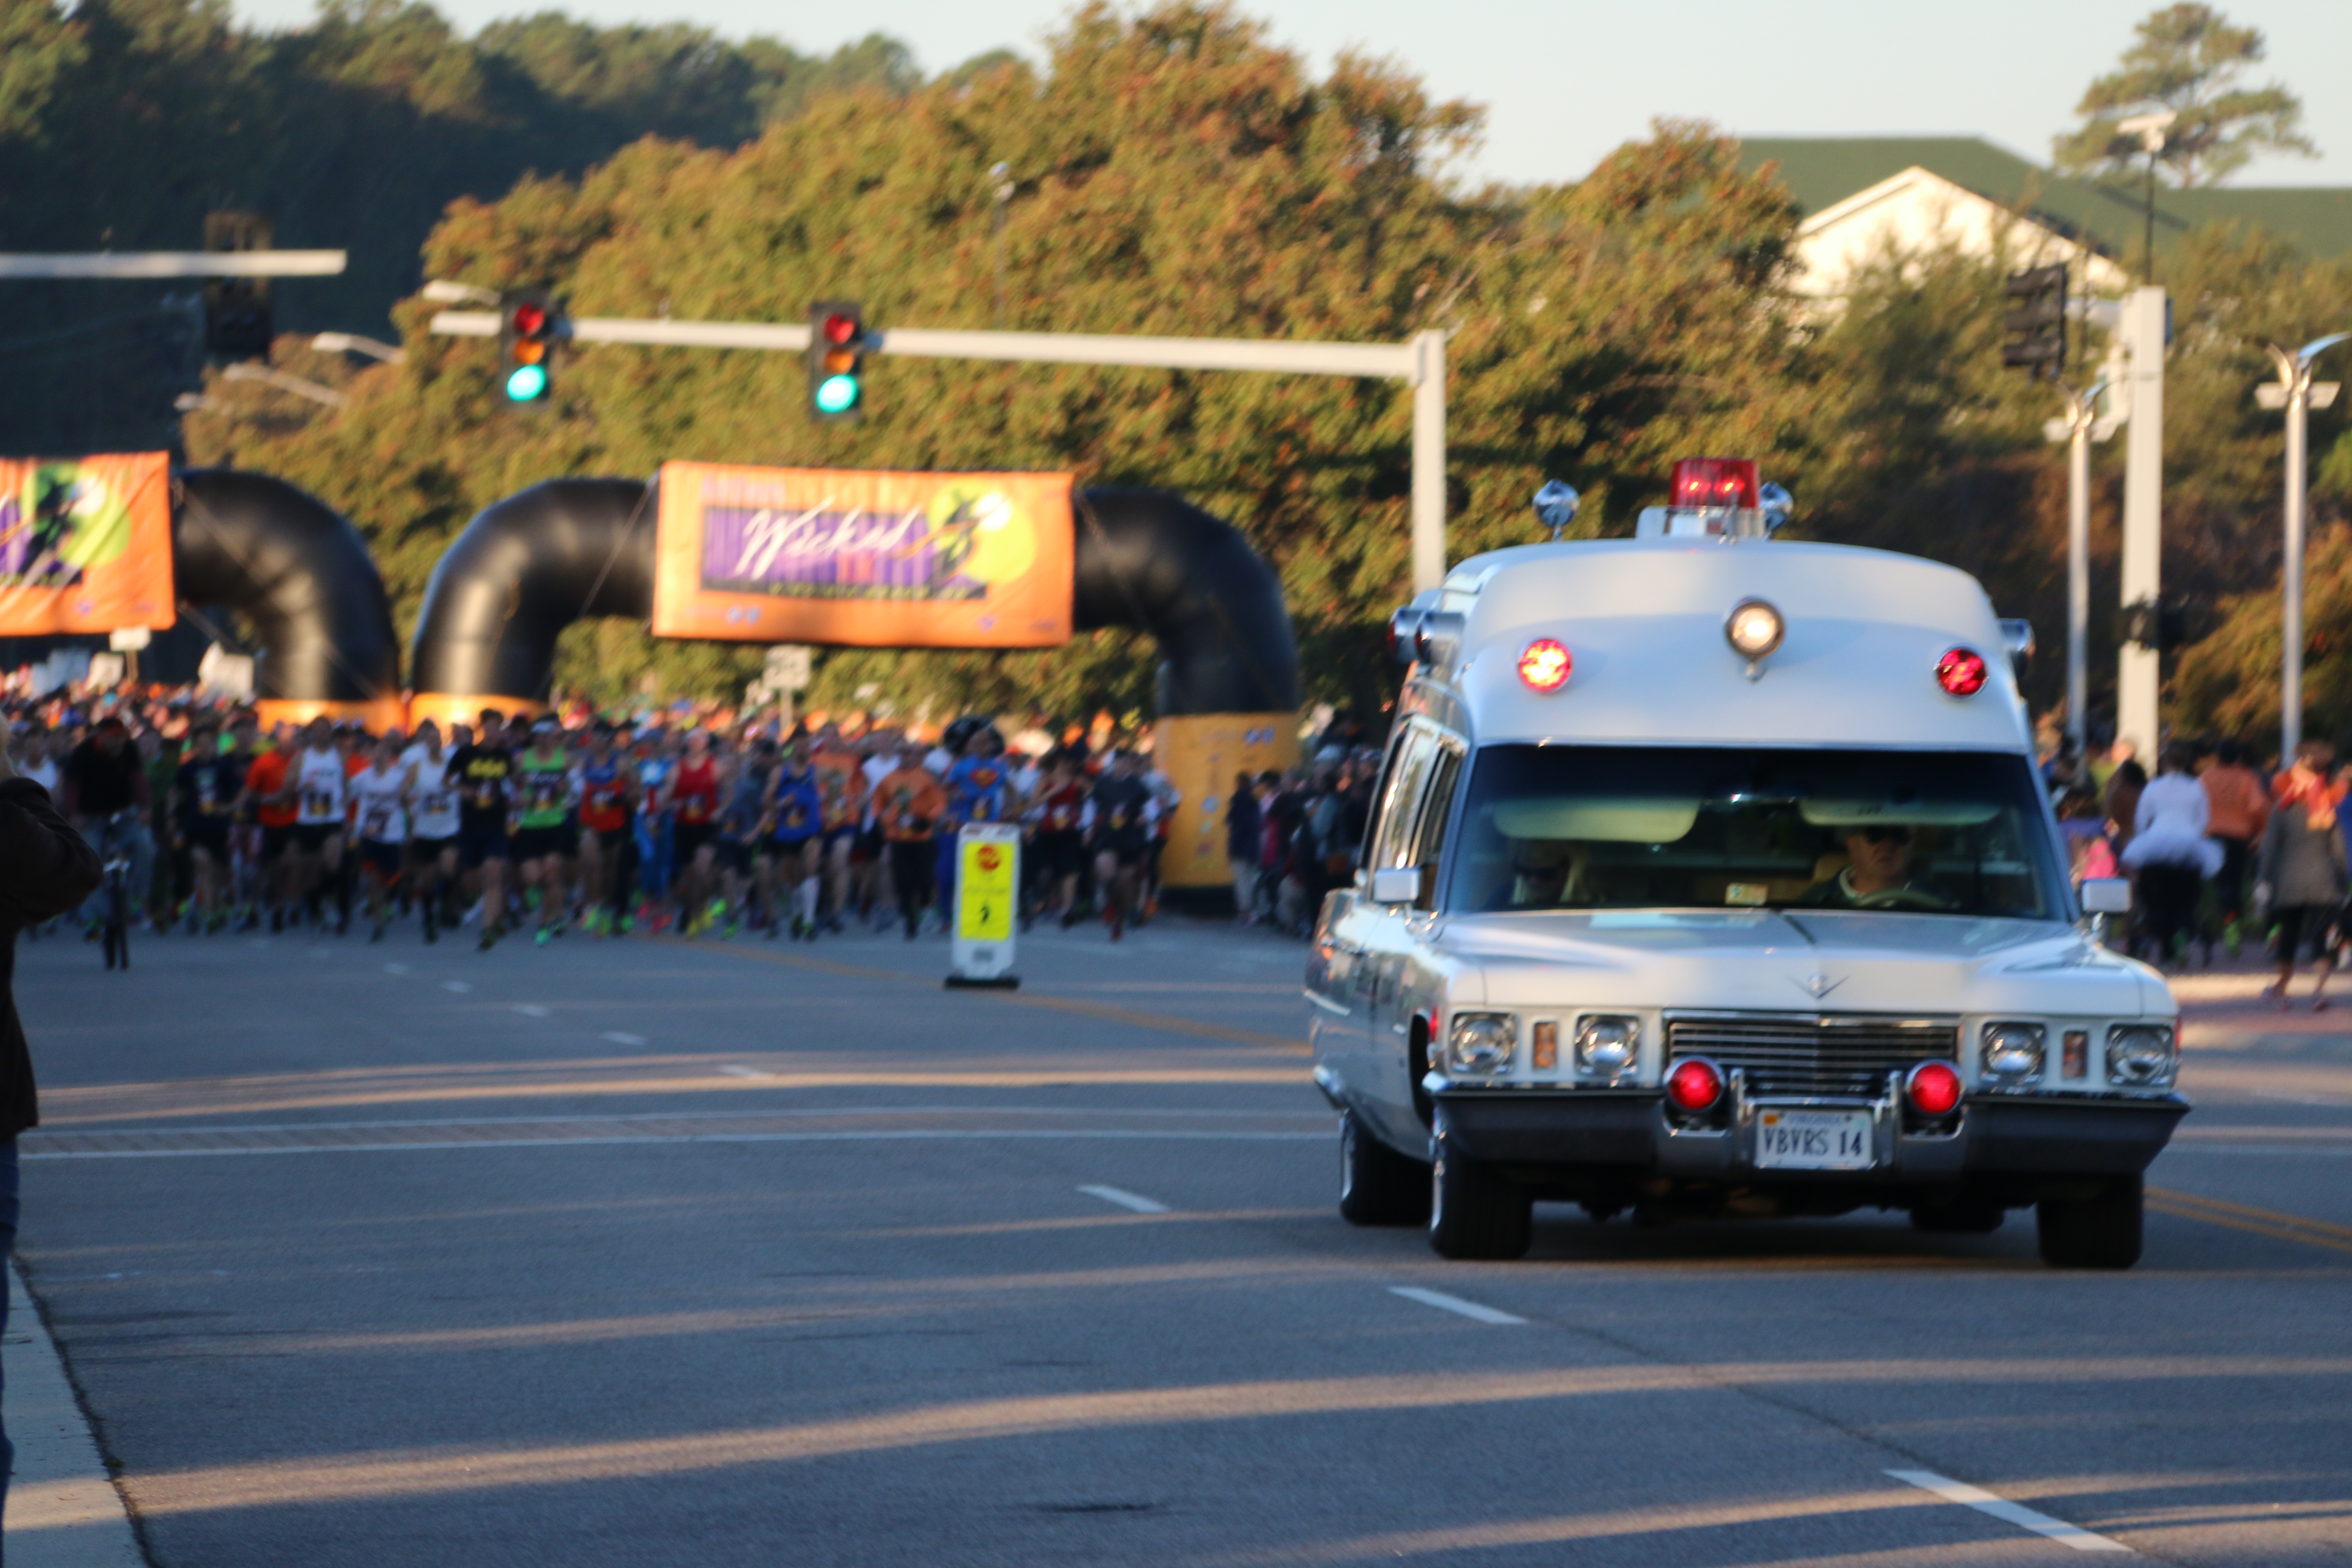
The Wicked 10k is held in Virginia Beach usually the weekend before Halloween. The course is flat (of course, its held in southeastern Virginia!) and finishes along the broad walk with an ocean view to your left. You can find out more about the race, here. You can expect to see many racers dressed up in a wide variety costumes. Those who choose to dress up can be entered into the costume contest. If you choose to participate in the costume contest it takes place before the race and at the post-race party. You can check out some of the costume winners at the Wicked 10k Facebook page, here. There was live music playing during the race and the bands are good. You definitely will have a few zombies hanging around the course, so watch out!. Truly, a fun Halloween race.
The race is run by J&A Racing. They are the owners of the Shamrock Marathon Weekend. I have run many of their races and most of them numerous times. J&A Racing runs the Big Blue 5k, the Shamrock Marathon Weekend, Wicked 10k, Santa 5 Miler, the Crawlin’ Crab Half, and the Harbor Lights Festival. All the races are held in the southeastern part of Virginia, better known as Hampton Roads. I have never had one complaint about any of the races I have run by J&A Racing. Packet pick-up is easy and the vendors present are great. Many of the vendors are local companies and depending on the race, you will find a few military foundations at the expos. Race day is well-organized, corals are managed and water stops are well maintained. You can find more about J&A racing and the races they run, here.
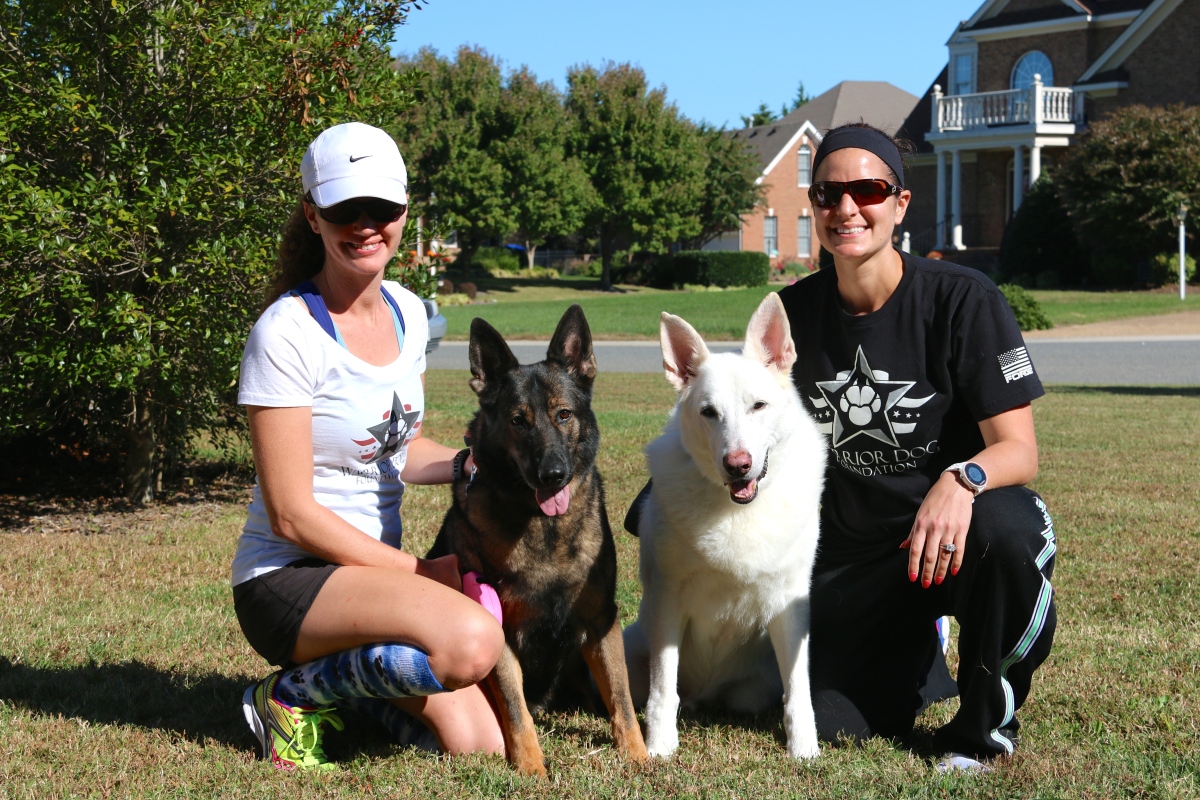
Several weeks before the Wicked 10k, L and I tried diligently to figure out a costume. After all the brainstorming, we came up with not dressing up. We decided instead to support a newly founded non-profit organization that supports Special Operations Forces (SOF) military dogs called Warrior Dog Foundation. The foundation helps find retired or injured dogs that cannot return to service homes, helps those dogs injured in service recover and is home for those dogs that cannot make the transition into family life. Their organization website can be found, here.
There are many ways to support this organization. Here is how…
Catch up on some reading and learn about what these dogs do
Trident K9 Warriors: My Tale from the Training Ground to the Battlefield with Elite Navy SEAL Canines by Gary Brozek and Mike Ritland
Here is a link that will give you may options from reading to listening (portion of sales goes to the foundation)
Just a side note, to-date, there is no size chart. I have found women sizes run a little small. I am normally a medium, but passed that along to L. L normally wears a small, but the medium worked for her. Men’s shirts are pretty true to size. J had no problems. In addition, material is good quality and there is no shrinking after washing. The company that makes the shirts is Forged, another great US company, find out more about them, here.
Make a direct Monetary Donation
There are three main pillars for donation, K9 Outreach, Education and Handler and Gold Family Support. You can find a link on the top right corner below the menu bar on their website or you can click this link to make a donation. The organization uses Paypal for direct donations. If you like to support your USPS service, you can send checks to Warrior Dog Foundation, PO box 2450 Denver, CO 80201.
You can send them items they need. As a former worker of a nonprofit organization, I suggest reaching out to them directly. You can do so via this email address, info@warriordogfoundation.org. I make this suggestion because you will know what they need and use. You will not purchase and send items they do not use or cannot use. Keep in mind, not everything can be used and most of the time organizations get overloaded with certain items and not enough of other needed items.
Before, moving back to the race. Remember to keep your receipts for Uncle Sam, especially the last two listed item, since they are tax-deductible. 🙂 There are numerous reasons to support this organization, whatever your reason is any action helps even if it is just helping to spread the word. For our family, our reasons are close to our hearts and those close to us know most of the details.
You can find the Warrior Dog Foundation on Facebook, here. Instagram photos, here. Twitter, here.
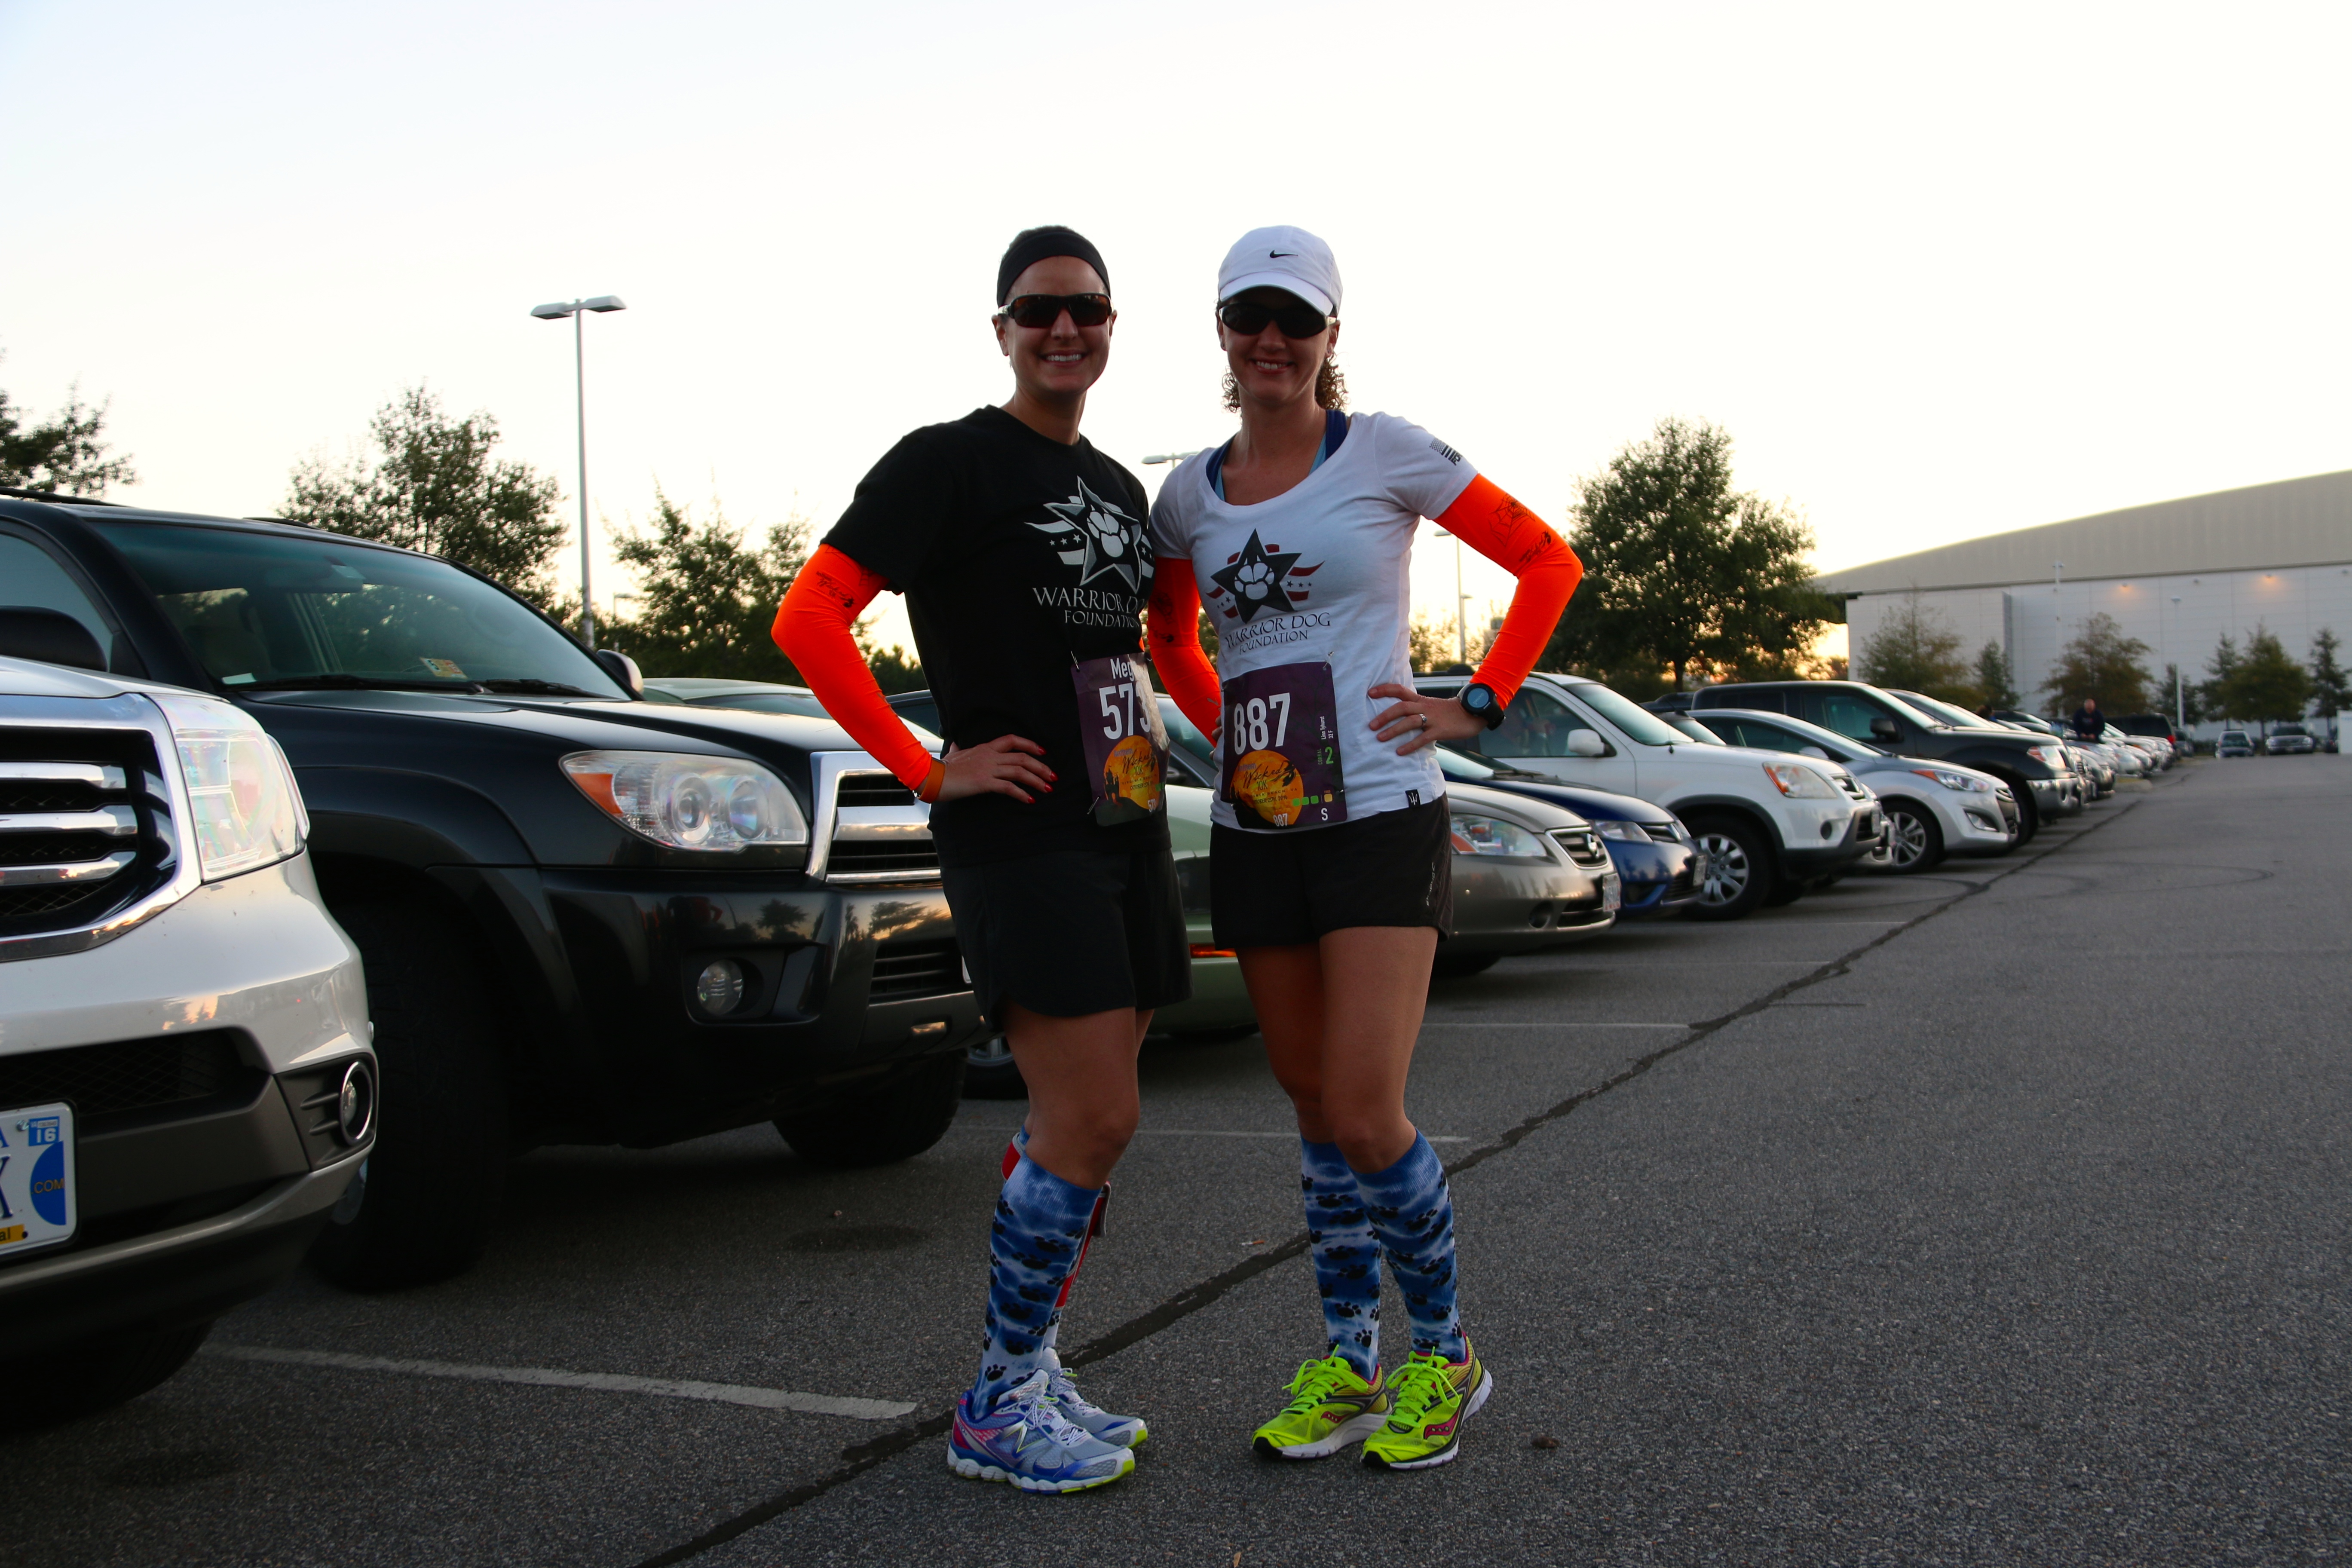
Race Day had a rather uneventful morning, which is great! M woke up with little hassle and J got his cup of coffee before leaving the house. Not bad for starting the morning at 5 with two of the worst morning people, I know. We arrived at the race start around 7 in the morning. Parking was easy and well-organized. We were able to park near the Virginia Beach Convection Center, the location of the starting line. L and I did some warming up and J got a picture of us before we headed to the starting line. And yes, we got some blue paw print socks. If you would like a pair yourself, here is the link. They are not compression socks, but they stay up and keep your lower legs warm.
L & I before the race
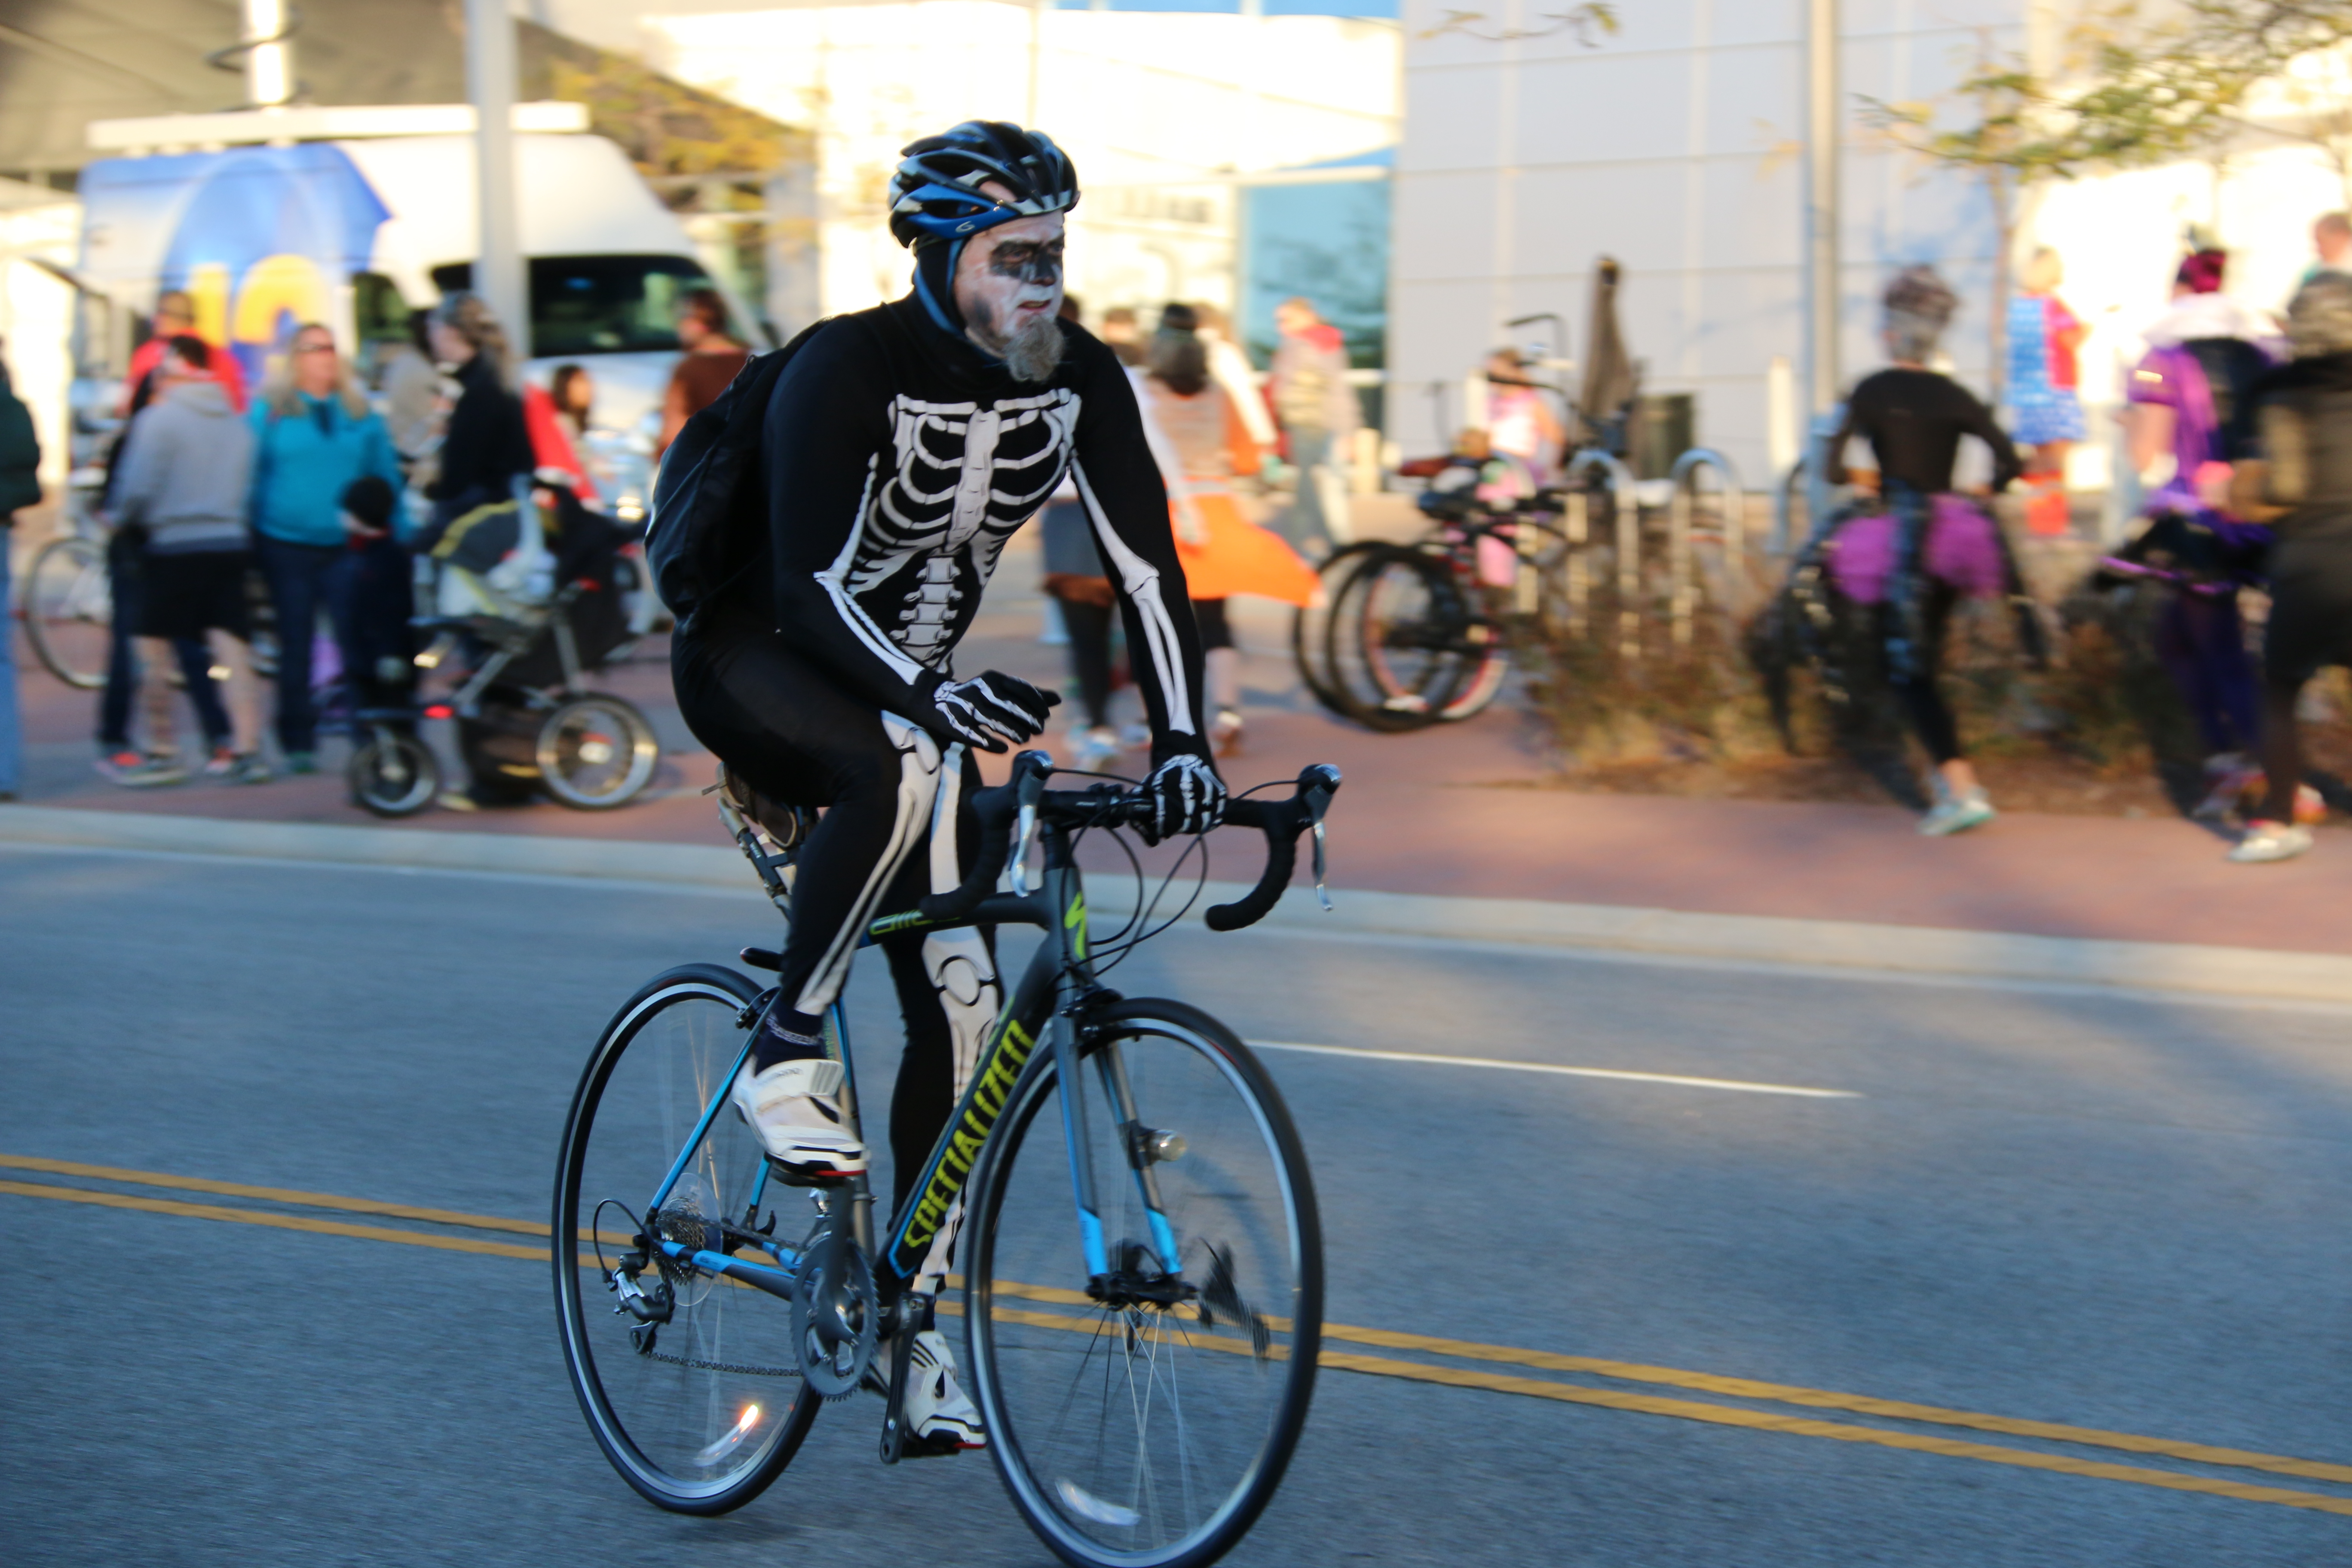
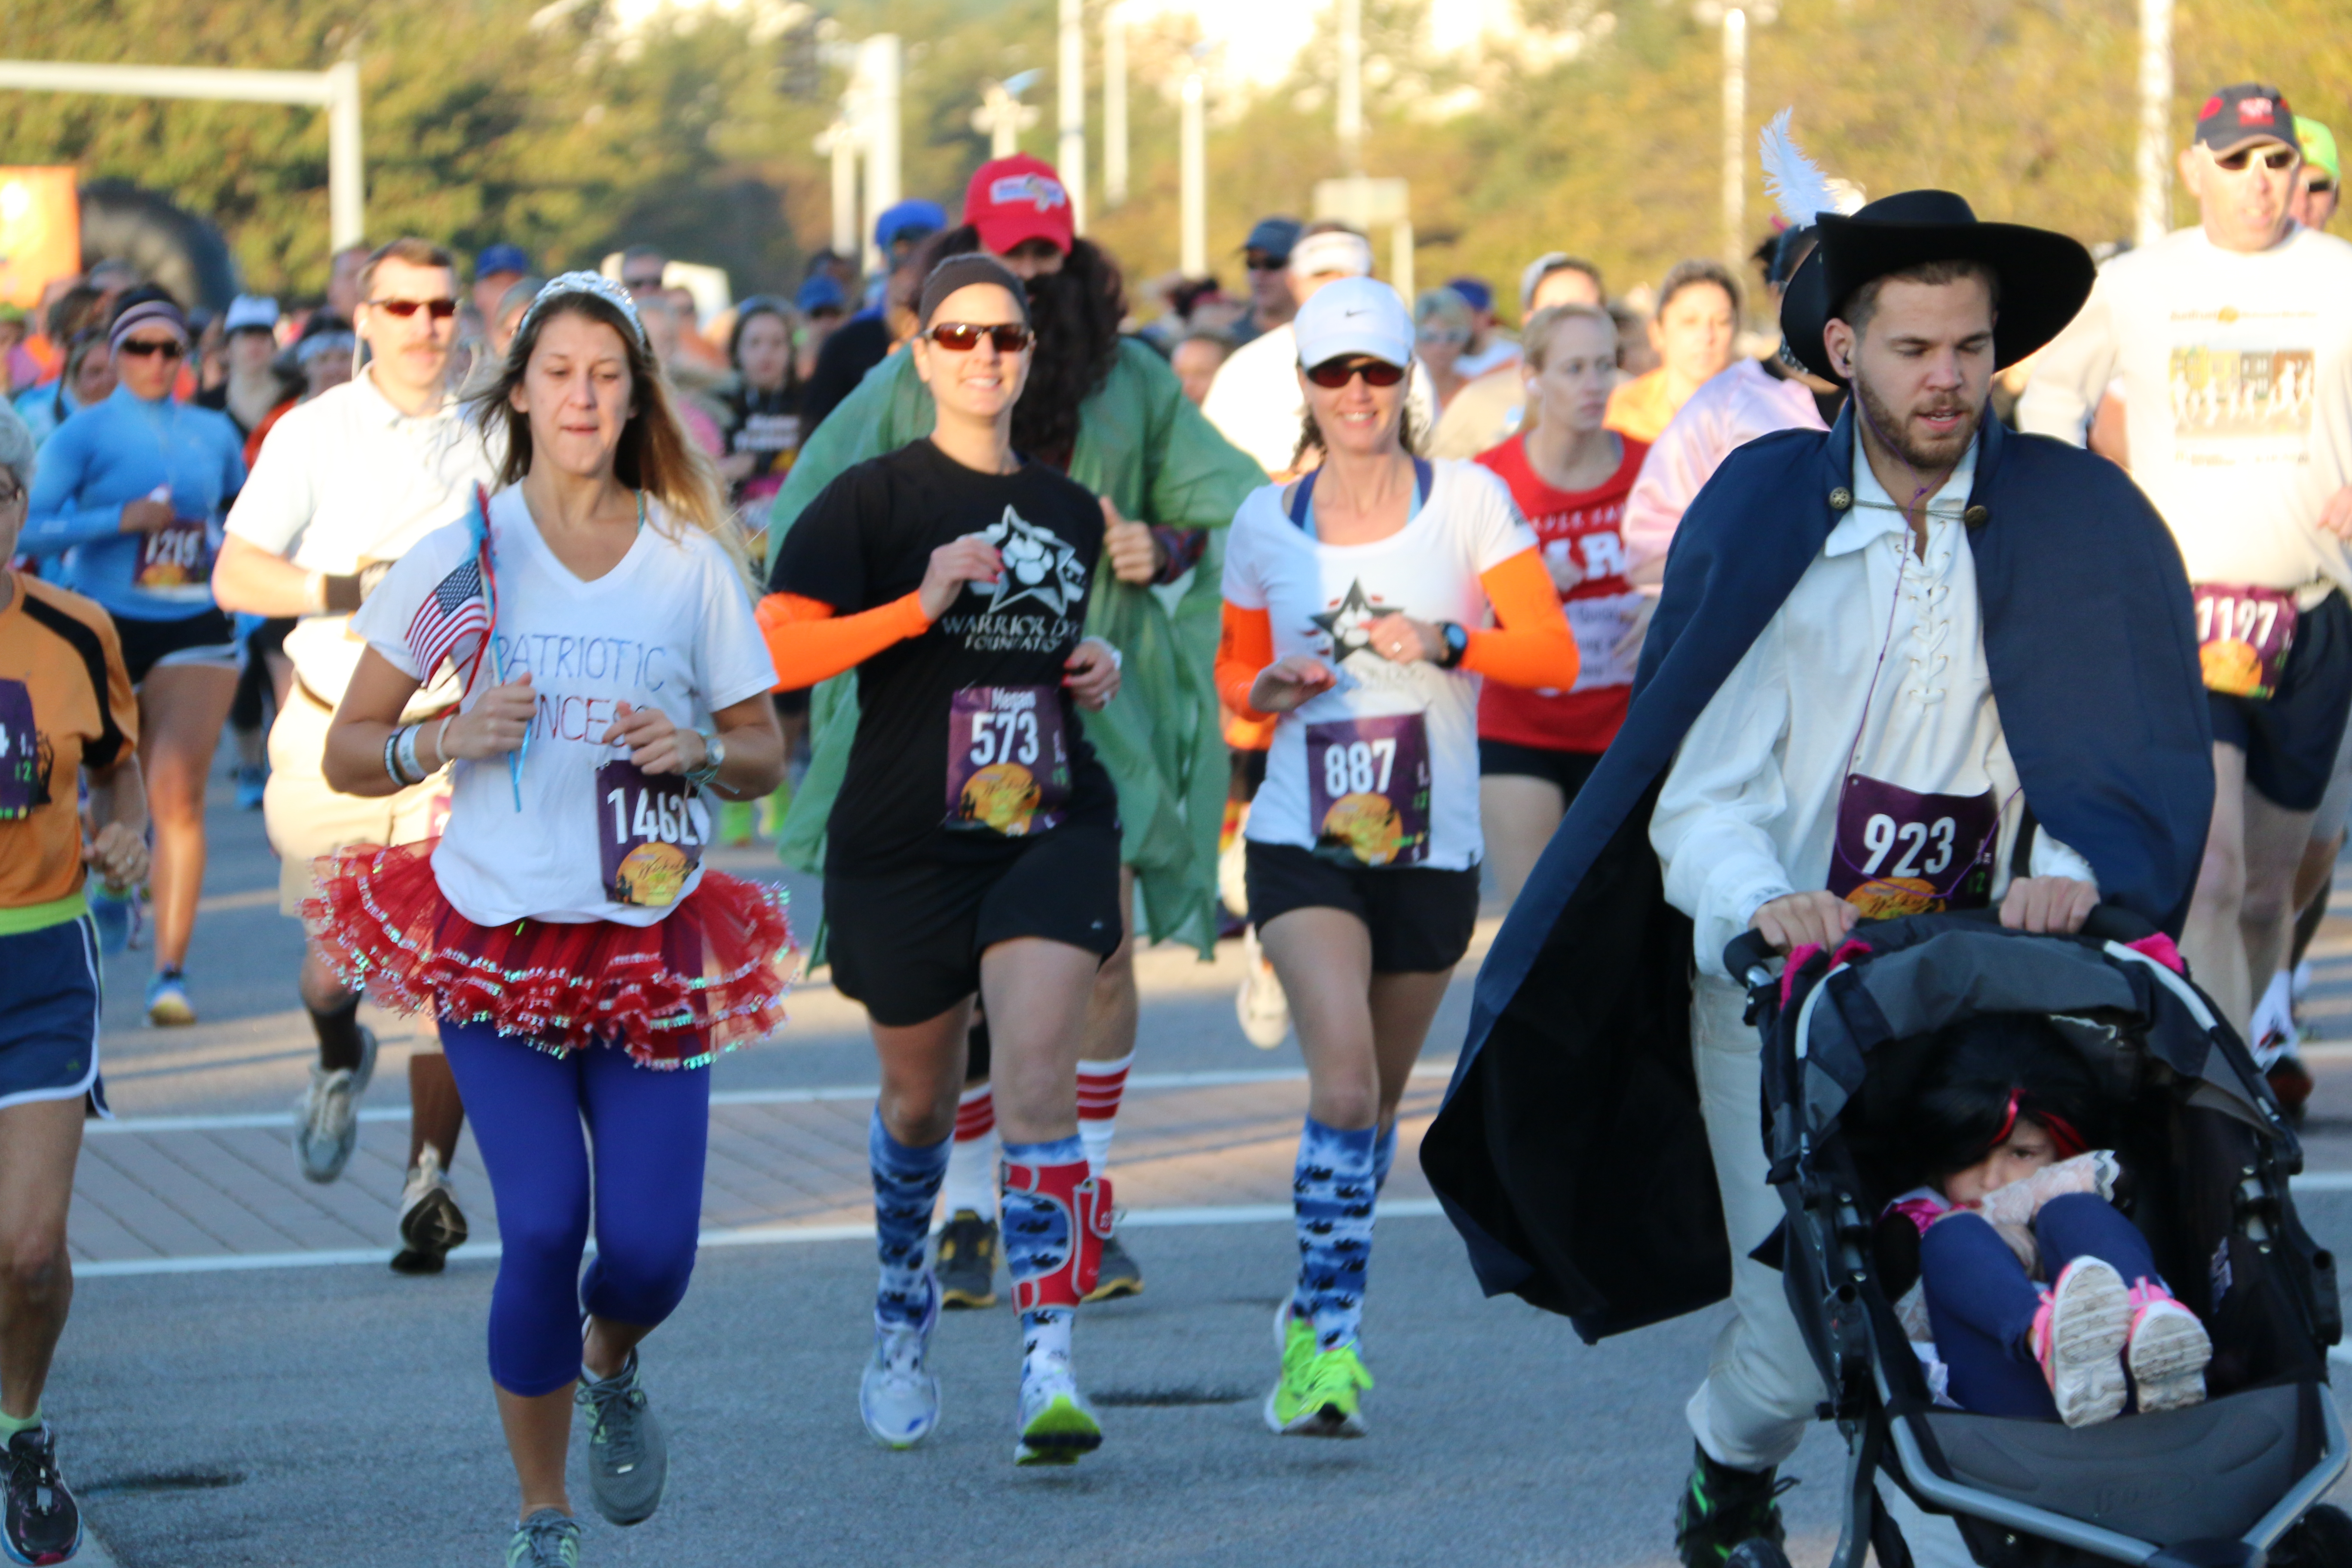
One of the nice things about this race is the corrals. They are actually managed and each corral has a gap of one minute. The race is rather large about 10,000 participates this year, I think. We started in corral two with Wonder Woman, the Playboy Bunny, Forrest Gump and numerous other characters. J was with M near the starting line and captured the beginning of the race.
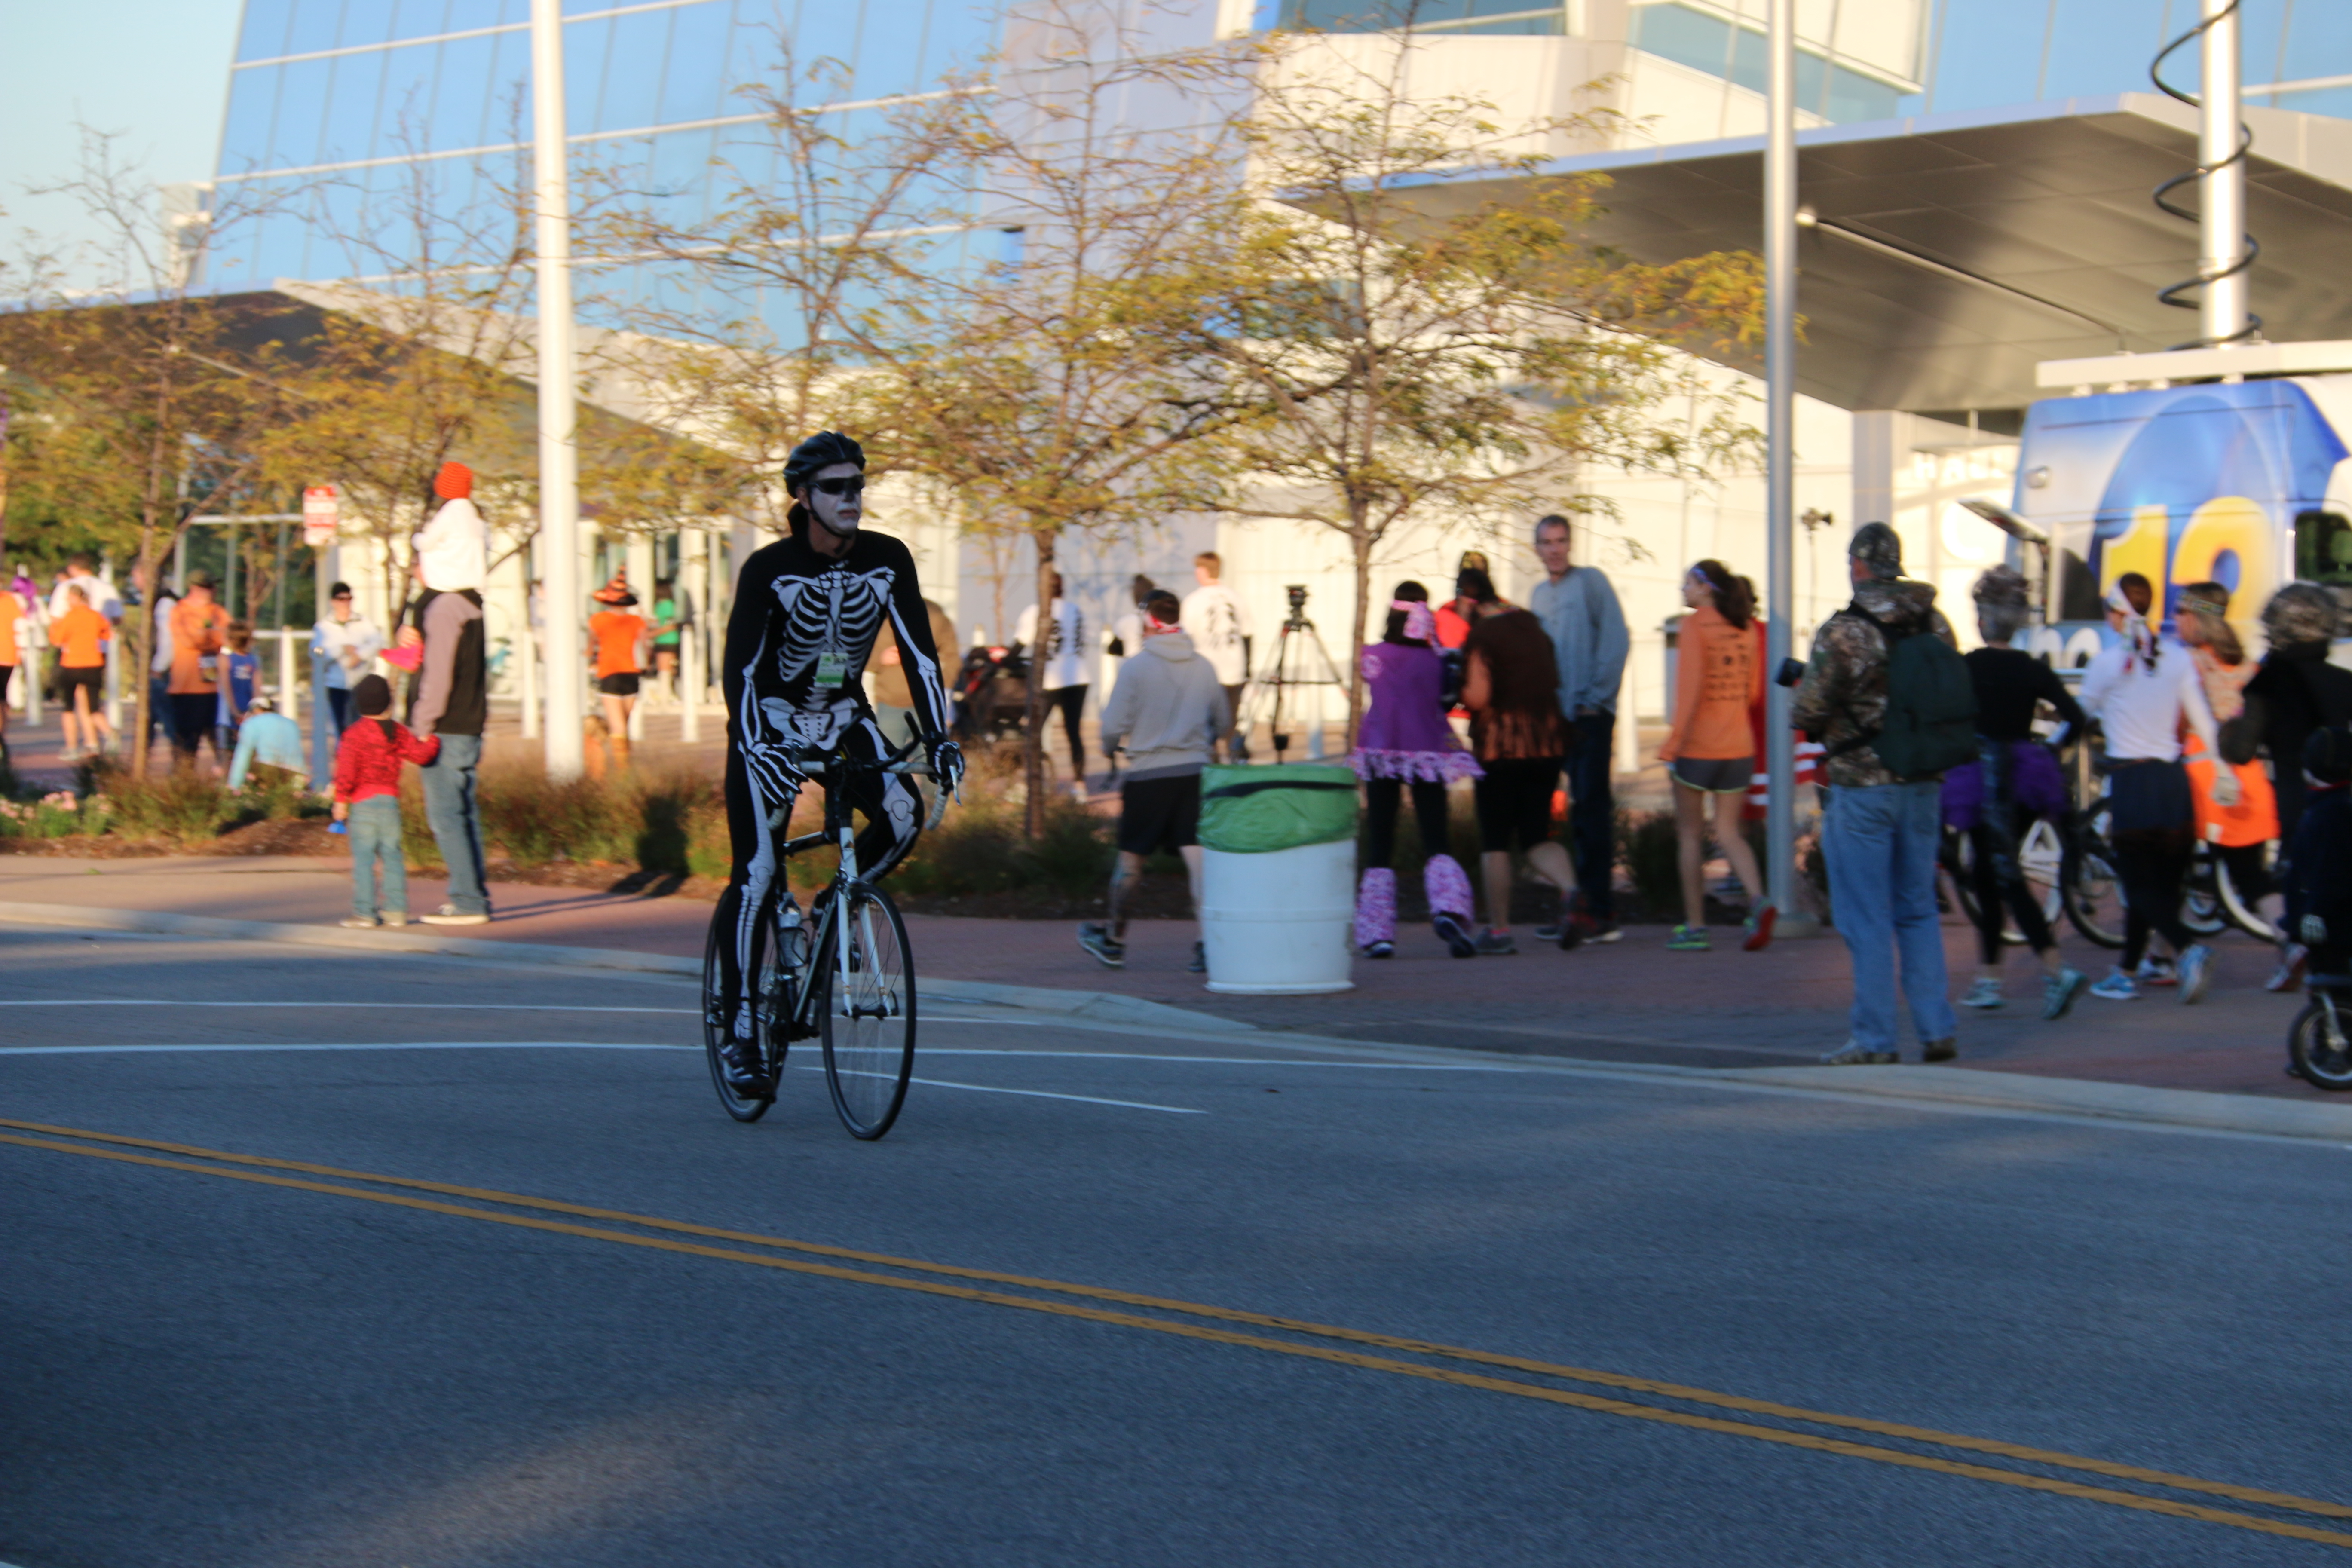
Skelton BikerSkelton BikerCan’t miss those Wicked 10k Arm bandsTeam HoytGhostbusters
The race was rather uneventful. L and I kept a pretty set pace around 8:50 minute miles with a two stops at two of the three water stations. We passed some zombies, live music, some dancers performing “Thriller” and numerous costumes. With the costumes, if you can think it up — it was there. L & I finished our easy run in 54:58 on a beautiful day for a run.
At the finish
We wrapped up the race with a picture with the King Neptune Statue. You don’t fly from California to Virginia Beach oceanfront without stopping by and taking a picture. Even though, it adds about a two-mile walk after a running 6.2 miles. 🙂
All and all, a great race followed by a long run of 10 miles that put my weekly mileage at 30. Not a bad way to start into training for hiking season which starts the first week of November. I decided to add two half-marathons to the “to-do list” one in February and the other March. Also, to that list I added not letting another 7 to 8 years pass before seeing L, again. In the meantime, may the fun times of training begin….
Here is one of my favorite costumes from the race. Fabulous job. You can find a clip of this costume at the after party doing some dancing on the Wicked 10k Facebook page.
My Fav Costume
Lastly, I can’t have a post like this without the pups …Here’s one with L, Abby, Gabe and I.
There is one major question, I get asked all the time when hiking with M. In fact, I get asked it so much I have a standardized the answer to encumber answers to the next several questions that are highly likely to be asked. The most asked question is **drum roll**
How much does your pack weigh?
My answer – My pack weighs between 40 to 45 pounds. It depends on length of the hike, the season, the weather and the weight of M. M weighs between 30 to 32 pounds.
So, how did I come up with 40 to 45 pounds. Well, as stated M weighs between 30 to 32 pounds. Yes, I weigh her, bi-weekly during hiking season. My only purpose for this to make help make sure my pack states under 45 pounds (per the specs requirement for my pack). By knowing her weight and the weight of water I’m carrying makes it rather easy to pack everything else.
I carry two sources of water. One is a 2 liter Camelbak, which weighs approximately 4.4 pounds. The second is a 1.5 liter Camelbak, which weighs approximately 3.3 lbs that is for M. The great thing about water is that it will be used and my pack gets a wee-bit lighter as I go. But, if needed at huts the water will be partially or completely refilled. This means at maximum I carry about 7.7 lbs of water.
Let’s calculate that, so you don’t have to break out the calculator, break out the pen and paper or think too hard. I know its been a rough week. 🙂 The weight of M and the weight of water means I carry 37.7 to 39.7 lbs. That leaves me with a remaining weight of 5.3 to 7.3 lbs.
The inside my pack are the items below:
2 to 3 diapers and wipes
Plastic bag for dirty diapers
long sleeve shirt for M
Rain/wind jacket for M
Long hiking pants for M (used as backup)
Cold weather hat for M (used when its windy)
Extra Socks for M (used as backup or if needed as gloves for unexpected weather change)
Toddler Medkit
Snacks for M and I (homemade trail-mix & bars which is normally carried in my cargo or front pocket)
Snack cup
Long sleeve shirt for me
Rain/wind jacket for me
Extra socks for me
Medkit for myself
Rain/Wind cover for pack
Orange Trail Marking Tape
Waterproof matches
That is the standard items that HAVE TO come along. The only items that may which to J’s pack is my long sleeve shirt, rain/wind jacket and extra socks. Again, during the colder season, which for M since she is not moving most of the time really starts towards the end of August/beginning of September. And that is subject to change when hiking the White Mountains. Why, simply because it snowed this year in June. As I always say, being prepared is what is most important and half the battle.
The accessory items (i.e. connected to my pack in a handy location) are as follows:
Chap stick (which is 99% of the time is in my front zip pocket)
Sunblock
Special Ops 6″ tactical knife with pouch (Thank you to J for the lessons in uses and how to use)
Emergency whistle
Mirror for M
Old Fashion compass
Map (which is 99% of the time is in my cargo pocket in a waterproof protector)
Flashlight
And that folks sums it up. Surprisingly, your clothes and items do not add that much extra weight, but it still counts towards the total weight.
No matter what my pack always always carries emergencies items for M and I. That’s for injuries, unexpected people or animal attack and separation from J. We never want anything to happen, but we rather be prepared for it then be “up sh*ts creek without a paddle”.
And if you are wondering, we have taken a well-used hiking trail in Virginia that we played a real game of “hide and get moving” from a Black Bear. We actually could feel the impact tremors from the Bear’s paw striking the ground and hear the bear growl which means “Exit, stage left or be lunch”. No matter where you go for hiking, remember you are on their land, their territory and its best to respect that, but be prepared.
It’s been quite a bit of time since my last post. I am a bit sorry for that, but not really. We have had lots of things going on. We are back to our “other” home in Virginia. After being gone for several months, things need a good cleaning and OMG the mail needed to be sorted and addressed. The latter should be a torture tactic. Seriously, the amount of junk mail was insane (and I was in direct marketing!!), the trips to my neighbors with their mail (Oops!!) and the rest of the ‘regular’ mail. Three USPS mail service boxes and numerous boxes from UPS and FedEx was just a daily workout in itself. But that is all under the bridge, including the cleaning because nothing beats lying down to sleep in ‘your’ bed in ‘your’ room.
In other great news, our little Miss M has started her first ‘year’ of preschool. And she is doing great! Preschool is only M,W,F for three hours. It’s enough time to do additional studying, run some errands or run some miles without chasing a toddler. In fact, when I’m extremely lucky, I get to spend a cup of coffee with my husband, while he works and I study. That’s ground coffee beans with hot water in a cup, not “coffee coffee”. If you missed that, it’s probably a good thing. Anywhos… Oceana Airshow….
After a year of ‘sea frustration’, the Oceana Airshow is back.
J and I have been attending this event since our first year of marriage or maybe it was one year before. Truly, that depends on if you talk to myself or my husband. Either way, that’s 10 or 11 years. Both ways it’s a good amount of years. He took me to my first one and I’m sure he will take me to my last one, too.
The Oceana Airshow has been our way of saying farewell to the Summer and happily welcoming Fall. Even if, the cooler weather doesn’t come for another several weeks. There is only one other location we would want to be and that is mountain side.
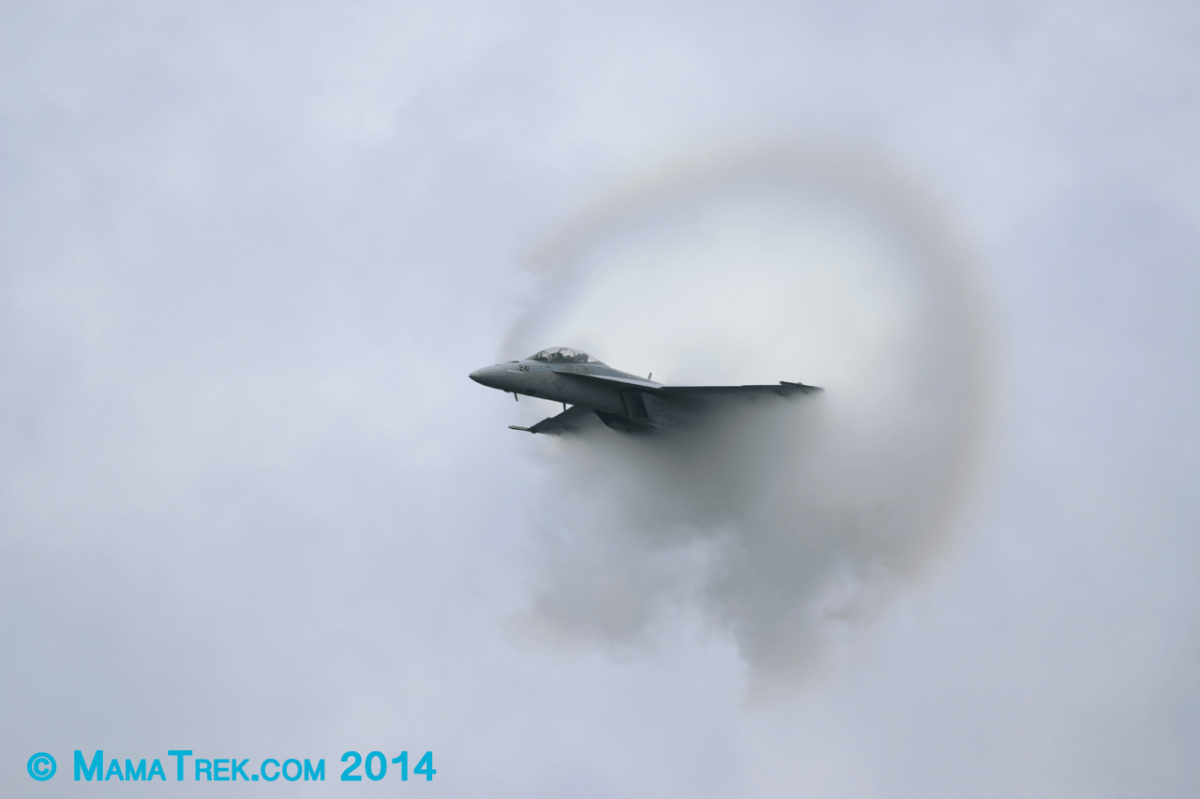
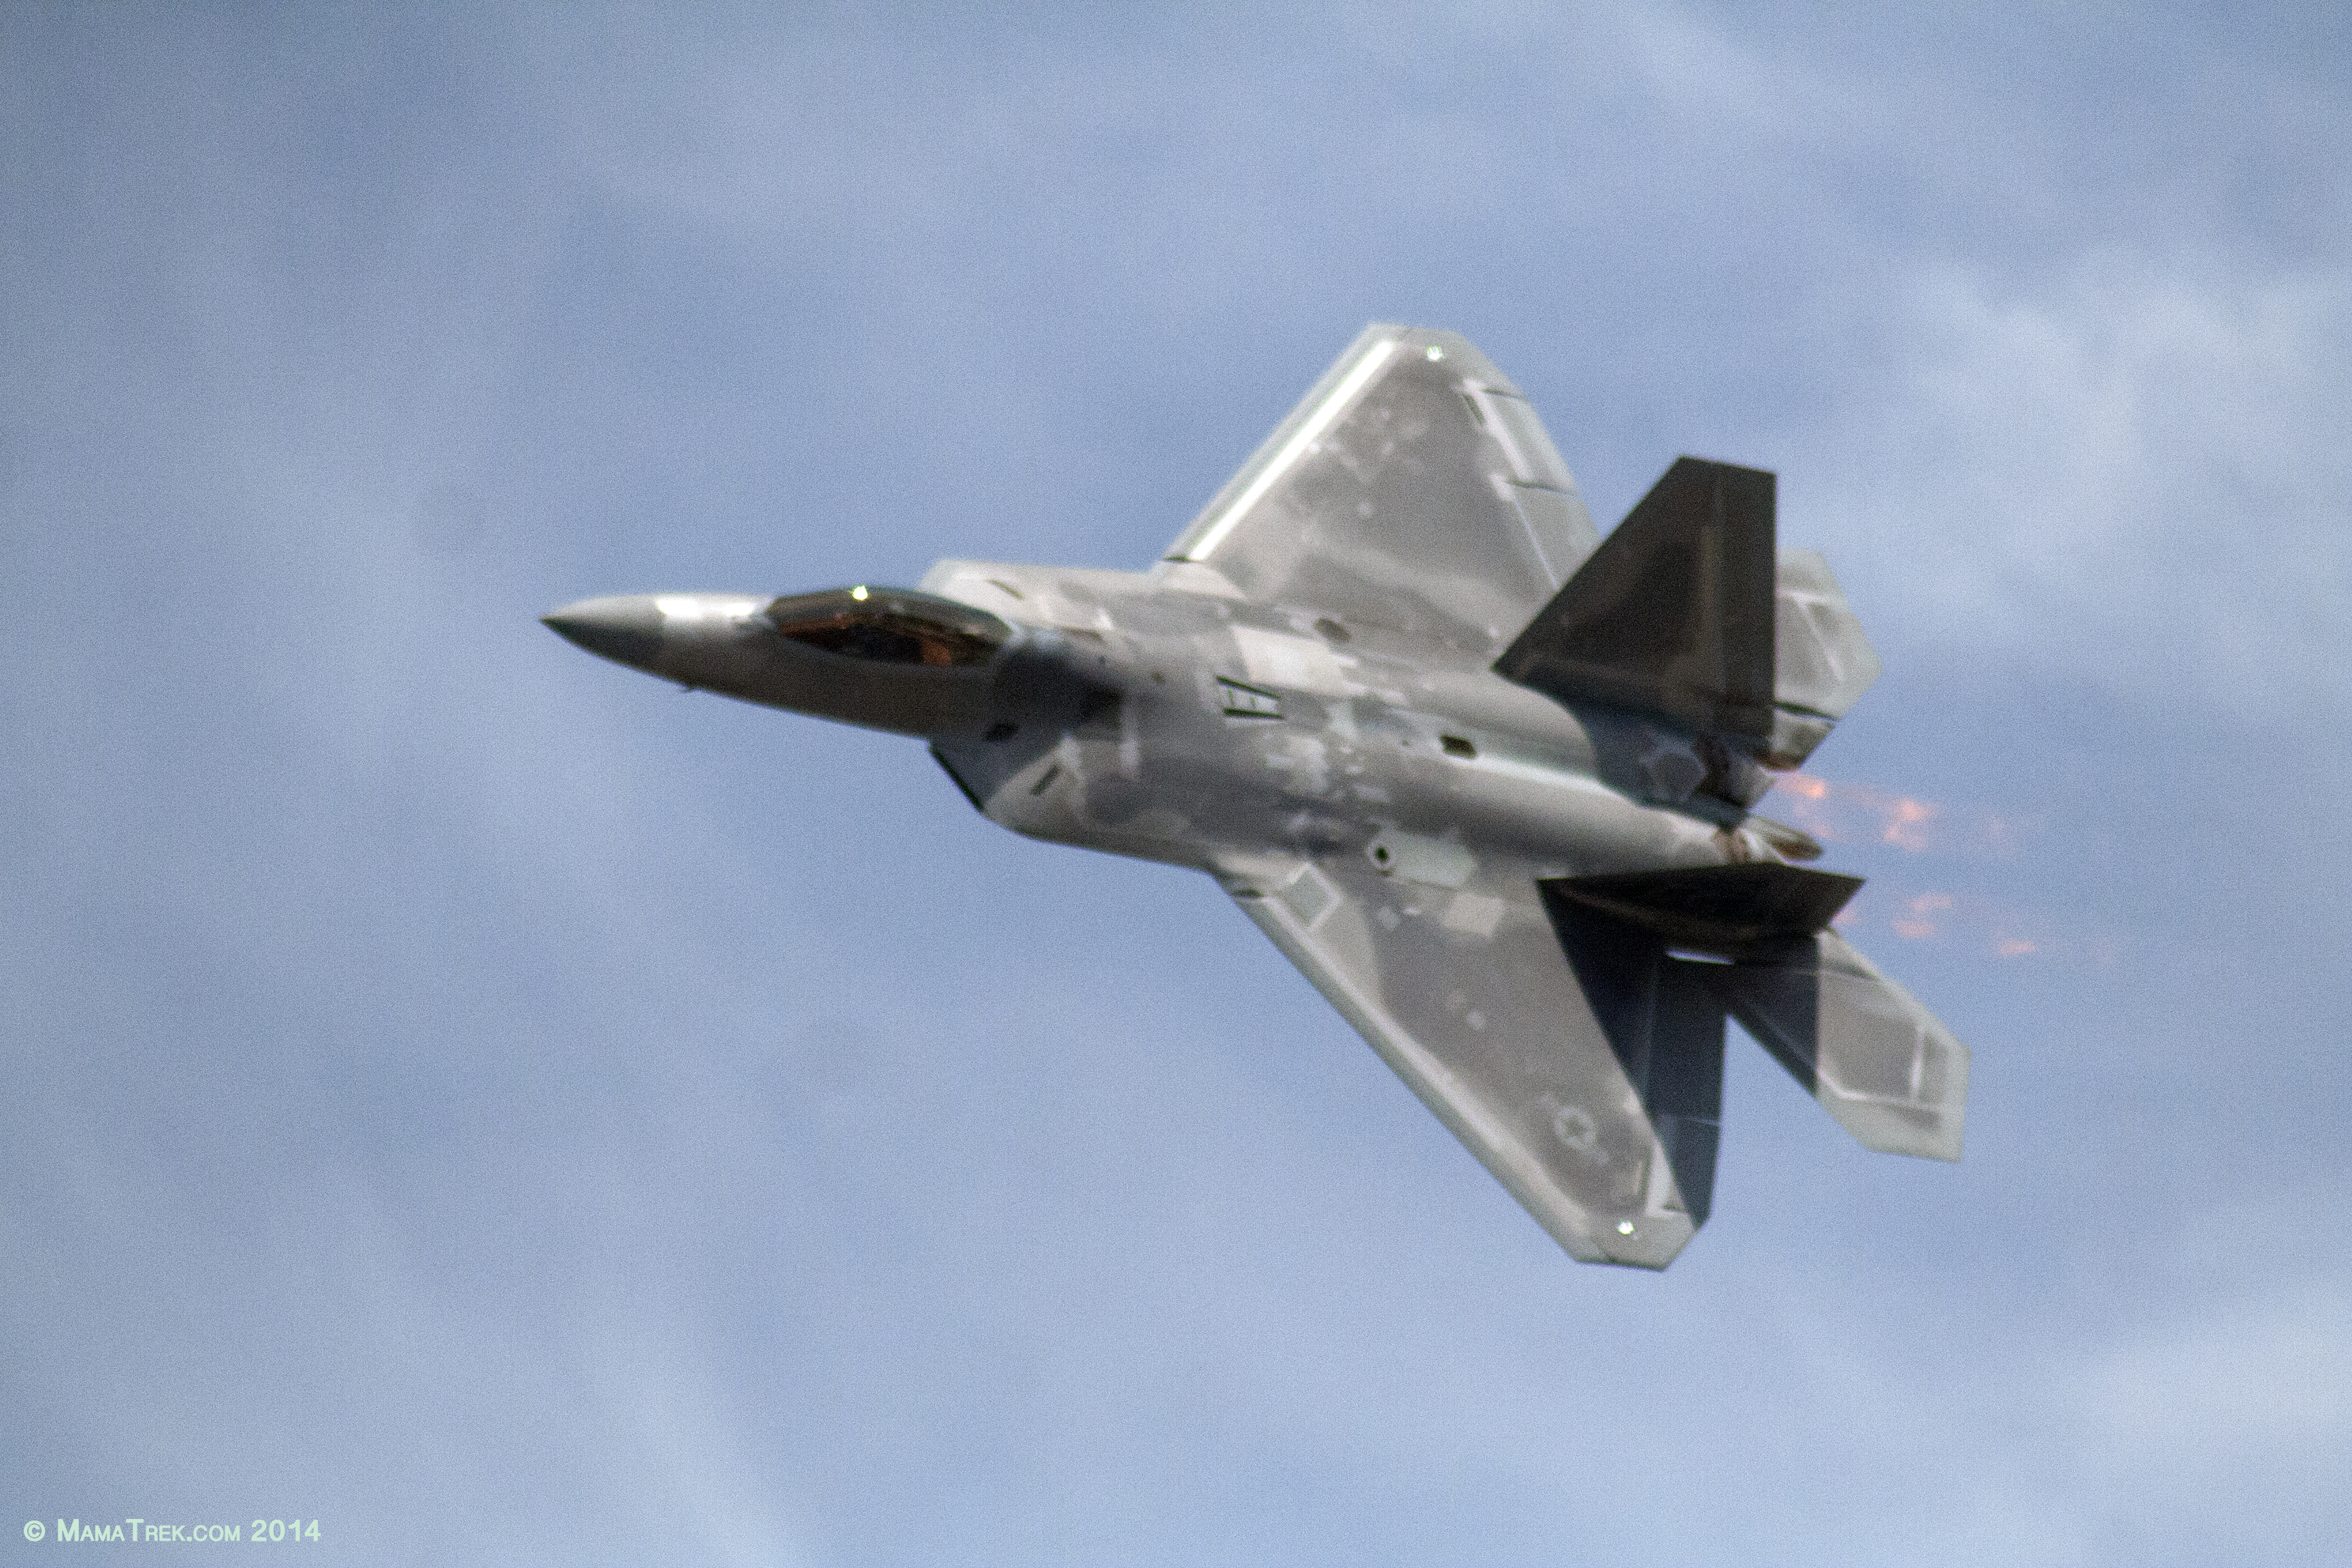
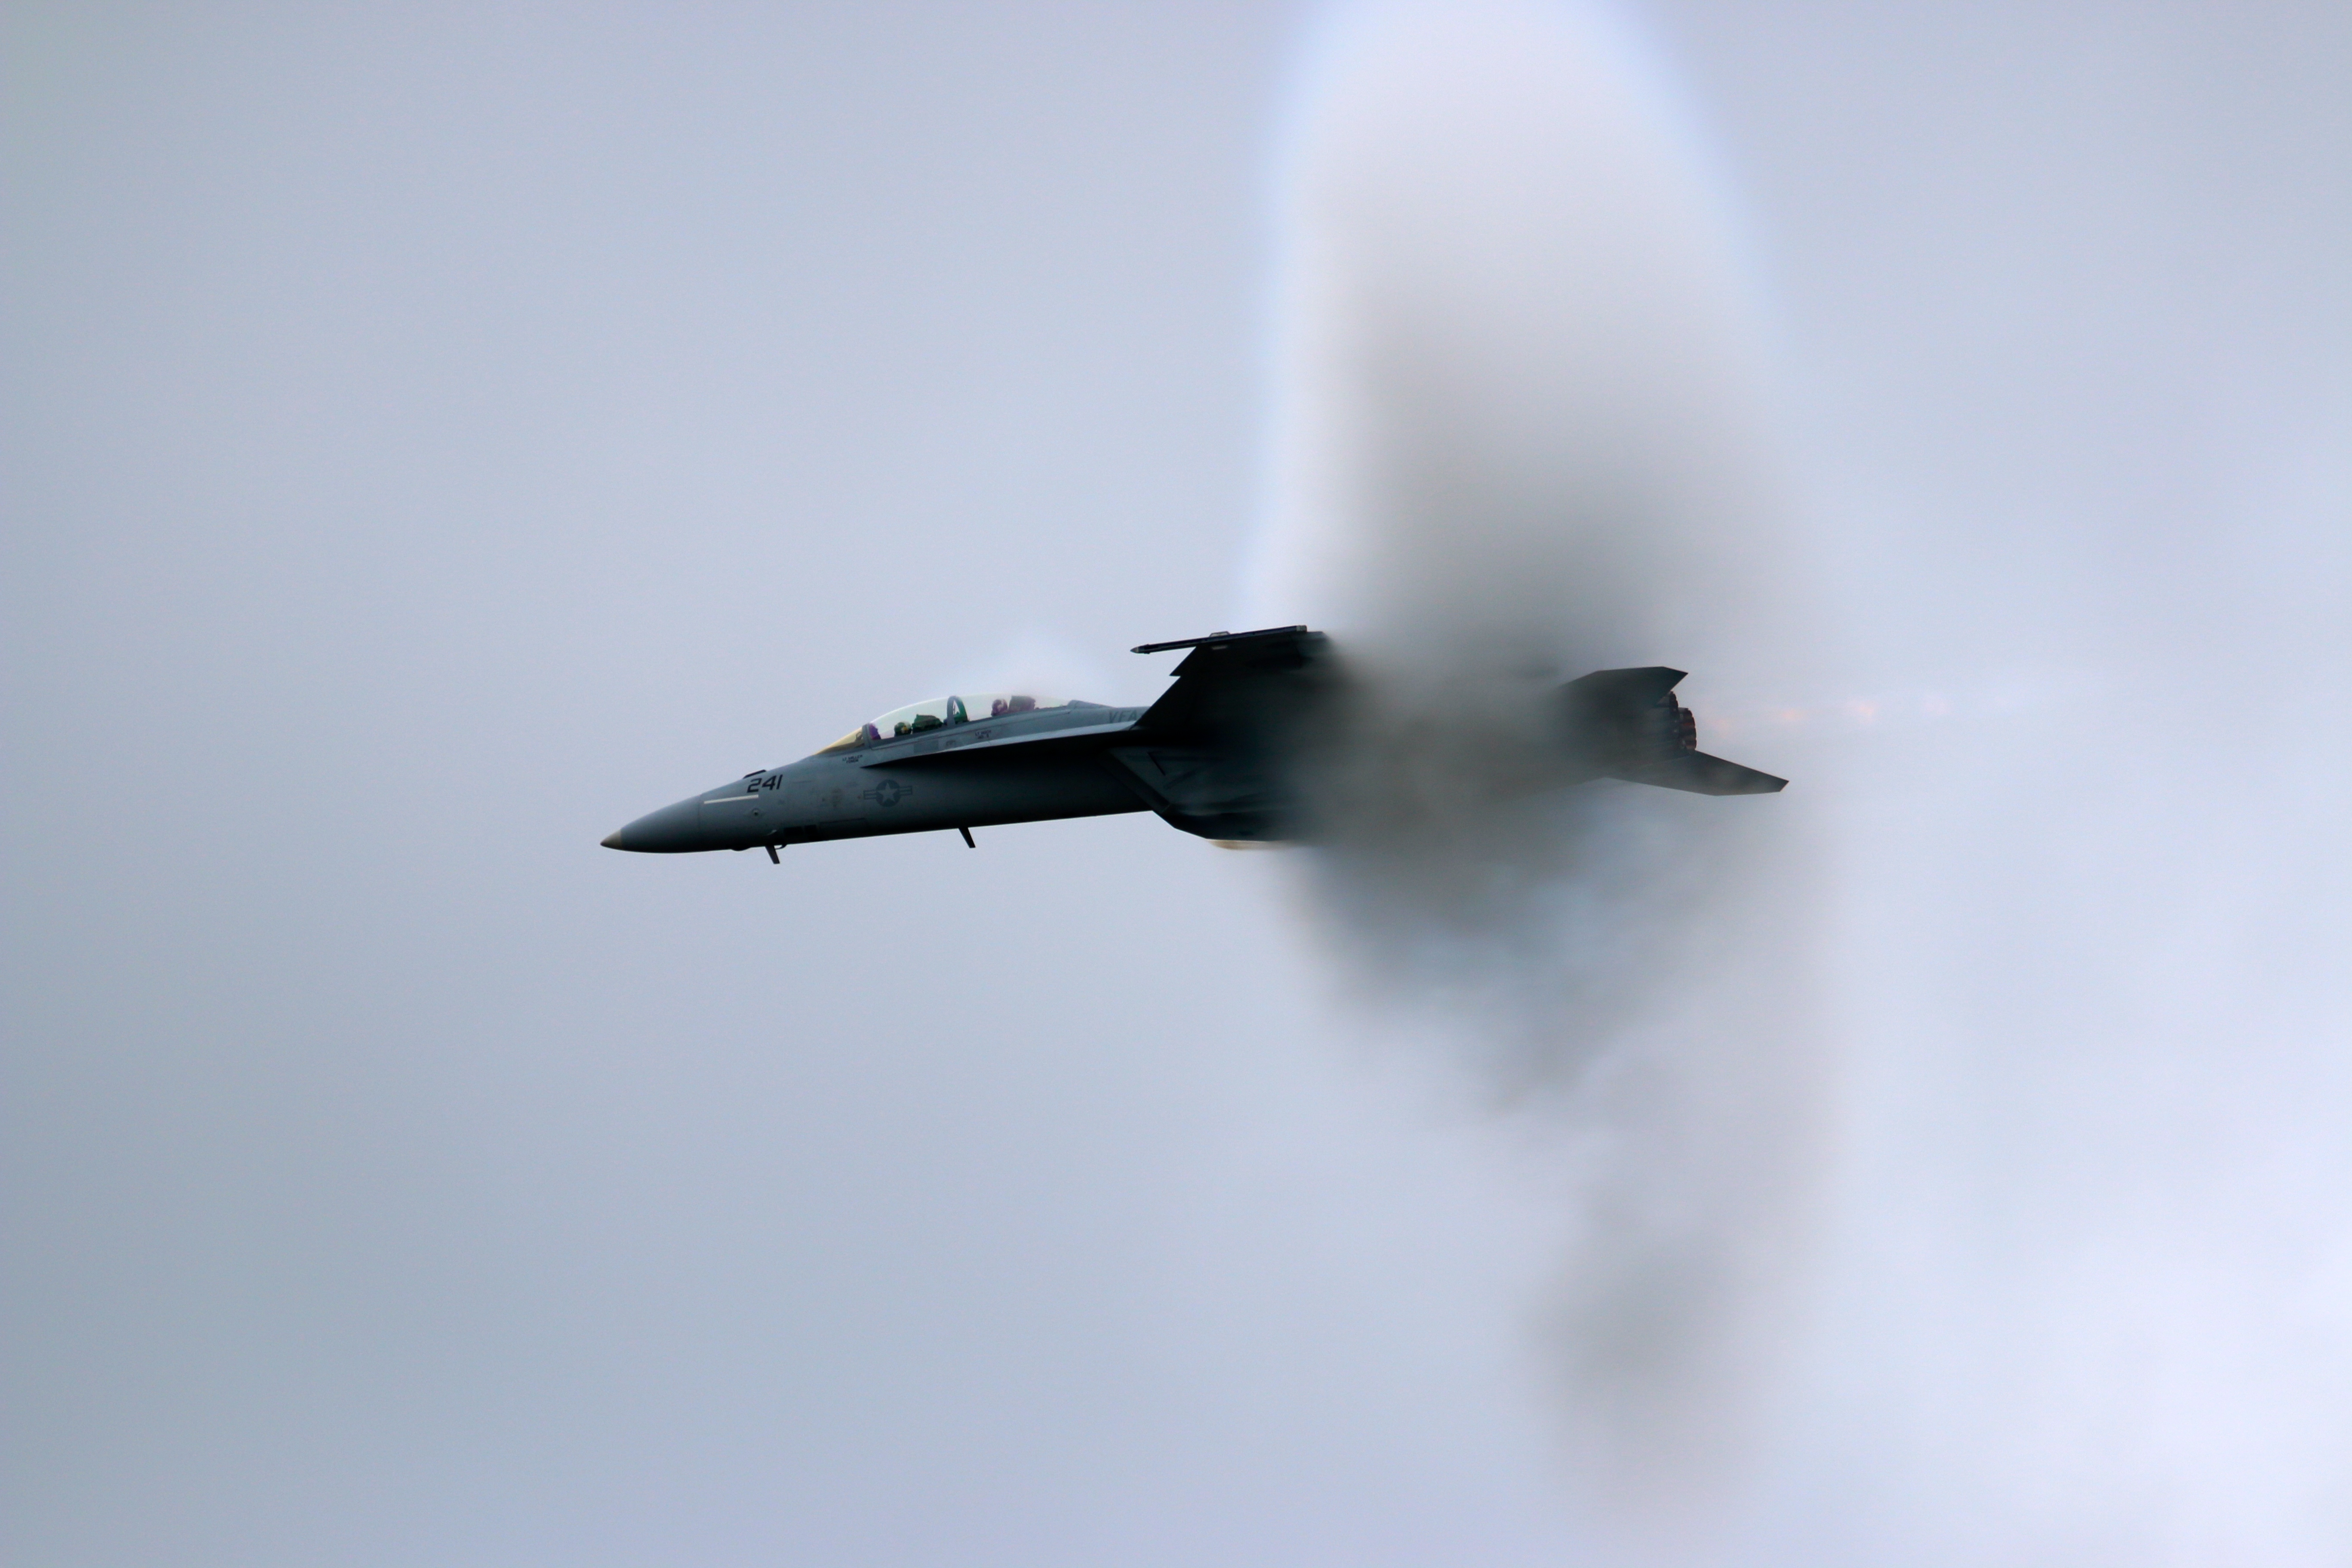
Several years ago, when Air Power Over Hampton Roads was around, we welcomed the Summer with their program. Air Power Over Hampton Roads is the Air Force’s airshow. It was a great show, but I got to say the Navy has the whole parking and directing traffic very well-organized. During, the Air Power show, the B-2 bomber make a pass overhead and when the F-22 Raptor is active, you get to see that jet ‘slide’. I did not miss type. It slides, during a pilot directed move. It’s pretty freakin’ incredible. Anyhow, both are pretty amazing to see. Maybe one day the show will be back or Oceana will have one or two of those ‘planes’ on the flight schedule. Either way, I’m glad to see the F-22 Raptor back in action, even though the man hours are high and costly to maintain.
B2F22 — Raptor
Back to Oceana Airshow, I will get the complaints out of the way. After spending time working in conjunction with the USCG, USN and USAF’s Morale, Well-Being and Recreation (MWR) programs, I was disappointed to see that the USCG was not present at this event. They had no static display nor were they part of the show. I am not biased towards the USCG, my family blood runs through the Army and Navy. It’s just the USCG does not receive enough recognition for their work protecting of this Country, its citizens and their work overseas. If you did not know, the USCG does work overseas ranging from humanitarian efforts to security. Yes, I know they are part of DHS and not DOD. I’m not sure if this is a funding issue, invitation, or something else. And, well, that sums up my complaints with the airshow.
On to the noticeable changes, there are two main changes. First, there was a noticeable decline in vendors. What I mean by this is, I found there were more company vendors present than vendors of purchasable items. Not just vendors that sold logo items, but the fun and unique items. In addition, the static displays were decreased. It is a little bit disappointing. The displays were mostly fixed winged planes. Security has changed, which is somewhat nice to see.
This year, we passed on the preferred parking. Not the best decision, not the worst. Preferred parking gets you to a special lot that is closer to the main gate. Honestly, depending on your time of arrival and the parking pattern for that year, you may park close to the preferred parking area. However, we did purchase our Executive Sponsor Chalet (ESC) tickets. We have been doing so for about 5 years. The tickets are well worth the cost of $60. Your ticket price gives you the benefit of all you can eat and drink with limited wait in-line time, bathrooms in the ESC area, seating and most importantly, you have an enclosed area with a prime location called ‘Center Stage’. The enclosed area means you are accompanied with the other guests that pay the cost to be in this enclosed area and some of the performers in the show. You are given a wristband on entrance so you can come and go as you please.
We order our tickets usually a week or two before the event. We like to have a general idea of the weather for the event. You can purchase the tickets online, here. Keep in mind that the tickets are non-refundable, but the money goes to the Navy’s MWR program. Also, purchasing your tickets day of the event may be problematic since there is only so many people allowed in the ESC area.
Will Call and the ESC entrance are in two different locations, but close to each other. I would say within a half a football field distance. I do not truly get this step up, but whatever. I would have thought the Corporate and ESC tickets/booth would have been placed in-between those two groups compared to those that select the bleacher and reserved are rather in the same location. We do not mind the walk, after 14 miles up and down a mountain, 50 ft on a flat surface is a walk in the park. At will call, you can either pickup your pre-order tickets or purchase your tickets to the specialized location. If you ordered online early enough, your tickets with be ‘snail’ mailed to you. We have never waited in a line over five minutes to pick up tickets.
The Airshow is a wonderful event. The skills of all the pilots, sky jumpers, wing walkers and drivers are one of the best in their fields if not the best. Seeing them push the limits of their planes, their body and skills is quite an experience.
Whenever you can go to the Airshow, my advice is go. I give this as free advice, even if it is not your thing you maybe surprised on what you learn, the people you meet and most importantly you are supporting the MWR program, therefore supporting your military members and families. Oceana is not the only location that this airshow takes place. You can find the locations of this show here. It is a great day for you, your family and/or friends.
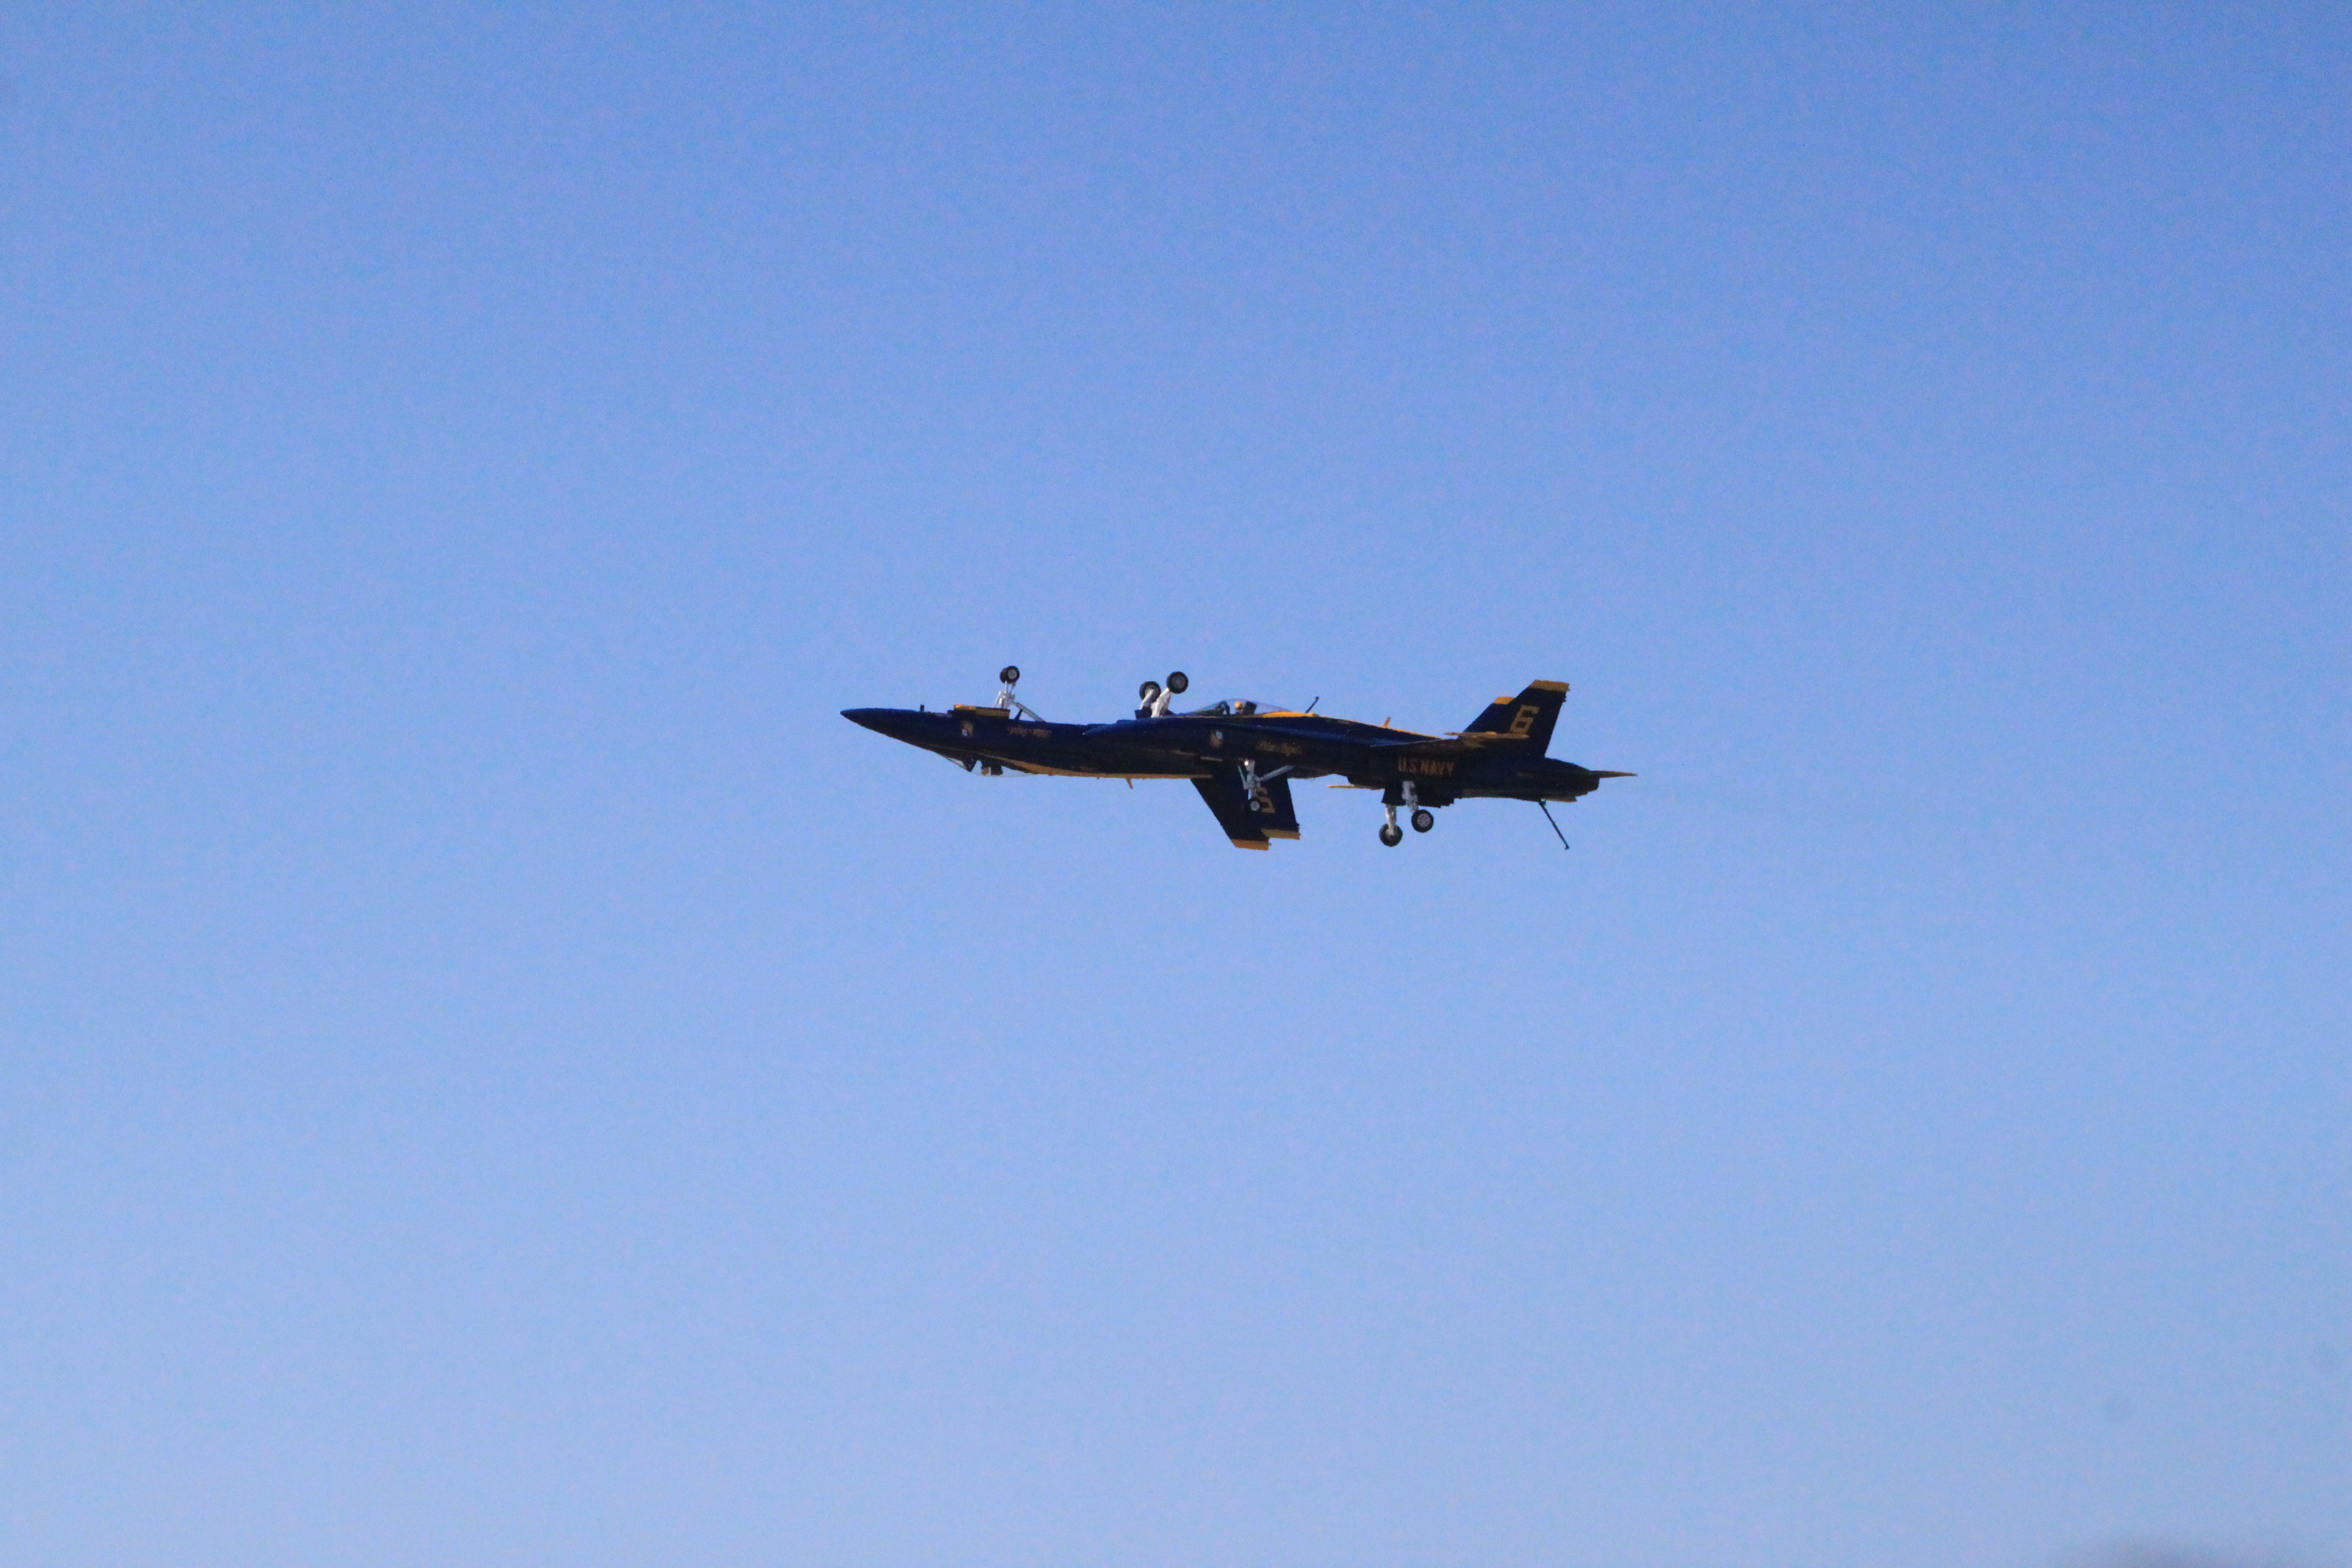
We had some perfect weather for some great photos! The Blue Angels show was called short due to rain. Overall, it was a great time and M had a wonderful experience at her first airshow.
Here are some pictures from the current airshow and some past shows….
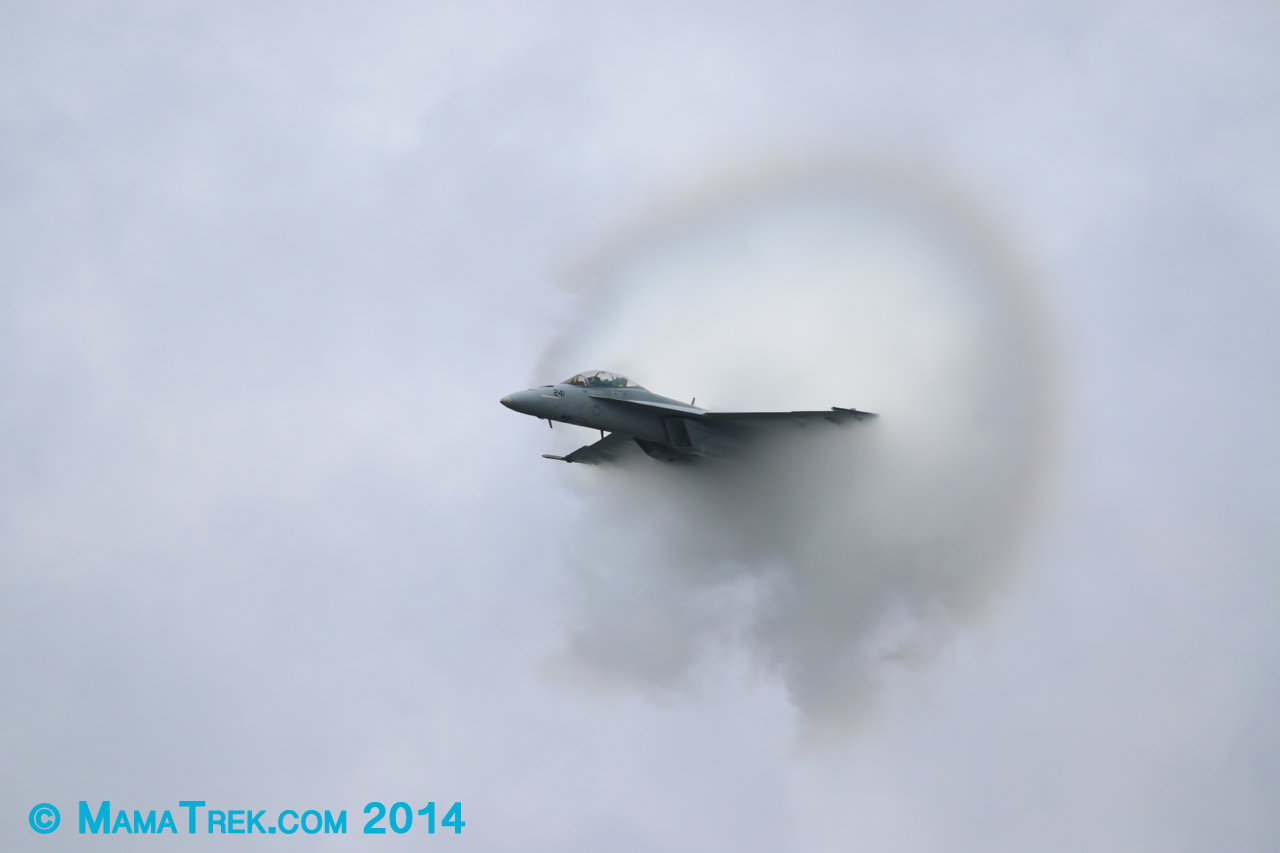
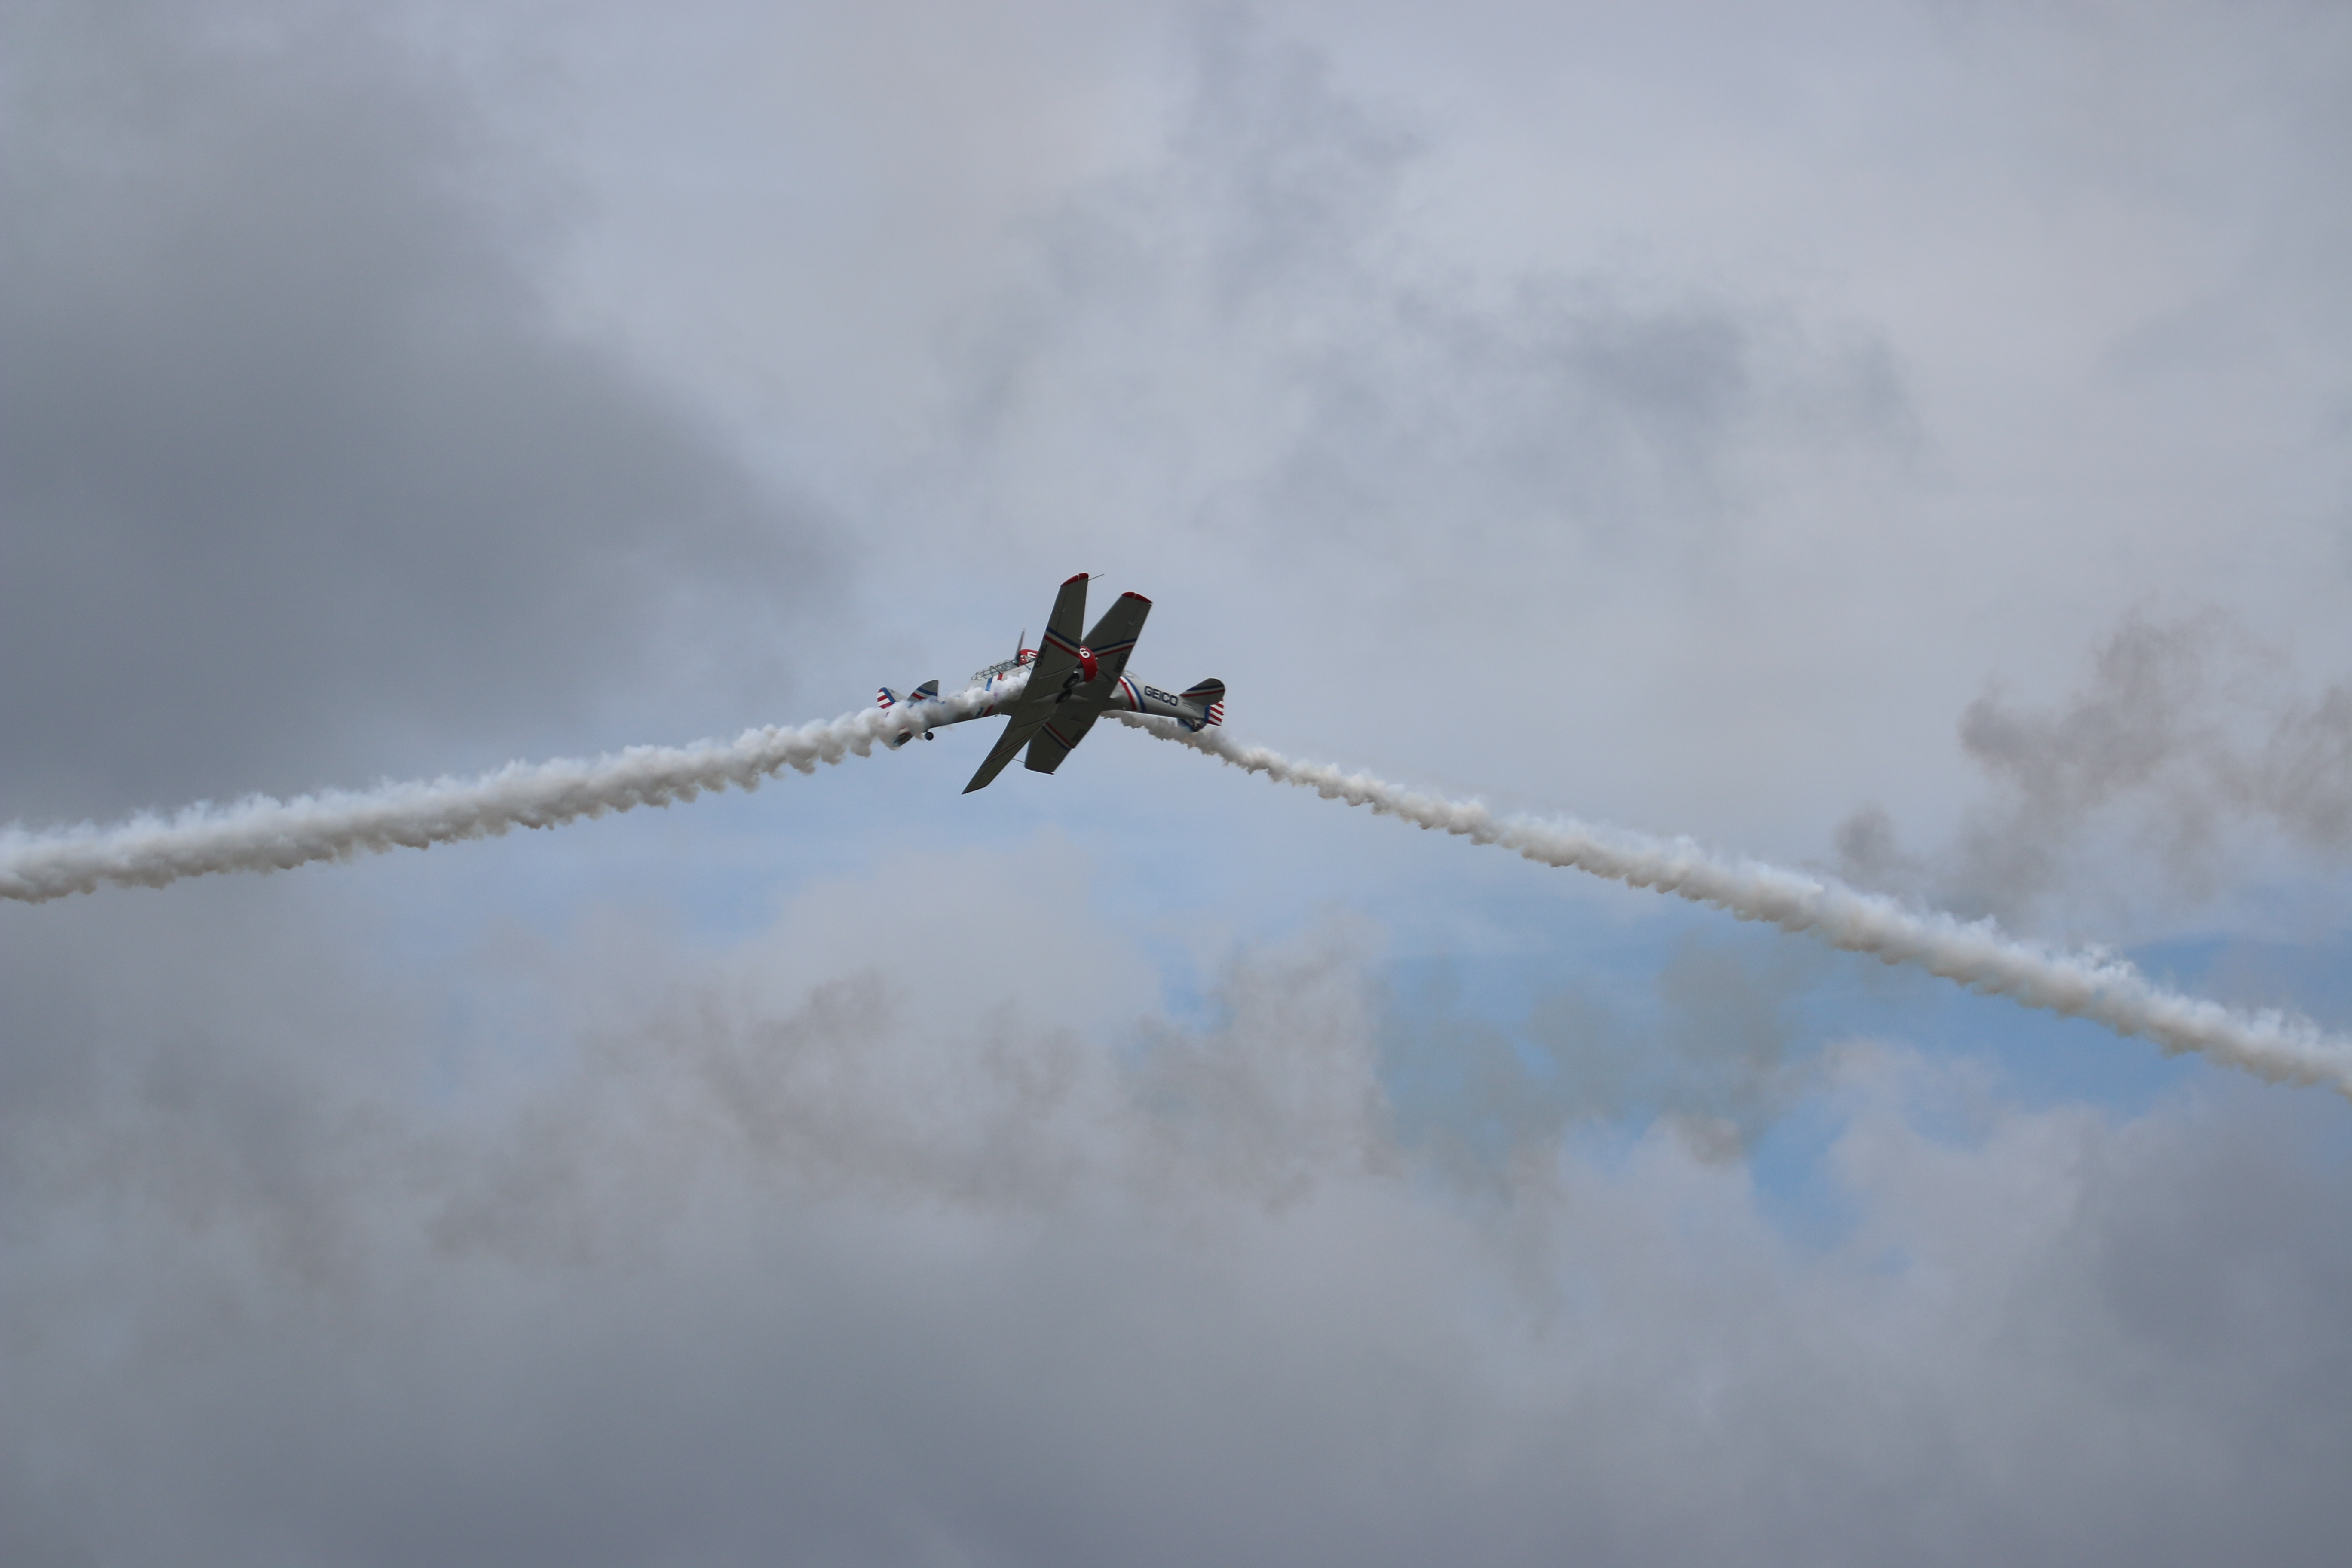
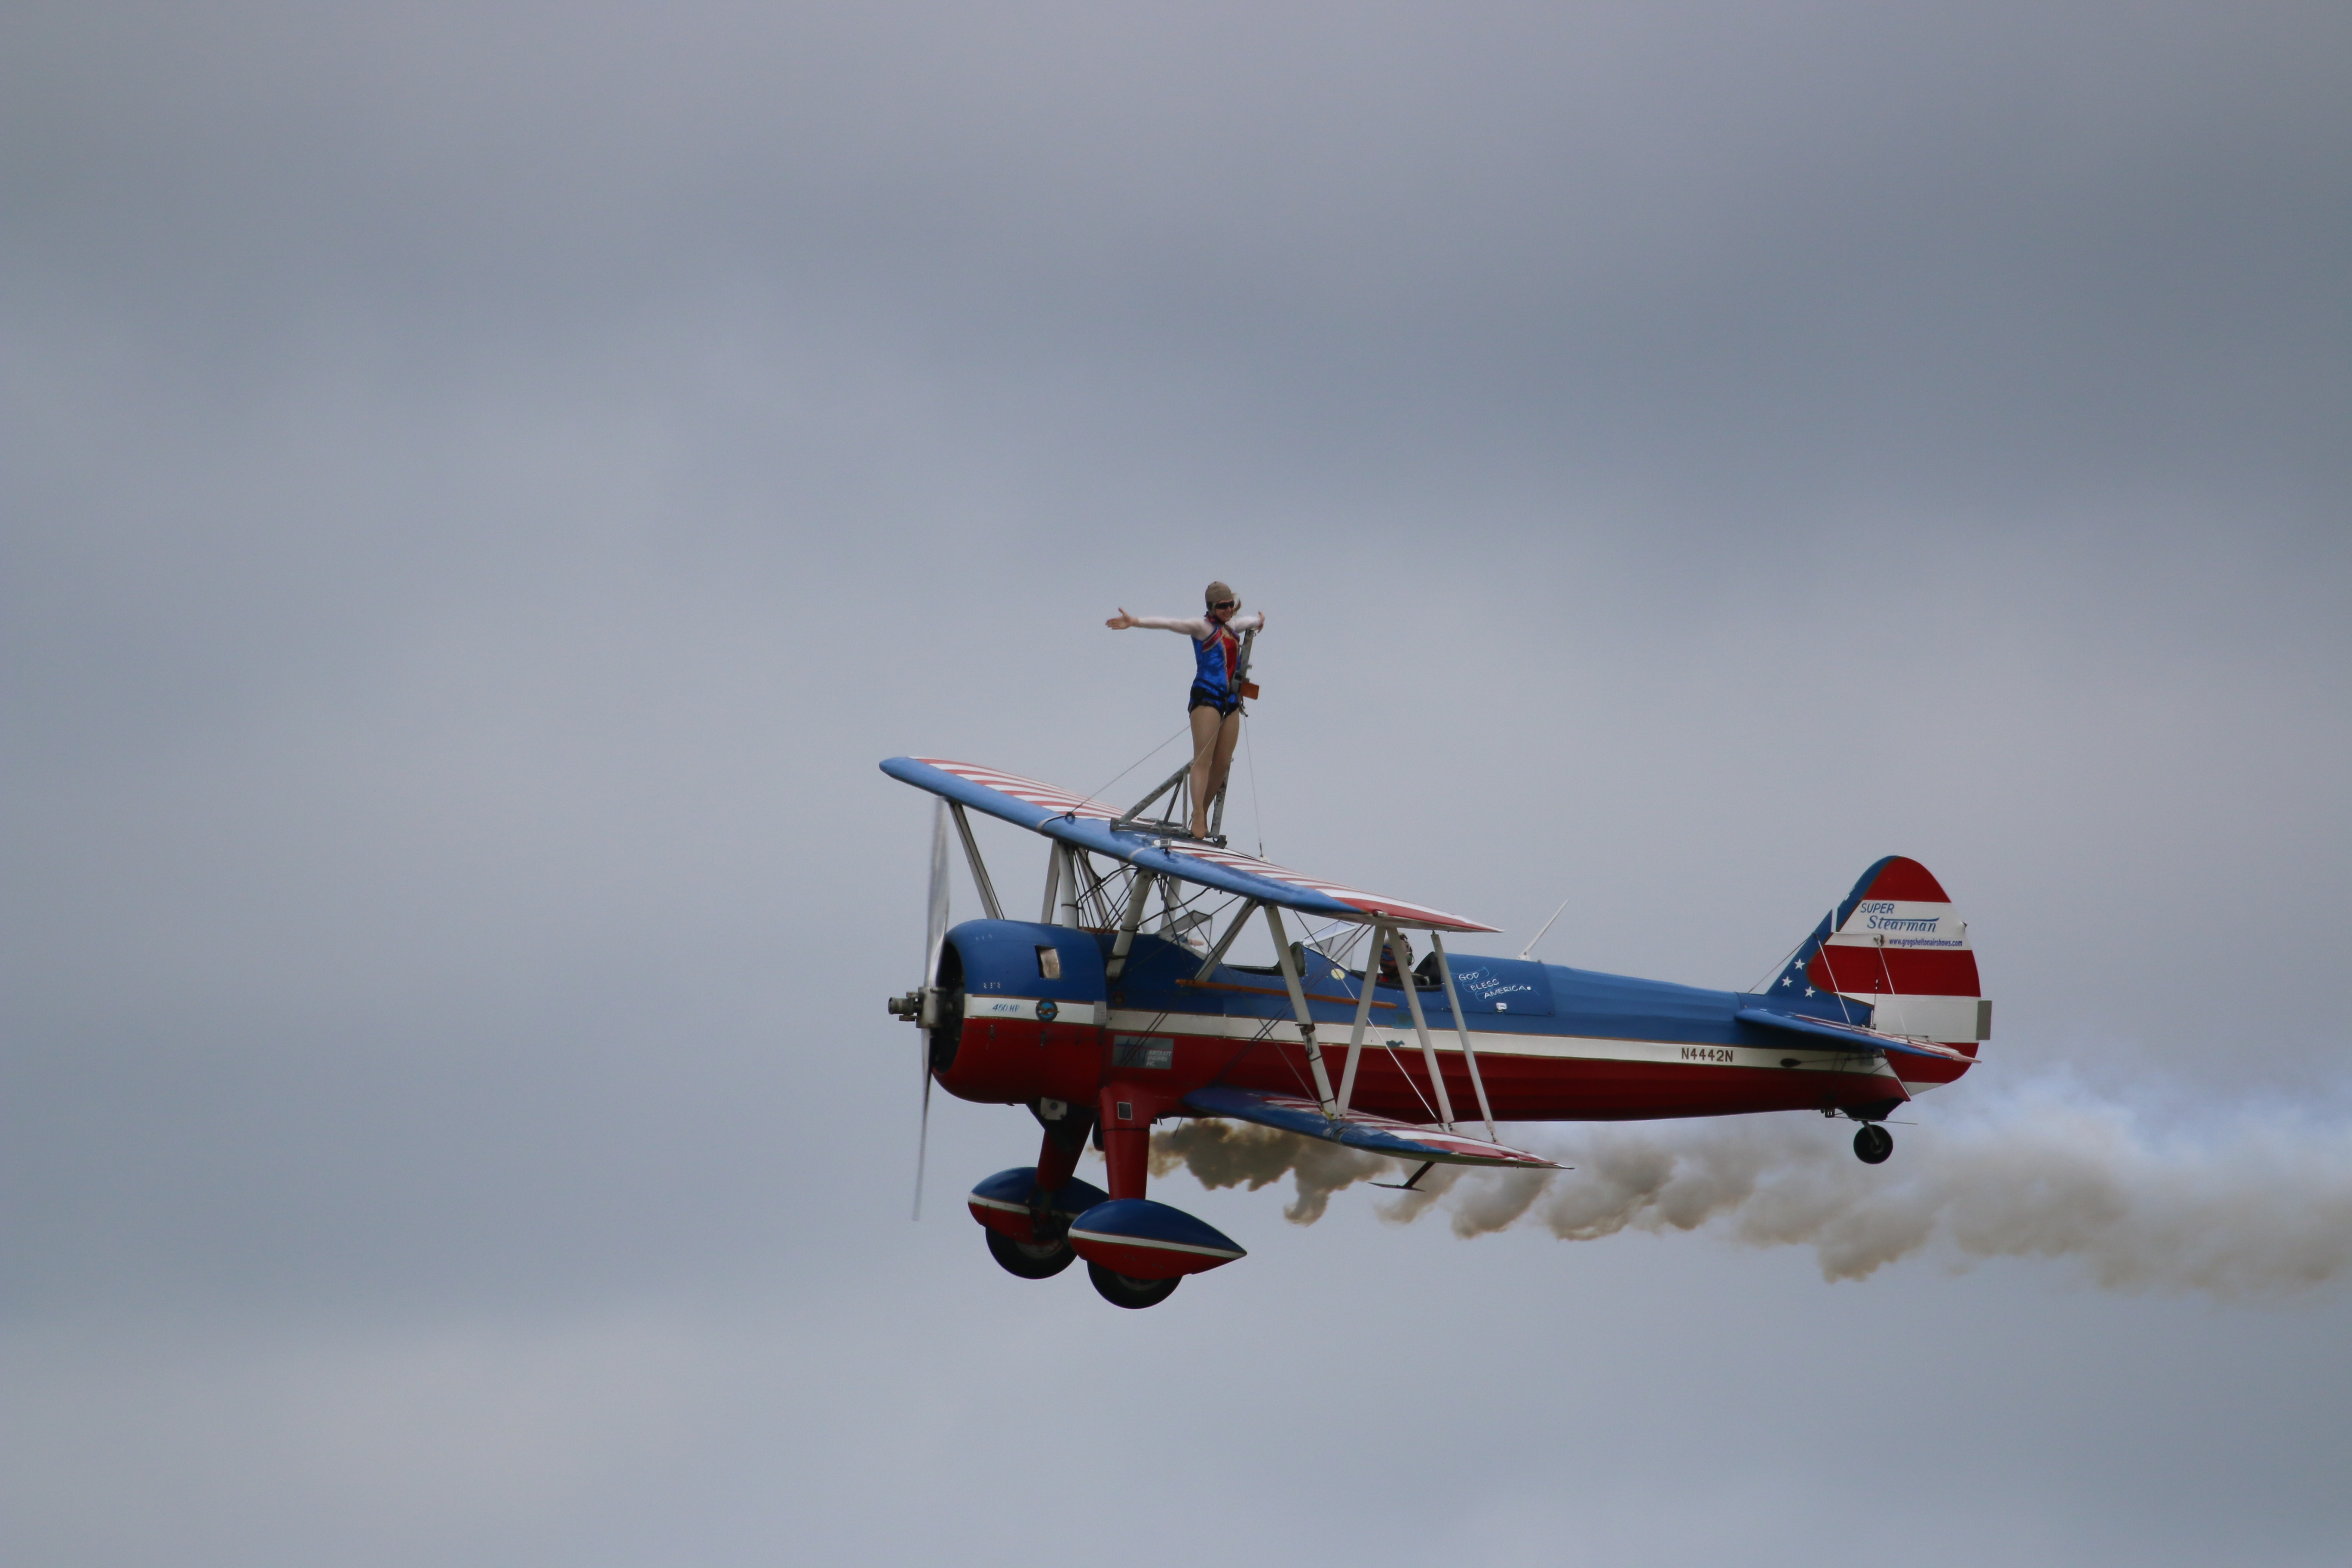
F18F Superhornet 2014201420142014Sky jumper 2014Using our carrier at the event — windy day 2014Geico Skytypers 2014Wing walker 2014Wing walker 2014
Above is Stage 1, Stage 2 then Stage 3 of awesomeness aka vapor 🙂
Blue Angels 2014
Some pictures from the past….
Above images in sequence, Blue Angels, having some fun planes 5 and 6.
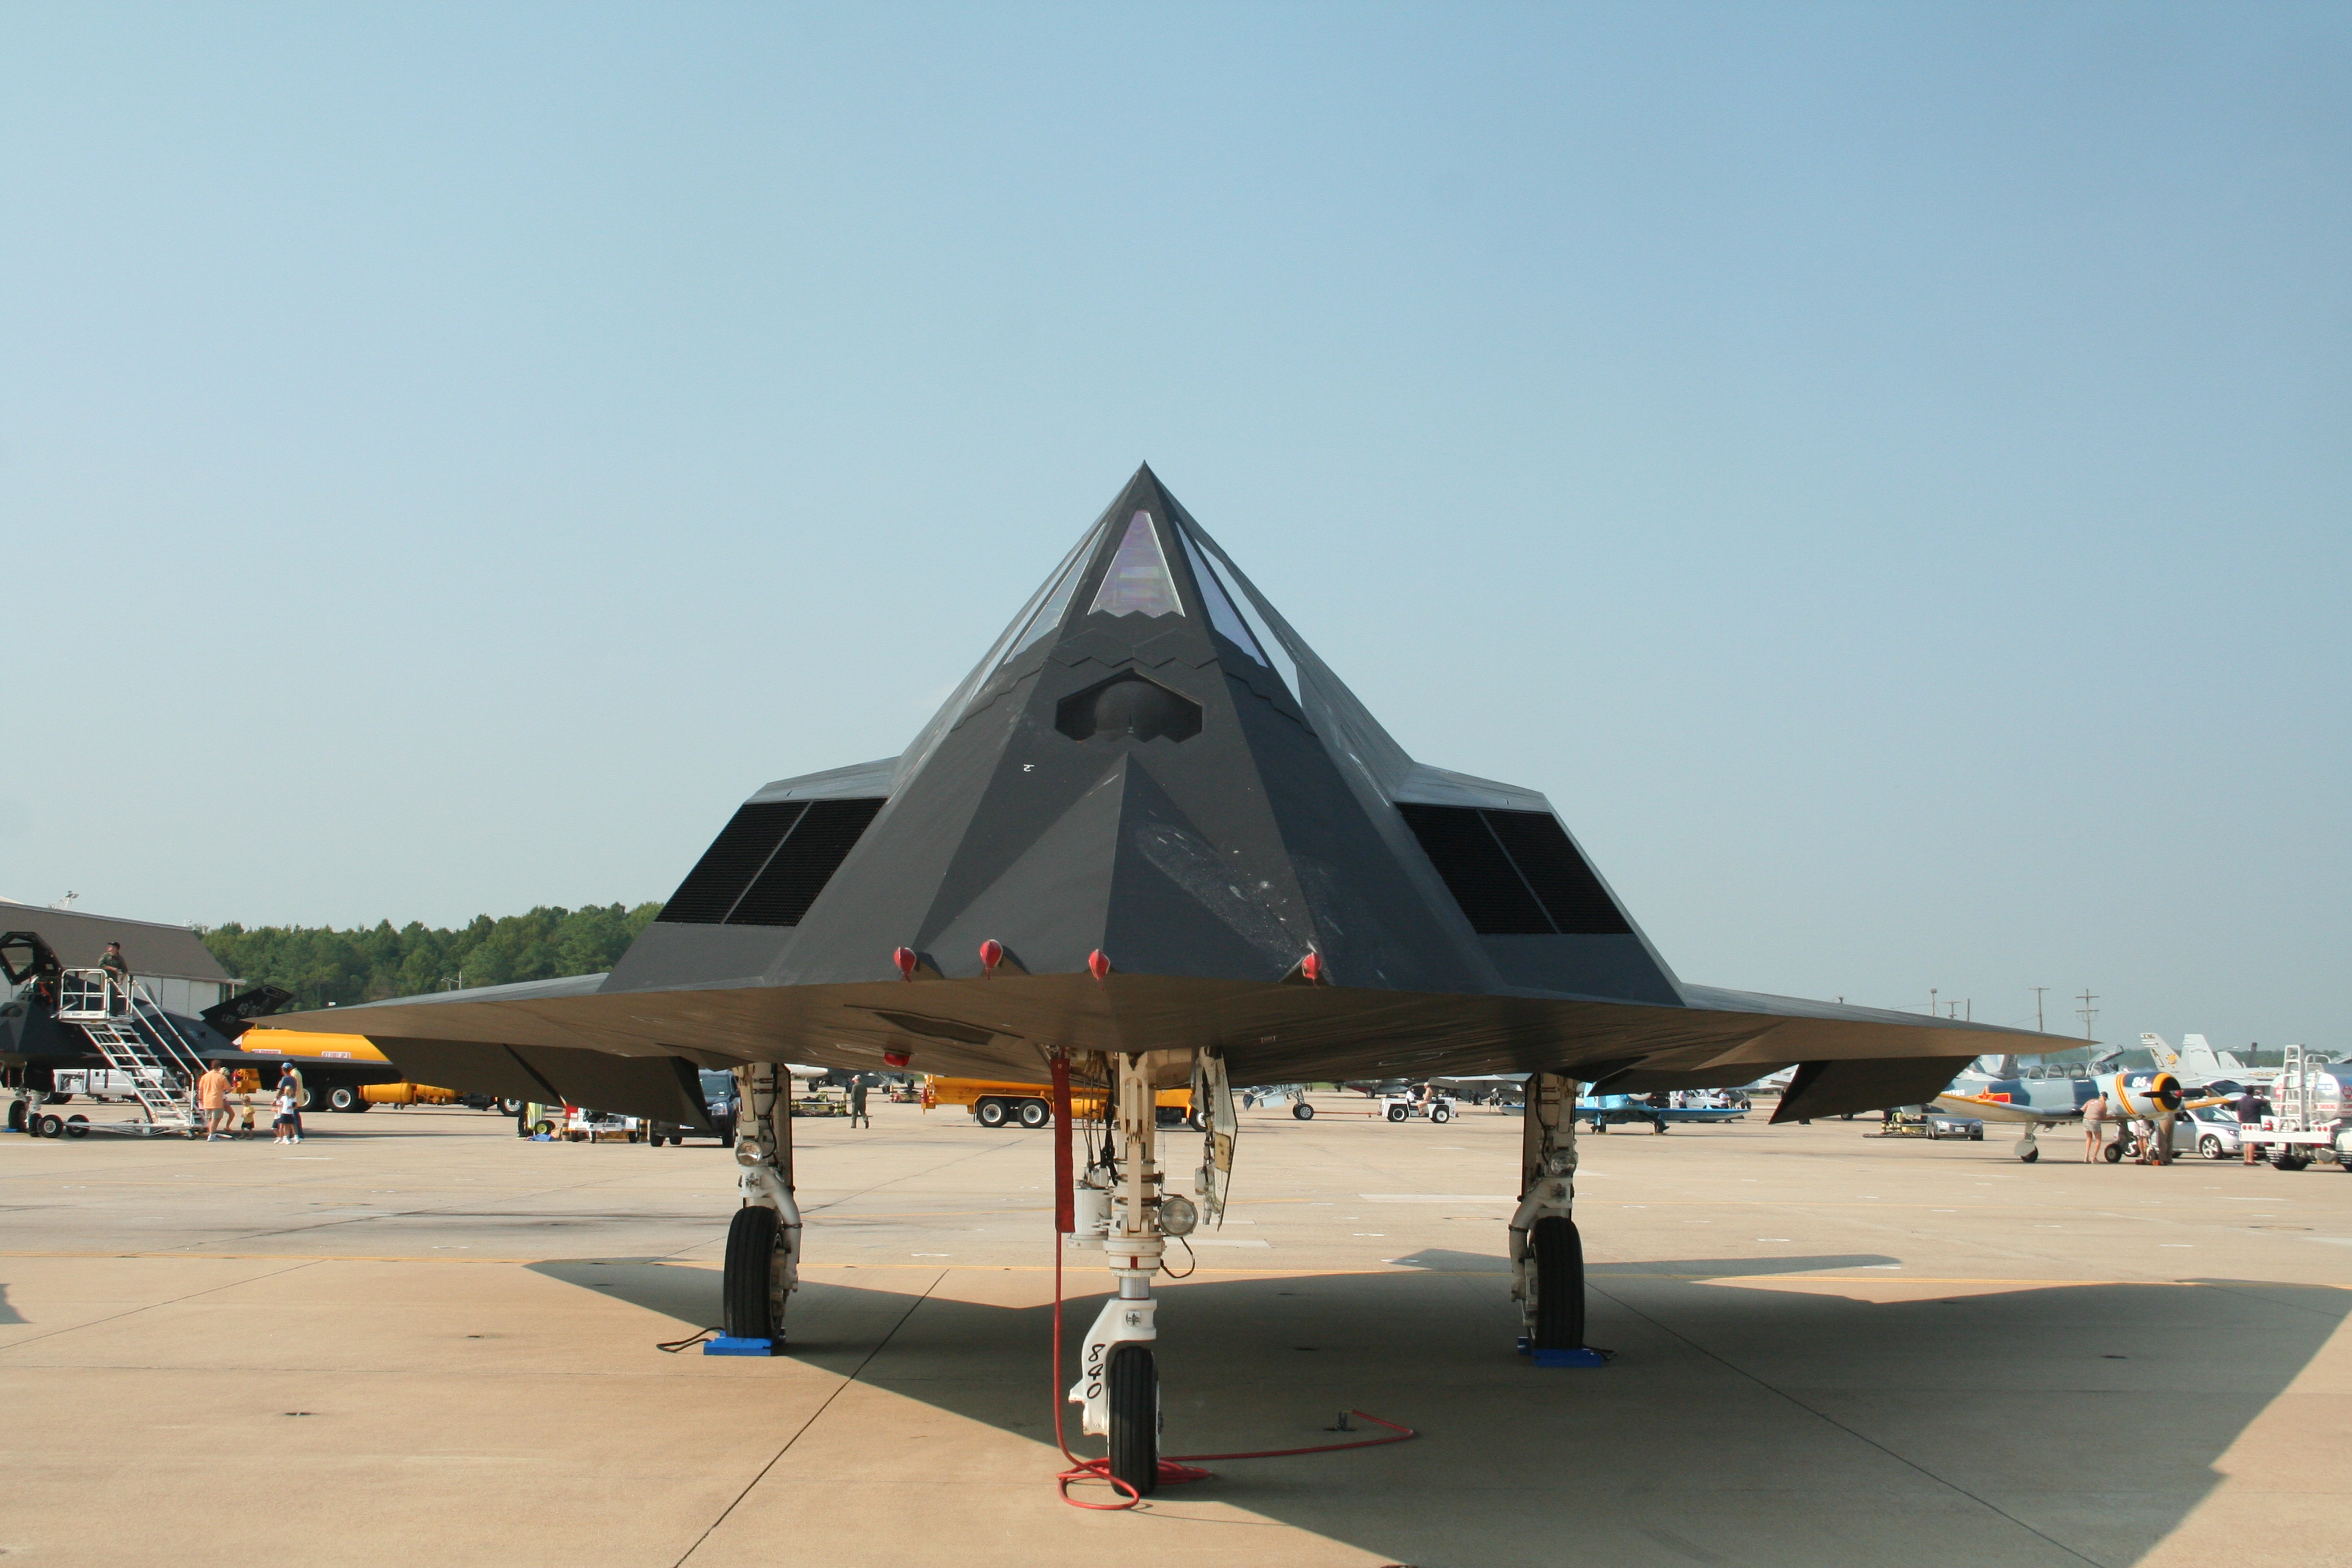
Static DisplayStatic DisplayStatic Display
Last but not least, the one and only… FAAAAAAAAAAAAT Albert!
Fat Albert
Even though, the weather this year was not the best. I want to send a thank you to all the sponsors, supports and active duty personnel. Especially, to the military police and the crew that managed the ESC gates. See you next year….
What can I say about this hike? I think one word sums it up, beautiful!
Lonesome Lake is a wonderful location for families or anyone who wants to spend some quality time in the mountains. The views are incredible. Basically, it’s a small slice of heaven in the Franconia Notch State Park. You can find out more about Lonesome Lake, here.
The lake has an AMC Hut about 400 ft from the lake. For more information about the hut, you can find it — here. This is a popular hut during the summer time, so plan ahead.
We planned to stop by this hut for our normal break routine. ie.. water refill, bathroom, snack time, let M out and run around. During, our short visit, I heard the same question asked several times by different hikers. I have heard this question asked at other hut locations. So, I am going to take a moment and answer it. And for anyone that needs this question answered. I am sure the staff is sick of answering it. So, what’s the question, you wonder…..
“How do you guys get the food up here?”
The answer is simple the staff carries it up. There is no special helicopter delivery system, no ATV, no dirt bike and no green men from Mars who beam the food in. It’s that simple, the staff carries it up and cooks it for you. These are the same people, who answer your questions regarding your stay, trail details, clean up after you leave and brings down the trash they created and the trash that you forgot about or purposely left behind.
So, remember to thank them. Even when we are just passing through using the bathroom, siting at the table and refilling our water, we thank them. They are always preparing, planning and answering questions. Yes, they love their job, but a little appreciation goes along way.
And remember it’s not their job to carry down your trash. They carry up all the items to make sure stay at the hut is one of your best stays ever. They carry down the trash, so help them out by carrying down your own trash. We carry all our trash down, which includes M’s dirty diapers. Just do your part, even if it’s just a few tissues.
And please, do not ask this question again… 🙂
Okay, off he soapbox and onto our hike…
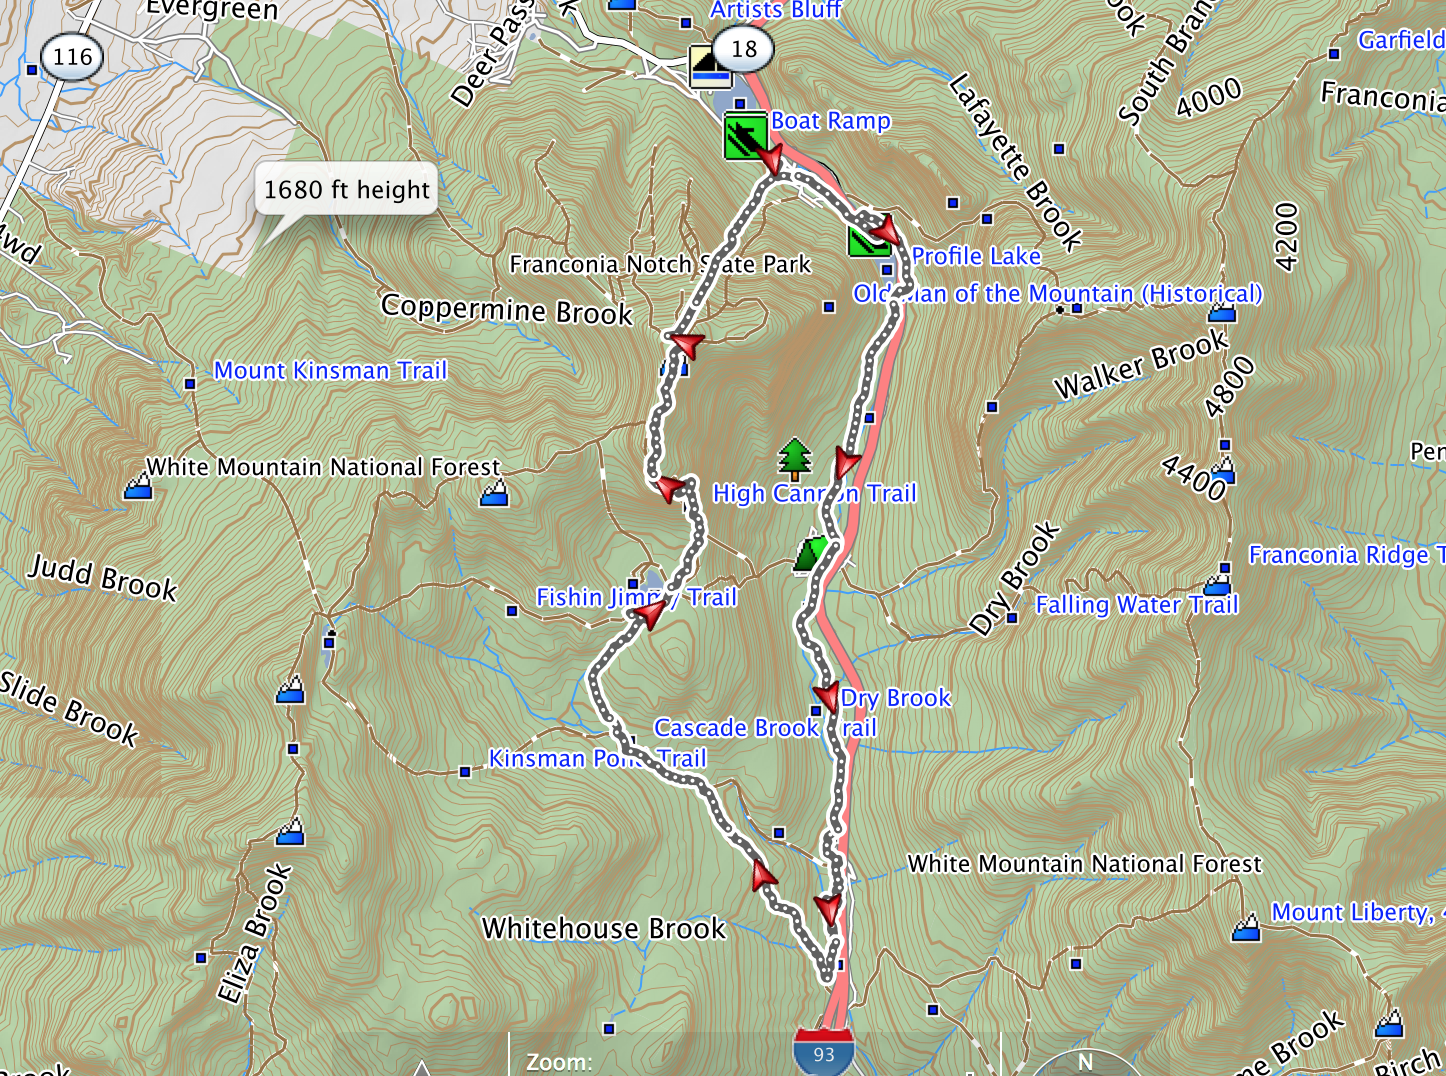
We parked at the Basin and walked the Pemi Trail to the Cascade Brook Trail. If you do not like water crossings this is NOT a hike for you. Your first major water crossing is tough. We ended up back tracking about 250 feet to find a location to cross. Your second major water crossing is at the junction of Basin – Cascade Trail and Cascade Brooke Trail. This bridge was washed out a few years ago and still has not been replaced. In high waters, there is no way to cross this with a child hiking or on your back.
There are other paths you can take to get to Lonesome Lake, such as, Lonesome Lake Trail. Pretty straight forward trail name on the map.
Here are some pictures from getting ready to go and the Basin area…
Ready to go with Miss M looking at Cannon Mt.Mom and M at the BasinThe Basin
The Pemi Trail follows the brook and connects with the Cascade Brook Trail. You will literally walk into this sign.
Pemi Trail & Cascade Brook Trail
Yes, as of 2014 the bridge is still out. And do not get all upset about it. There are only so many volunteers to help rebuild and maintain trails and only so much funding.
Heavy rain, smelting snow and just good ol’ White Mountain weather can cause the water to run high. If you are unsure about crossing water then skip this trail and head up the Lonesome Lake Trail. If you are hiking during the early Spring and don’t want to carry a canoe for about 1.5 miles to Cascade Brook to cross then re-plan your route. All jokes aside, we travelled up and down the Cascade Brook to find the best place to cross. What is easy for a regular hiker with a 5 lb pack is not the same for one with a 42 lb pack with a moving child. It is a bit of a challenge.
Once you are on the Cascade-Brook Trail the climb is very easy. I use “very easy” since we have hiked the Jewel Trail, Webster-Jackson Trail, 19 Brook & 19 Mile Trail, Baldface and many others. The Cascade-Brook Trail is a great beginner trail up to Lonesome Lake minus the water crossing. The climb is gradual and the terrain is very basic. You will deal with some rocks but nothing too strenuous. Even though, it is a basic/easy trail, during or after a good rain, some of the terrain a bit more challenging. So, use a bit of caution.
During our hike up to the crossing… Miss M decided it was time for a nap.
Loving the new chin pad by Deuter… M is happily napping
Here is the junction of the Cascade Brook Trail and the Basin-Cascade Trail. Along with a few other trails.
Junction… Yes and M is napping again…
This water crossing was a bit tricky, not as much, as the one we faced following the Pemi Trail before meeting up with the Cascade Brook Trail. We were about to cross when another hiker coming down the Cascade Brook Trail and gave us a hand. And no, that’s not the ’round of applause’ hand. He took the time to help me and M across the water. He stood in the middle and helped to guide me along to J. We could have done it alone, but this hiker took the time to show us generosity. Not many do, and we give him many thanks.
This crossing is not made for first timers or amateurs hiking with a toddler, one miss step or slip, you and yours will be mid-leg or laying in rapidly moving water and will hit every rock in the immediate area on your way down.
From this crossing, we ran into a group of hikers at another junction. This junction is for the Kinsman Trail or Kinsman Shelter and the Lonesome Lake Hut and Cascade Brook Trail. They were on their way to the Kinsman Pond, which you can access the from the Cascade Brook Trail, just turn left at this junction. We ended up taking some time to help their group decide what path was best for them based on time, water needs and their strength. We used our good old fashion AMC White Mountain Guide Map to give them a better visual of the trails, inclines and locations of huts.
I know shocking we are a high-tech family, but our go to item is a paper map that is secured in a waterproof plastic zip lock bag. In fact, we didn’t just use this map for this one instance, but we pulled it out at the junction point of Hi-Cannon Trail, Kinsman Trail Ridge and Cannon Mountain and Lonesome Lake Hut.
Once, you get to this junction for the Kinsman Trail & Shelter and Lonesome Lake Hut, you have 0.8 miles to Lonesome Lake then another about 500ft to the hut. The 0.8 miles is filled with bog bridge crossings and rocks. The rock trail is basic, but take note of the moss on the rocks. If you do not know what moss looks like it’s the green stuff on the rocks. The moss makes your footing troublesome. Just be wary of the moss. No need to slip and get an injury.
The whole hike up to Lonesome Lake is absolutely worth every view. I mean it, do a 360 and take in it the beauty. Since, we hiked Little Haystack to Mt. Lincoln to Mt. Lafayette to the Greenfield Hut and down the view of the that range was incredible. We took a moment and reminisced about our last summer hike of 2013 before carrying on up to the hut.
At Lonesome Lake on the way to the hutMarker along the way to the hut
View across the lake
Across Lonesome Lake Hut to Franconia Range
We spent some time at the hut. With helping the hikers at the junction and our normal scheduled hut time. We fell behind our time-table by an hour. An hour, is not much, but when facing some serious climbing the added time is very important BUT we cannot skip our rest time. Rest is so important during long hikes. We made the decision to head up to Cannon Mountain and two additional back up plans during our rest at the hut. All the while, M was snacking on your sandwich and talking to whoever or whatever would listen.
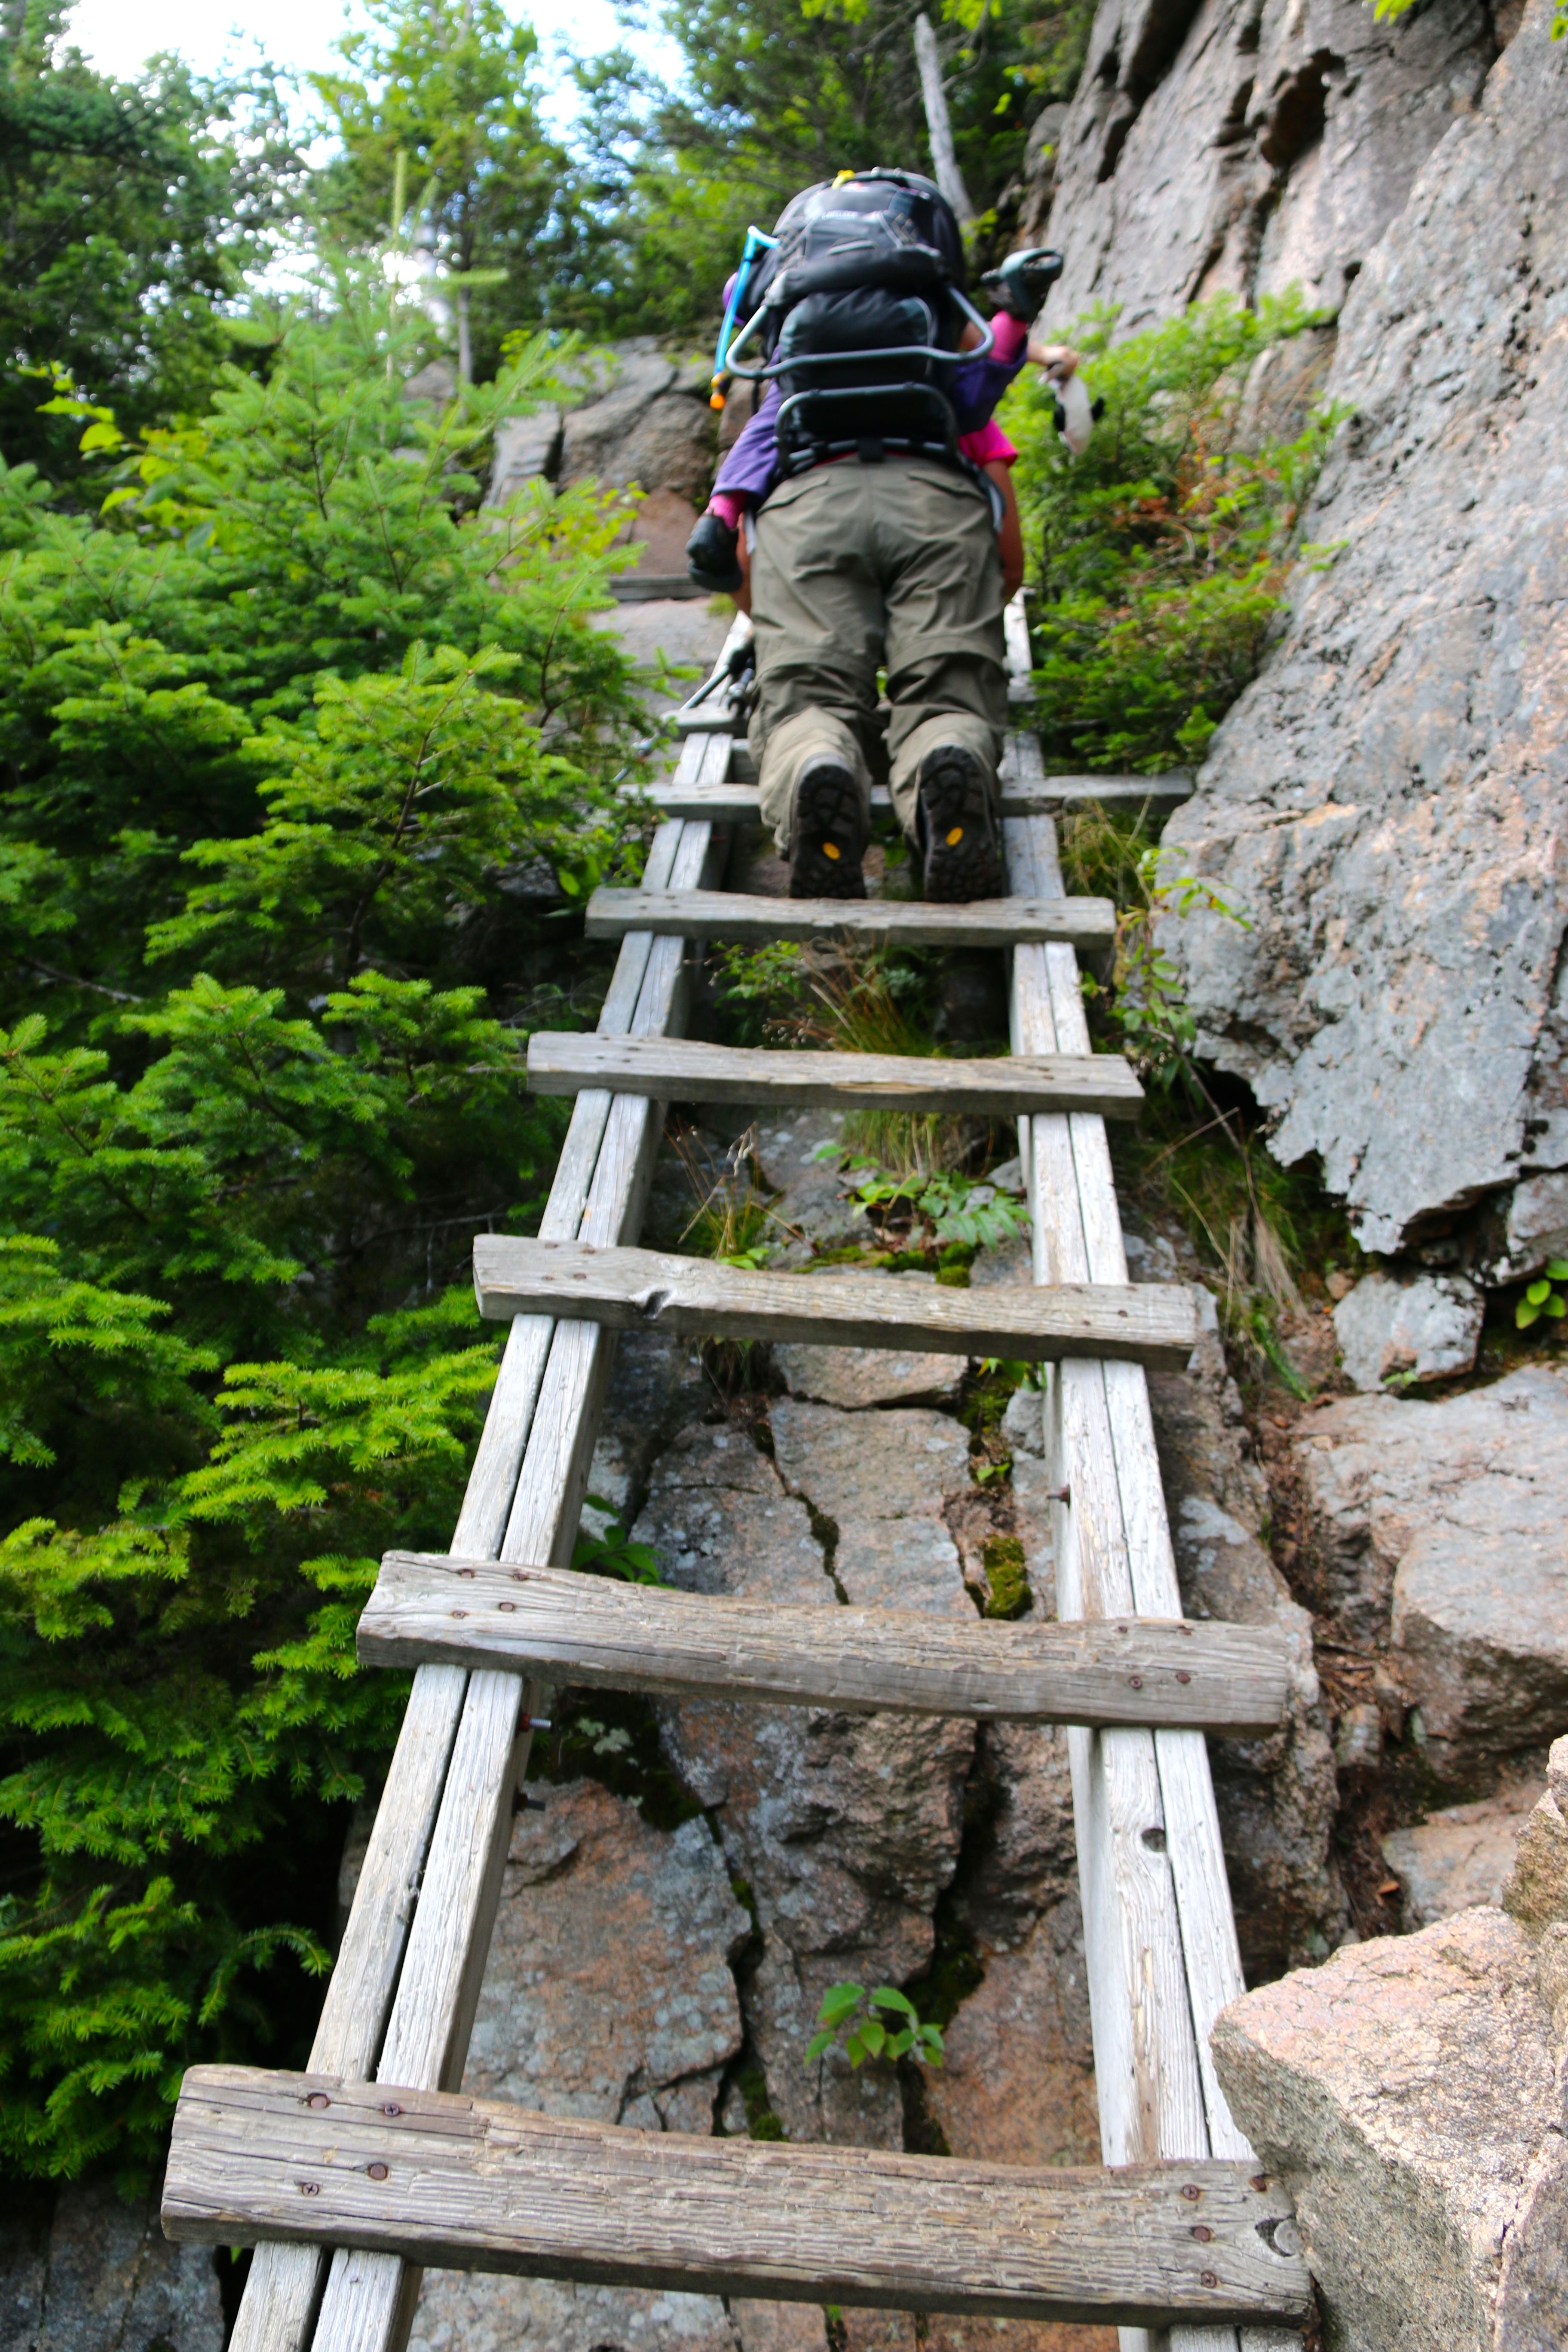
There are numerous trails up to Cannon Mountain. We took Hi-Cannon Trail. This is NOT a trail for those starting out nor a trail for the lone hiker with a toddler. This trail is tough and you will face many obstacles along the way including but not limited to stepping up on rocks, climbing over rock facings, climbing up rock facings, climbing rocks with views straight out and down and lastly a ladder. Yup, a ladder. To help you again, a l-a-d-d-e-r that is nailed to the rock facing. And the climbing is steep, some would say very steep and arduous.
The ladder part of the climb has two problematic areas. 1) You slip, you better recover really quickly. With a toddler on your back there is not room for error. So, take your time. 2) At the top of the climb, you do not have room to step up and off the ladder. You will need to step to left along a wood plank to step off the ladder then push yourself up to a standing position. You know, those ridiculous side squats or side lunges you either hate or ask yourself why someone is doing them. This would be where that training comes in pretty handy.
Climbing up the ladder…Almost to the top of the ladder
Looking down from the top of the ladder
After this stressful point of the climb, you will deal with more rock facings and more climbing. It is rather basic to what you just faced, but it can still cause some trouble especially if you are fatigued. The best thing about making it up this far are the views.
Of course, I just pointed to the lookout areas and J took the photos. This means my daredevil husband was hanging off a ledge to capture a few images.
Lonesome Lake from Hi-Cannon Trail
This is a panoramic photo that has been “stitched together” from multiple shots taken higher up from two different clearings.
Panoramic View from a hanging cliff on Cannon Mountain to right is Lonesome Lake
After the ladder and the great views, you come to another junction, which is Kinsman Ridge Trail and Cannon Mt. Trail. This junction is the location where I suggest you rest and check your time. From here the summit of Cannon Mountain is a half mile. The views from the observation tower are amazing, but it is not worth putting yourself or hiking group in endanger due to weather or limited sunlight.
Your descent back to the hut will first be either Kinsman Trail Ridge or Hi-Cannon Trail are both challenging ascents and just as challenging if not more challenging descents because of fatigue. The Jimmy-Fishing trail is not as hard, but you will first have to make it to it.
With that said, J and I revisited our plan and pulled out the good ol’ map. We revisited our back-up plans and looked at all the trails down and decided the best route was for us to take the Tram down. Yeah, I know hiking up and not hiking down may not qualify as a true hike for some. But we made the best decision for us given the time and the fact that we hike with a toddler.
So, we hiked the half mile up to Cannon Mountain.
On the way to the summit
Ironically, we saw this sign posted. Be safe out there. Going up is only half the battle you still have to make it back down.
Hiker Code
We climbed up the tower enjoyed the view, captured the moment and thought about the hike up. All what we accomplished, as a team and as a family to get to enjoy the fantastic view in perfect weather.
A view from the tower
We climbed back down the stairs. J and I discussed how much we both reallyreally wanted to hike down, but we kept to our back-up plan. We knew it was best and safety thing to do.
The Tram is located about 500 ft from the tower. It costs 26.00 for our family and you pay it at the bottom. The Tram ride is under 10 minutes. At the bottom, there is a gift shop and locations to sit and enjoy some food and drinks. The views from the Tram are wonderful. We met some really wonderful people on the Tram and another group of hikers that made the same decision we did after their climb up Cannon via the Kinsman Ridge Trail.
Now, don’t get your panties in a twist, we still had to walk four miles along the bike trail and Pemi Trail to get back to our vehicle. That my friends is the hardest part four miles full gear and nothing exciting to climb or to distract you. Honestly, it is like walking full gear in formation in boot camp the only thing missing was the drill sergeant.
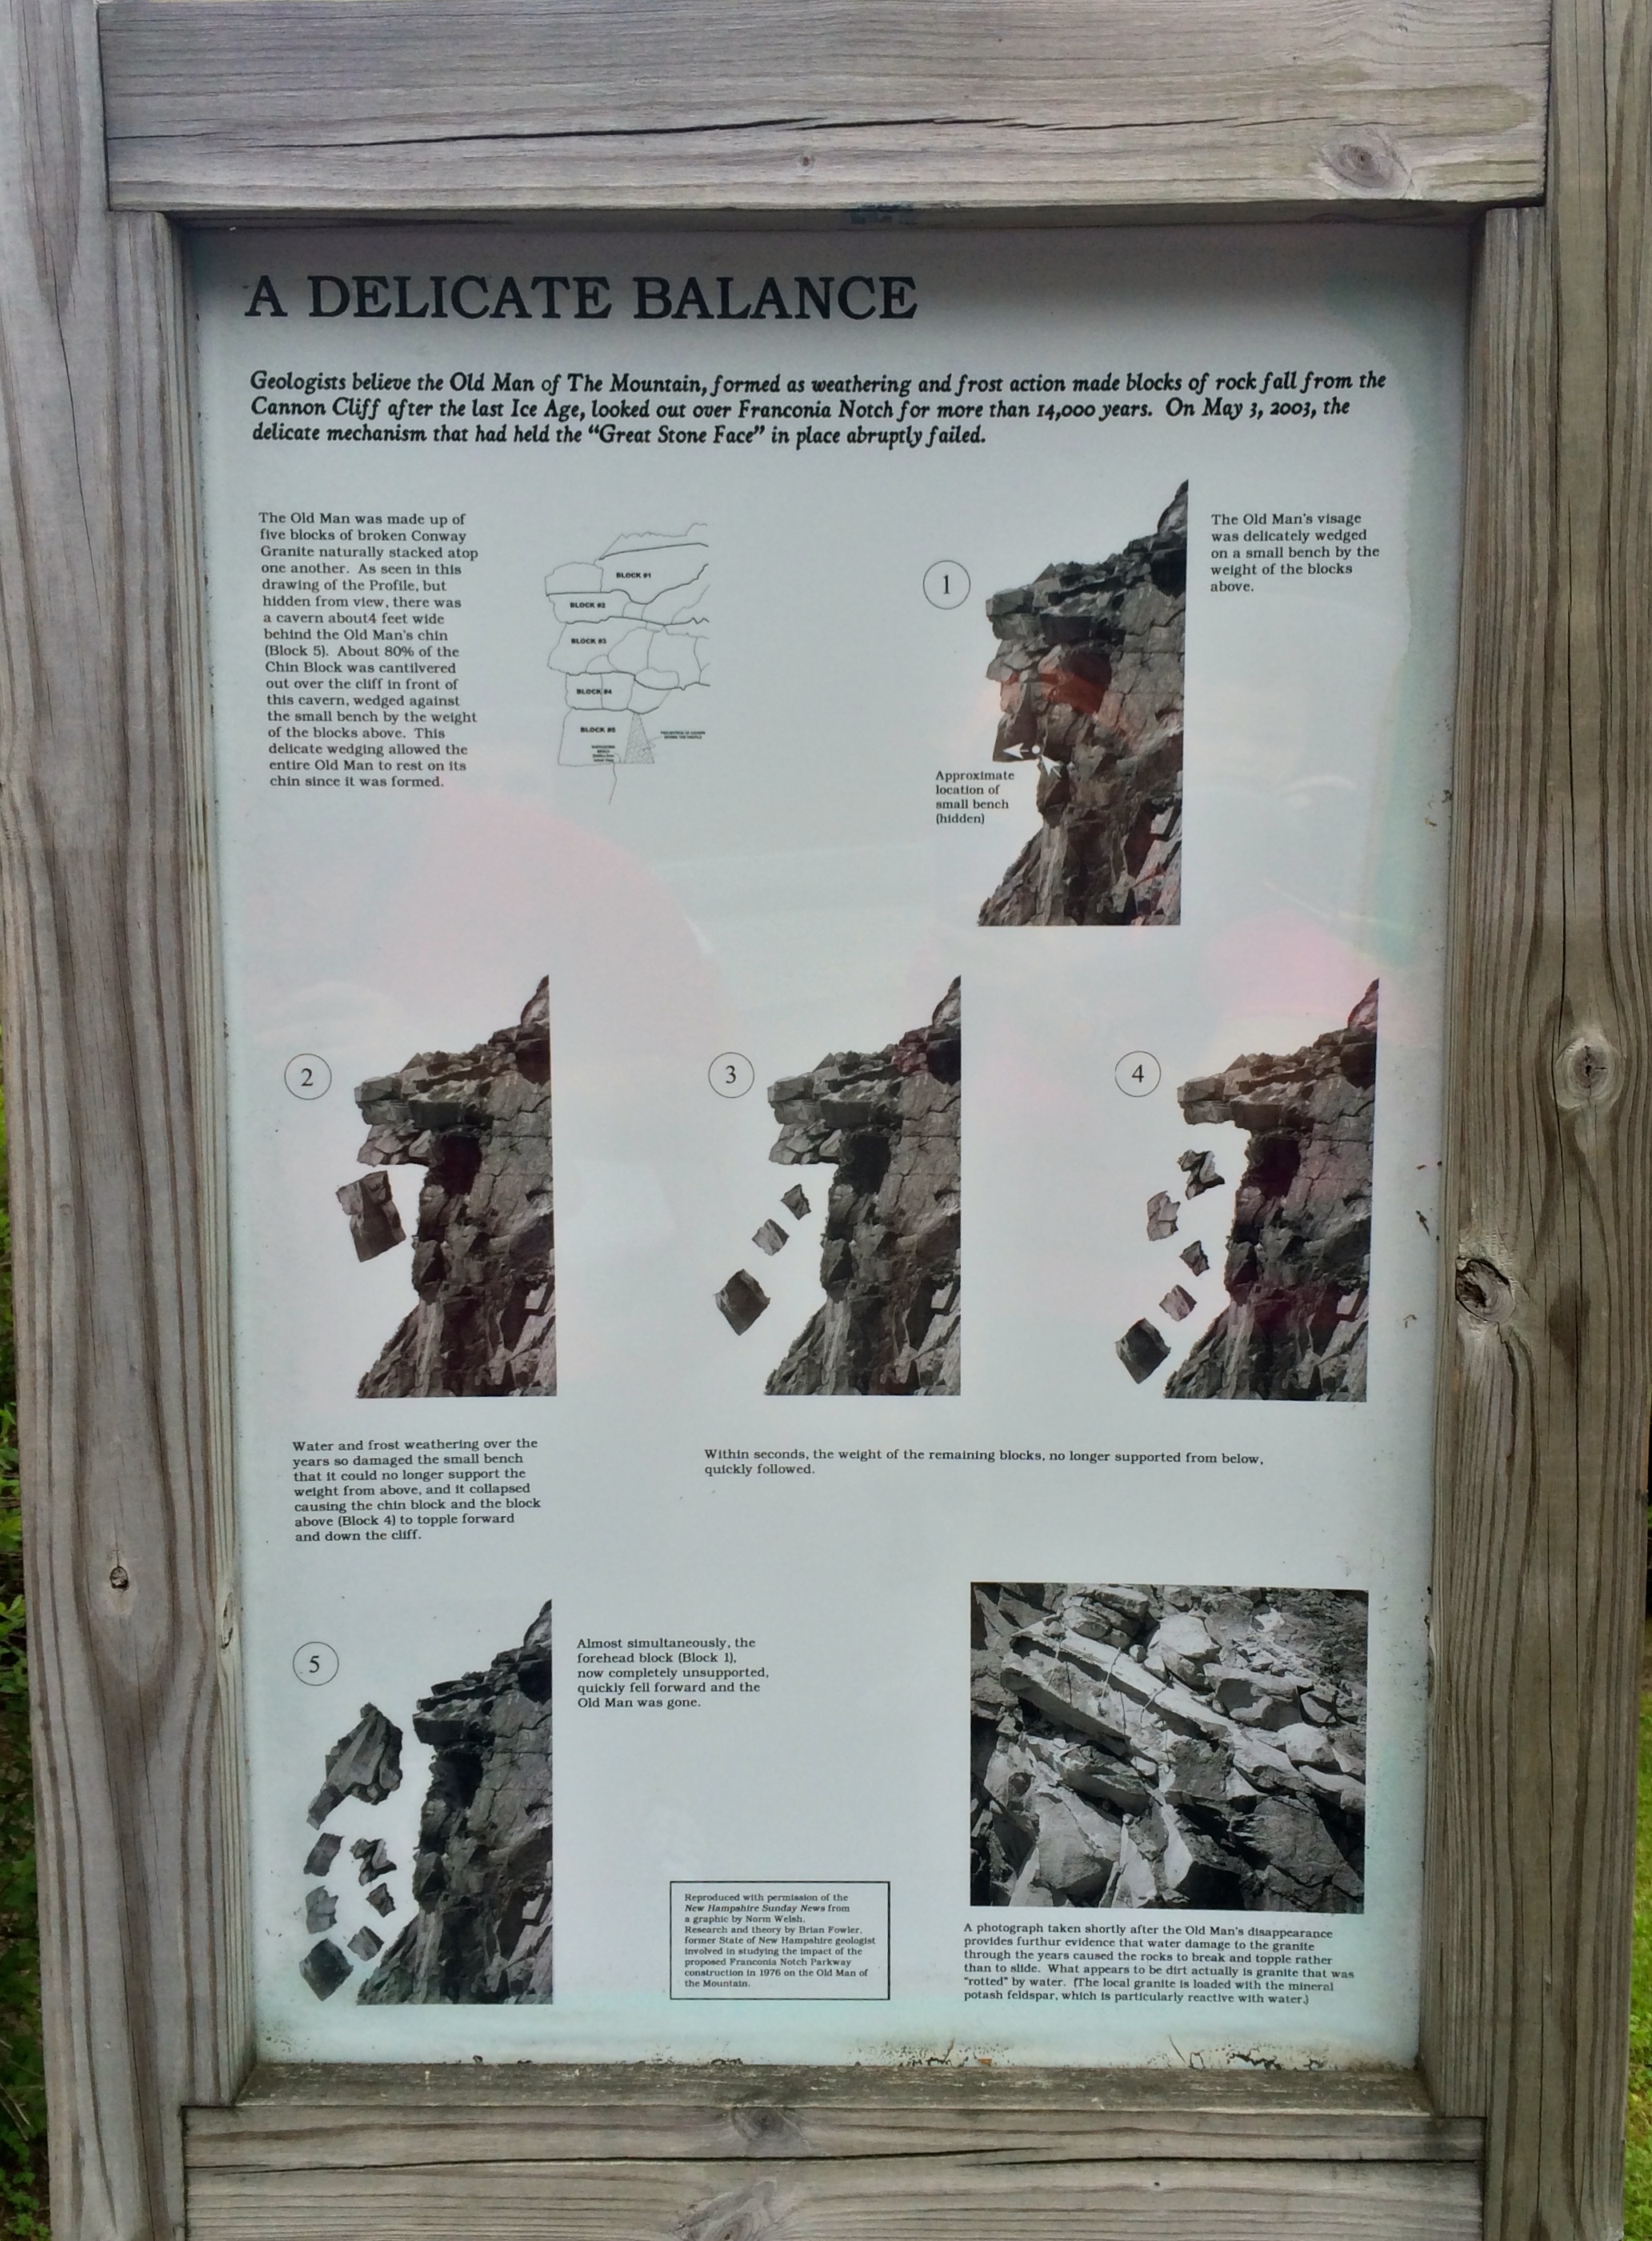
We did stop along the trail to see the ‘Old Man of the Mountain’ Memorial.
Daniel WebsterOld Man of the Mountain
The fall of Old Man of the Mountain….
How Old Man of the Mountain fell
In all honesty, the walk back to the car is a pleasant walk. But I can say I was extremely happy to make it to the car. My Garmin Fenix clocked our hike as 13 miles with a moving time of 7 hours and 30 minutes. We got back to the car at 530PM with an hour and half drive back to our home. If we hiked down the mountain we were looking at arriving at the car between 730 and 8PM with the travel ride home. We definitely made the right decision for our family. I would say from how Miss M looked like she was ready for a dinner, bath and her bed.
As mentioned, a few blogs ago, M and I received an ‘upgrade’ on our backpack/kid carrier. We were using the Deuter Kid Comfort II, which you can read about it in a post I wrote, here. That post goes into some important items to think about, I will re-address some of them during this post, because they are worth repeating a few times.
*Note; Toddler is interchangeable with Infant*
First off, my suggestion to anyone trying to find a toddler backpack for hiking is to go to your local hiking/outdoor retail store and try every single one on with your toddler in the seat. Some store examples are Eastern Mountain Sports (EMS), REI, Gander Mnt, etc. I suggest calling ahead to make sure they have kid carriers at their location.
Also, make sure you have receive help from the store’s staff, they will know about the how to properly adjust the carrier for your toddler and fit the pack on you. What works for me, may not work for you. After trying several types on with M, again this year, we went with the Deuter Kid Comfort III. I have read some poor reviews over the pack. Most of the reviews, deal with not having the pack properly fitted for your child and/or you.
Lastly, I suggest thinking about what you will be hiking, how long and where. This will help you find the correct carrier and also help the store’s staff give you options.
I have absolutely no complaints with our Kid Comfort III (KC3). I have tried to find errors and things, I would want replaced or changed, but I can’t find have anything to complain about. For what we want, this pack is perfect. Every small issue, we had with the Kid Comfort II (KC2) has been improved. I am picky, very picky about things I purchase. With this pack, I have no buyer’s remorse…. none at all and that is definitely saying something.
Here is the link to Deuter’s site to show the pack — link. You can get all the information from them, but I am going to take you through the changes and why we love this carrier.
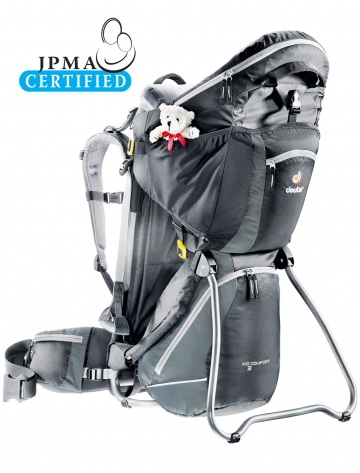
I am borrowing Deuter’s image of the Kid Comfort III. My pack is loaded out for hiking and I don’t want to get you confused on what is part of the pack and what is not. And yes, you get the teddy bear shown, red bow and all.
Kid Comfort III
Okay, let’s get down to business. Here are the changes from the Kid Comfort II to the Kid Comfort III
1) The adjustment for fitting your back, sizing your torso.
Here is the old, from the KC2. The 4 loop adjustment…. A.K.A — A big PIA, if you have to change the pack between people and one is shorter or taller.
With the new, Kid Comfort III the adjustment is now found under the back padding and is a simple pull to shorten or loosen to lengthen. In addition, there is an easy sizing chart on the pack itself. When looking at the back of the pack, it is located behind the right side strap where your shoulder area would be if the pack was on your back. You can also find the location for your water bladder by finding the H2O marker on the pack and you will see the sizing chart. The sizing is done by L, M,S and on the arm strap is a line to help you line up to the correct fitting. Depending on your load, elevation gain or loss, and as your child grows you may need to adjust it. So, don’t get stuck on a setting.
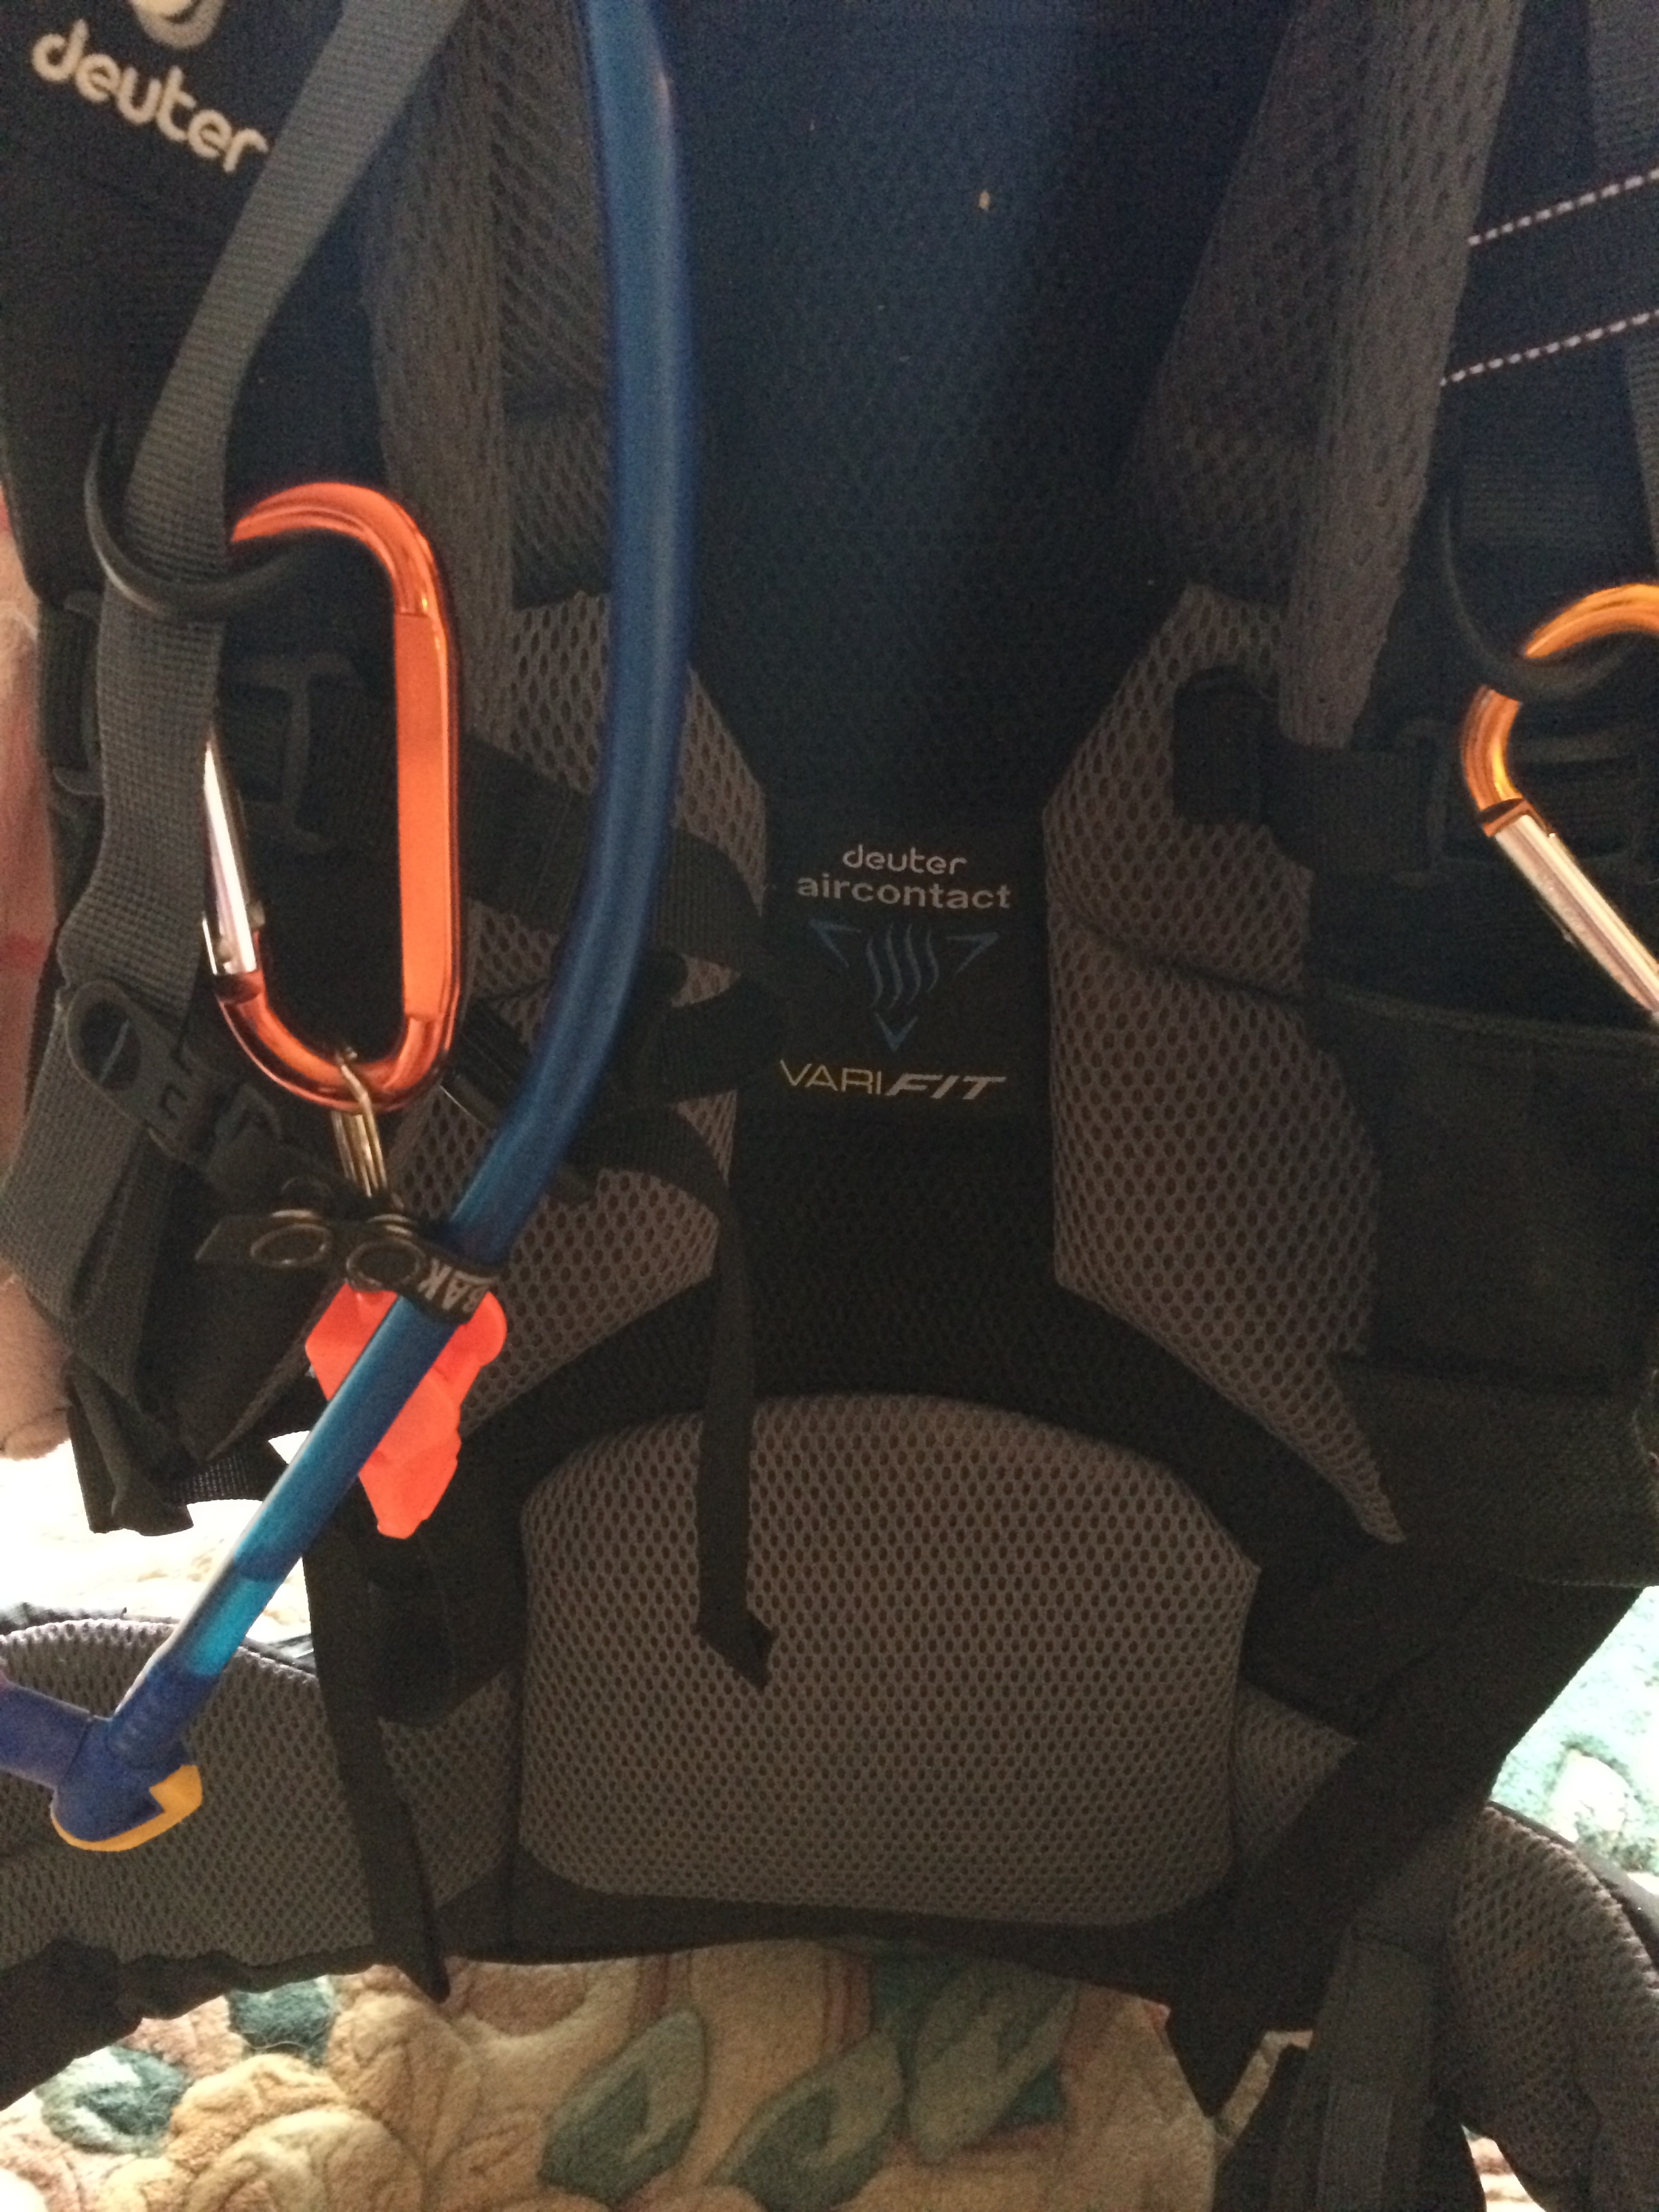
Here is the back padding on the KC3
Back padding (excuse the whistle , water tube and carabiner clips)
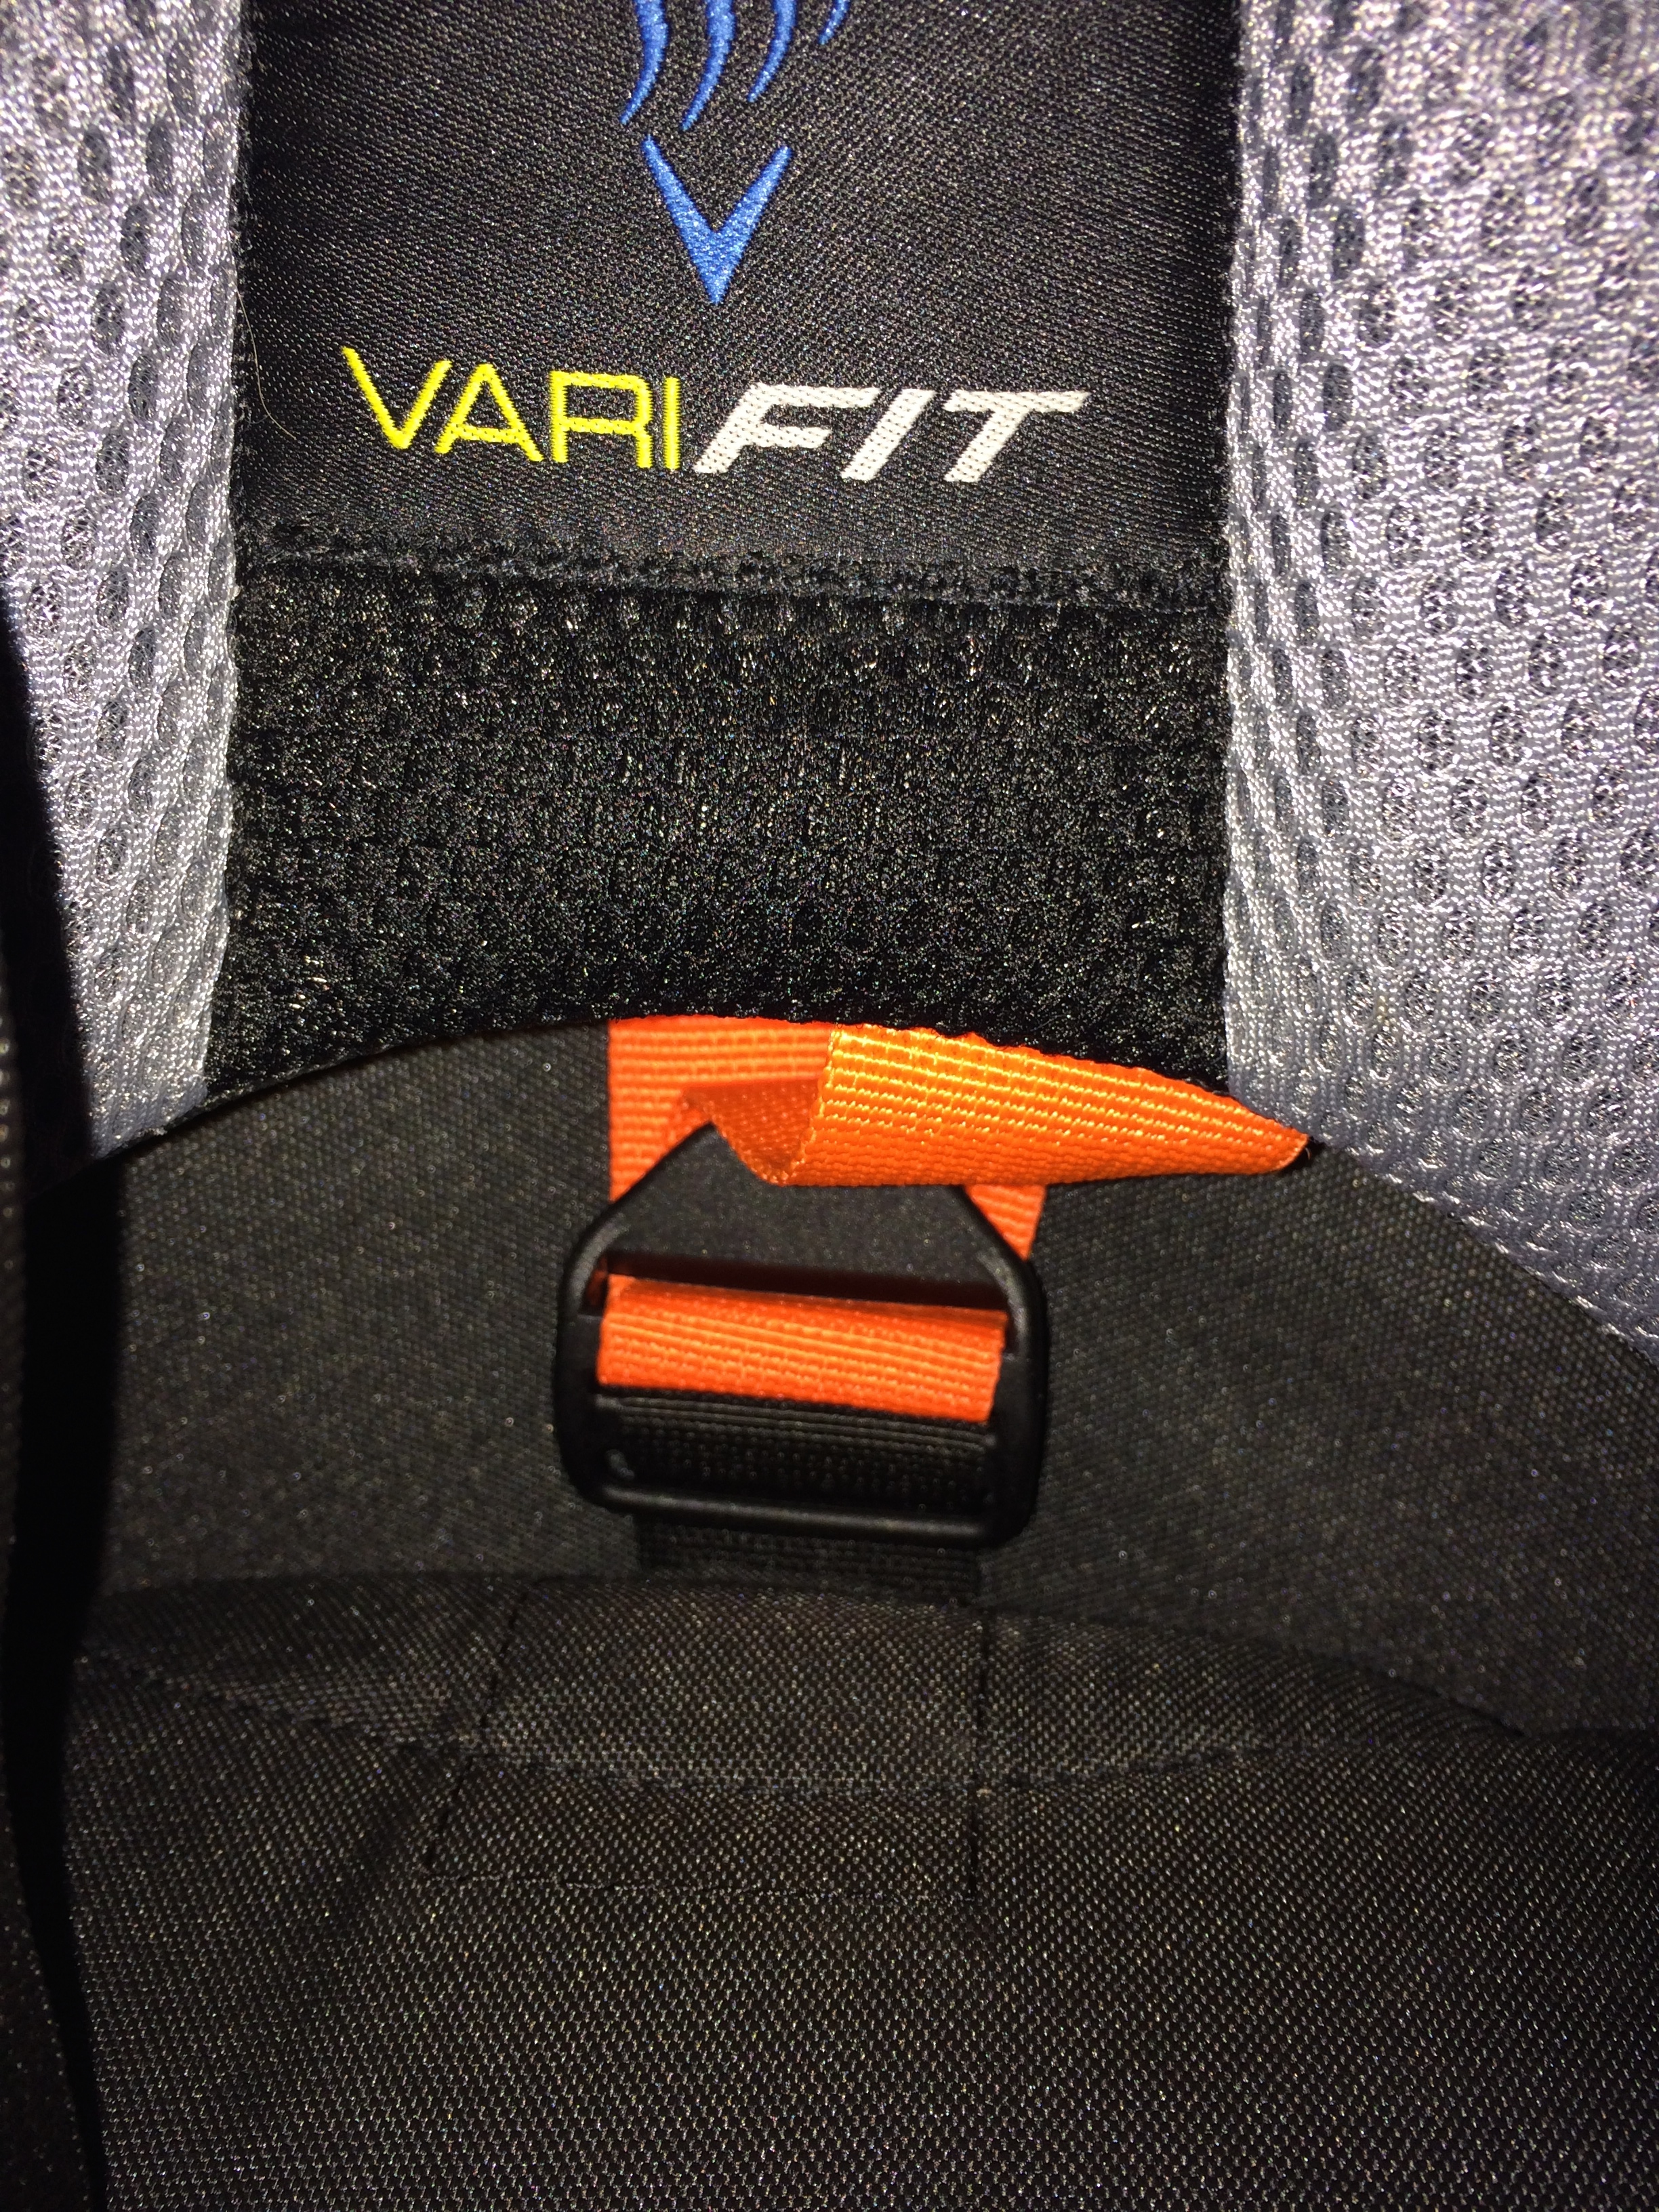
Right below the “VariFit” is the location of the strap. You flip out the padding and find the orange strap that you will loosen or tighten. The padding is connected to the pack with velcro.
Here is the sizing marker. As you can see the shoulder strap has the marker (white line on the left) and the sizing chart is on the right.
Another view of the sizing. As you can see, it is located near your water bladder.
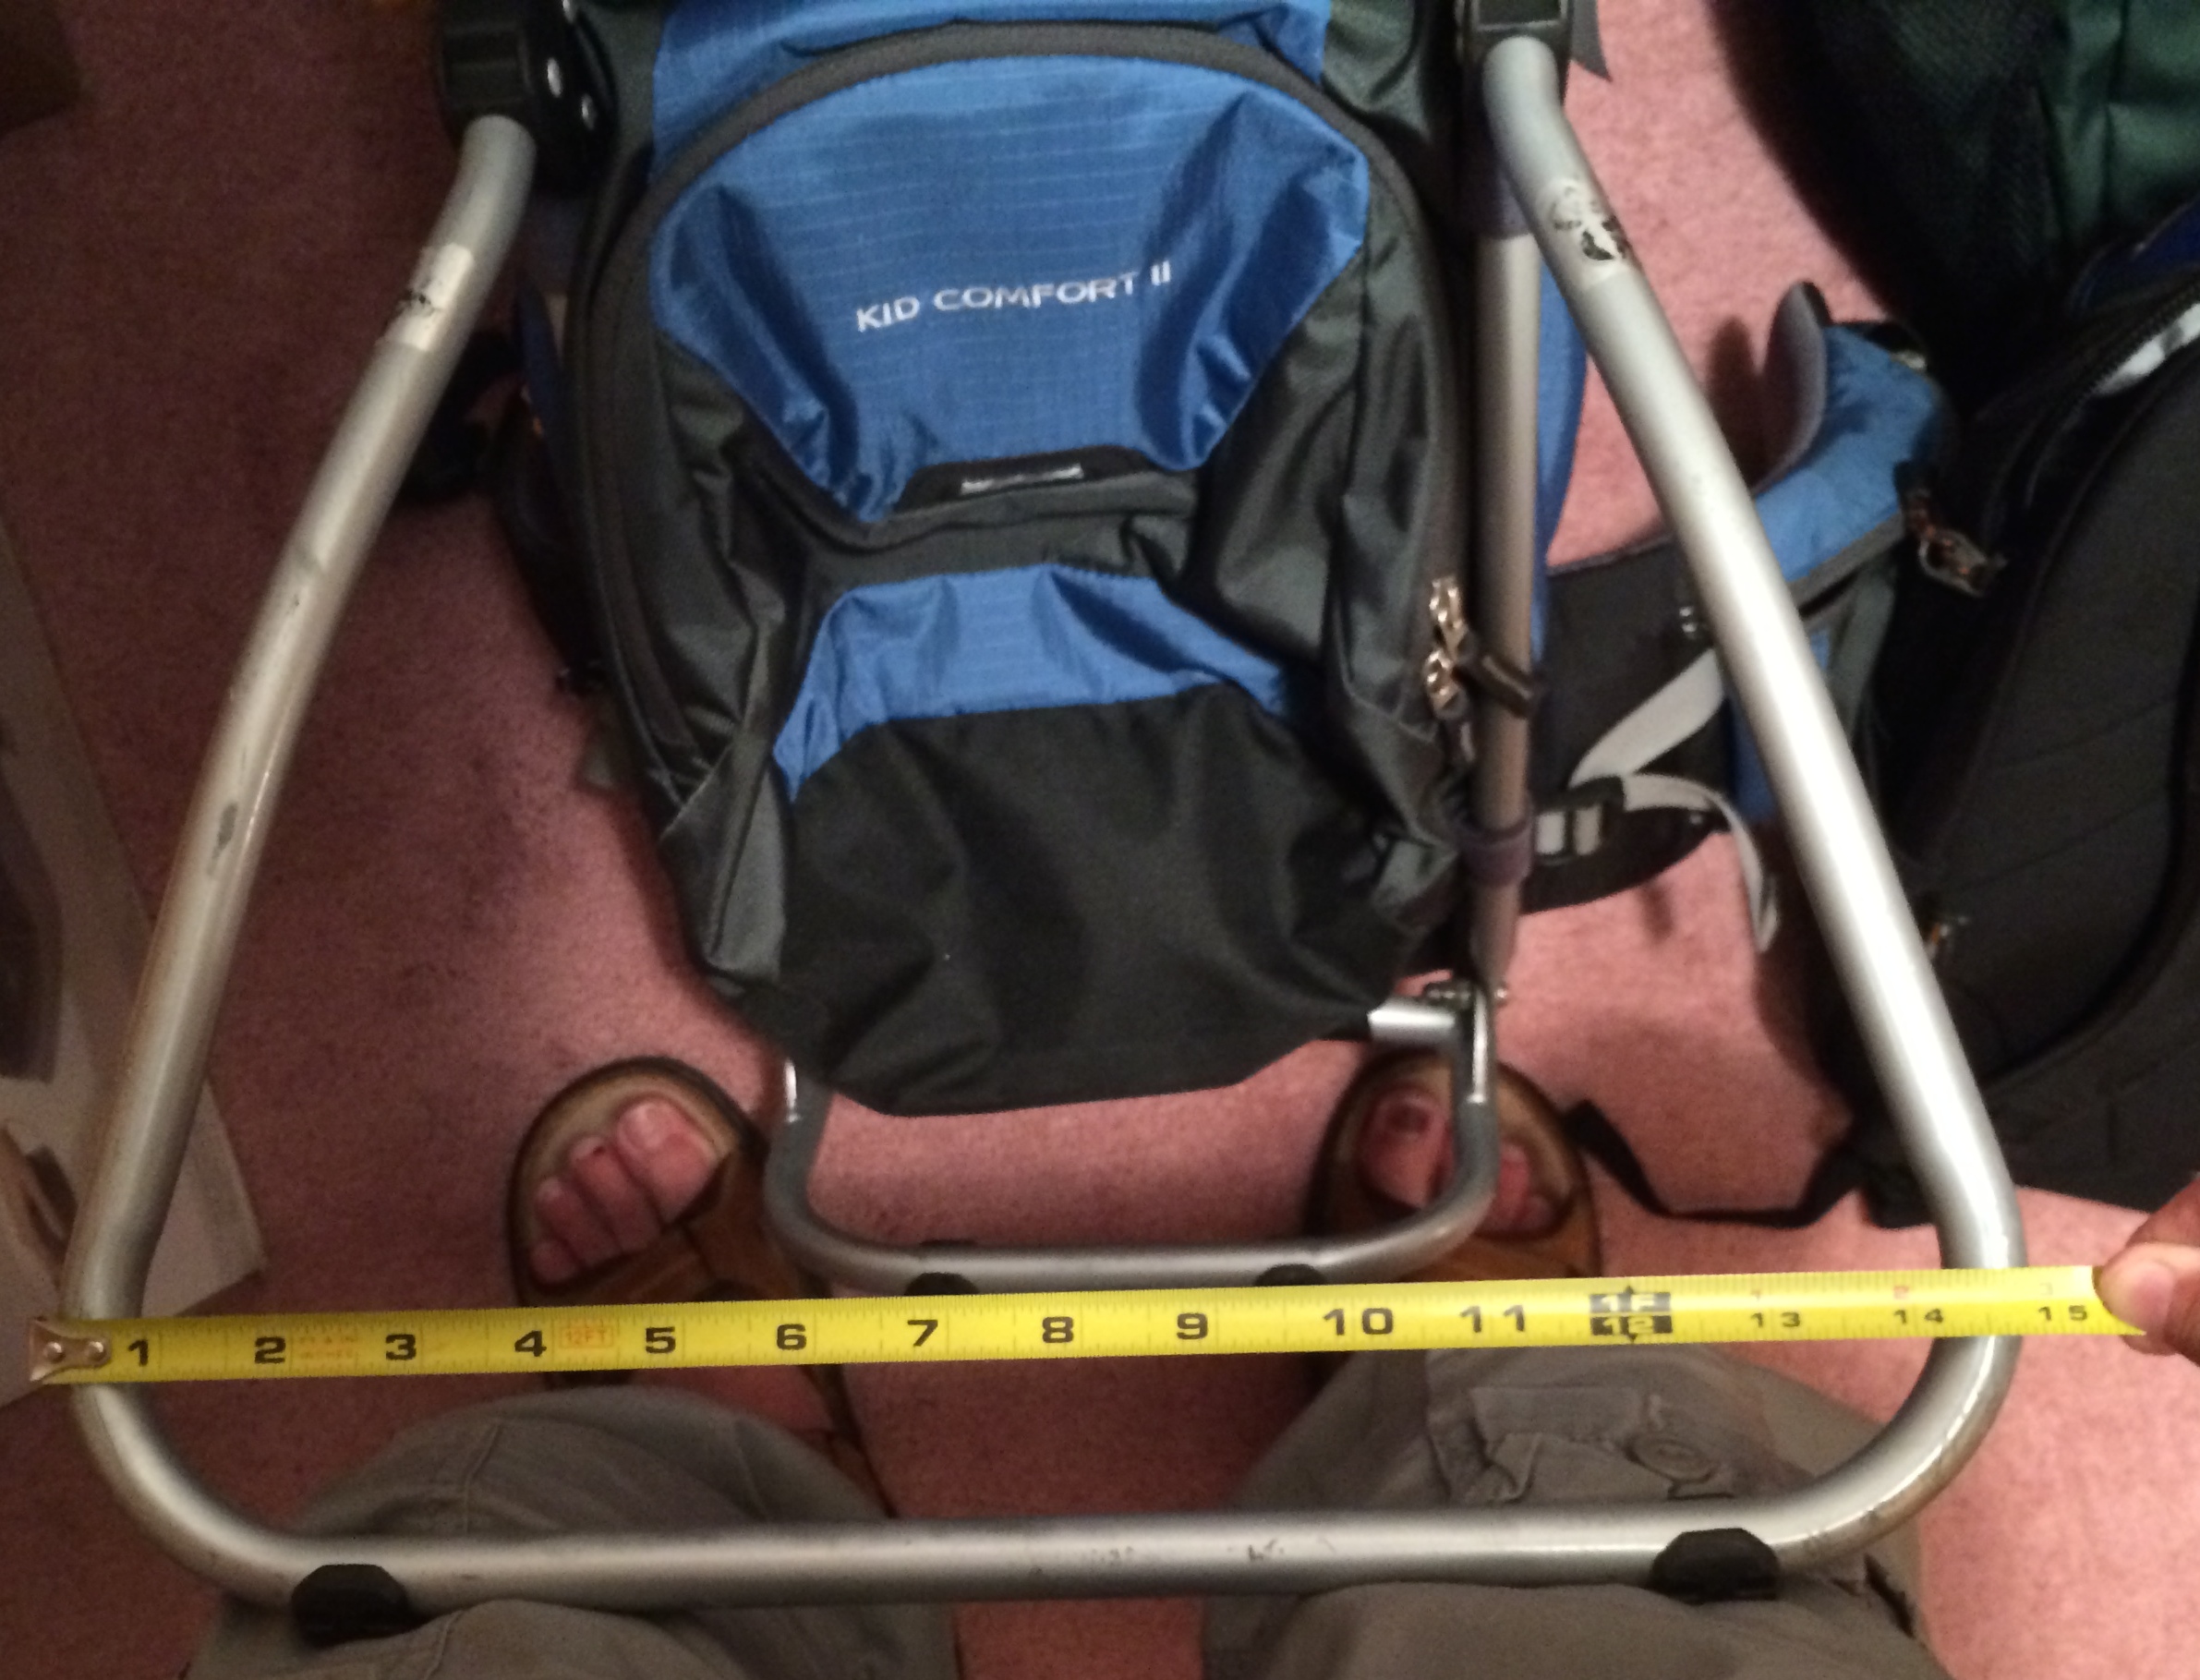
Next up, the kick stand. The Kid Comfort II (KC2) is more square and does not have as wide of a base as the Kid Comfort III (KC3). This is important just for stabilizing the pack on the ground. With our Kid Comfort II, we always had to help stabilize the pack for M to get in. Now, with the Kid Comfort III, M can easily get in and out without trouble.
The images below show you the distance between the KC2 and KC3. The KC3 is about 2 inches wider.
Kid Comfort III 16.5 inches wide.. Please, note their is an addition pack in this picture connected to the KC3 that does not come with the carrier)Kid Comfort II 14.5 inches wide
Some other differences…
*Note: These are not in any order*
The front pocket of the KC3, which is located underneath your child’s seat is larger than the KC2. This is helpful in many ways, but mostly for weather changes preparedness and/or longer hikes. Do note this does depend on how well you pack.
KC2 had only one pocket on your waist bucket. With the new KC3, there is one on each side and you get a mirror in one pocket. We still use our own. Simply because I can connect the mirror to my carabiner clips for easy access or quick ‘put-away’. It is a nice function to have. You can pack snacks, iPhone, mirror and other items you want on hand into these two waist pockets.
The Sun Shade on the KC2 was detachable. This I hated!! We ended up either packing with J’s gear or placing it on the carrier even when we were not using it. Below is the picture to help you understand the old way. In the KC3, it is part of the carrier, it is located in a zip pocket right behind the child. Unzip the location and pull it out then when you are done with it tuck it way. No swing strings, no child trying to pull it.
Old way, you can see the shade cover hooked up, but not being usedZip pocket – Location of Sun Shade
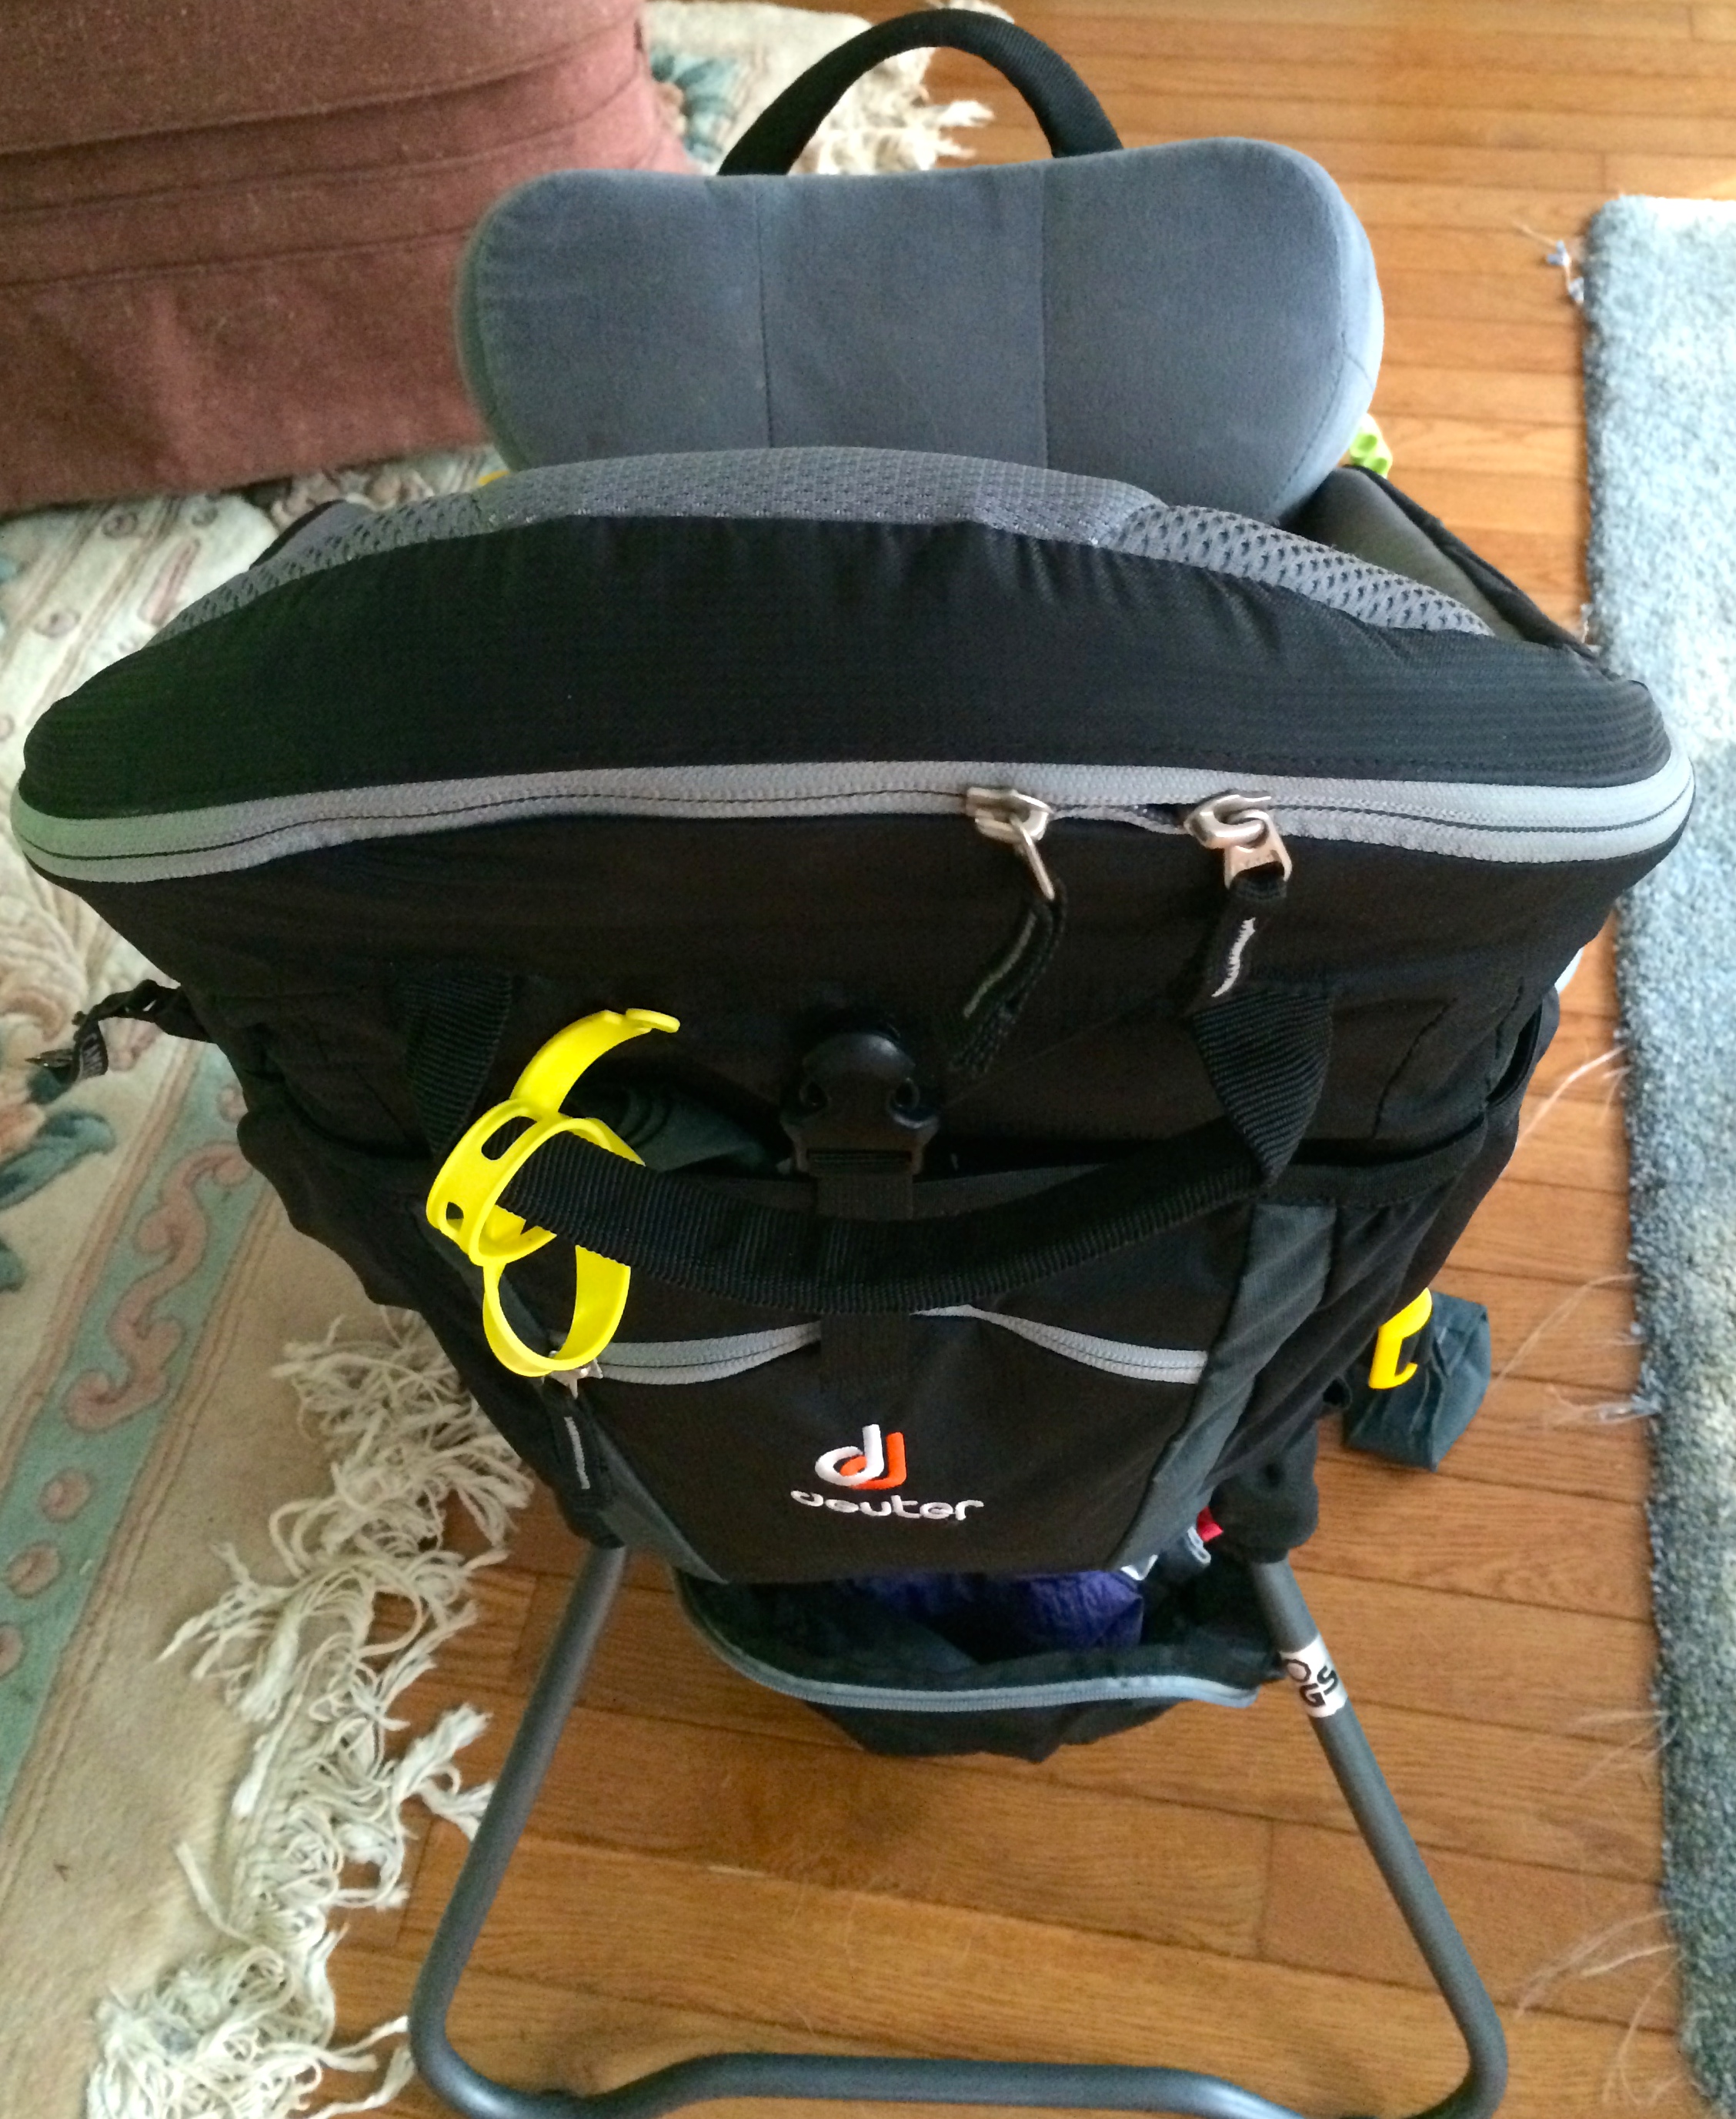
The KC3 comes with foot stirrups for your child, the KC2 did not. This is wonderful! Your child will have their feet secured and stable. This makes them feel more comfortable. No more swing feet, no more getting kicked. I have received many comments on this one key thing on the Kid Comfort III. It’s purely a blessing!
The KC3 allows you to adjust the child resistant straps at the shoulder. As your child grows you can move up the straps. In addition, you can lower the seat of your child for growth or comfort. There are two locations to do this. First, is on the side of the seat and the other is in the front of the child’s seat. The adjustments are very simple, normal loop system.
The upgraded chin-pad, you can see it here at this, link. This pad can be is easily removed for washing. There are two snap buttons in the front and two loops to connect it to the pack in the back. We love this upgrade. It has helped keep our daughter’s head more stable when she sleeps.
Sleeping on the chin pad
The below image shows you the sun shade, foot stirrups, chin pad. Please, note, the sun shade is not in place, this was during our lunch break and M fell asleep. We did not want to wake her.
Napping on Carter Dome
One major point, I give to the Deuter Kid Comfort is the side buckle, which allows for side entry. It is a small, but important item that all Deuter Kid Comforts offer. Our daughter loves hiking with us, this side buckle allows her to climb in when we are ready to go and out when its time to walk around. Yes, there are times we have to ‘put her in’, but that is only about 5% of the time, the rest she goes willing. Other carries, do not have this option. This buckle is not easily opened by a toddler. It locks in similar to a seatbelt clip.
Miss M has been known to climb in the pack when I am cleaning it or packing for a hike.
Sneak in her pack to play
As we did with the Kid Comfort II, we connected a camel back waist pack to the back, so M has her own water source. This does add the weight to the pack, so be wary when doing this. This is the only issue I have will ALL child carriers used for hiking. There is no location for your child to have their own water source. Yes, most packs have a 2 Liter area for a bladder. But this means you and your child will need to spilt it. Two liters of water can go quick on a hot, humid, or harder trail.
In addition, we place Nuun in our water for electrolyte replenishment. Since, M isn’t doing much work, she doesn’t need them. Nuun is another recommended item for hydration. Unlike, Powerade, Gatorade, and other sugar filled hydration fluids, Nuun uses no sugar, no carbs it’s a great hydration source. Oh, as a suggestion, don’t use the Strawberry lemonade, it’s the only type so far we do not like. And my husband loves Strawberry lemonade.
If you have any questions or areas you would like clarification on. Please, don’t hesitate to reach out to me.
First off, I am not the camera person on our hikes. All the images you see are done by my husband. He is learning as he goes, but has found a great love for photography. Most importantly, it’s the way we capture our moments for our daughter.
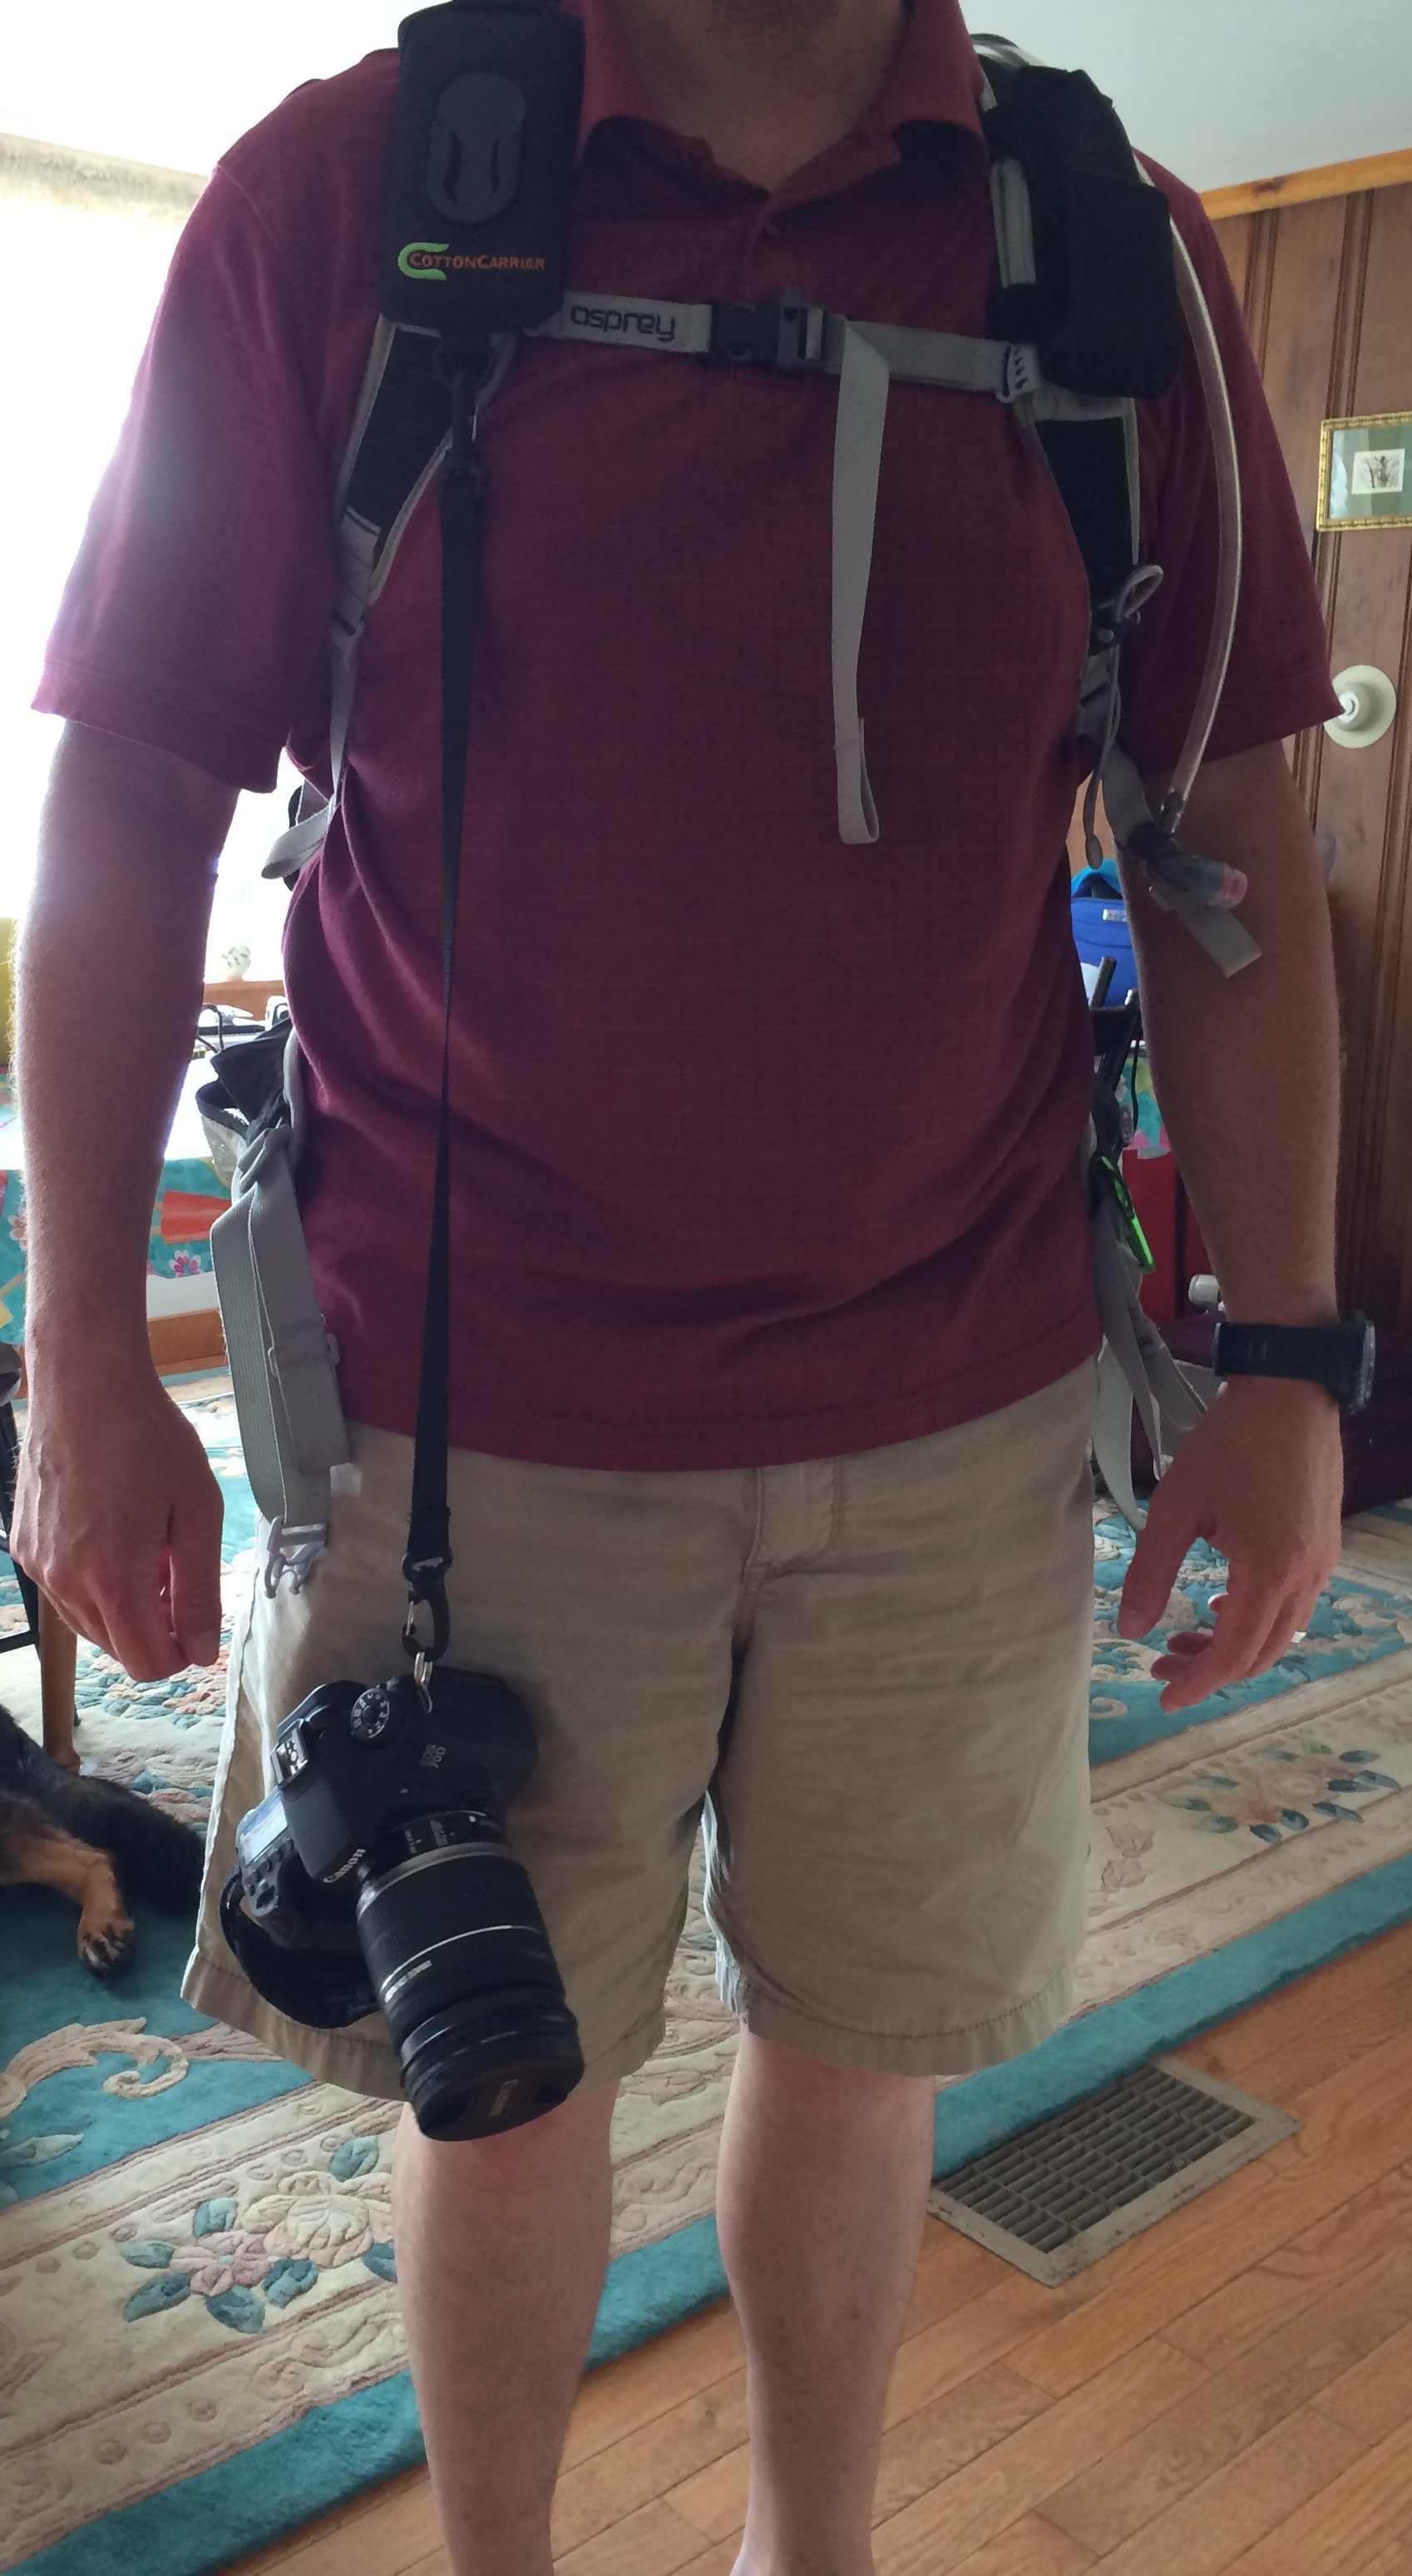
The biggest issue for anyone hiking with a camera, outside that of your phone, is how the heck to carry it. You can put it in your bag, which means putting your bag down and get your camera out then putting it back in and moving on. Well, that’s great, if you enjoy doing all that and do not want to take images that happen in under 25 seconds.
You can use a standard neck strap then engineer a way to strap down the camera to your pack or belt, so the camera is not swaying while you move. Depending on the camera, its weight can start stressing your neck and shoulders.
We, more like, J has been looking for a device for his camera when we are hiking. The Strapshot by Cotton Carrier was it. We watched this video that helped us really see the differences and what we needed to help make a purchase. The video is done by Landslide03 via YouTube. You can check out the video, here. It is a little lengthy 27:33, but he walks you through the difference between the StrapShot by Cotton Carrier and the Peak Design Capture Clip V2. It was very helpful for seeing differences and the StrapShot in action.
Here are our reasons for the StrapShot:
*In no order of importance*
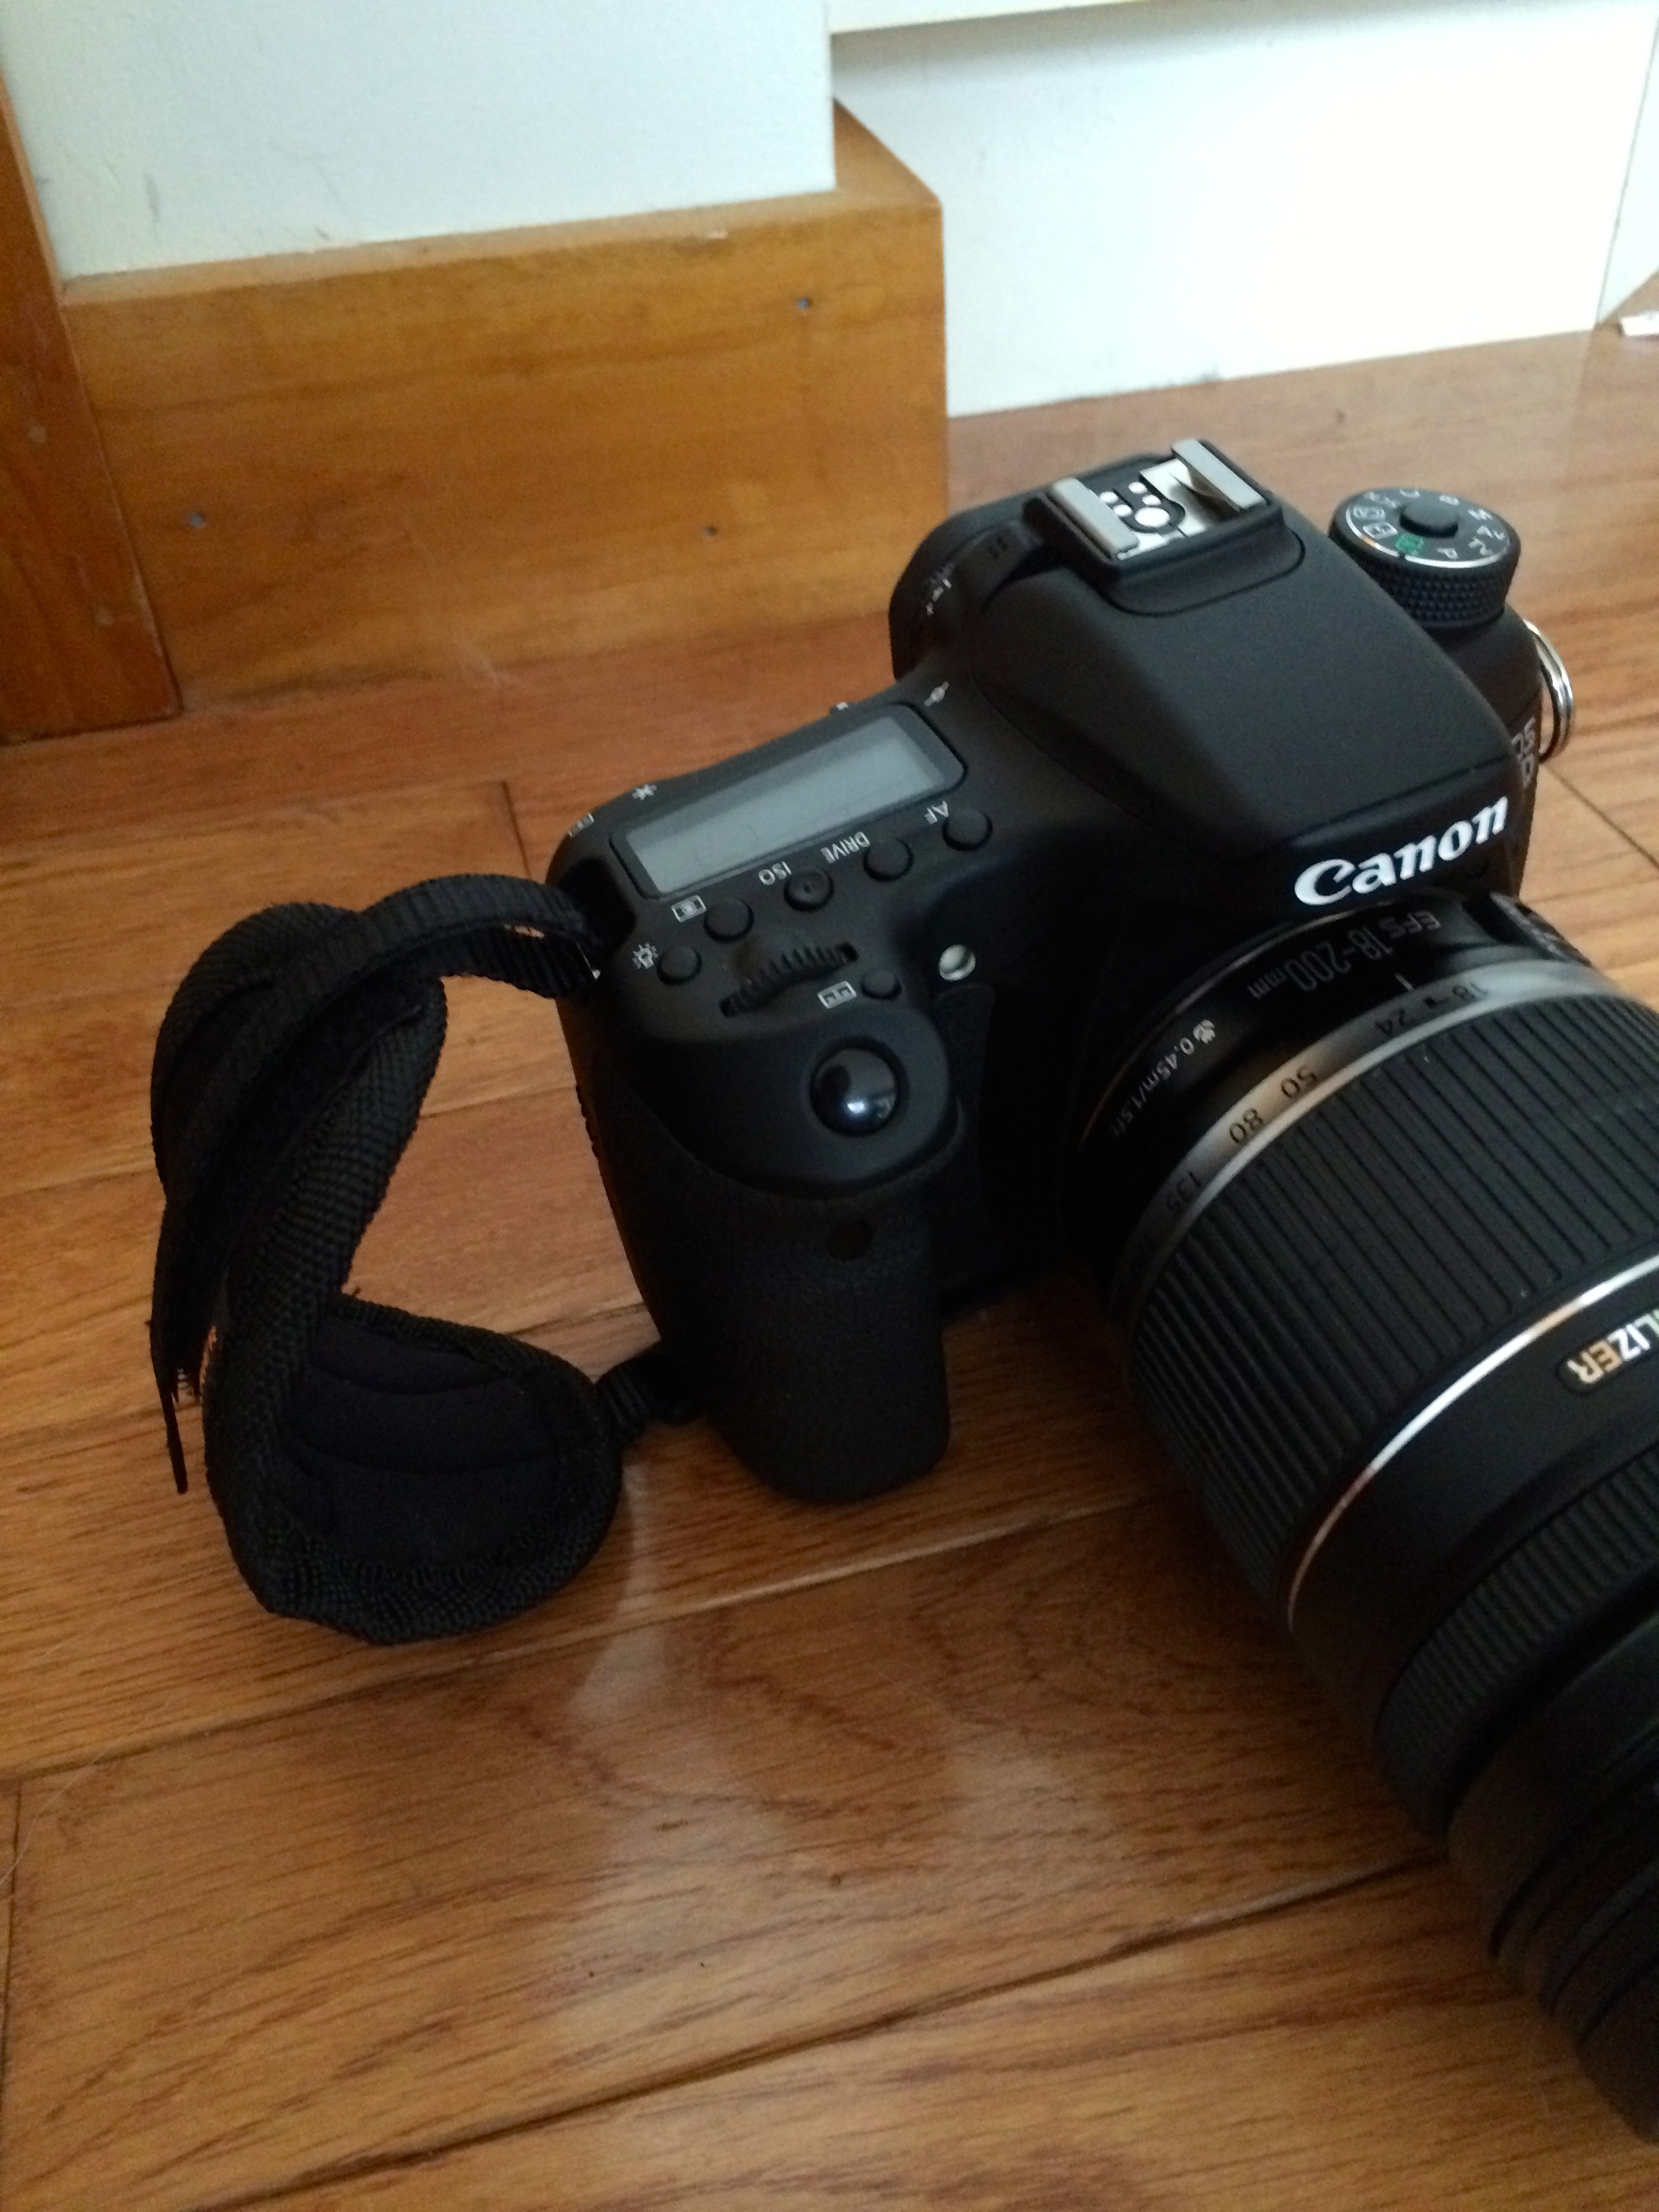
Weight of lens, helps to secure the camera in place. J uses a Cannon EFS 18-200mm IS. The lens weight makes the camera stay in place.
Security straps connected to the camera. After spending time researching this, many other brands do not have this function.
Easy of un-latching the camera from the strap, its is a turn and pull technique.
The design allows the lens to be forward and not hitting the user in the chest. You can see the gap between the camera and body below.
View of space
The connector piece to the camera allows for tripod access. The piece that connect to your camera and allows the camera to sit in the StrapShot, allows you connect a tripod to it. That means no additional adjustments or items! Score!
No jamming on the connector (camera to strap). It is easy to remove the camera without looking and easy to reconnect it.
Redundancy for camera safety. You best friend 🙂
You receive a hand strap for your camera. It’s very helpful.
During, our last hike, we spoke with a professional photographer, who saw the StrapShot and we ended up discussing it with him for sometime. We spent about 5 to 7 minutes walking him through all the functions. He was using a Canon EOS 5d Mark 3 with a current using lens of 25-105mm IS. At the end of the brief conversation, he wanted one and took a picture of the StrapShot to order it. He had to pull the camera out from the bag then place it back in. He was so over it and honestly, I do not blame him.
Here are some images to walk you through what was listed above….
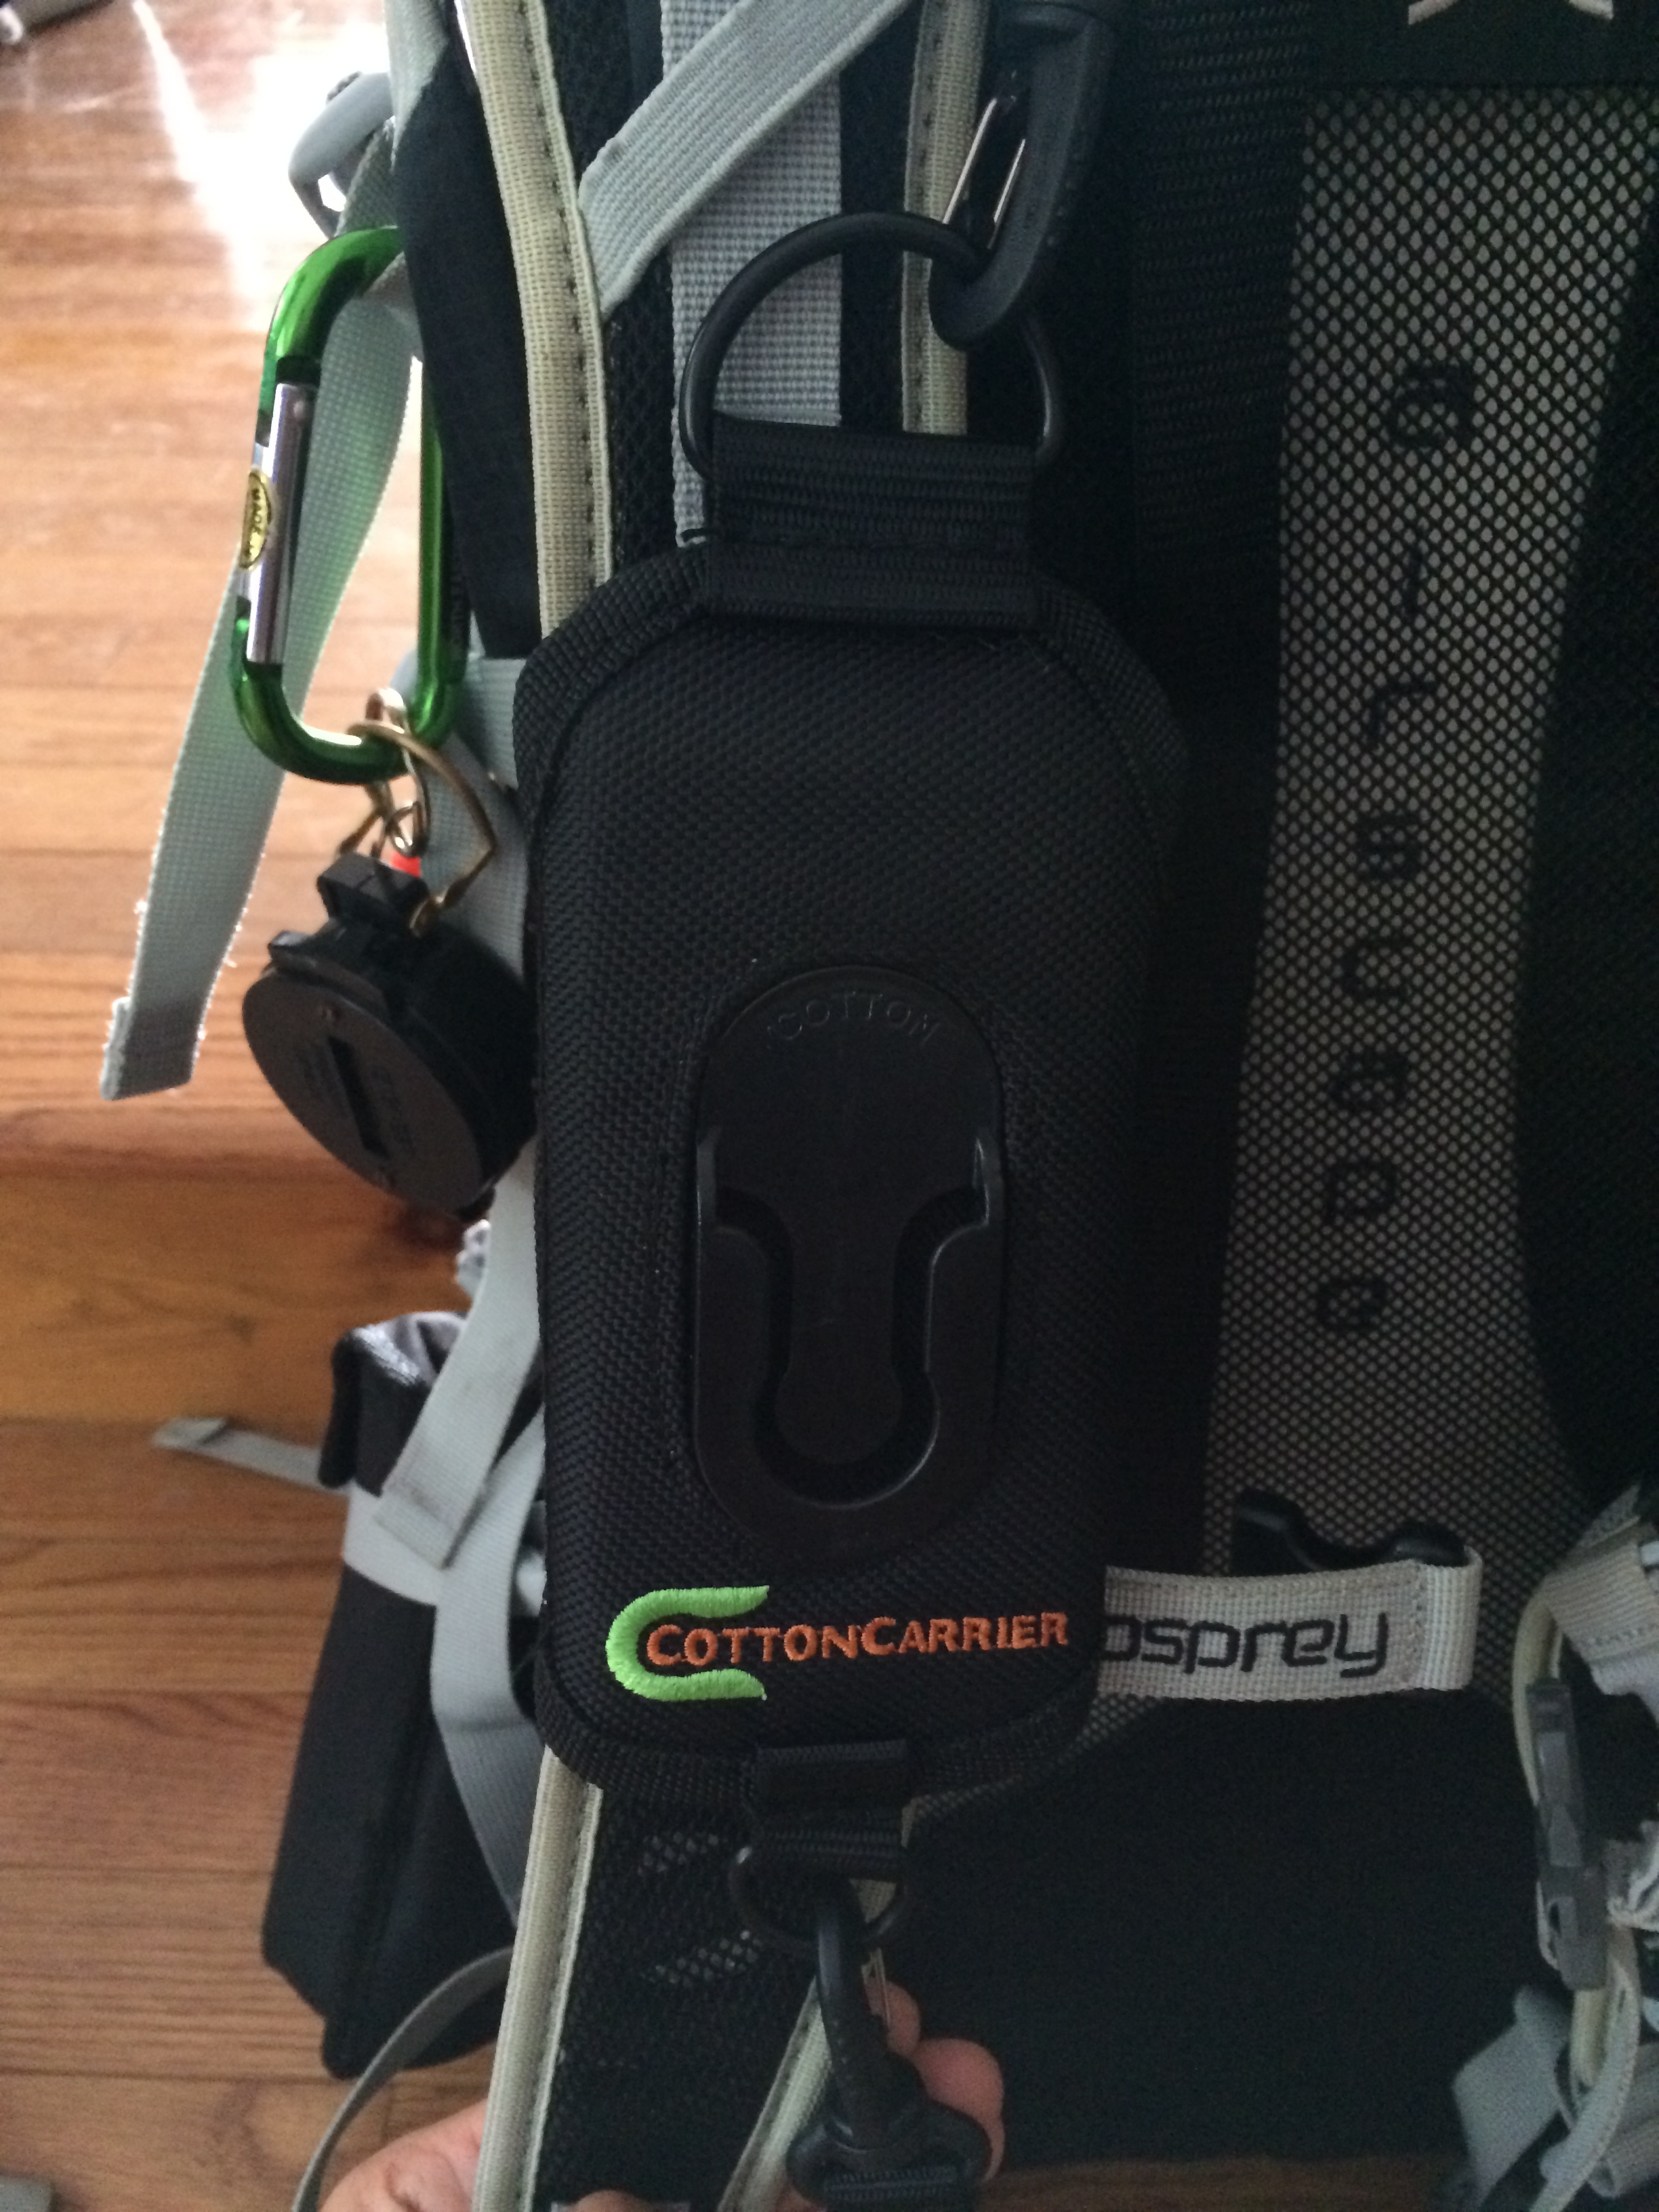
The StrapShot connects directly to your backpack on the shoulder strap.
Front view of the strap connecting to your shoulder strapBack view connecting to your shoulder strap
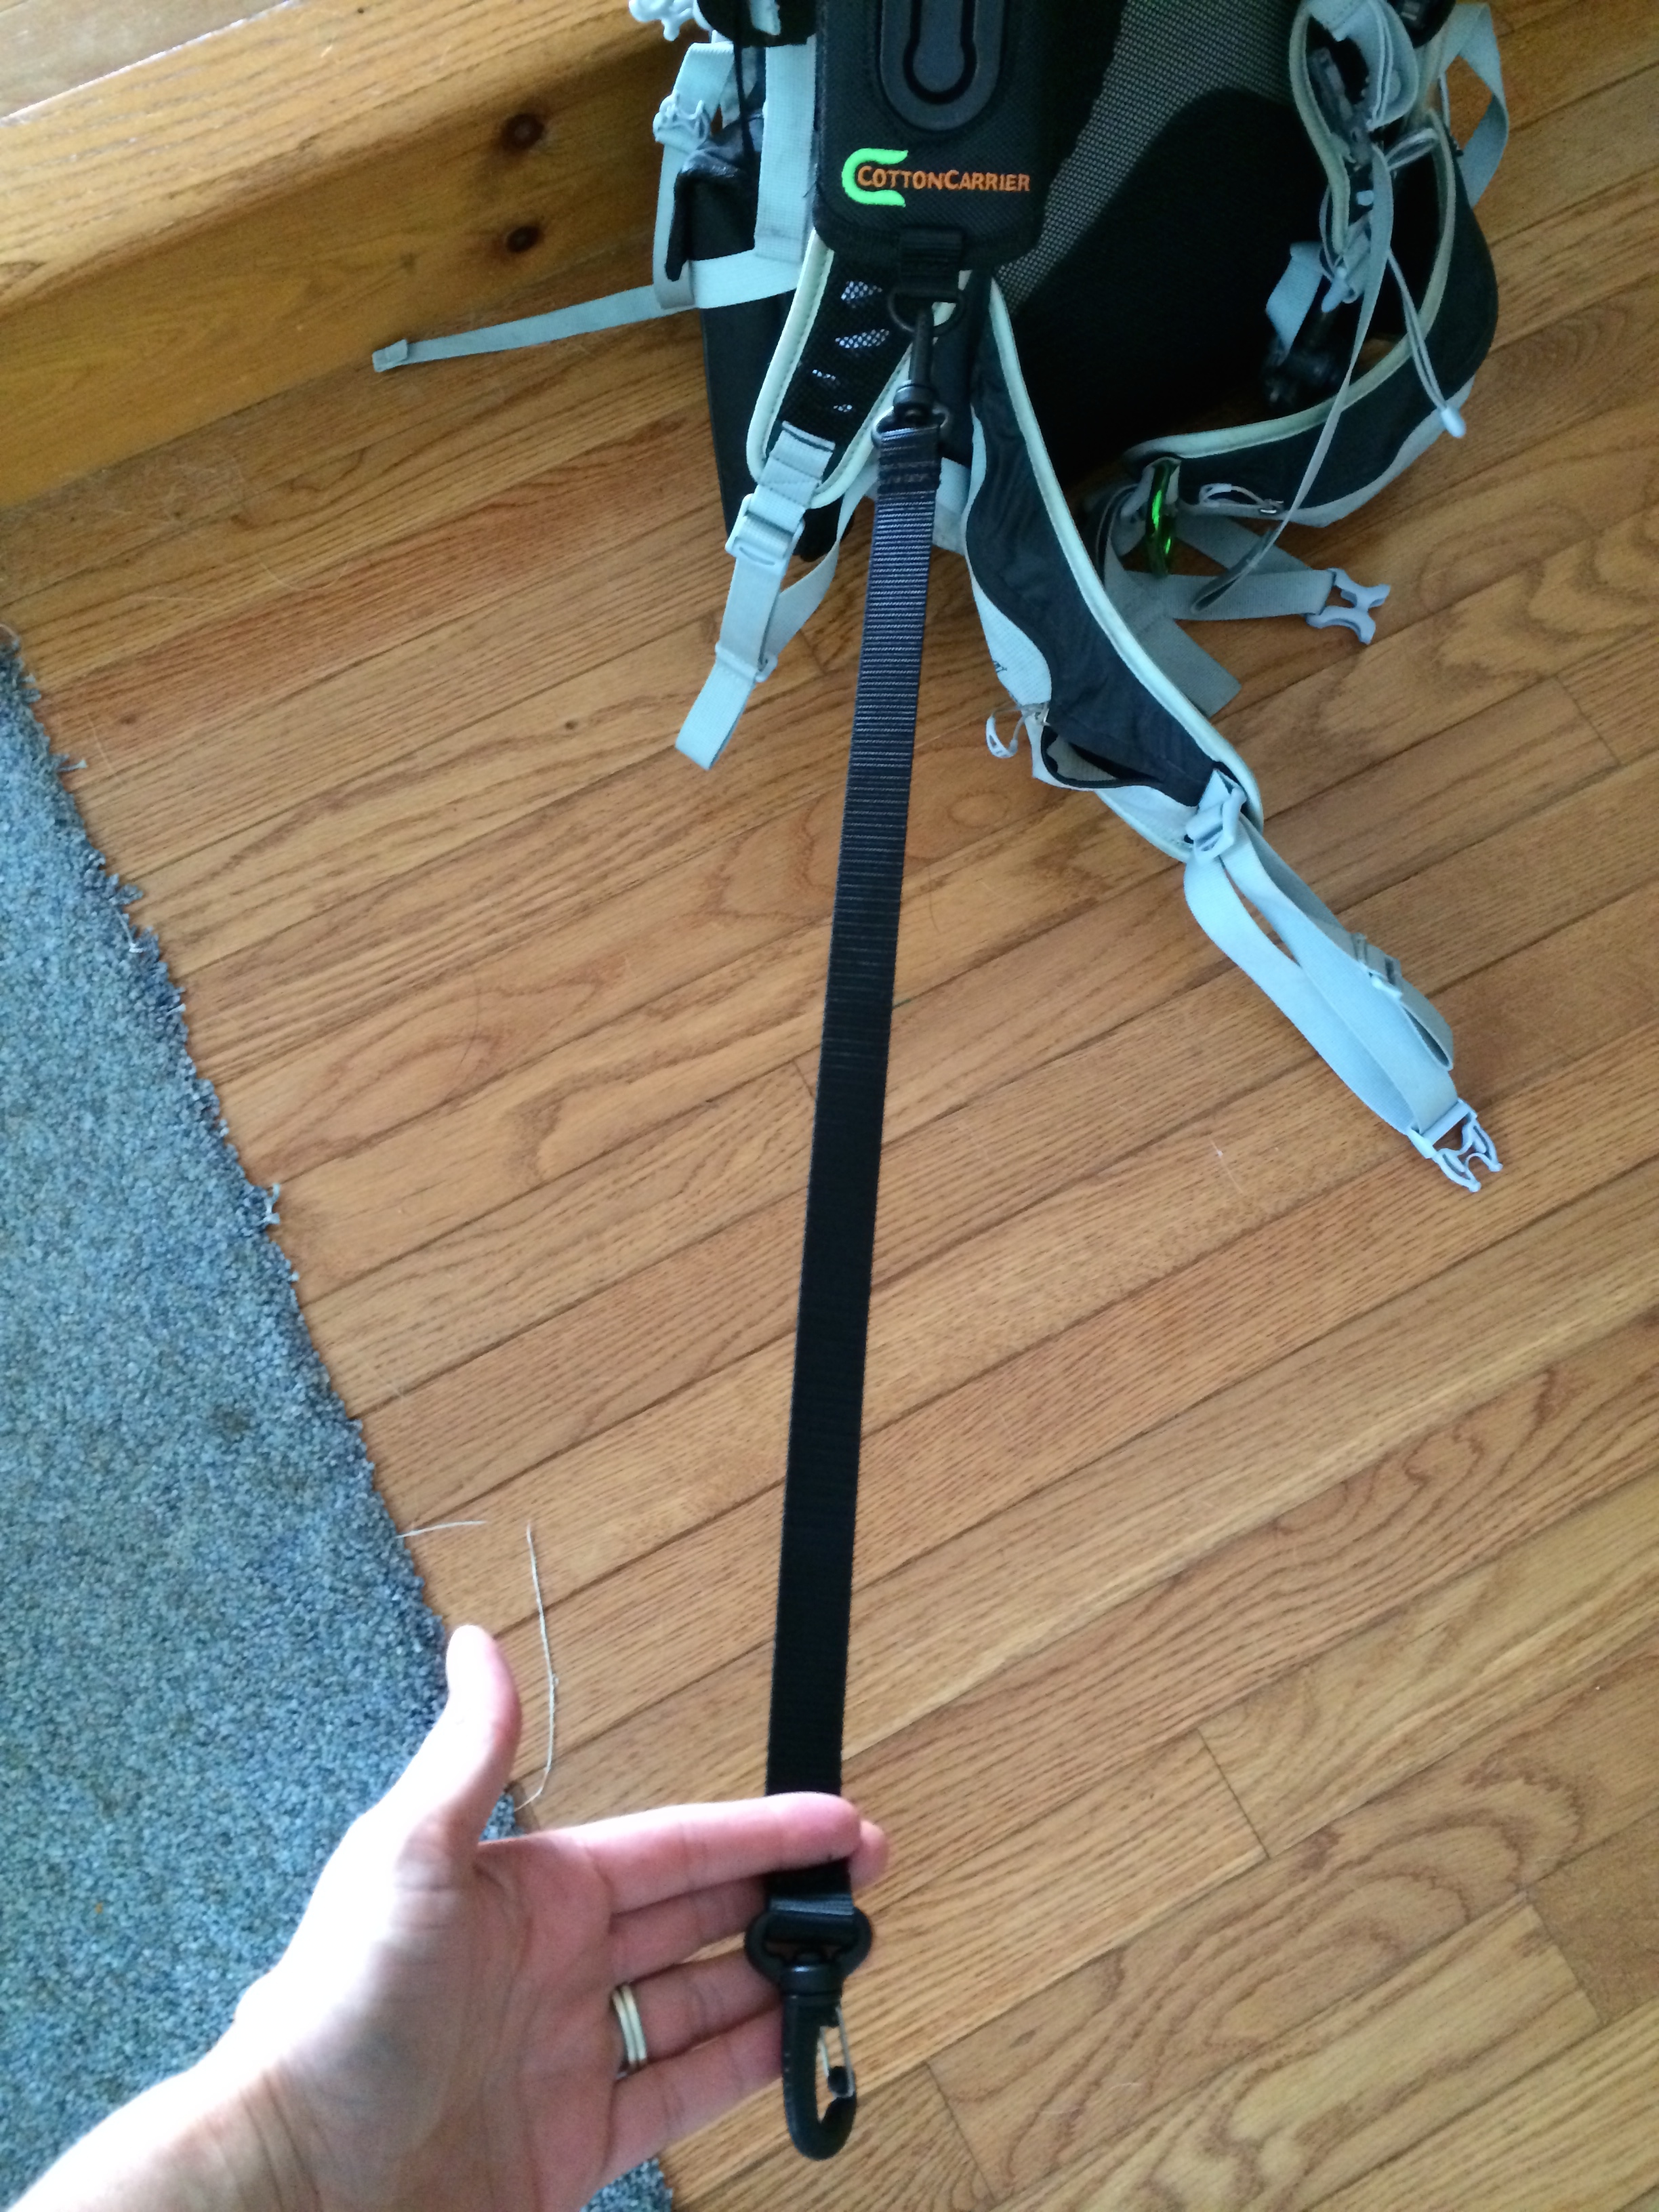
Here are the two security straps for your camera…
First, is the lanyard that connects to the back of your backpack
The second safety strap. Is for all you with butter fingers ( or not) … The strap connects to the StrapShot then to your camera.
To help understand the size of the StrapShot connecting to your pack. This is a side by side image of the StrapShot and a Special Forces 4 inch combat knife folded — its 6 inches long.
*Note the knife sleeve is upside-down on purpose, this allows for easy access.*
StrapShot compared to knife
In closing, if you hike, want easy access to your camera and security for your camera the StrapShot is the way to go. It is great for wildlife images. Below are two wildlife images from our last hike of Mt. Height and Carter Dome. These would have not happened with any other device.
You can check Cotton Carrier’s website, here. You can check out the StrapShot, here.


