Mount Garfield to Mount Washington

It’s not a hike without some sort of complication either late in the night created by the Admiral’s excitement to “go to the mountain” or the morning phone call to the Navigator asking for help to deal with some networking and WiFi issue. The fact it was a combo of both was not surprising. At least, we got the hiccup of the hike out-of-the-way before we left the house.

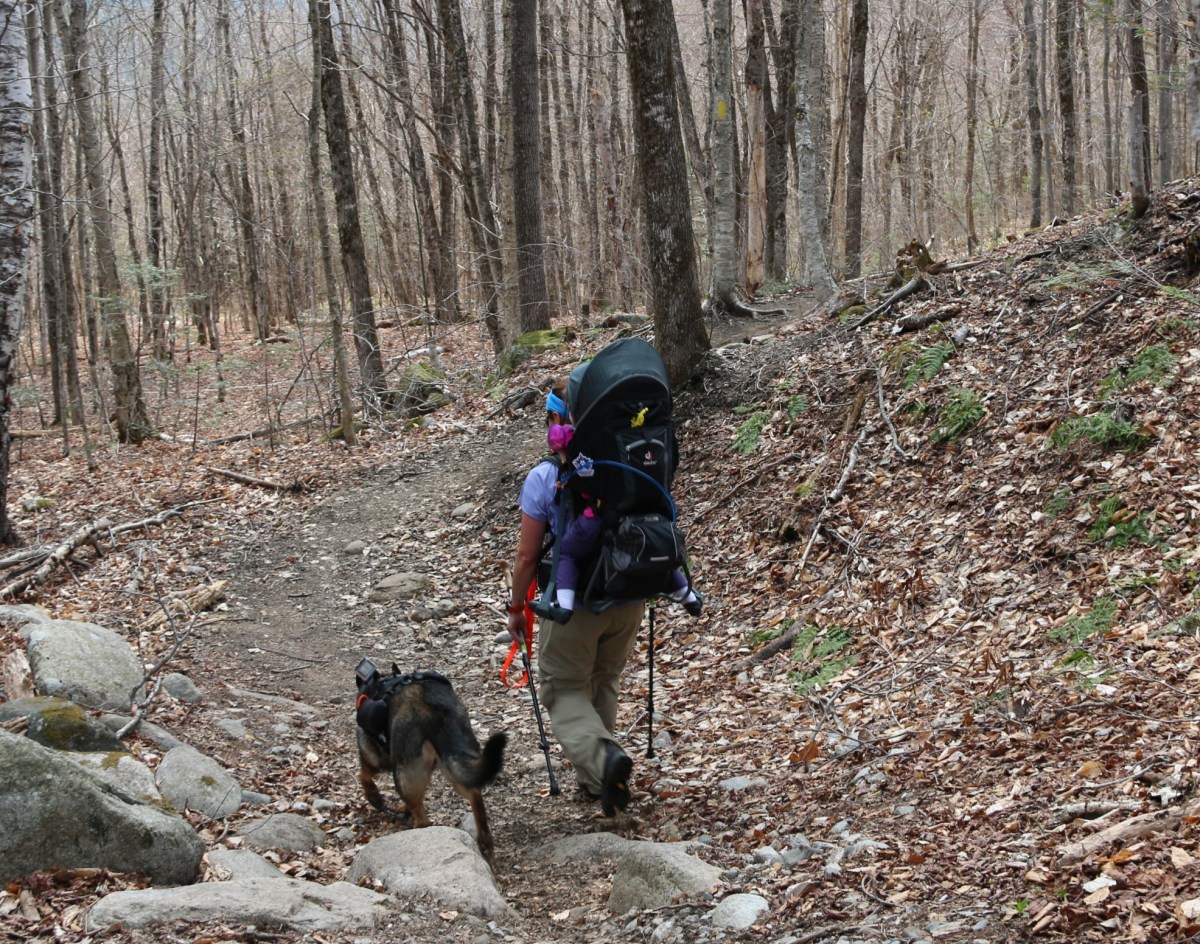
We headed out to the start location a bit later than planned, but it was manageable to make the summit and get to campsite one. We would arrive at the campsite at nightfall.

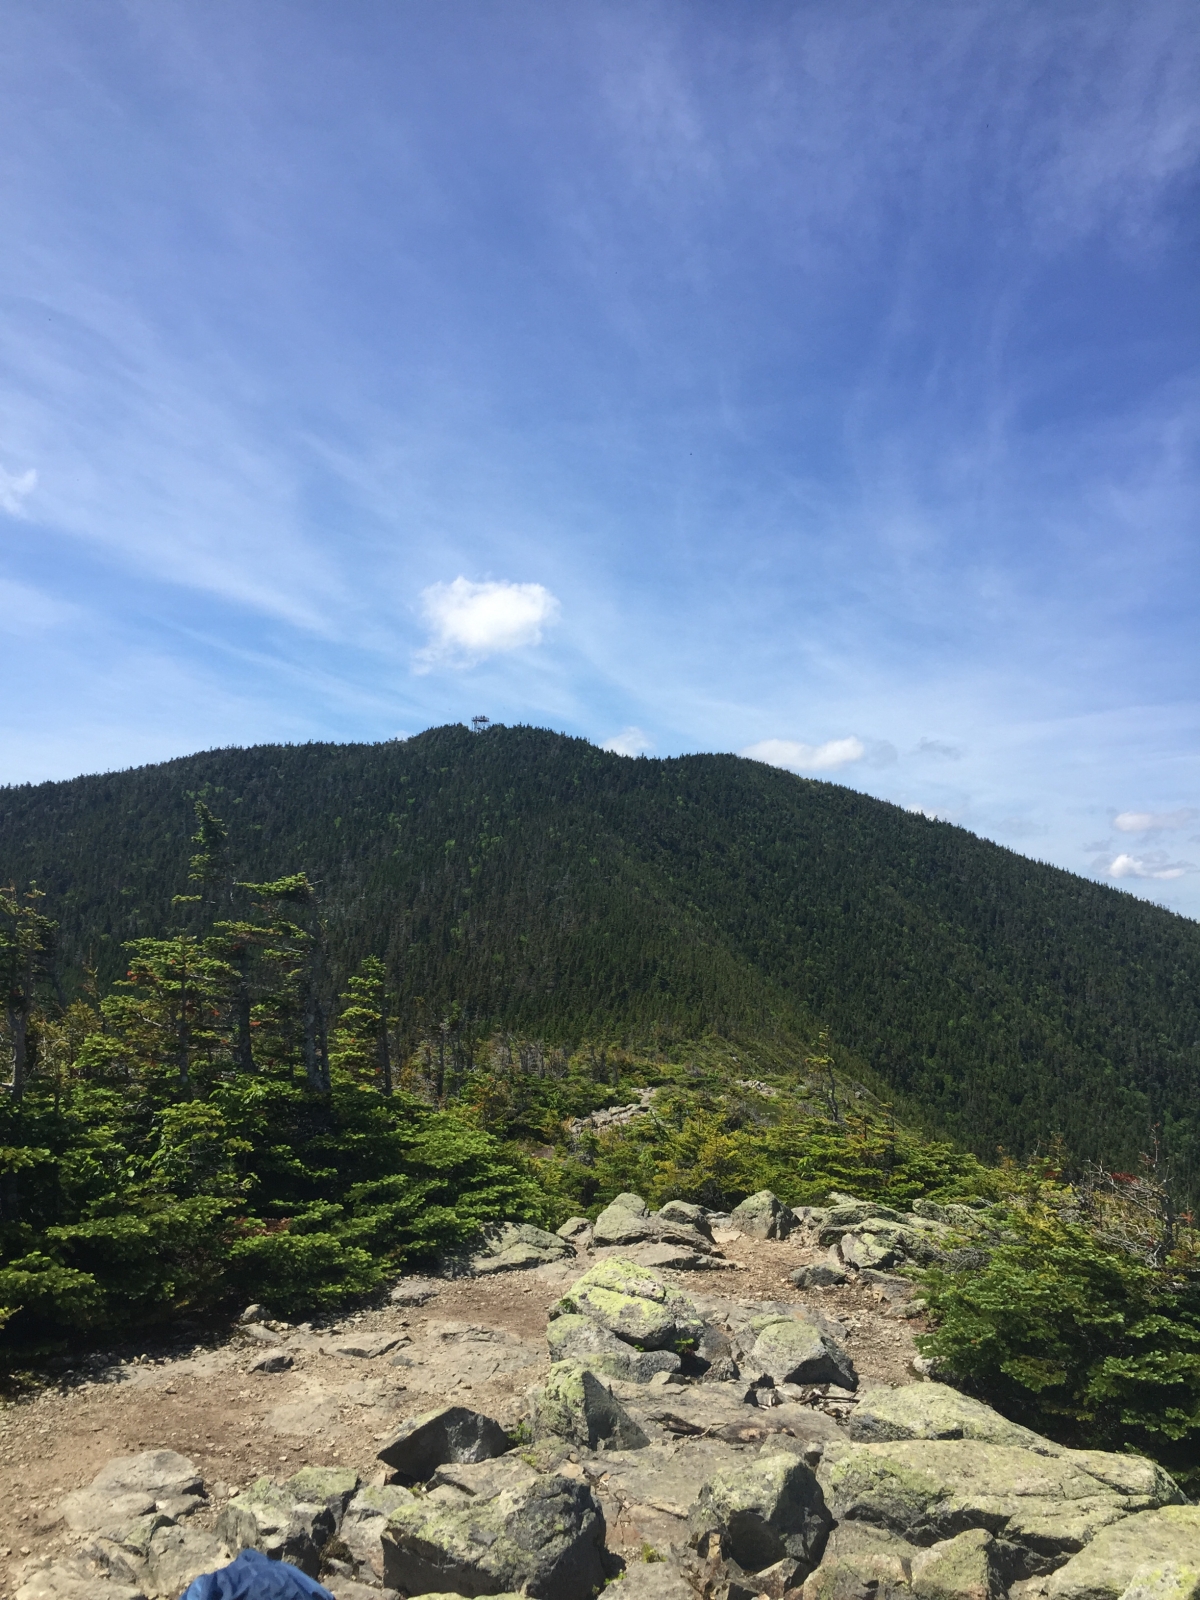
The hike up to the campsite one was rather uneventful and a good warm up to the remaining terrain on the hike. We followed the Garfield Trail to the summit of Mount Garfield and down to Garfield Campsite. The summit approach was a bit of a rock scrabble but nothing difficult. New hikers may find it problematic, just take your time.

Some images along the way to Garfield

Up to Garfield Water crossing
Water Crossing
Up to Garfield Abby during break time
Break time
Up to Garfield Abby
Abby leading the way, she focused on the Navigator

We were surprised to find out that we were able to locate Abby via her pet tracker, Tagg. This is the first hike we have done with being able to receive the update. It was short-lived, though. However, it is about right. Smack in the middle of a few trees on a side of a mountain 🙂

Abby's location about right in the middle of no where
Abby’s location

We captured a few images at the path division, one direction leads to Mount Garfield and to the Franconia Ridge, the other direction is a steep rock to rock descent on the Garfield Ridge Trail and to the Garfield Campsite.

IMG_3317
Someone snuck a picture without us knowing
IMG_9005
Trail Sign
Garfield Ridge
Garfield Ridge heading to campsite

When we arrived to the campsite, we met with the Caretaker to receive our site location, unpacked before we needed our headlamps to move around the camp. We were placed at campsite #7, which is located on the right edge of the camp.

As a note to hikers using campsites — All hikers with two legs are $8, four legs are free, but no shelter is offered to four legs during storms. AMC rules so plan accordingly.

A memory plaque for Anne Converse Backus. You will pass this plaque on your left when you approach the campsite.

IMG_9010
Garfield Campsite

Anyone hiking the Garfield Ridge Trail and happens to need water. This campsite has a water source outside the campgrounds. It is about 8 to 10 steps from the trail junction for the Garfield Campsite & Garfield Ridge Trail.  Just follow the sign below to find the water.

Make sure to read the warning sign, if it’s not there — here is the cliff note version: boil water, use filtration system or take your chances of becoming ill.  (If you need understanding on becoming ill, please watch Naked & Afraid, episode Botswana Breakdown, 2014, season 3 episode 9 there is no medical team moments away on a mountain and well no modern bathrooms.  We are not avid watchers of the show, but during recovery it was on and found it right on spot for how to get yourself sick.)

IMG_9008
Water at junction of Garfield Ridge Trail & Garfield Campsite

We had our dinner at the campsite assigned “meal grounds”. It’s just in the center of the campsite with a cook pan. Abby enjoyed her raw diet dinner while we had some leftovers. First day meals and second day morning meals on long hikes are always nice. If you plan smartly, you can freeze your meal and by the time you sit to enjoy it — its unfrozen. 🙂 Abby’s dinner was still a bit frozen, but it is helpful for keeping moisture in her diet.

IMG_9013
Yum Yums
Dinner Date
We shared the same side of a rock booth, while the Admiral and Navigator shared the other.
IMG_9018
Moons Out, Goons Out

The caretaker notified us of bear activity, we followed all rules with food storage, trash and added in our toiletries for good measure. This meant placing all those items into the bear boxes provided to us.

Campsite Bear Box
Campsite Bear Box
IMG_3319
Closing up for the night

Abby’s activity for the day via Tagg, a pet tracker.

Activity for the day

The night was cool, windy and clear. About 430 in the morning, Abby woke me up. First thing, I thought was, “really you have to use the bathroom this early” and then I heard the activity and felt the impact tremors of a bear or two. I was not up for sticking my head out of the tent to get a firm count on the activity. Since, Abby’s behavior made it clear to us it was not a little raccoon.

We maneuvered into position while Abby went into a low guarded position. Minutes later, Abby let out one hell of a deep growl within moments we could hear the outdoor activity moving farther away, the Navigator exited the tent and all as well. Of course, the Admiral was snoring through it all.

IMG_9021
Abby hanging out in the tent while the Admiral caught a few more minutes of sleep
Ready to leave
All ready to leave

We headed out of the campsite and refilled our water. Though, it was a cold morning the temperature would be in the upper 70s by mid-day with possible severe thunderstorms in the evening and overnight.  This is one reason we love  our AMC huts and campsites, it’s a location to receive our weather updates.

Albeit in the Whites, it is still best guess 🙂  So, plan for the worst and pray like hell for the best.

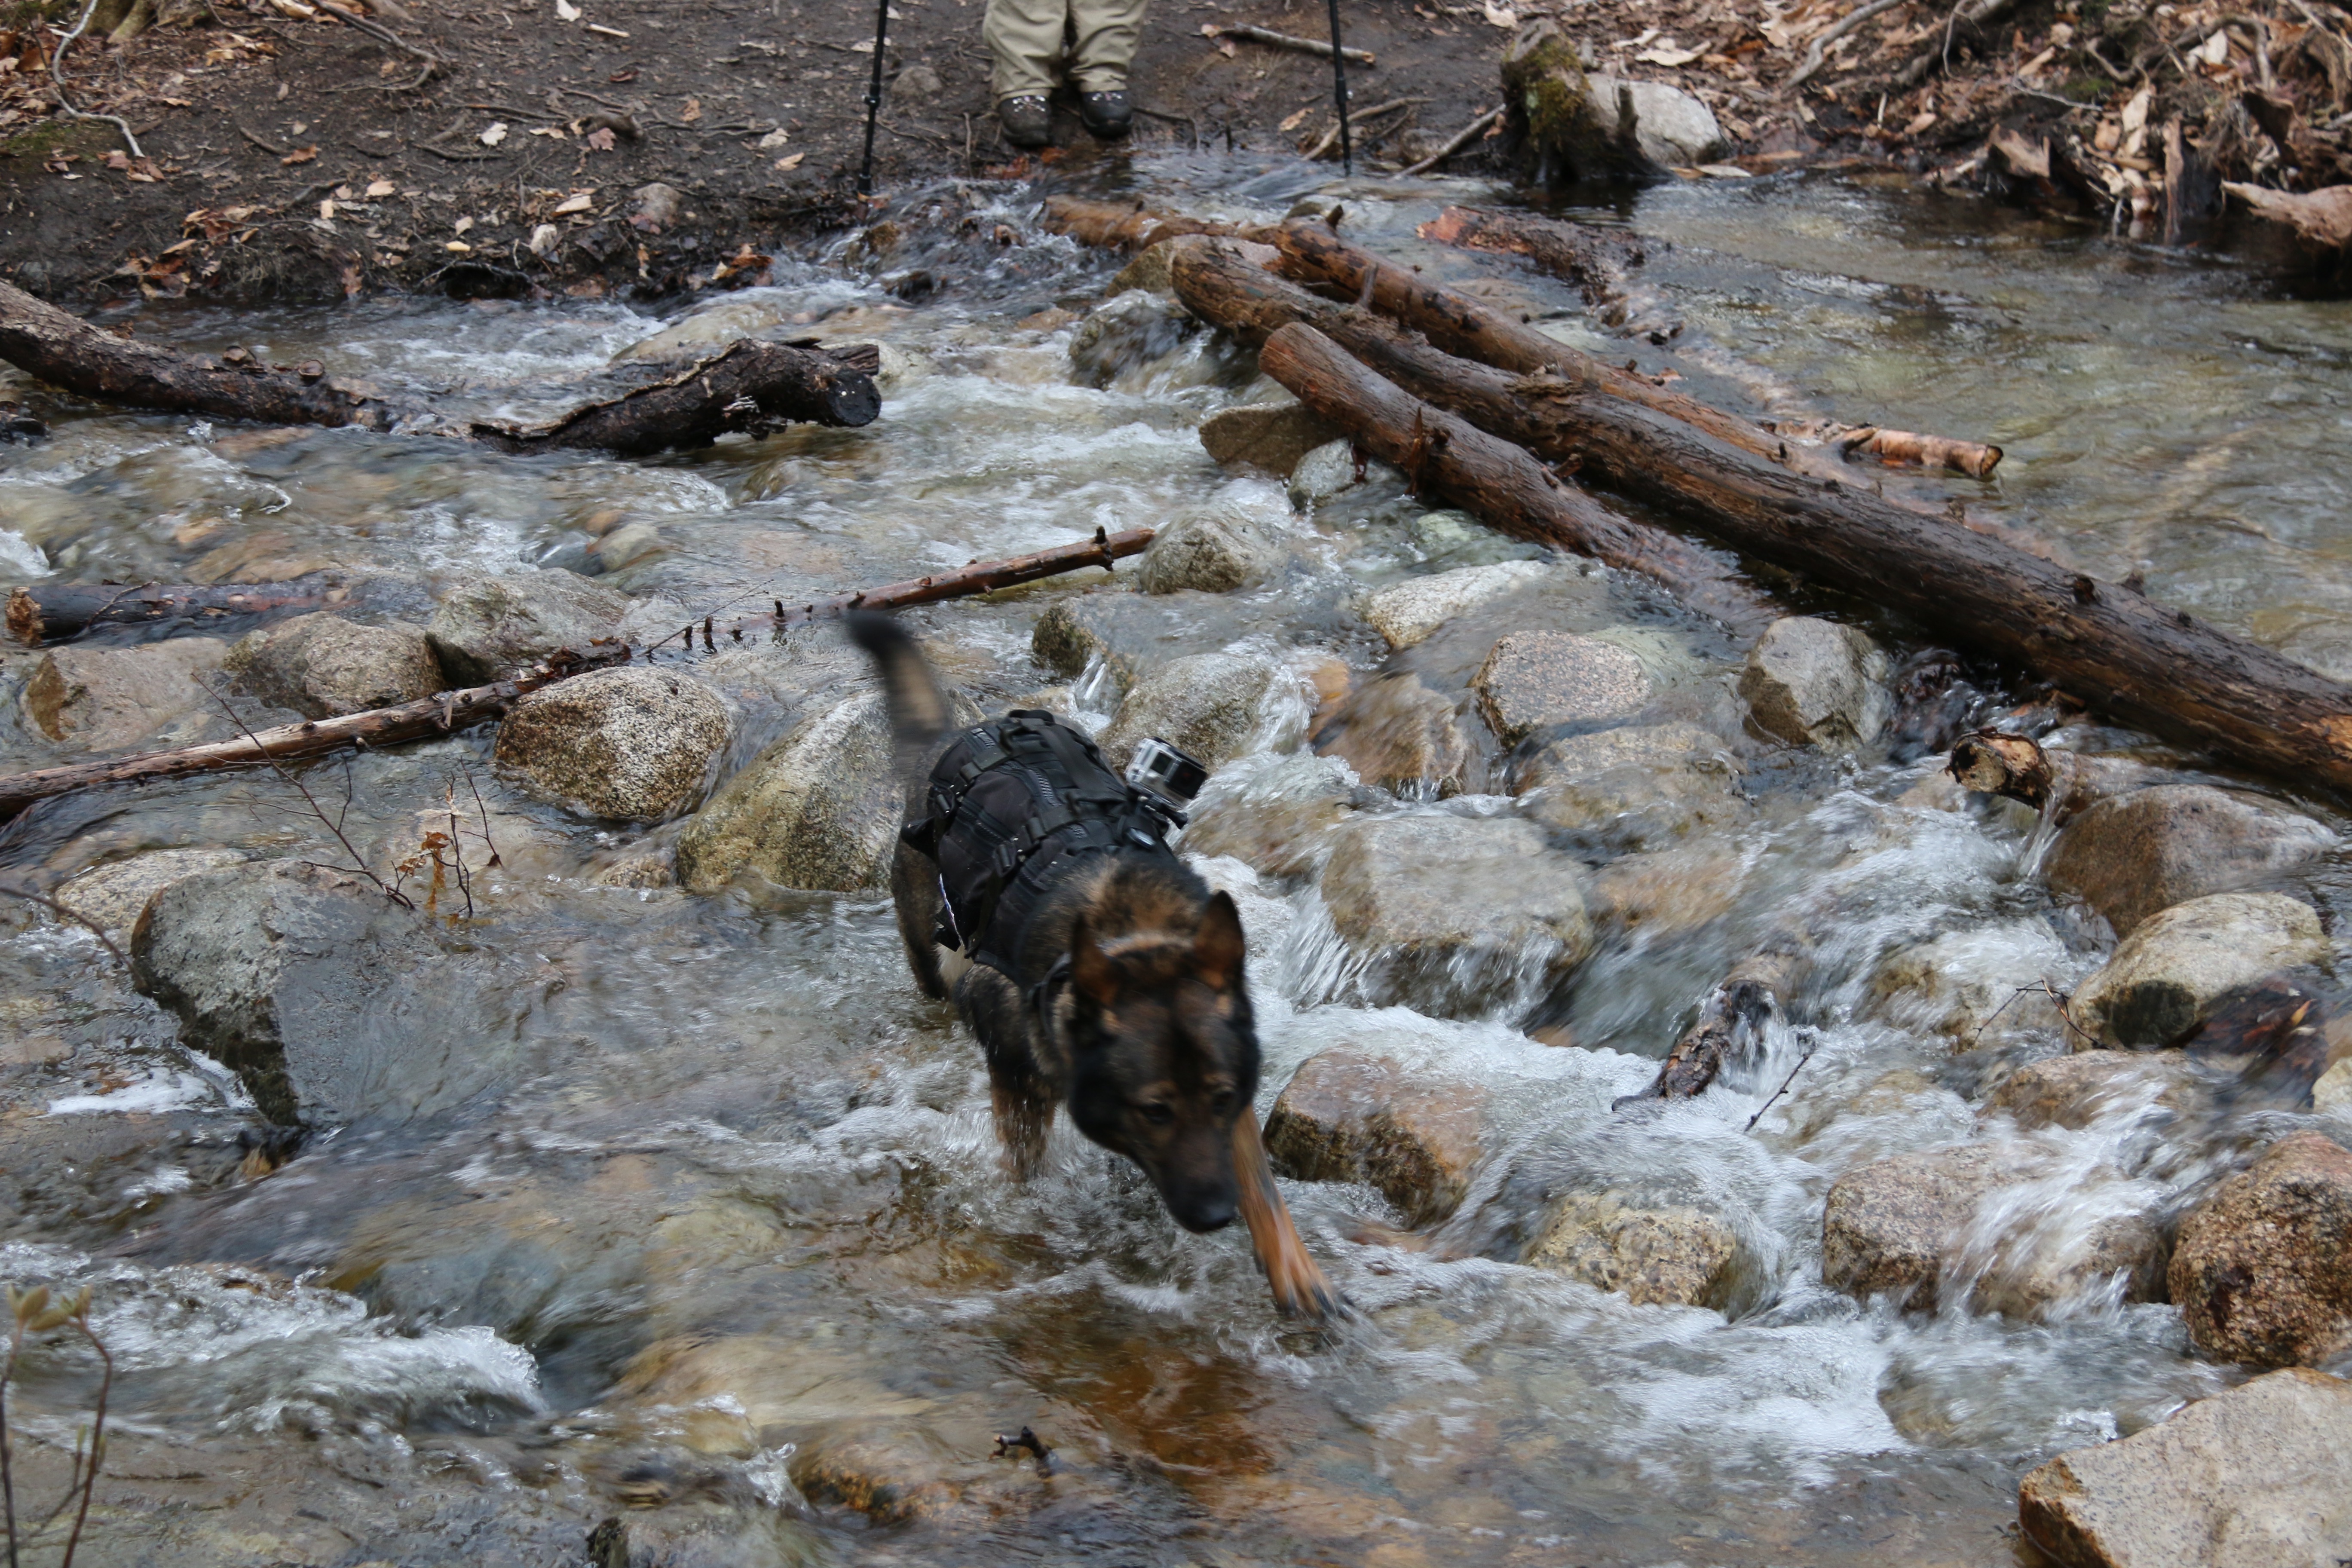
After refilling our water, we headed down the Garfield Ridge Trail to Galehead Hut. About 1/2 mile into the morning trek, Abby came to a dead stop and looked back with one of her famous WTF looks. When reached her location, we fully understood her look. Our morning plans to leave camp an hour later, so that the clouds were passing over us was worth it.

We came to a point where we needed to travel down a ‘waterfall’. Now, it’s not a gushing waterfall, but the climb down is steep. Of course, Abby being wise and small avoided the rocks by traveling through the trees. The Navigator and I made our way down the wet moss-covered rocks while listening to the Admiral talk about rocks, trees, and made sure we very careful.

This image does not do the climb down justice, but you get an idea of the terrain.

section on the descent
Descent
IMG_9007
Descent

Here is the descent from the campsite to the waterfall and off Garfield.

Map of descent
Map of descent

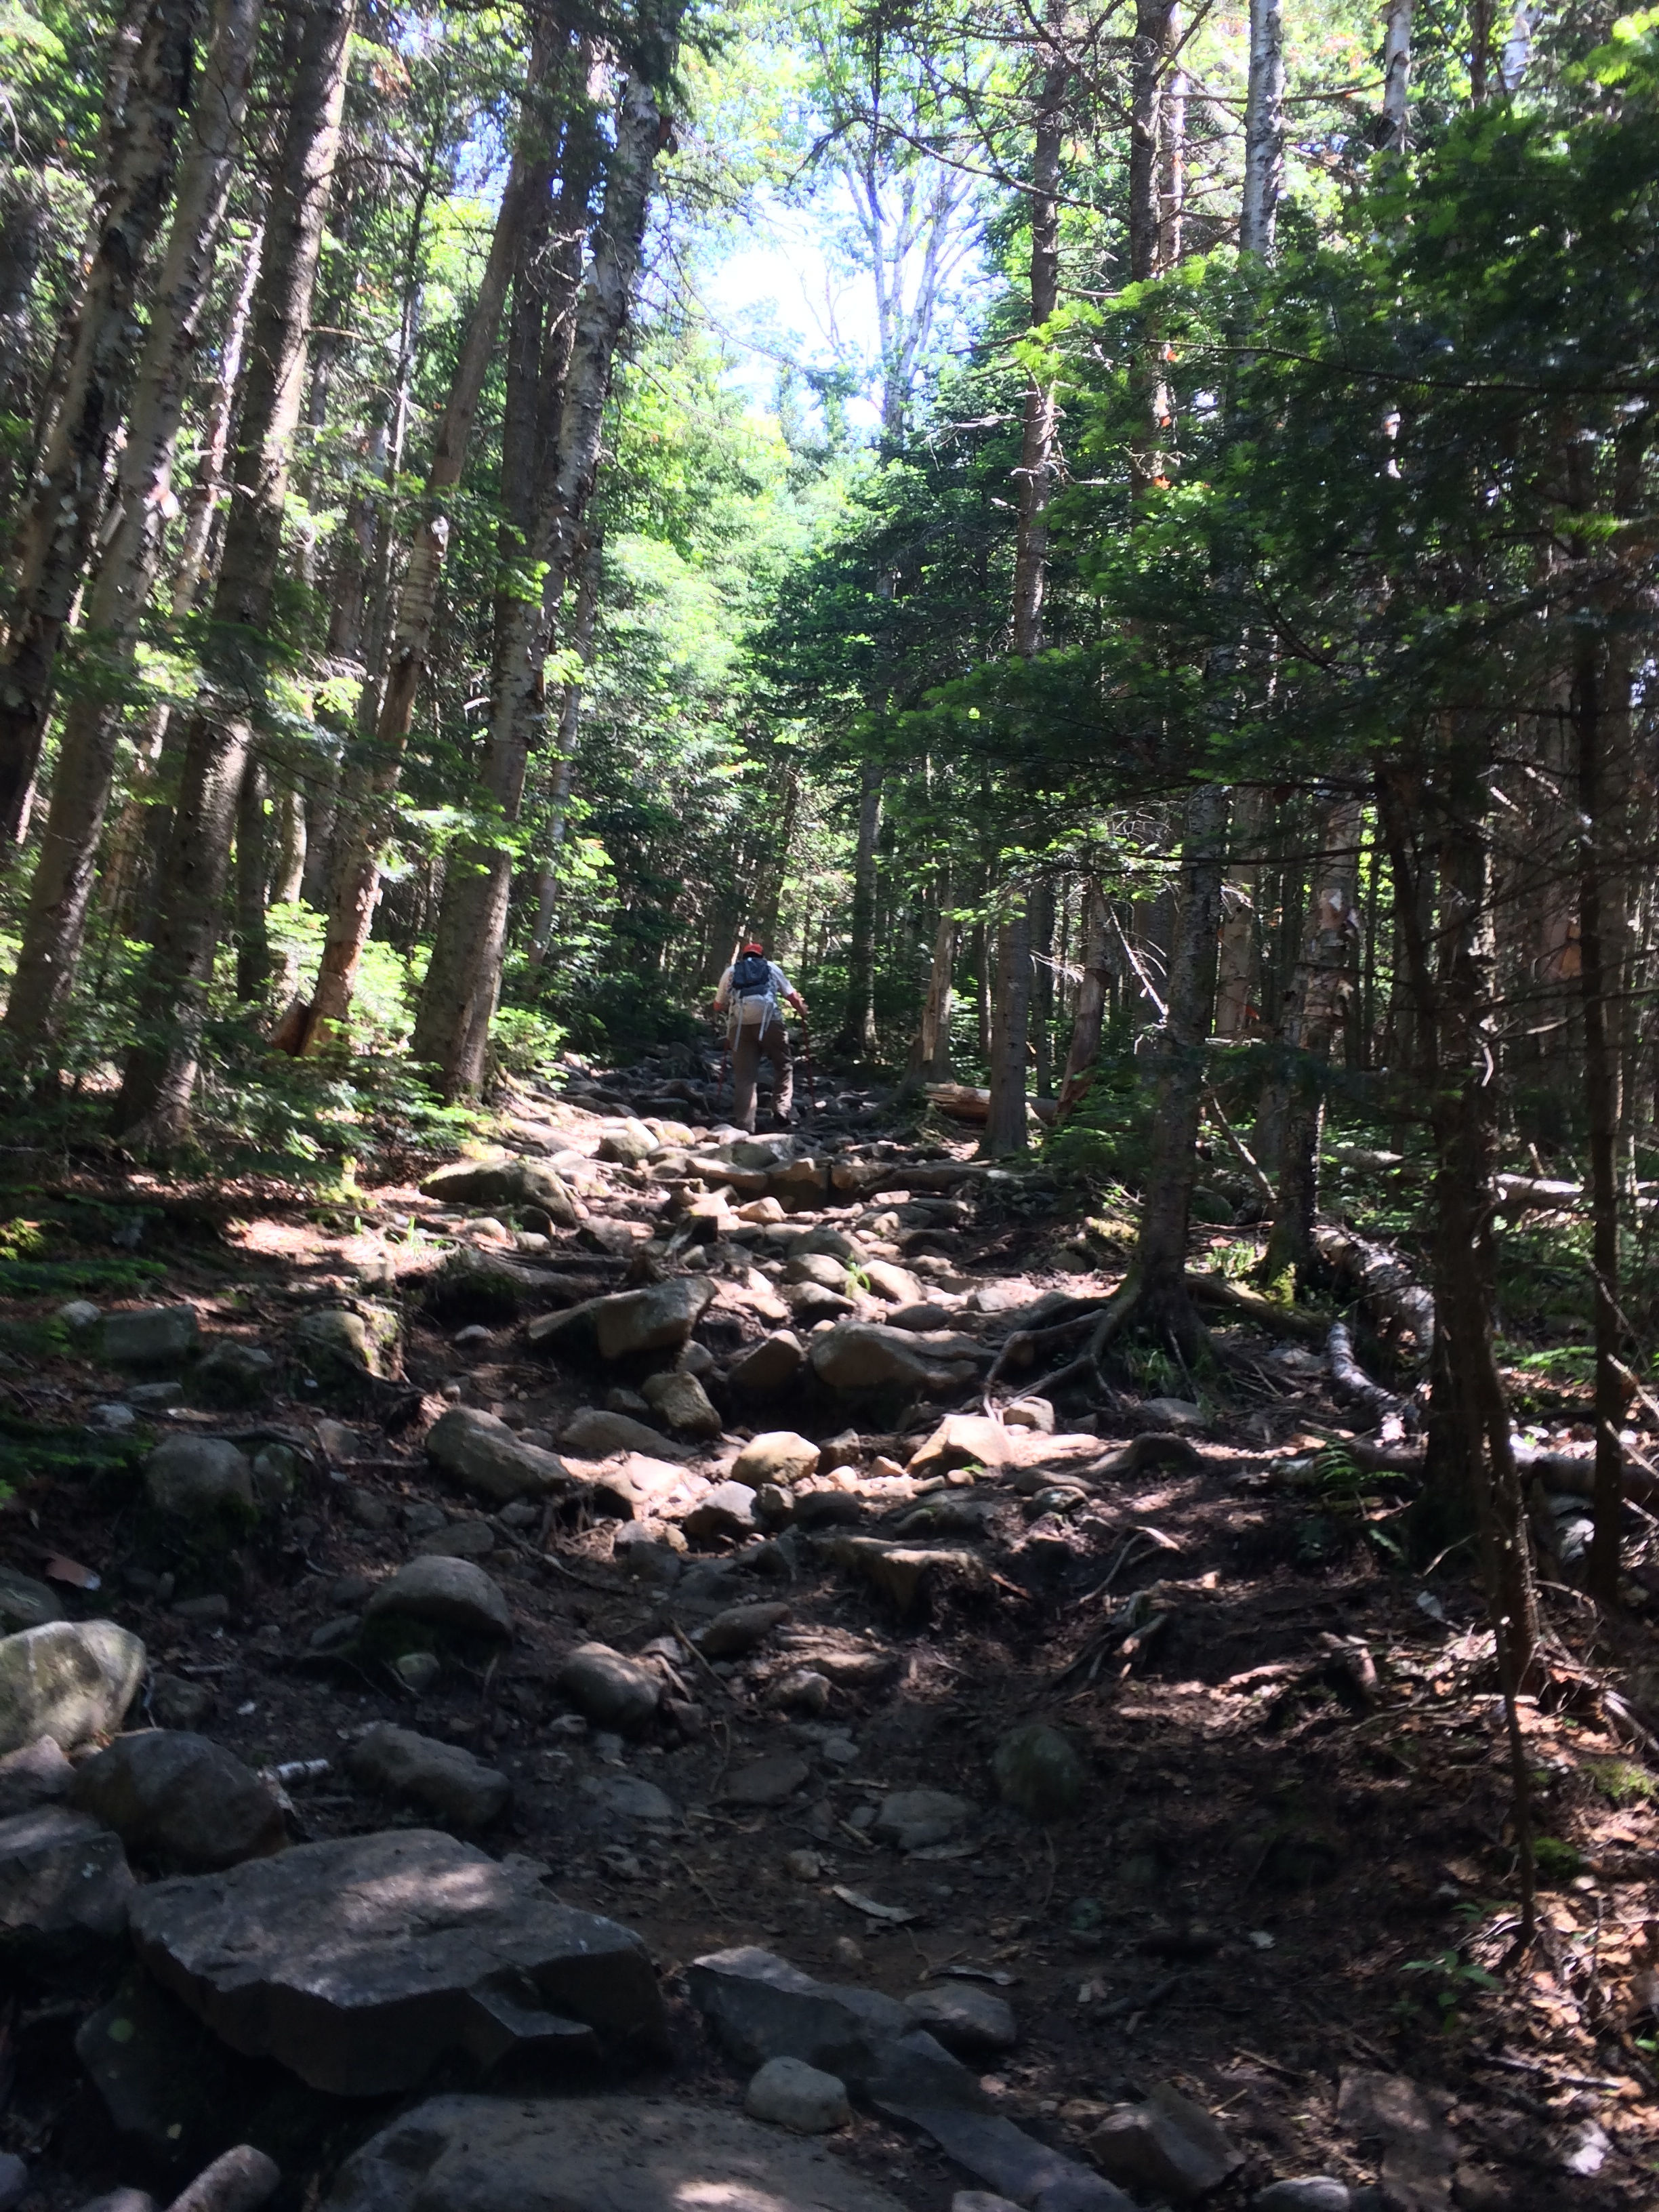
The rest of the trail to Galehead Hut is what we call PUDS, also known as, Pointless Ups and DownS. Most of the ups and downs are on rock facings and some are steep, but not steep enough for a hand over feet climb.

IMG_9038
Trail Sign

Below is one of the easier rock facing climbs, it gives you an idea of the terrain and the puds.  There are some rather steep descents, if you take a moment and look around you may find a well-travelled path to your left or right. The path leads around the rock area, it is safer for people with heavier backpacks and easier on your legs.

IMG_9048
One of many rock facing climbs

Not all of the trail is rocks. You will stumble across some roots along the way. No pun intended.

IMG_9043
Abby leading the way

And there are a few short-lived areas of flat.

IMG_8982
Always watching – break time.

Here is a section of the PUDS hike.

puds

The last 0.6 miles to Galehead Hut is a rather steep climb. You can see the incline in the image above. Galehead Hut is located to the right in the image above.

Trail Junction
Trail Junction

Galehead Hut is located at the ‘base’ of South Twin and Galehead Mountain. Galehead Mountain is a quick half mile climb from the hut. This is a great location to drop your gear and make the climb. You will take Frost Trail to the summit of Galehead. The summit of Galehead has no great views at the summit. However, there are some views along the way.  So, when you drop your gear, remember to bring the camera. 😉

We hung out at the hut for some time. The trek from Garfield to Galehead was not the easiest nor the worst, but the carrying 54lb pack, 43lbs of it was moving and talking, made a break without the pack feel like heaven. I am pretty sure Abby was happy to disconnect from her saddle bags weighing 5 lbs, too. I did not have to ask the Navigator, who nicely dropped his pack of 56lbs right on arrival. (Remember, we are carrying items for three people’s needs in one and a fourth packs)

As usual, we got the weather updates, refilled our water and made a few friends while hanging out at the hut. Of course, Abby was the center of attention before she just wanted to be left alone and regroup in her corner.

We had an early dinner while a few storm clouds passed over and reviewed our plan. The night forecast was a high probability of serve thunderstorms.  Our next location to camp was Guyot about 3.5 miles away.

A few things about Guyot Campsite. It’s in a rather open area, which means limited tree cover. There are shelters for storms, but dogs are not allowed. From the hut, one will have to summit South Twin, descend South Twin, walk to Mount Guyot, descend part of Mount Guyot and reach the Guyot Campsite. There is a point in the trek where you must commit to the campsite or fall back and camp in the tree line of South Twin. The approach to the campsite is open from Mount Guyot and at times steep. So, plan wisely.

We made our plans to attempt to make it to Guyot campsite. We would make a judgment call at the point of total commitment. We collected our gear and we were off.

First goal was to tackle the very steep climb of South Twin. It’s a short climb, but very steep. Very steep puts it mildly.  During the climb, Abby needed a few supported jumps. One of the jumps was onto a steep rock facing and then onto a huge bolder. We needed to work together to support her on the second jump so she did not fall backwards and made the jump to the second onto boulder without face planting into the next rock only a few inches from the landing on the boulder. We did have to lift her up twice. I am grateful she had a very supportive harness that made lifting her very easy and comfortable.

It’s a tough climb, but manageable. It’s an easier climb to start a day of hiking rather than end a day of hiking on tried legs. But I am very glad to have climbed up rather than descend it.

Here is the climb in two views.

South Twin, North Twin in background
South Twin
South Twin

The climb is a workout. You will know you are getting to the summit when the terrain changes from big boulders to those pesky little loose rocks.

Terrian
Terrain
Terrian
More terrain

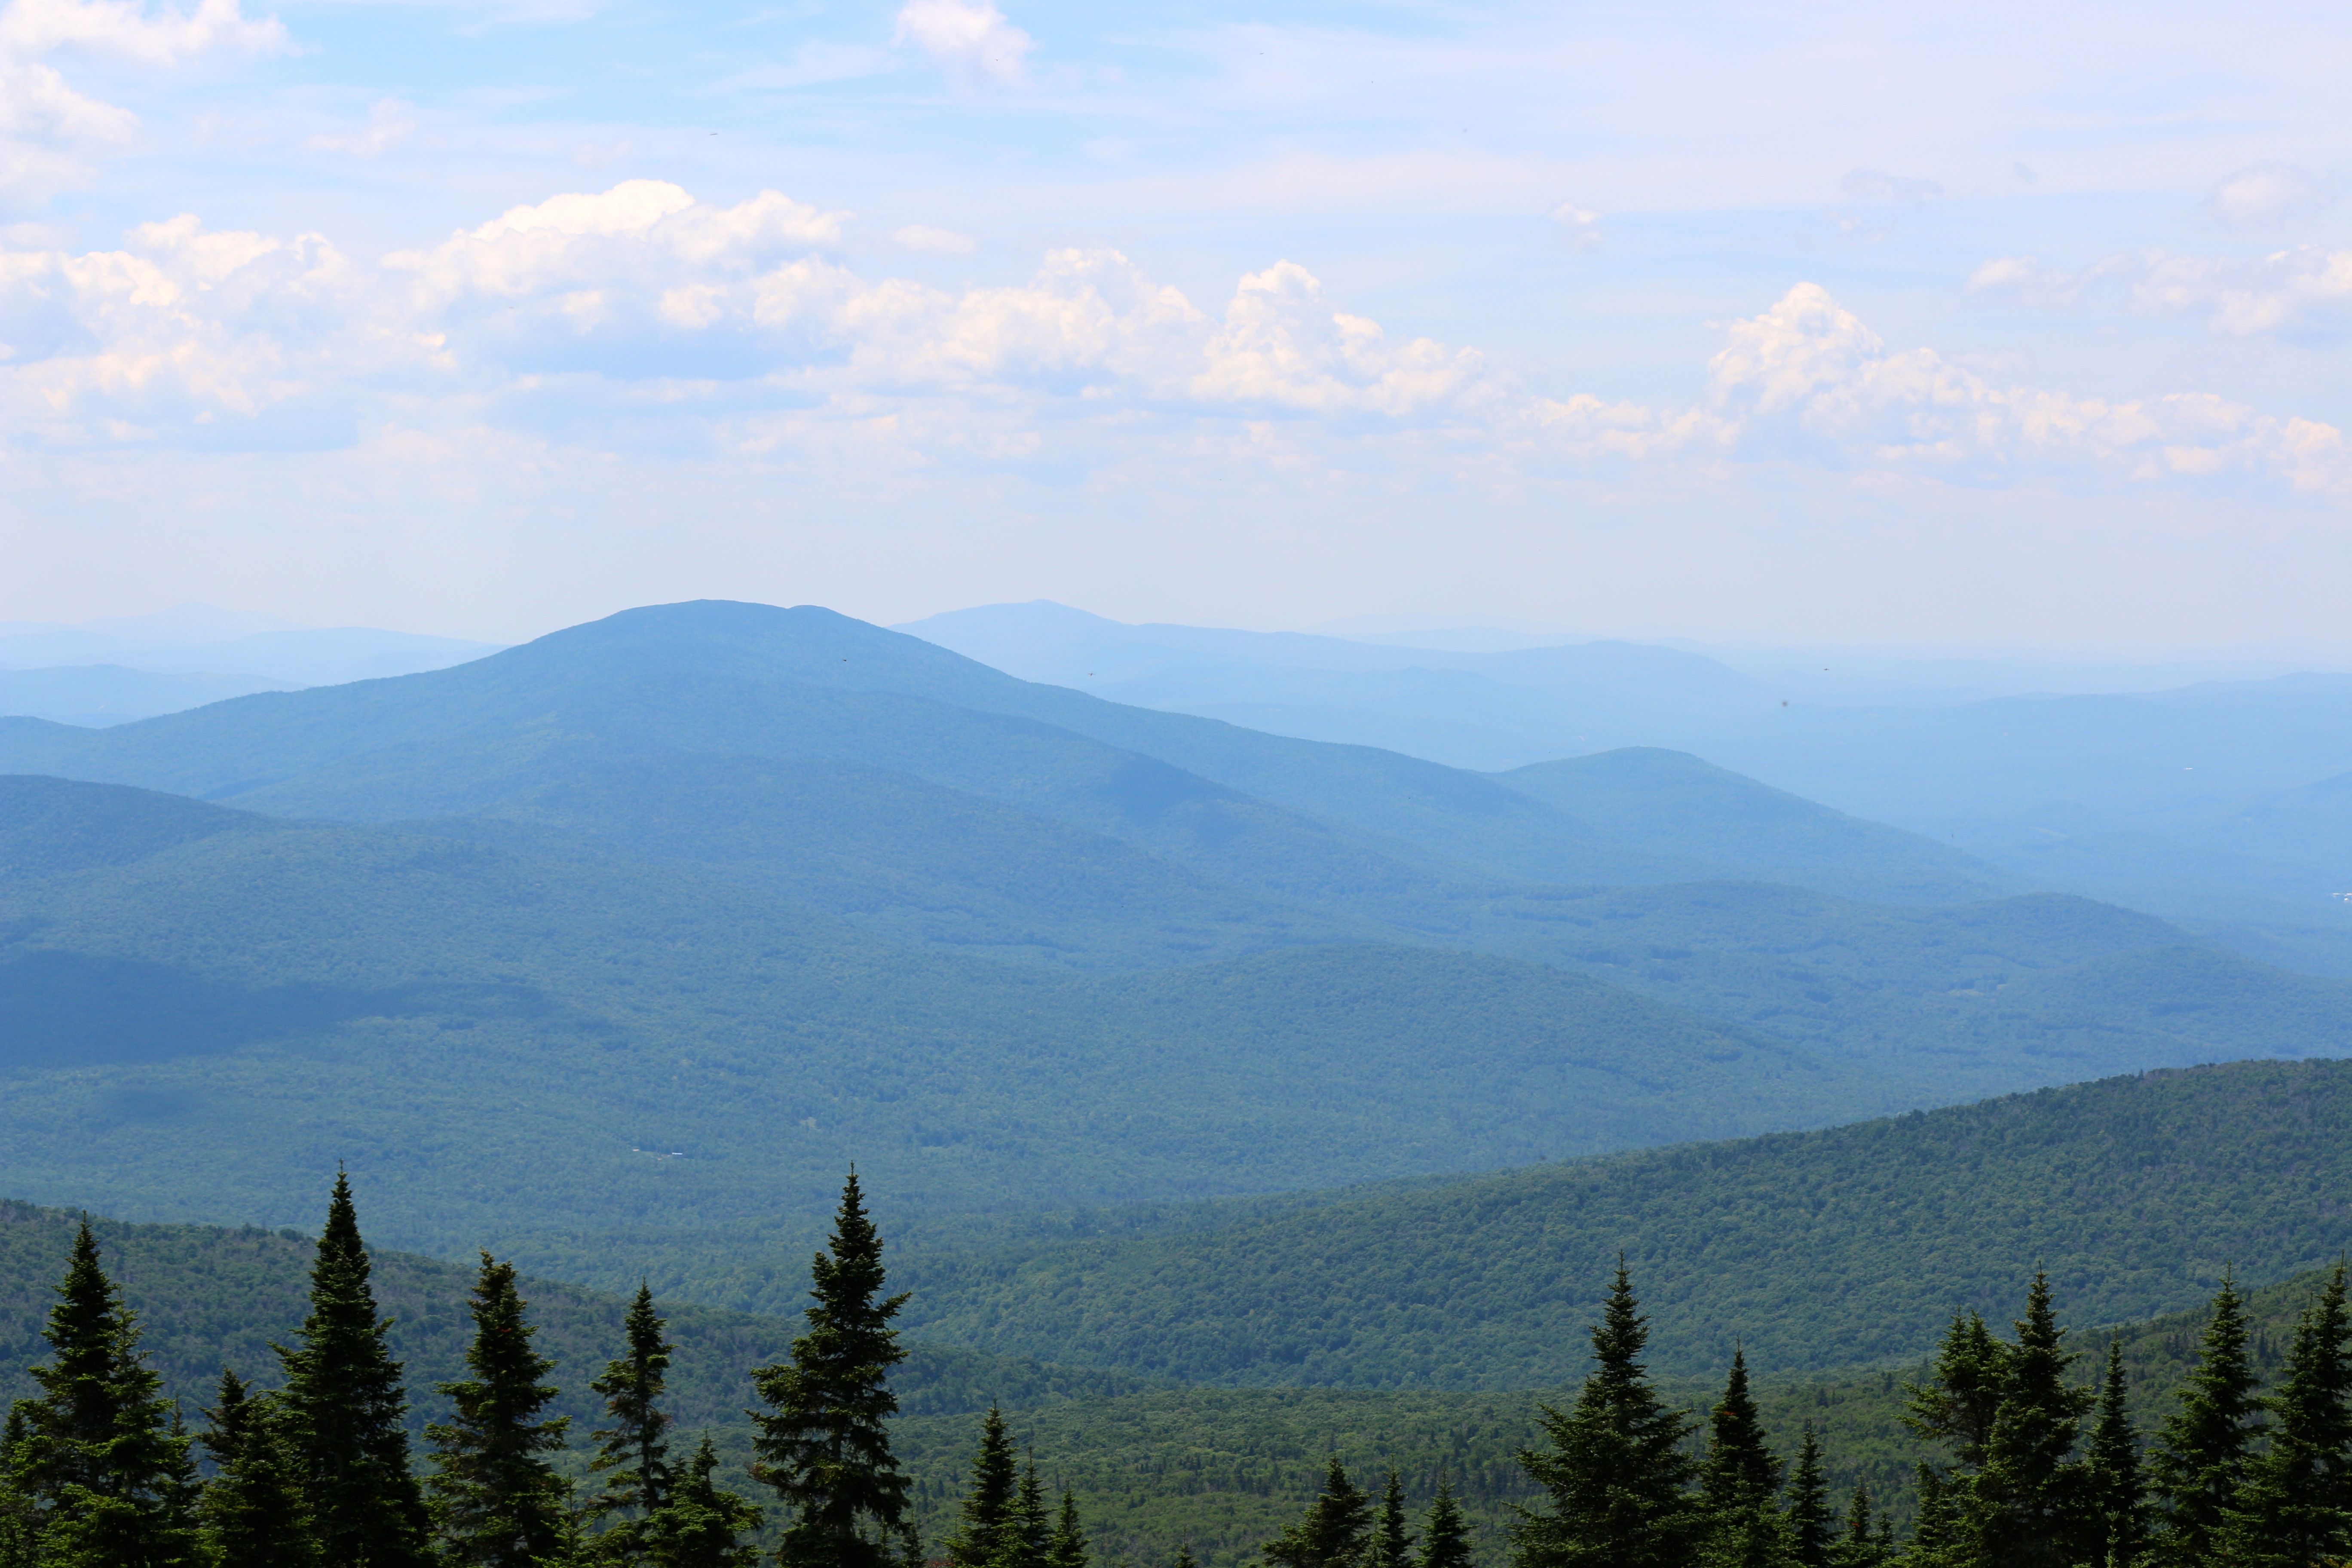
Here are some images looking back out during the climb.

Looking back
Looking back, rain clouds passing by again.
Looking back out climbing S. Twin
Looking back out climbing of South Twin

The views from the summit are absolutely amazing and very worth the climb.

Abby and I are the Summit
Summit of South Twin
At the summit of South Twin
Hanging out at the Summit
Walking around on the summit
About to descend South Twin
About to descend South Twin,  Abby is so over pictures

A few notes about South Twin, if you are traveling onto North Twin continue walking straight for roughly 1.2 miles, if you are traveling to Guyot, Bonds, Zealand you need to descend the mountain to the “south by southeast” or from the summit path you just climbed, it is to the right.  The above image is the trail sign where you start to descend. It’s a nice gotcha if you are not paying attention.

Also, if you are heading up South Twin via Twinway Trail with a child carrier, make sure he/she is secured snugly in the carrier. It will help limit their movement helping you climb without large shifts of weight, especially those going backwards.

The descent from South Twin is quick, but a bit steep. Absolutely nothing like the climb up South Twin. You will descend back into the trees and have a nice flattish walk to Mount Guyot. This is a highly camped area, so if you are looking for a campsite there are various places. While you travel along the path, look for well-travelled paths heading off the main trail, most of them are to campsite, just make sure the one you chose to camp at is 200ft from the trail.

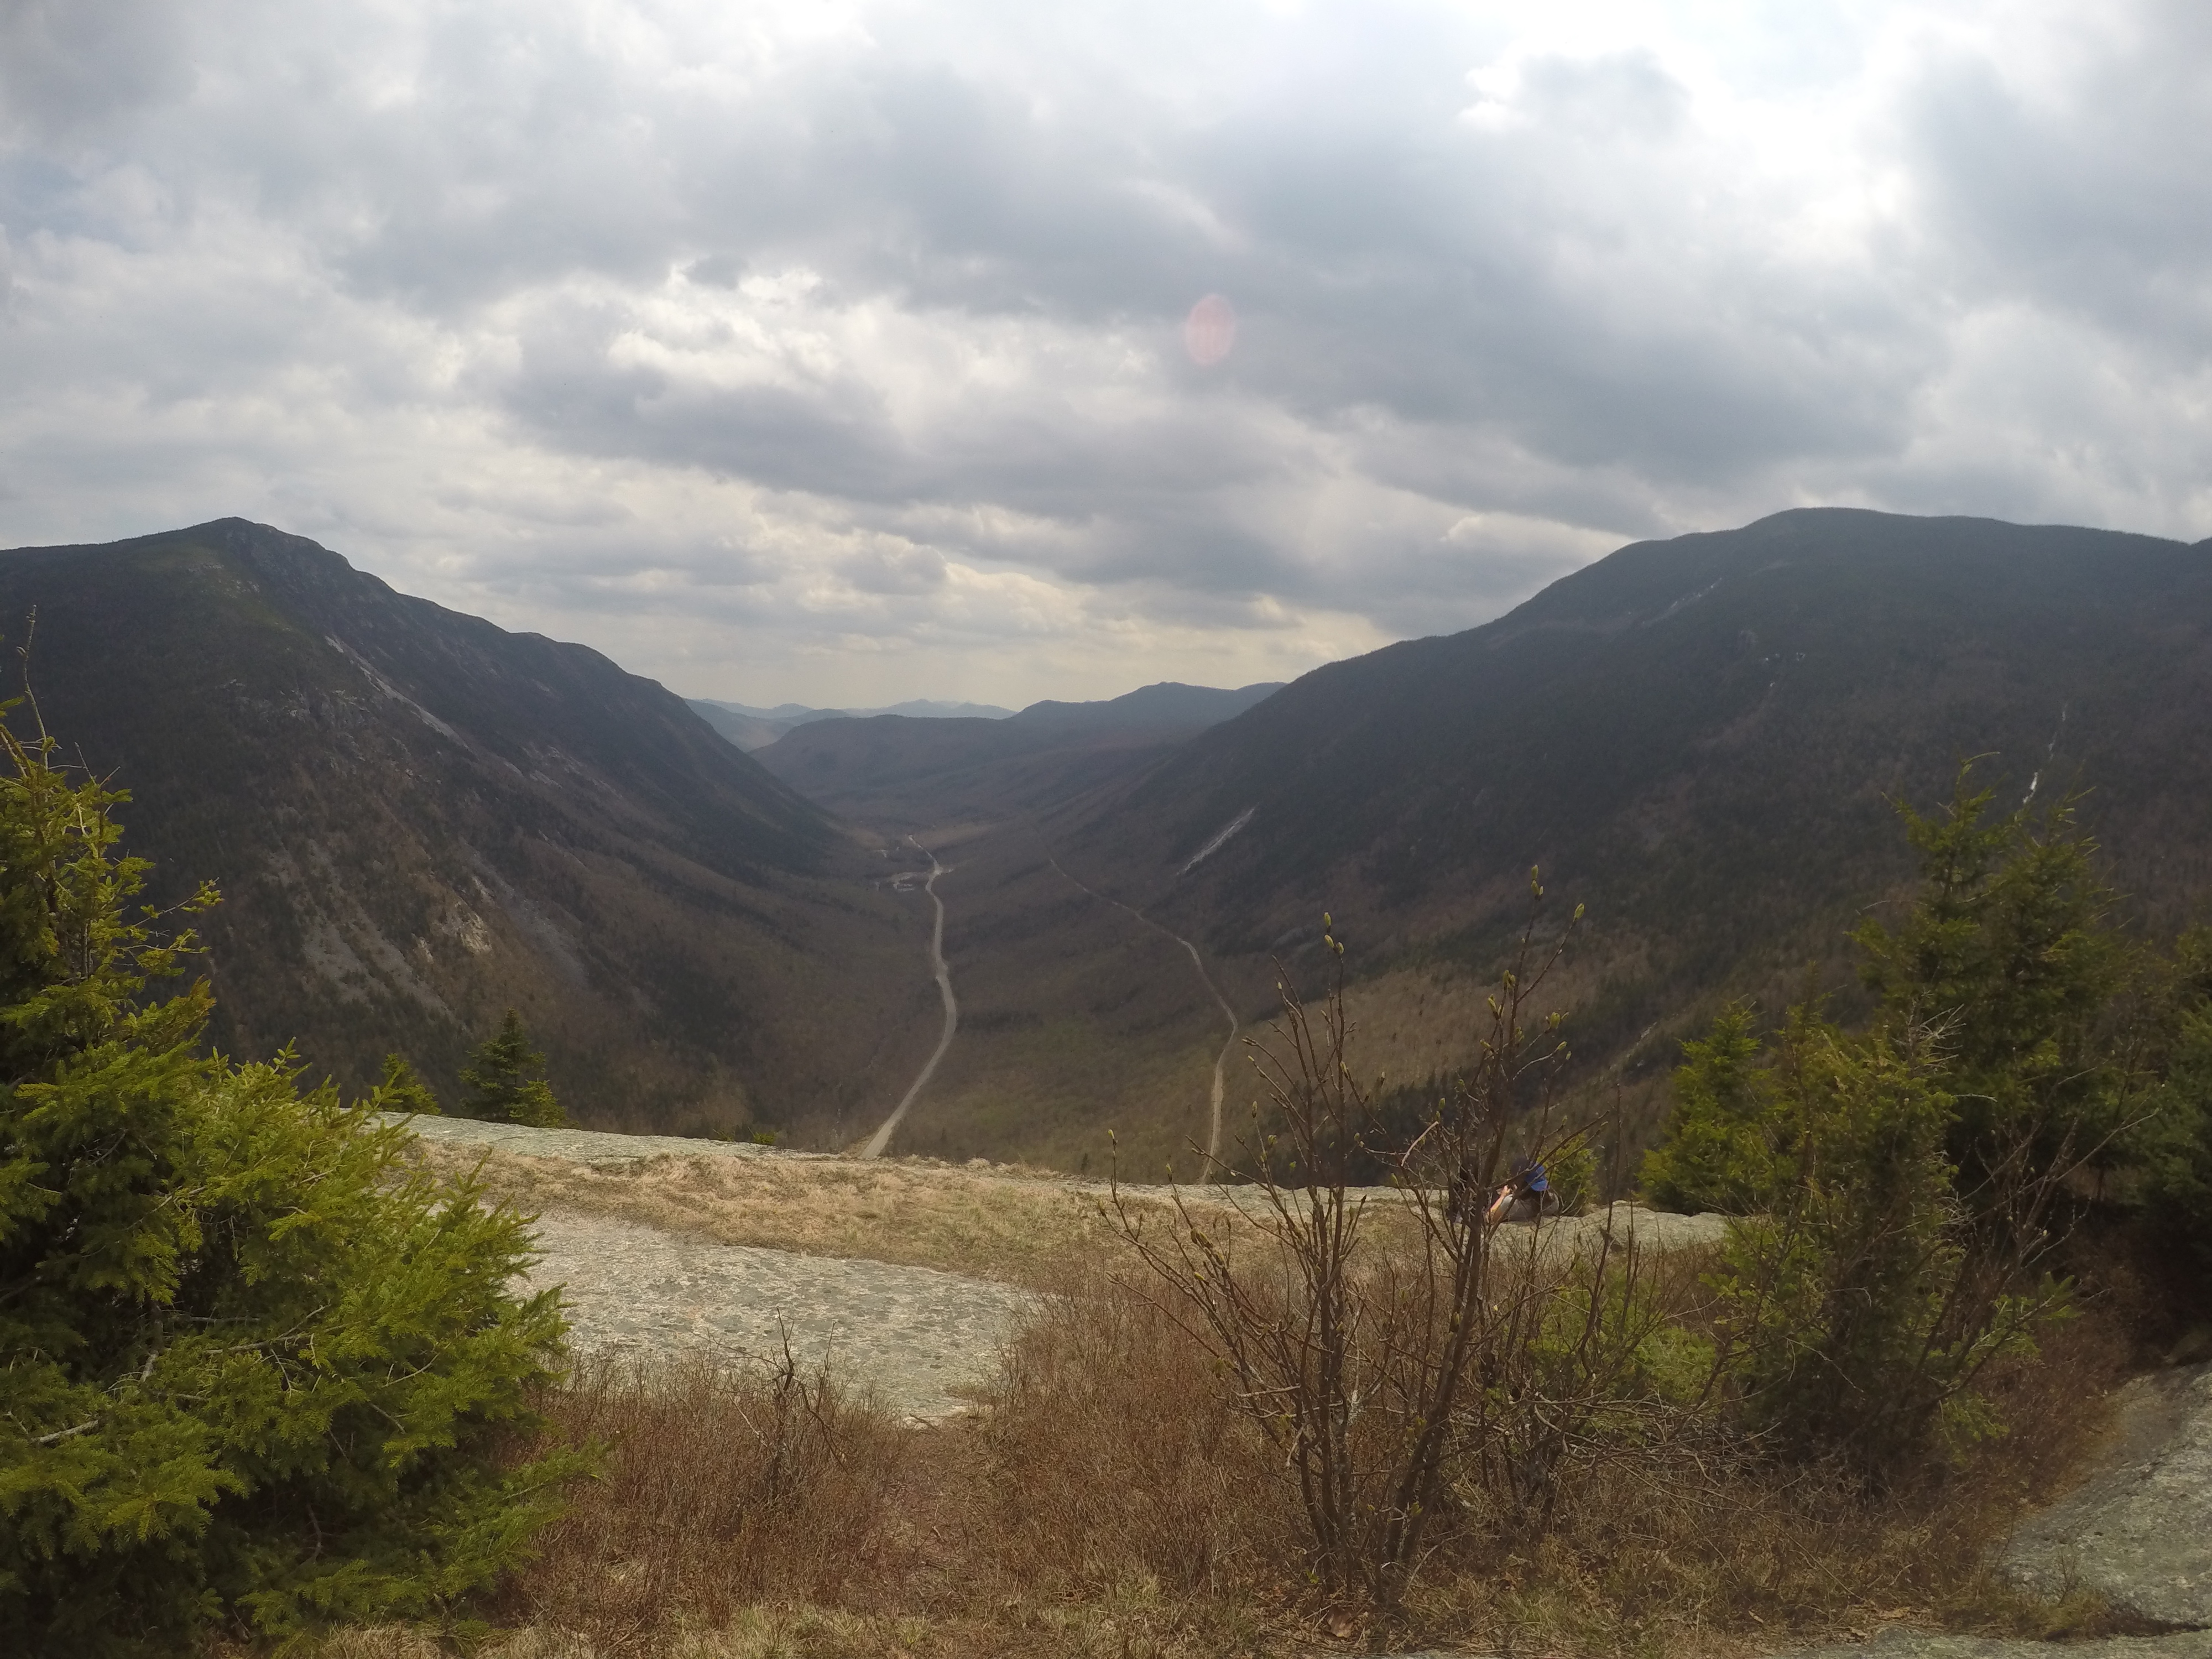
We broke out of the tree line roughly 2 miles passed the descent. This is the point of the commitment. We took a short break looking out over the area we were to camp and climb the next day. It was beautiful. During the break, we saw an awesome multiple lightning strikes in the distance and rain, we made the decision not to make the commitment and went to our back up plan for the remaining of the hike.

We headed back into the tree line to a nice level camp area, we marked as our back up campsite as we walked by it. We made camp, hung our food in case of bears and within 5 minutes of getting settled in the tent we had a nice lighting show and rain for remaining of the night. It was an amazing storm, but I am glad we were fully covered and did not need to retreat to another location. Also, we had no bear visitors that night.

Abby did extremely well throughout the day. It was not just a physical workout for her, but a mental test. She followed every command to wait, climb, jump, rest, go (okay to pass and lead), platz (down), plac (crawl), bot (here) and leave it. The below picture is the result of her hard work. She did not even wait for her blanket or removal of her leash before laying down for the night.

IMG_9075
Result of the day.

Abby activity for the day, 10 hours 26 minutes of movement. (resting hours includes not only sleep, but anytime Abby is not moving, laying down, sitting, standing still, etc)

activitystwinday

By the morning, she was all ready to go. In fact, she became the morning supervisor of taking down camp. We felt like she was grading us on time and method.

IMG_9078
Abby supervising

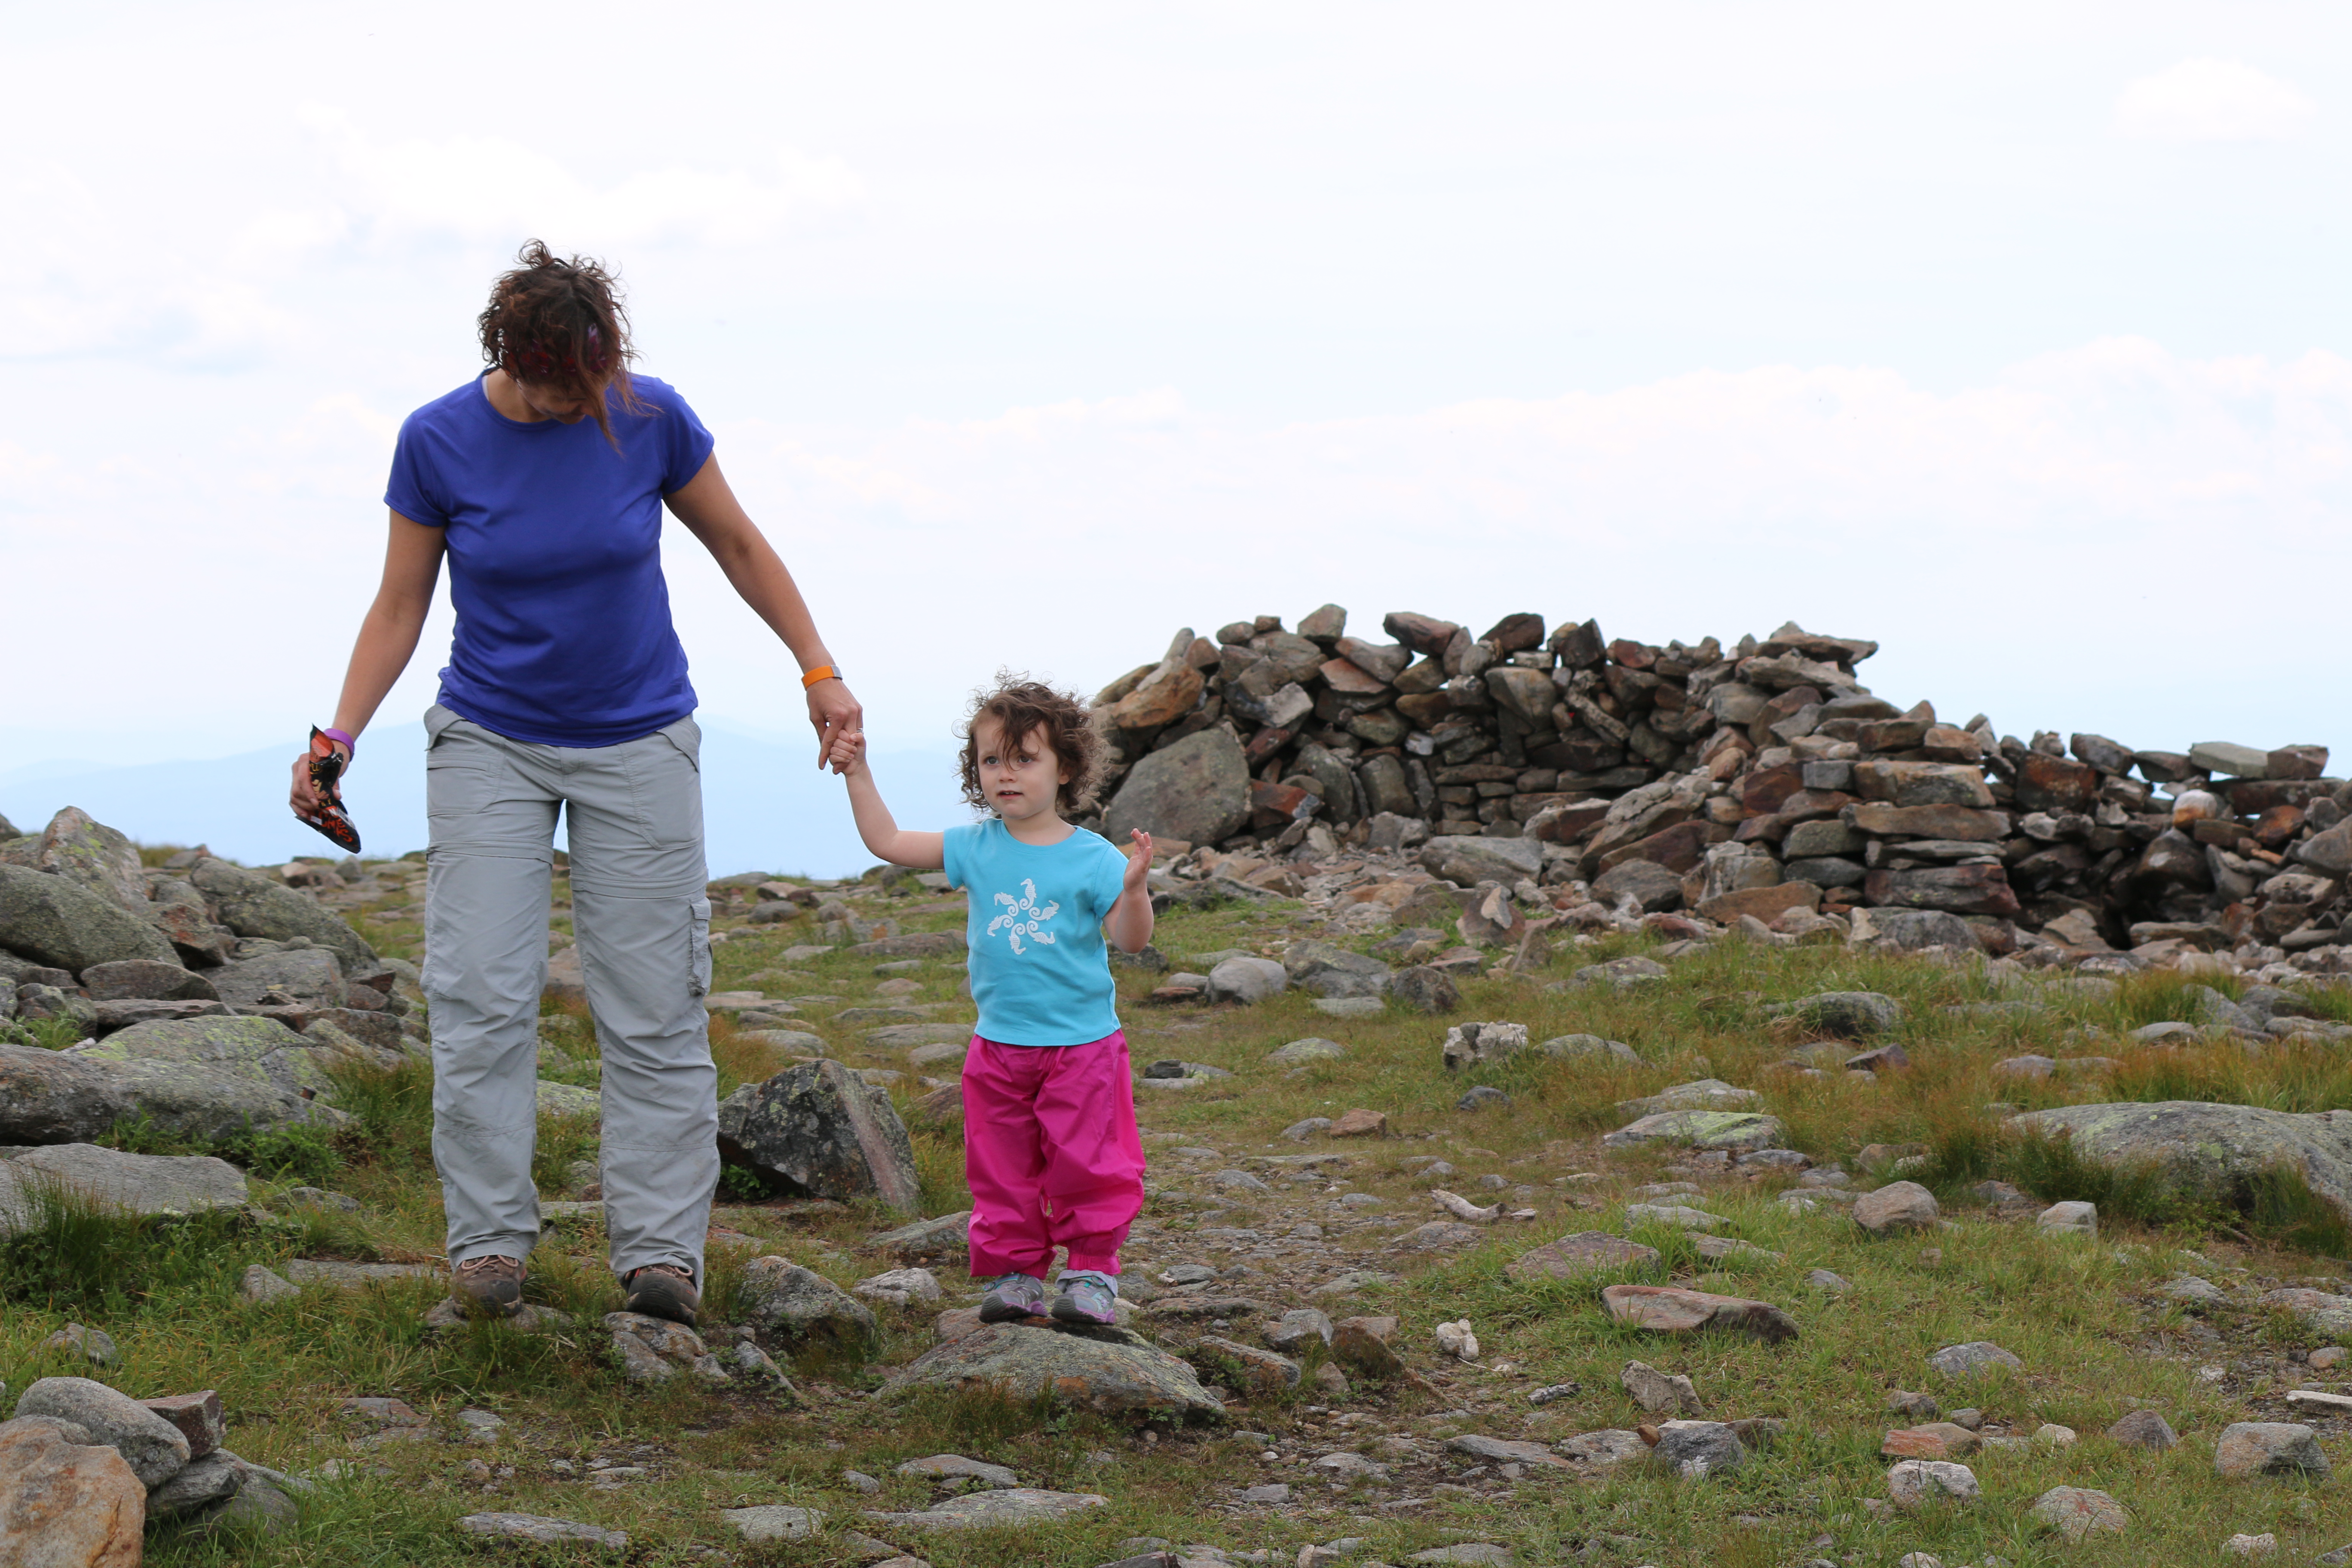
The morning view of campsite two. Abby and I walked the area in the morning to stretch our legs and to allow Abby to enjoy all the smells the woods have to offer before getting ready to work. The Admiral chatted away to her pony. (The Admiral is 3 and half years old)

IMG_9077
Campsite two

Since, we did not commit to Guyot Campsite, we would not be able to make West Bond, Bond and Bondcliff. The decision was made to keep our family together and safe. It did remove about 6 miles from our total. With that being said, we have planned to make the hike to the Guyot and to the Bonds in the near future to keep Abby’s word of making it there. The fall foliage will hopefully be amazing this time of year. So, check back soon for the post, images and videos.

We headed back to Mount Guyot in the morning. The view in the morning was even better with most of the clouds gone and the sun out. It was a good area to take a break. However, the wind was very active. We dealt with 30 mph winds with gusts up 37 mph. A very normal occurrence in the Whites.

MtGuyotBreak
Enjoying the nice breeze and view
Heading2Mtguyot
View going to Mt. Guyot

The path up to Mt Guyot or down to Guyot Campsite is open and a rock to rock pathway. Night travel, rain or high winds can make the path little tough to navigate. Though, its probably very nice place for some snowshoeing.

Rock path
Rock path, Admiral loving the wind

Follow the path until you get to the junction one path goes to Guyot Campsite, the path up heads to the summit of Mt. Guyot

Some images from the summit of Mount Guyot

summitmtguyot
Mt. Guyot Summit
Abby and Dad hanging out
Abby and Navigator hanging out
Abby on Mount Guyot
Abby on Mount Guyot

Continue on the path to descend Mt. Guyot and follow the Twinway Trail. It’s a nice trail with some huge boulders that you will need to climb over or work around.  Twinway Trail will bring you to the summit of Mount Zealand.

Yes, you will descend Mount Guyot then climb up Mount Zealand only to descend Mount Zealand to get the Zealand Falls Hut. Though, it is ups and downs, but far from pointless. 😉

Heading from Mount Guyot
Descending Mount Guyot

Just follow the path and signs along Twinway Trail

Twinway Trail Sign
Twinway Trail Sign
ATwinwayTrail
Abby on the Twinway Trail

The summit to Zealand is a little tricky for about 25 feet, if that. The summit of Zealand is 0.1 miles off the Twinway Trail. There is no views at the summit, but along the cliff there are 360 views. At the summit, you will find numerous Gray Jays/Canadian Jays or Camp Robbers. The latter is a nickname well-earned.

Canadian Jay, Gray Jay, Camp Robber,
Canadian Jay, Gray Jay, Camp Robber

Abby was not assumed at all with the summit of Mount Zealand

Summit of Zealand
Summit of Zealand

The descent of Mount Zealand is quick and easy. First, part is a steep rock facing descent, which is also a great location to take a break and enjoy a snack. Here is where all the views are located.

View from Zealand Cliff
View from Zealand Ridge

The second part of the descent is a ladder. Nothing like the ladder at Cannon Mountain via Hi-Cannon Trail. It’s just five steps and not so steep.

ladderzealand
Abby being guided down the ladder

I will train Abby to at least look while spotting.
I will train Abby to at least look while spotting.  However, she is waiting for the command to move.
descentzealand
Descent from Zealand

The rest of the trek to Zealand Falls Hut is rather uneventful. Most of the hike is downhill with some areas of rock facing climbs. You will pass over a few bog bridges. Though, Abby decided to entertain us with skipping the bog bridges and plow through the mud. :/ At least, she wasn’t headed into the car or home for a few days. 🙂

After the descent of Zealand, you will remain dropping elevation until you reach the Zealand Falls Hut.

Heading down Zealand

You will know when you are close to the hut when you start hearing the Zealand Falls. It’s a beautiful little area and during the summer months packed with people. There are a few pools water. Abby went to cool off. Though, I was glad she went to clean off the mud. It is also, a great location to give your feet a quick spa treatment.  Though, I suggest first removing your boots and socks.

Zealand Falls
Zealand Falls
Zealand Falls Hut
Zealand Falls Hut

The Zealand Falls Hut is rather popular because of its easy hike to the Hut and has easy water access. We enjoyed some nice hot beef and barley soup and instant coffee while we relaxed a bit before heading on to our next campsite.

Of course, we got the weather report before we left. Again, the forecast was thunderstorms at night. The storms seemed to be following us and a theme song to the nights during this hike.

We climbed down a short descent, roughly 750 feet, from Zealand Falls Hut. There is a nice water spot for lunch, break or to avoid some of the hut traffic.

IMG_9222
At the base of Zeland Falls Hut

We continued to follow the Zealand Trail. The Zealand pond is very beautiful and a great location to maybe see a moose or two during the off-season of the hut.

HikeK9 0
Bridge Crossing (click for larger image)
HikeK9 -3
Zealand Pond (click for larger image)

Here is my view from the bridge and pond images above.


IMG_9109
Storm clouds

We hiked to the A-Z Trail junction and took the trail leading up to Mount Tom Spur. It is a 2.8 miles trek easy with a moderate areas.

IMG_9111
Trail sign
IMG_9112
View along the A-Z Trail
A-Z Trail Abby & Navigator
A-Z Trail
A-Z Trail

Our goal was to make it to the campsite location before the storm hit. Unfortunately, we made it about a mile before we felt the first few raindrops.  We managed to get the Admiral covered, rain covers on the packs and electronics safely stored out of the rain before it started pouring.

When I say pouring, I mean it. It was the type of rain that causes puddles in a few minutes and when you are traveling up hill, there is a small river of water traveling down. Your quick dry pants are just soaked in minutes. That type of pouring rain, the deluge type.

The storm ended up cutting our day light short, which meant we were rocking headlamps up to Mount Tom Spur area.

The A-Z Trail is truly a hike in the woods. You will face different terrain in a heavily dense trees and bushes. Not many people travel the path even though it is a cut over to the Presidential Range. Most people travel via the Ethan Pond Trail. That being said, keep you eye out for yellow trail markers it easy to lose the trail if you are not paying attention and you will see numerous trees with bear markings. No worries, no attacks have occurred. It’s normal you are in their territory after all.

You will know you hit your ascent to Mount Tom Spur, because the path will just start to ascend with rocks. Its steep at a moderate rate. Passing through this area in the dark in the rain was a bit tricky. I remember a large amount of swearing coming from somewhere behind me, thankfully the Admiral was taking a nap. 😛

Abby enjoyed the rain as a way to cool off.  She led the way last the 0.2 miles to the campsite. The red lights attached to Abby’s harness were extremely helpful this evening and night. We removed her packs and placed them into our packs to protect them from getting wet.

Abby leading the way at night

By the grace of the Mountain Gods, the rain stopped for roughly the last half mile to the campsite location and throughout camp set up. With all the bear markings, we hung our food and other items a little farther than usual. We got all settled in before the rain restarted and the thunder came.

In the morning, we pack up camp while our supervisor decided we could manage without the watchful eye.

Our Napping Supervisor

We followed the A-Z Trail to the Avalon Trail and out to Crawford’s Depot.

Navigator and Abby
Navigator and Abby
Admiral and I on the Avalon Trail
Water Crossing heading to Crawford's Depot
Water Crossing via Avalon Trail heading to Crawford’s Depot
Trail sign
Trail sign
Look both ways
Look both ways before crossing
Crawford's Depot
Crawford’s Depot
In case you what google it
In case you what to find the location

We could not have been more happy to see the Highland Center. For a few reasons, first and most important real bathrooms, cooked food, cold drinks and a chance to do a wash down. There is nothing like a good hand and face wash after a few days in the woods. Plus, our car was close by with a stash of goodies, clean clothes and a chance to unload items we no longer needed.

We lived a lavish life for a few hours before making our way to our final campsite in a light rain. Our final campsite was off the Jewell Trail. A trail we have travelled numerous times to the summit of Mount Washington. Our original plan was to camp at the Mizpah tentsite. The weather report of rain throughout the night and morning, we decided to travel on a trail that was covered for half the hike up to Mount Washington.

We did this for a few reasons. Once, we left the Mizpah tentsite we would have to travel about 7 miles above tree line in what was projected to be in the clouds and rain. Shelters nor huts allow dogs. Lake in the Clouds Hut would be available for water and some food, but no shelter, if needed. Basically, there was no areas for safety.

The morning of September 11th, we were in the clouds with light rain. The visibility was limited but manageable.

We made it to the summit in the latter morning, of course the summit was usual in the clouds.

IMG_9136
Oldest mountain hiking trail in America
IMG_9152
Summit Marker

IMG_3451

IMG_3474
The Cog Railroad, sorry no dogs allowed.
IMG_3447
Mount Washington State Park
IMG_3456
At the Summit
Trinity Height Connector
IMG_3433
Lake in the Clouds Hut
IMG_3462
Summit Marker
Tip Top House, old hotel at the summit
Tip Top House, old shelter for hikers at the summit
Summit
Summit, 9/11
Abby sitting on the summit marker
IMG_3461
I said “home” Abby totally agreed
Where the cloud meets the Mountain
View
Click for panoramic photo
View
Click for Panoramic photo
View
Click for panoramic photo
Hike to Mount Washington

Overall, it was a great hike. We enjoyed our time on the trails and all the hikers we met along the way. We made tough calls to make sure we were all kept safe. Our original plans had to be modified, but it happens. We worked together as a team to get through some tough areas. We had numerous laughs along the way. And made memories that will be carried with us for a lifetime. We did it all while supporting a great organization, Warrior Dog Foundation.

It doesn’t get much better than that!

Please, visit our store to purchase the Hike for K9 Heroes Hoo-Rag Bandana. 100% of the proceeds to directly to the Warrior Dog Foundation. To learn more about the Warrior Dog Foundation, visit their site, here.

Mount Carrigain, Signal Ridge Trail

Mount Carrigain is part of the 4,000 footers in New Hampshire. Mount Carrigain is located Grafton County, NH. The mountain is named after Phillip Carrigain, NH Secretary of State (1805–10), and is on the south side of the Pemigewasset Wilderness. There are two main paths to the summit. Desolation trail, which is steeper can be accessed by Carrigain Notch Trail, Nancy Pond Trail and a few other trails. The other option is Signal Ridge Trail, not as steep but still a rough terrain with a steep incline. Signal Ridge Trail can be accessed by Sawyer River Road off of Route 302. *Note: Sawyer River Road is closed during the winter months* We took Signal Ridge Trail, which can be found two miles from turning onto Sawyer River Road from Route 302. The trail is on the right just after a bridge with the parking on the left.  In the parking lot area you will see this gem of a tree.

IMG_2446
Tree in parking lot.

The trailhead…

Trailhead for Signal Ridge Trail

Note: The trailhead sign misspells “Carrigan”. AMC Link From the trailhead to the junction the trail is rather easy and a pleasant walk minus the mosquitoes. I suggest bringing some repellent. We allowed M to walk some of trail at the beginning because it was that easy.

M on the trail
M on the trail

About 1.5 miles into the hike you will have to cross the river. At the beginning of the spring season this crossing could be extremely difficult or impassable. After the river crossing, you have about  0.2 miles to the junction. You will cross some log bog bridges heading to the junction.

IMG_2466

At this junction you can either head left to continue Signal Ridge trail or head straight on Carrigain Notch trail. We went left, on Signal Ridge trail and shortly into trail is where the terrain became harder. From the junction, it is 3.3 miles to the summit of Mount Carrigain. The trail offers nothing exciting other than incline and rocks. In some ways, it feels like you are on a ‘death march’ to the summit. But, do not worry the views at the top are amazing and even more amazing on a clear day.

If you hike this trail during rain or after take your time with the climb some careful footing is needed especially when the rocks are wet. There is a section of this hike that is pure rock; not large rocks, but those pesky little rocks. Watch your footing, especially on descend.

Here is a small ‘rock climb’ you will face. It’s rather easy, but with larger backpacks or a small child on your back it will take some maneuvering.

signalrdigetrailrock

IMG_2495

Though, there is really no views or excitement to the summit. There are locations were you get what our family “sarcasm” calls “outdoor a/c”. In other words, you will hit areas, where a nice breeze with come through. Of course, that is more towards the ridge line and summit, but on hot days like our hike, we are thankful for what we are given.

You will reach the Signal Ridge at the 4.5 mile marker. You will know its the ridge because straight ahead of you about a half mile away is the summit of Mount Carrigain and the fire tower, to your left you will be some shrubs and trees and  to your right you will see the Presidential Range, Attitash Mountain and on a clear day into Maine.

Mt. Cardigan fire tower
From the Signal Ridge to the summit of Mt. Carrigain fire tower

**Note: Fire towers or lookout towers provides housing and protection for a person known as a “fire lookout “. It provides housing for those on duty searching for fires. Now a days, it is done by airplane. So, when you climb up, think about those that lived and did their job to keep the forests and wildlife safe in the early 1900s. **

The ridge is a great place to take a moment, rest and regroup. The trip up to the summit is short and after your ‘death march’ climb, its really nothing. But remember what goes up must go down. Here are some images from the ridge and summit.

Mount Washington from Carrigain

Mt Carrigan Hike-Pic1

Mt Carrigan Hike-Pic2

Here are some terrain images by our GPS device. These are after the junction post approaching the ridge and summit.

incline
Basic Map
3D Map
3D Map

Over all this is a great hike. It is a workout, but well worth all of it.

Mount Carrigain in our books, lives up to its name of one of the most un- respected climbs and views of the White Mountains.

Happy Trails!

Mt. Willard – Spring Hike

Hiking season has officially begun! And we are excited to finally hit the trails.

We decided to start with an easy hike and get back into the swing of things. We did a repeat hike, Mt. Willard. We know the terrain and what to expect.

Instead of repeating myself, you can find more about Mt. Willard, here, and the trail details.

However, for those hiking the trails, the current conditions range from dry, wet, mud, snow and ice. You get them all on this hike. So, be careful. You could use micro-spikes, if you want, towards the summit.  We didn’t have them. We walked on the side of the trail and avoided the ice.

If it stays warm, all the snow and ice should be gone in about two weeks. Of course, that means mud and tons of it. Also, the water crossing may be a little tricky.

Here are some images from our hike.

IMG_1999
Heading to the summit
Water crossing
Water crossing while M took a nap.
Crossing the stream
Abby’s way of crossing the stream.
Getting close to the summit, snow and ice conditions
Centennial Pool, a little break
IMG_2019
At the summit, staying hydrated and taking a break.
View from the summit
IMG_2022
Summit photo before heading down.

For the first hike of the season this is a great trail. It was rather busy, if you want more solitude, I suggest skipping this trail.

A short clip from Abby, her view during the submit approach… 


Make a Donation

End of the year is here, if you can, want to or need to keep Uncle Sam at bay.

Please, donate to one or both of my favorite nonprofit organizations. I have no ties to either. I support them for the work they do and I believe in what they do.

IMG_3144

MWOBS studies the weather and does many climate research projects to help give us warning of storms which helps protect what we love.  Mt. Washington is known for the worst weather in the world with winds reaching 231 mph.  Find out more at http://www.mtwashington.org, here.

Untitled

Warrior Dog Foundation, is a home for SFO (Special Forces Operation) dogs. They help find a dog home after their service or injury. They work directly with the dog, house them, give them whatever care and training needed. They do all this with the honor the dog deserves. They provide a permanent home for dogs that cannot make the transition. Find out more at http://www.warriordogfoundation.org, here.

If you can’t donate, help spread the word.

Mt. Willard Trail – Winter Hike

Mt. Willard is a very easy up and down with an amazing view at the summit. The best time to hike this mountain is during the fall to capture the fall foliage.

Mt. Willard Trail is located in the Crawford Notch State Park. The trailhead is located in the same location as that of Avalon Trail, but instead of going straight, you would take a slight left onto Mt. Willard Trail. Since, we hiked Mt. Tom via Avalon Trail it was very easy to locate.

The trailhead for this hike starts at the Crawford Depot/Visitor Center on Rt. 302, just before the AMC Highland Center.  Anytime we hike in this area, we stop off at the Highland Center to get trail reports and if needed to sign in and out of the hiker log.

Here is the trail from the north view. Our total trip was 4.1 miles from our location at the highland center to the summit and back.

Trail
4D Map Trail
Elevation
Elevation

The trail condition for us was packed snow and easy water crossings. If you are hiking this trail during the winter, I suggest running into the Highland Center and speak with the AMC folks at the desk. Depending on what the weather was before your hike day, water crossings can be hard to pass or not passable at all. There are a few areas of the trail where you will have to duck under or walk around some broken or snow pushed branches. These areas of ‘obstacles’ are very easy to walk around.

We used our micro-spikes for this climb. It is an easy hike on packed snow, but with a moving toddler on your back its helpful to have some grip to the earth.  The climb and descent are very straight forward and rather uneventful.

Here are some images from the trail.

At the start 1
Crawford’s Depot


IMG_3034
Trail


Us on the trail
Us on the trail


Pool Area
Centennial Pool


Coming down the trail

Here are some few from the summit…

Mt. Webster


Summit Picture

As you can see, we added another family member to our hiking team. This was Abby’s first formal hike and she did very well. It was a little confusing in the beginning since we forgot her gear. The gear is key in helping Abby understand it’s time for ‘work’.  She stayed on her lead the whole trip connected to my pack and loved every moment. Our goal is to have Abby completely condition and trained for longer and harder climbs by this spring where she will join us on each hike.

Mount Moosilauke Hike, White Mountains, Hiking New Hampshire

The summer is in full-swing in our household. I am sure each of you have your own way to kick off summer. Our family it starts with the first family hike of the season. This year we started with Mount Moosilauke.

Mount Moosilauke is found on the western most part of the White Mountains in Brenton, New Hampshire. There are multiple paths up to her bald summit that gives you a wonderful 360 view of the land below and other mountain ranges. That is as long as it is a clear day, if not enjoy the workout and plan to come back on a clear day.

Here’s a quick link from Wikipedia about Moosilauke .

We travelled up the Gorge Brook Trail to the summit. It is the steeper trail and a more direct route from the Ravine Lodge.  If you want a nice walk up and down take the Snapper Trail and Carriage Road.  The summit is worth the climb, but those two paths are not too hard on the legs. The Beaver Brook Trail per topology maps and word-of-mouth is steeper and more problematic because of cascades.  We have not taken that path, but will be later this summer.

The loop (see below) is about 8 miles or for those that need to be exact is it 7.9 miles.

Mount Moosilauke
Scanned from pg. 35 “AMC’s Best Day Hikes in the White Mountains” by Robert N. Buchsaum


The Gorge Brook Trail and Snapper Trail to Carriage Road start in the same location and follow the same trail for a bit then the Gorge Brook Trail breaks to the right while the Snapper trail continues straight forward.

You will have some brook crossings with log bridges over most of them are before you turn right to travel up the Gorge Brook Trail.  The only concern is that some of the hand rails are loose, so don’t lean on them too hard.

Bridge Crossing
Bridge Crossing

Shortly, after making the turn onto Gorge Brook Trail, a gentleman coming down the mountain was so excited to see that we were carrying our daughter up the mountain. He had to take a picture of us to show his wife. He did not think she would believe him when he told her that he passed a family carrying a toddler up the mountain. He snapped a picture, wished a safe and great hike and we were on our way. It’s amazes me how unique the hiking/climbing/mountaineering family is always friendly, helpful and well wishing.

We enjoyed the Gorge Brook trail until we were slightly below the “Last Sure Water” (see trail map above), which is at elevation 3,300 feet the path is ‘out’ for certain hikers. I think it is about half a football field south of the sign. It looks like the path was lost to a land slide or tree going down or some combo of both. My husband made it across the path using a rock jutting out from the side. I think anyone that is not carrying a toddler or heavy weight shouldn’t have any issue with the cross.

Here is the sign for “Last Sure Water” and the near by Memorial of Ross McKenney Frost

Last Sure Water
Last Sure Water


Memorial
Ross McKenney Forest Memorial

I made it passed the land slide area by climbing up and around. My safety means the safety for our daughter, so that was an easy decision.  My husband did double back to check the area near the land slide to make sure the trees were in place in case I lost my footing. Unless, there is an extremely hard rain before hand traveling up the path 10 to 20 paces and crossing over a downed tree will do.

There was a couple behind us that caught up to us at the landslide point.  They looked like they were in their mid to later twenty. My husband let them know it was passable, but to use caution. The female asked, why I was up off the path.  My husband just simply said, ‘Well she carrying our daughter up the mountain.’  The woman gave the look of wonder and passed the landslide like my husband and the male went up and around like me. Until, the Dartmouth Outing Club fixes the path do what you think is best and safety for you.

Shortly, after the “Last Sure Water”  marker you will face the harder part of the trail that most say is strenuous or extremely strenuous. I would suggest a quick rest before carrying on. There is plenty of room at this spot for whatever you need. What lies ahead is a bit more work than what you just completed. There are not many good spots like this one until you make it to a clearing area near the summit. The incline increases greatly with a rocky path for about a mile or so. During this time, my suggestion is to keep moving, stay focused and take your breaks when you need them. You are only 1,500 and change to the summit and it is so worth it. You will do a small handful of switchbacks to help with the incline but most of it is rock.

One of the incline rock pathway…

Rocky Incline to Summit

Our quick break moment captured:

Quick Break
Quick Break

If you have not summited up the Gorge Brook Trail don’t be fooled by the bald area that is not the summit. This is a great area to break if you need to, but keep in mind that the summit is just through the alpine shrubs and up a little bit.

Follow the cairns to the alpine shrub and just keep walking until the next clearing … look up a bit and you will see the summit. Yes, you are that close.

Here are views from close to the summit.

close to the summit
Close to the summit on a switch back
Close to summit 3
Close to the summit
Close to summit
Close to summit

It maybe about a quarter-mile from breaking the alpine shrub to the summit. There are numerous places to rest, have lunch and recoup before the climb down.  Many people do camp at the top of this mountain. Enjoy your accomplishment, the views and take it all in. Most people travel down the Gorge Brook Tail. We passed 4 groups and 3 singles going down the Gorge from summit after taking the Snapper/Carriage trail up. One group did the Gorge Brook trail up and down.

We like the work hard upfront, rest and then take an easy path down. Keep in mind, I am traveling down  and up with now 45-55 lbs on my back and it moves around. Controlling down on a steep decline on tired legs takes a lot both mentally and physically. I know I can do it, but I am not one to do so when there is a safer way.

Here are some images from the summit, which was pretty busy with hikers enjoying their lunches and rest. The night campers had left, we saw a few coming down while we were going up.

We were informed that the summit sign was stolen and the college would be replacing it. Until then you will see the simple paper stuck to the wood. The flag was being carried back down the mountain that day.

Here are some views from the summit.

IMG_0258
Place holder until new summit post comes
IMG_4940
Summit View
IMG_0279
Happy camper at the summit
IMG_0266
Out walking around on the summit
IMG_0262
Old Glory @ the summit
IMG_4941
Panoramic Shot of the summit

We were glad to reach the summit and feel the nice breeze come across the mountain top. I was even happier to finally get a break and allow our daughter to get out and walk around. Our break and lunch was about 30 or so minutes. Many stayed longer, but we wanted to be starting back down before nap time.  This time the descent was not a nap time filled quiet descent. Instead it was full of two year old talk and noise making. Oh, well… you can’t win the all.

The descent down the carriage path to the south peak is what I would call perfect for tired legs and a first hike of the season. In fact, the descent was one of the easiest I have done since I started hiking several years ago. It is a little longer, but you know the rule you descend faster then you climb. The path down is again a bit rocky, but nothing like the Gorge Path. It’s filled with small rocks and a few step downs from rock to rock, but overall simple.

You will need to keep an eye for the sign to turn left onto the Snapper Trail and back to the Ravine Lodge. The Snapper Trail is pretty much a ‘dirt’ path with roots and some rocks. Again, simple. Before you know it, you will be back to the junction of Gorge Brook Trail crossing the final two log bridges and climbing back up to the trailhead or stopping off at the lodge.

Our hike time was 6 hours from the car up the mountain back to the car that includes our breaks and time on the summit. It’s a beautiful hike, well-kept trails and worth the sweat of climbing up.

Only thing now is to plan our next hike this weekend.